
Picture Specs: ISO 200, 35mm, f/4, 1/640 sec
Week 11 (10/13/2013 – 10/19/2013): Chelsea 11 Ave/19th St
Picture taken on 10/14/2013 at 4:57 PM
Picture description:
Since taking the picture for my second blog “A Day of Reflection” I’ve been drawn to taking more and more reflections shots. After a crazy/good weekend and with a very busy week looming ahead of me I thought Monday would my only opportunity to get a picture this week and an ideal time for a second “Day of Reflection”. The title of this week’s blog is just as much a reference to a day of relaxing outdoors as it is to the kind of picture I took. When things get busy it’s even more important for me to set aside one day to clear my mind and of course get a picture for this blog. Walking around the city and enjoying the fall weather is one of my favorite ways to relax. Add a camera to the mix and it’s a hard afternoon to top.
Setting out the target destination for my afternoon was Chelsea, more specifically the area surrounding the Chelsea piers. Knowing there were a couple of parks, some interesting buildings and of course the waterfront/piers in the area Chelsea seemed like the perfect spot. After popping out of the subway on 14th street I began my short journey towards the water. While on my way to my picture’s destination I unknowingly passed the Chelsea Market and a bar called “The Tippler”. Not to get off topic but I circled back to both locations on Wednesday (not for pictures) and if you haven’t been to either I highly recommend checking out both, very cool!
After a walking around for a little I eventually arrived at the Chelsea Piers and immediately saw what would be the subject of this week’s blog. There are two buildings right across from the Chelsea piers which are architecturally awesome. One of the buildings is the main office for IAC which is an internet media company and the other is ‘trendy’ residential building called Nouvel. Both buildings are incredible so it was difficult to decide which building should be the focus of my picture, that’s why I decided a reflection shot was my best option…and so the challenge of getting this week’s shot began
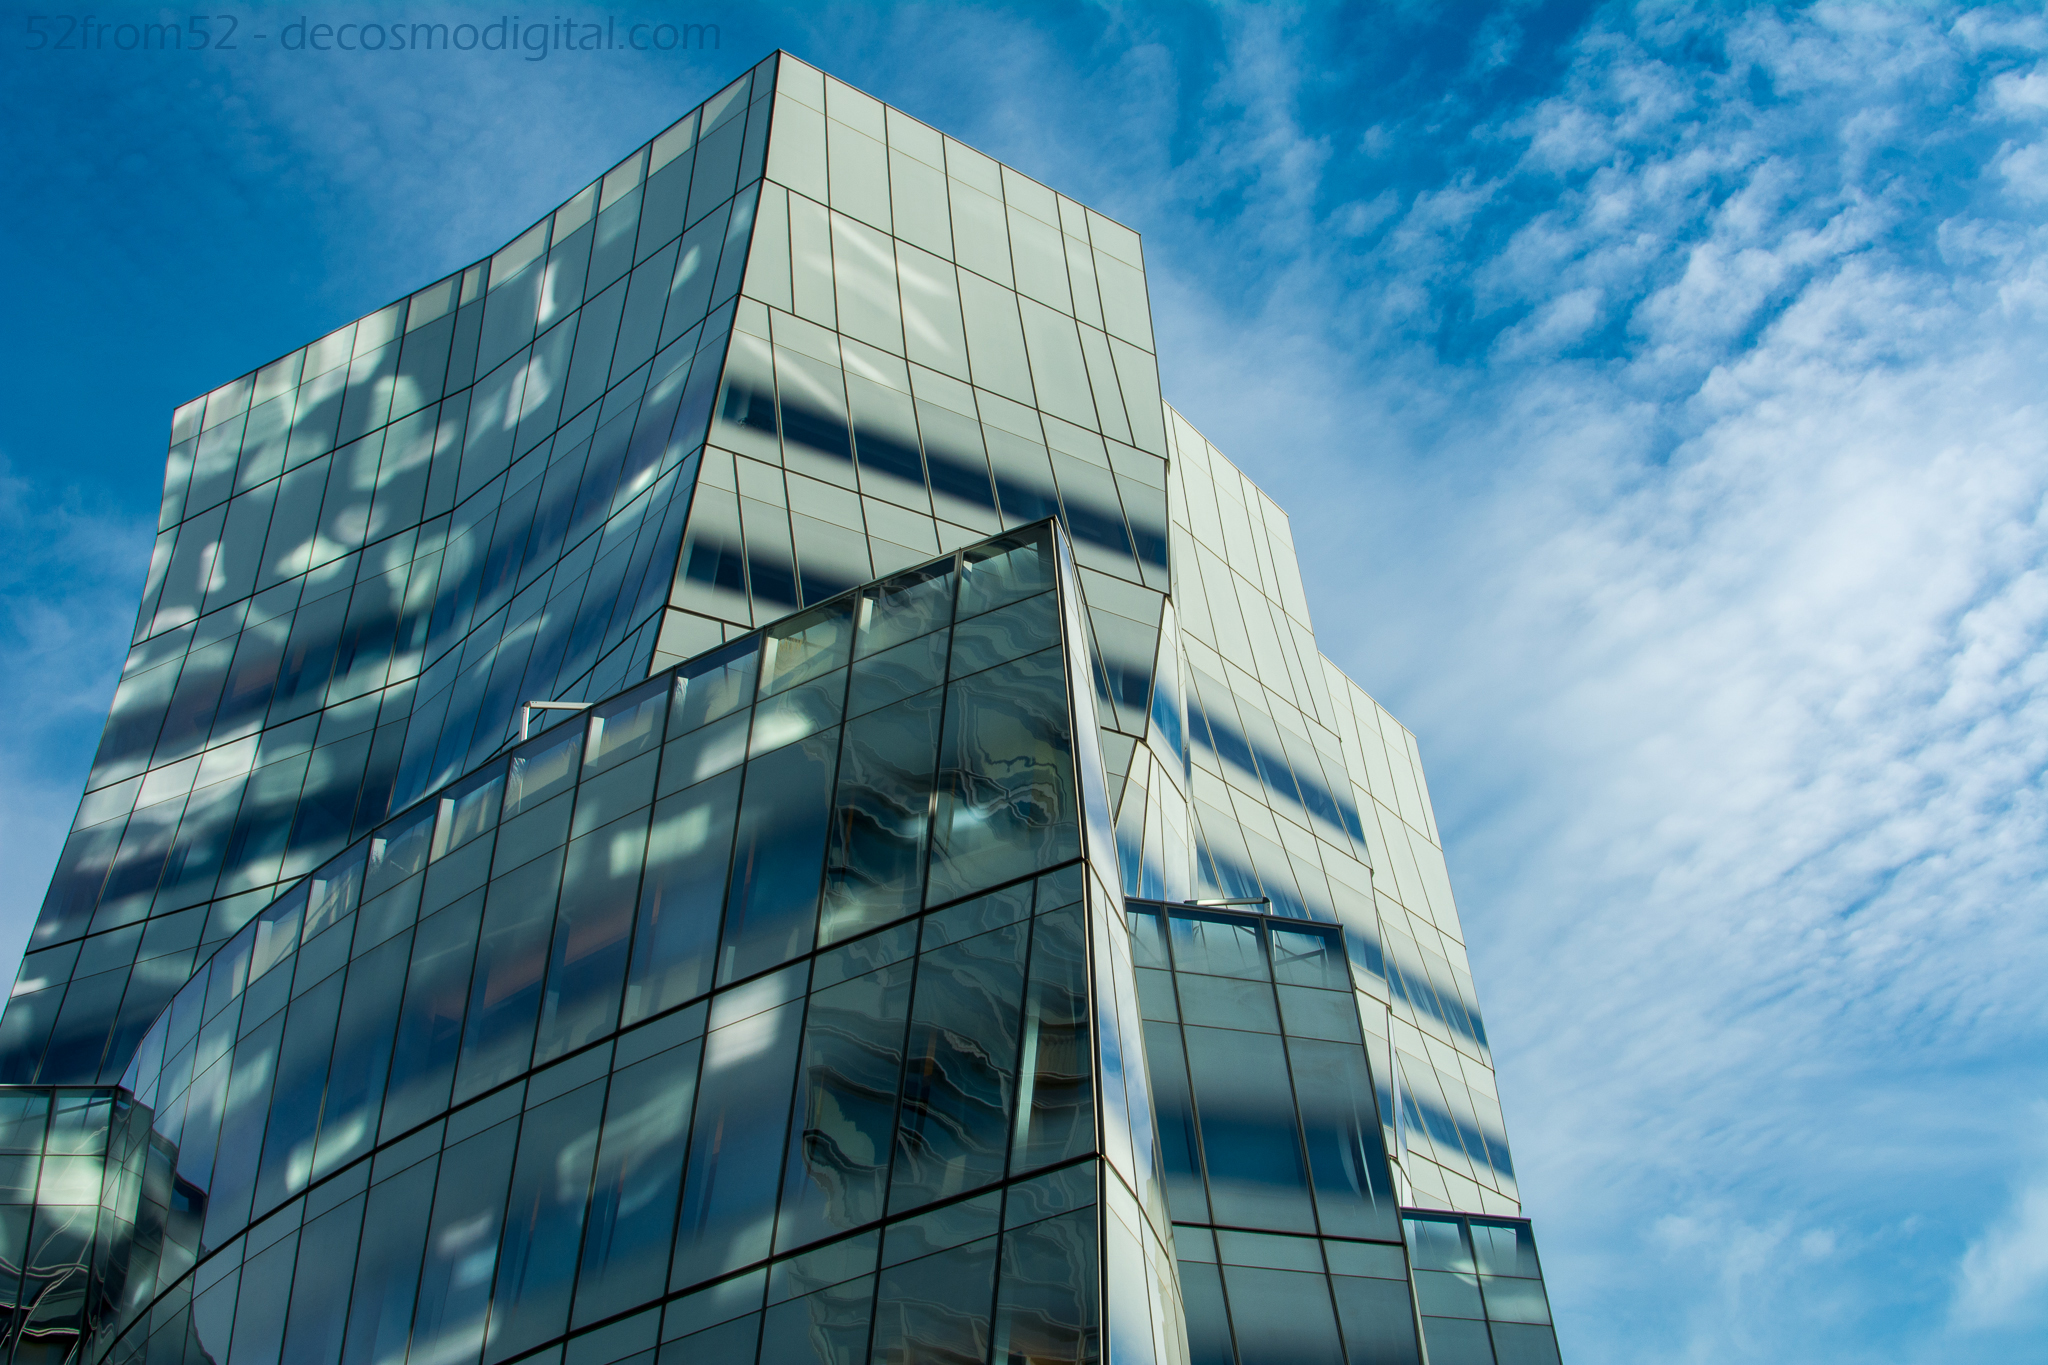
IAC Building
Photography concepts:
As mentioned in the this week’s picture description my goal was to get two buildings in one shot. Capturing multiple buildings would have been a much easier task to accomplish if I was using a wide angel lens, or even a zoom lens from a distance. As you hopefully have come to know by now this blog revolves around me shooting with my 35mm lens, which due to my crop sensor provides around a 50-52mm perspective. Most people don’t know what these ‘mm’ measurements equate to so let me put it into perspective once more, a camera phone is around a 30-35mm perspective. When shooting with a camera phone I’m sure you’ve had limitations when it comes to fitting everything in the picture. Now imagine shrinking that window by about 40%. Yes maybe now you understand why capturing buildings or wide scenes is so challenging, here is where using reflections comes in. Through the use of reflections you can capture larger images in a smaller window.

An alternate reflection shot
The first challenge in capturing this week’s reflection picture was finding an angle that provided a clear reflection of the Nouvel building. Once I found the right angle the second challenge was determining what lines I should use to level off my picture. I decided to align my picture on the Nouvel building. Once I had my angle and point of reference to level my shot the third and last challenge was messing around with settings to find the best aperture for capturing a crisp image. I took the same picture in an array of apertures to make sure once it came time for editing I had options. While shooting with a DSLR taking the same picture using different settings is the surest way to insure you get a great picture. When you’re reviewing pictures in the LCD screen on the back of your camera it isn’t always easy to identify one that’s going to look good on a big screen. This concept is commonly referred to as “bracketing” and is one of the most important photography lesson’s I’ve learned thus far. The concept of bracketing is applied to almost any camera setting, it’s most often use is probably when it comes to exposure or light settings. Below are a couple articles on bracketing if you’d like to read more about how to apply this concept. In the future I’m going to attempt to use bracketing and merging pictures to capture a picture that contains high and low exposure areas so stay tuned!
Bracketing Articles
Nouvel’s Site
