Picture info: ISO 250, 35mm, f/8, 1/1250 sec, – 1 exposure stop
Week 20 (12/16/2013 – 12/22/2013): Central Park, Sheep Meadow
Picture taken on 12/21/2013 at 3:00 PM
Picture Description:
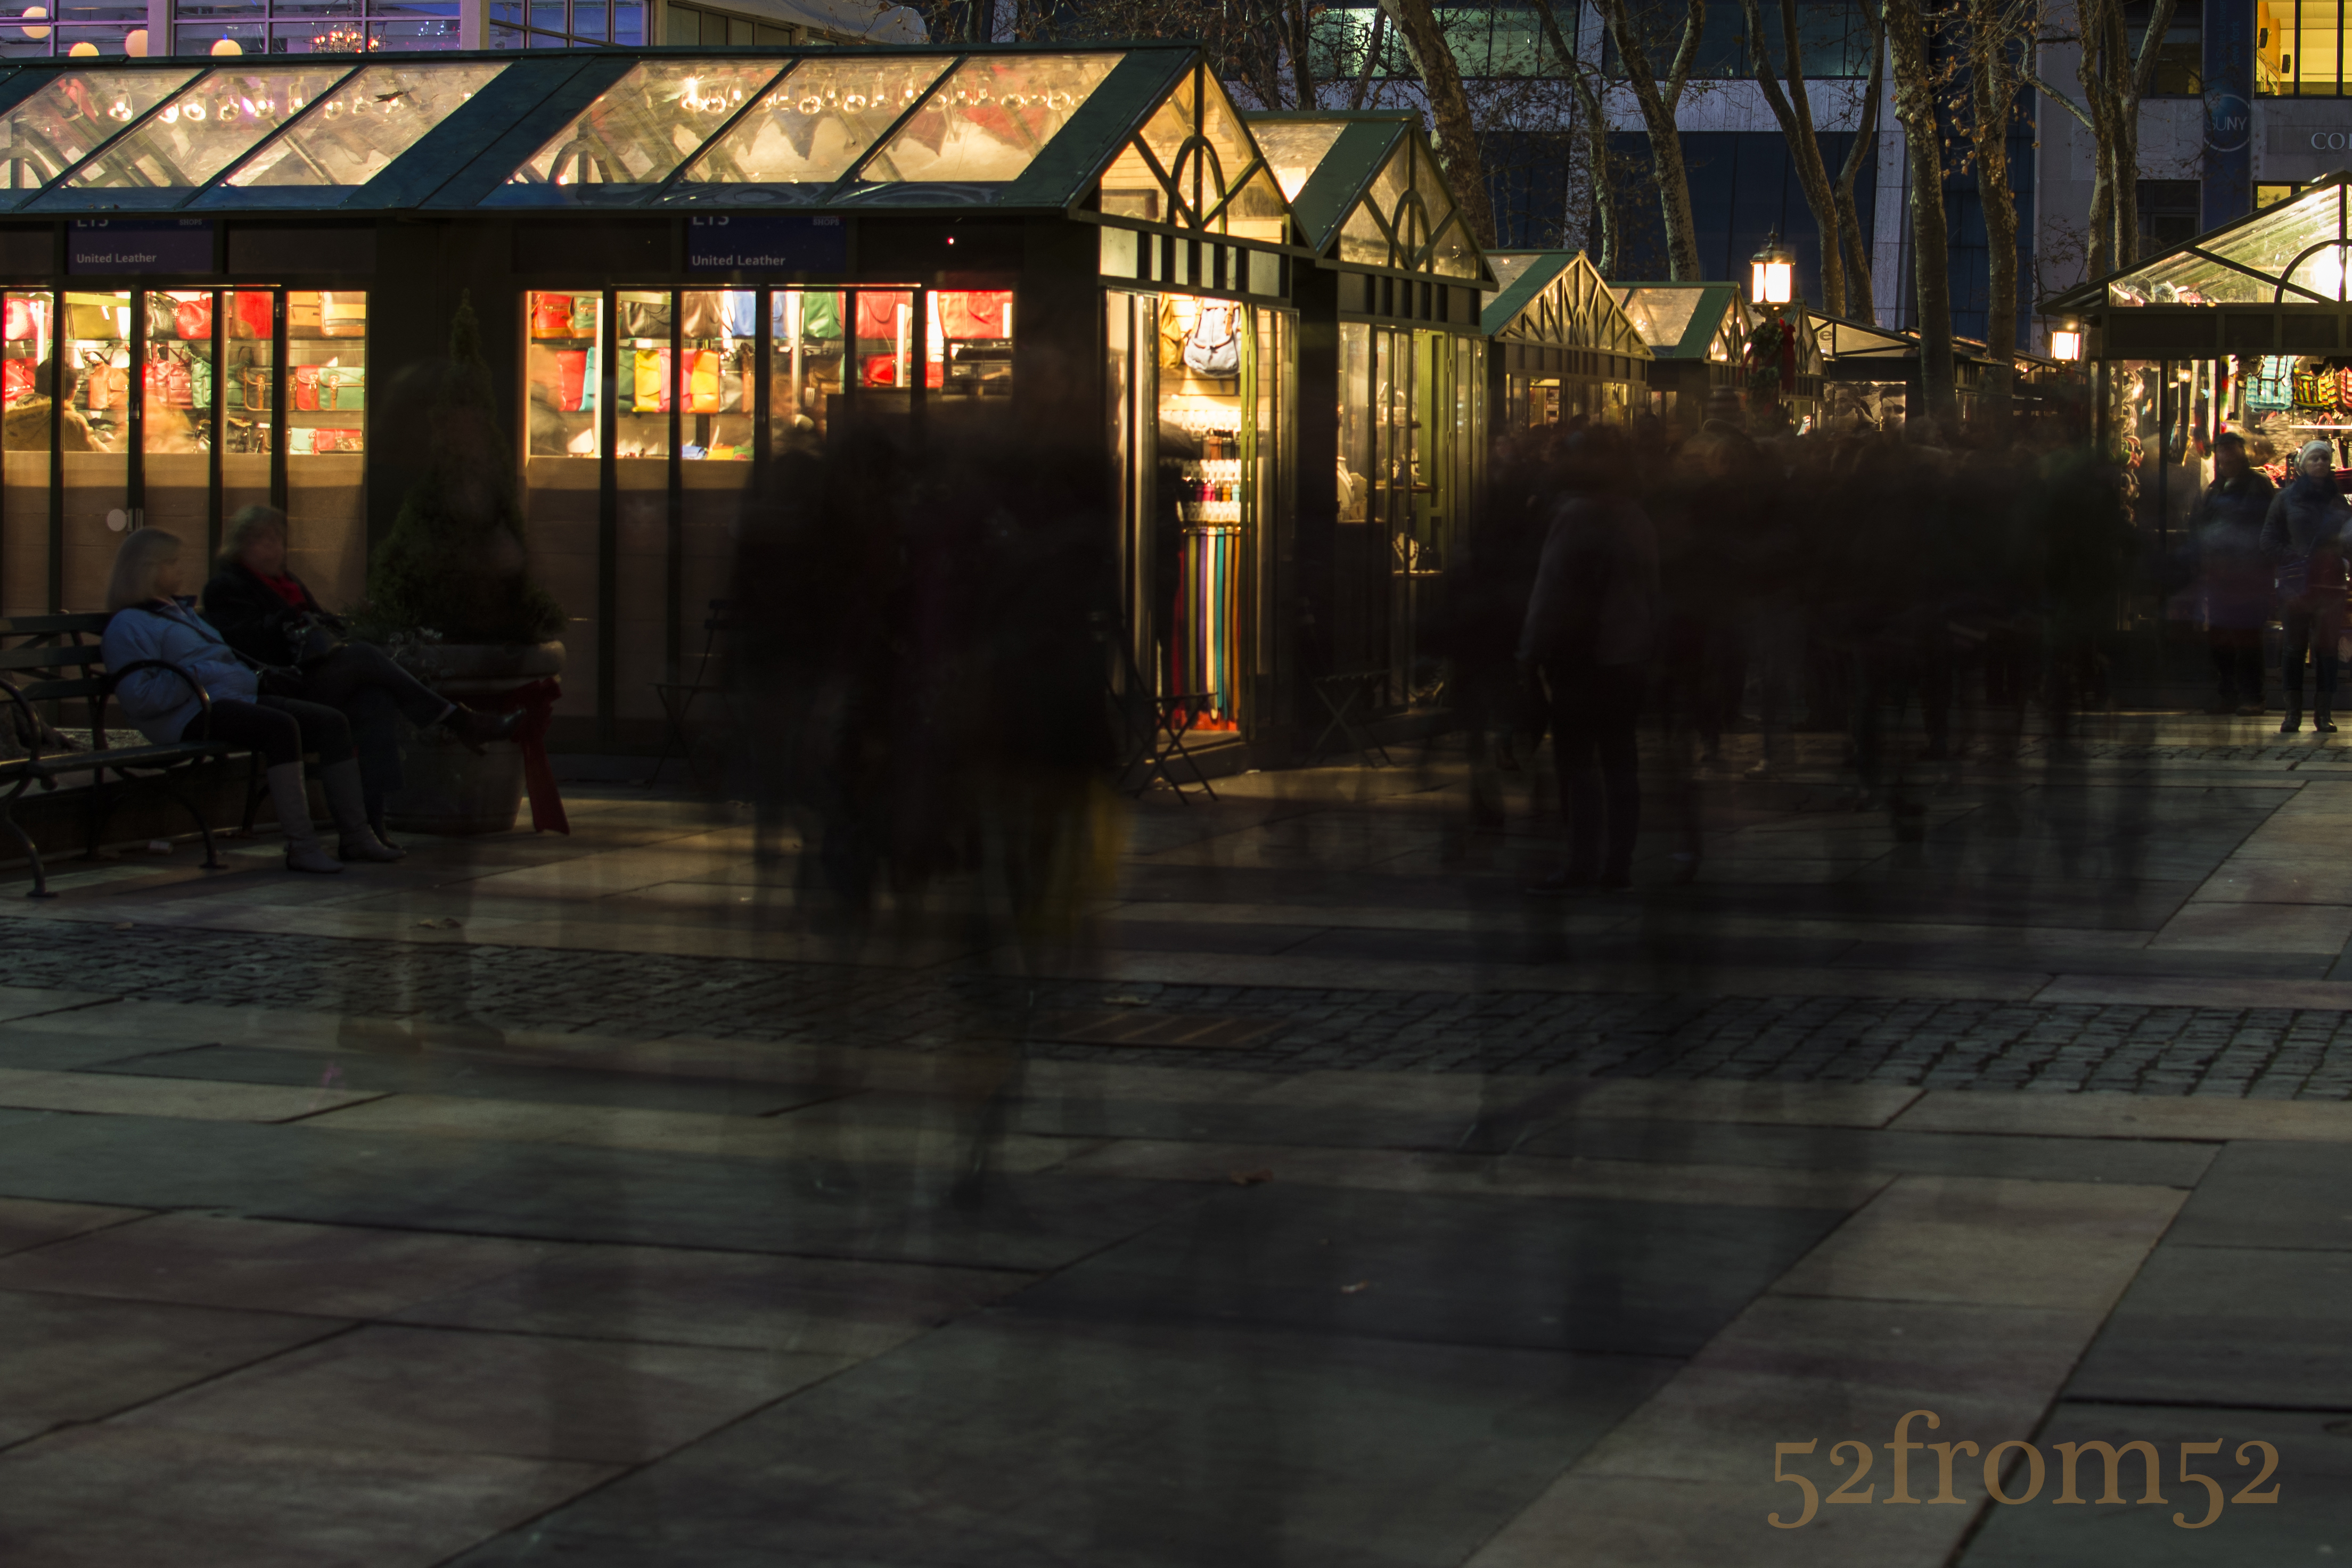
With Christmas less than a week away, New York City is buzzing with holiday festivities. This week I decided to check out the Columbus Circle Holiday Market located at the south west corner of Central Park. As the weekend approached, the weather forecast was calling for a warmer than usual day for December, so I decided to add a visit to Central Park to my agenda. While visiting the Central Park website I noticed that on their map page you’re able to select specific destinations of interest within the park. For weeks I’ve seen lots of great pictures taken of various arches and bridges in the park, which gave me an idea. My idea was to use the map and plot out an “Arch and Bridge Tour” which would bring me to all of the southern arches and bridges, starting with the Gapstow bridge (South/East corner) which is adjacent to the ice rink. With my plan set, all that was left was setting out on my weekend adventure.
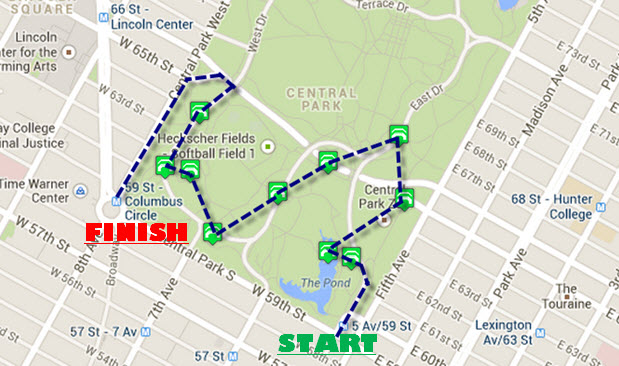
Planned Arch/Bridge Tour
My trip started with about an hour of fighting traffic and subway crowds prior to finally popping out of the 59th/5th subway tunnel. Upon emerging from the subway tunnel I was oddly greeted with the smell of spring. If the streets weren’t packed with holiday decorations I would have swore to you that I had traveled back in time to April. Even though I appreciated the nice weather I was a little disappointed, I really wanted to get some pictures of Central Park in the snow. Later on my disappointment was cured by the much appreciated feeling in my fingers and toes I enjoyed throughout the day.
After visiting the first couple of bridges and arches, Gapstow included, I was running into issues with getting good compositions with my D5200. The sky was getting washed out because it was earlier in the day than I usually shoot. I also wasn’t able to fit enough of the landscapes that I was photographing into my 35mm lens frame. Since the bridges weren’t cooperating I decided to cut my tour short and work my way to a part of the park called Sheep Meadow. The large 15 acre “meadow” is special to me because it’s actually where I finally decided to due this blog. Back in July I toured the park and ended up at the Meadow which I photographed and realized how fun it was to set out on photo adventures. July’s trip cemented my idea and I moved forward with this blog, and I haven’t looked back since.
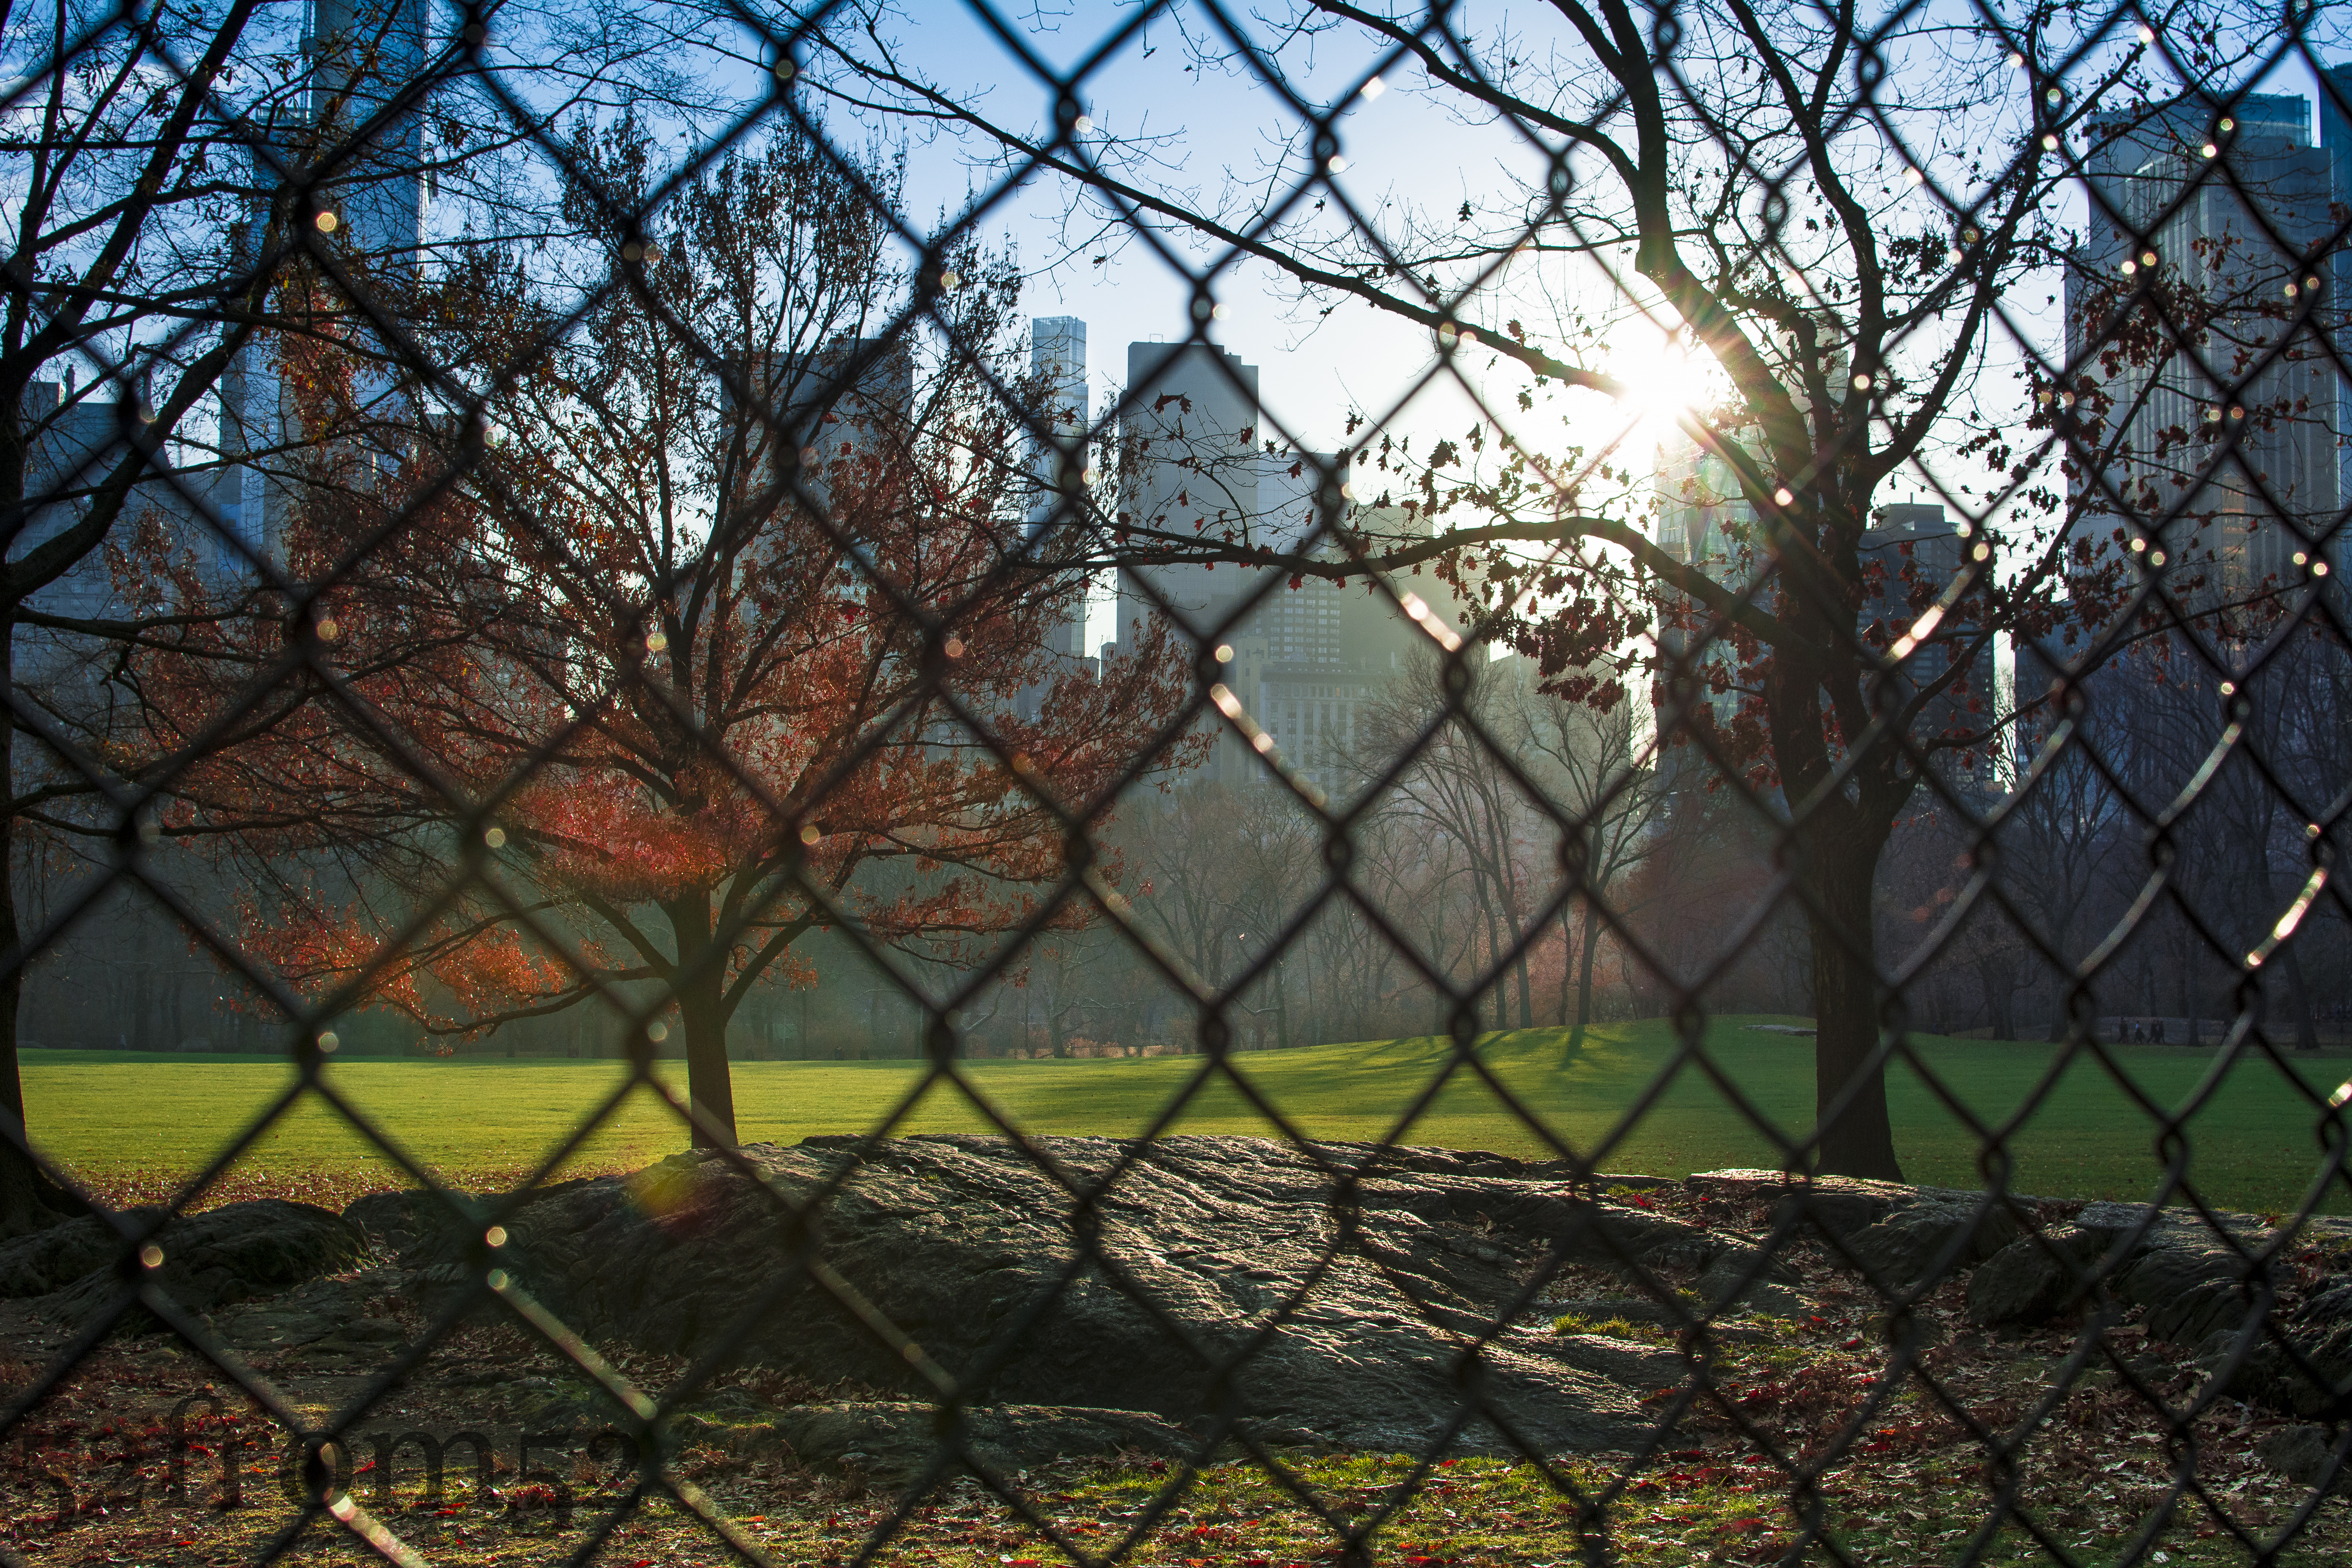
As I got closer to the Meadow I noticed that there were no visitors on the beautifully lush green lawn. When I finally arrived at the fence surrounding the meadow I realized why it was so empty, it was closed for the winter. Although I was disappointed this provided me with an opportunity to photograph the meadow without any visitors crashing my picture. I worked my way around the fenced perimeter shooting pictures above and through the fence. At the end of my trip around the meadow I spotted this week’s picture. The way the rock picked up the sun with the contrasting green meadow really caught my eye. Although the day didn’t turn out as planned, I was very pleased with this picture and really enjoyed my day in Central Park.
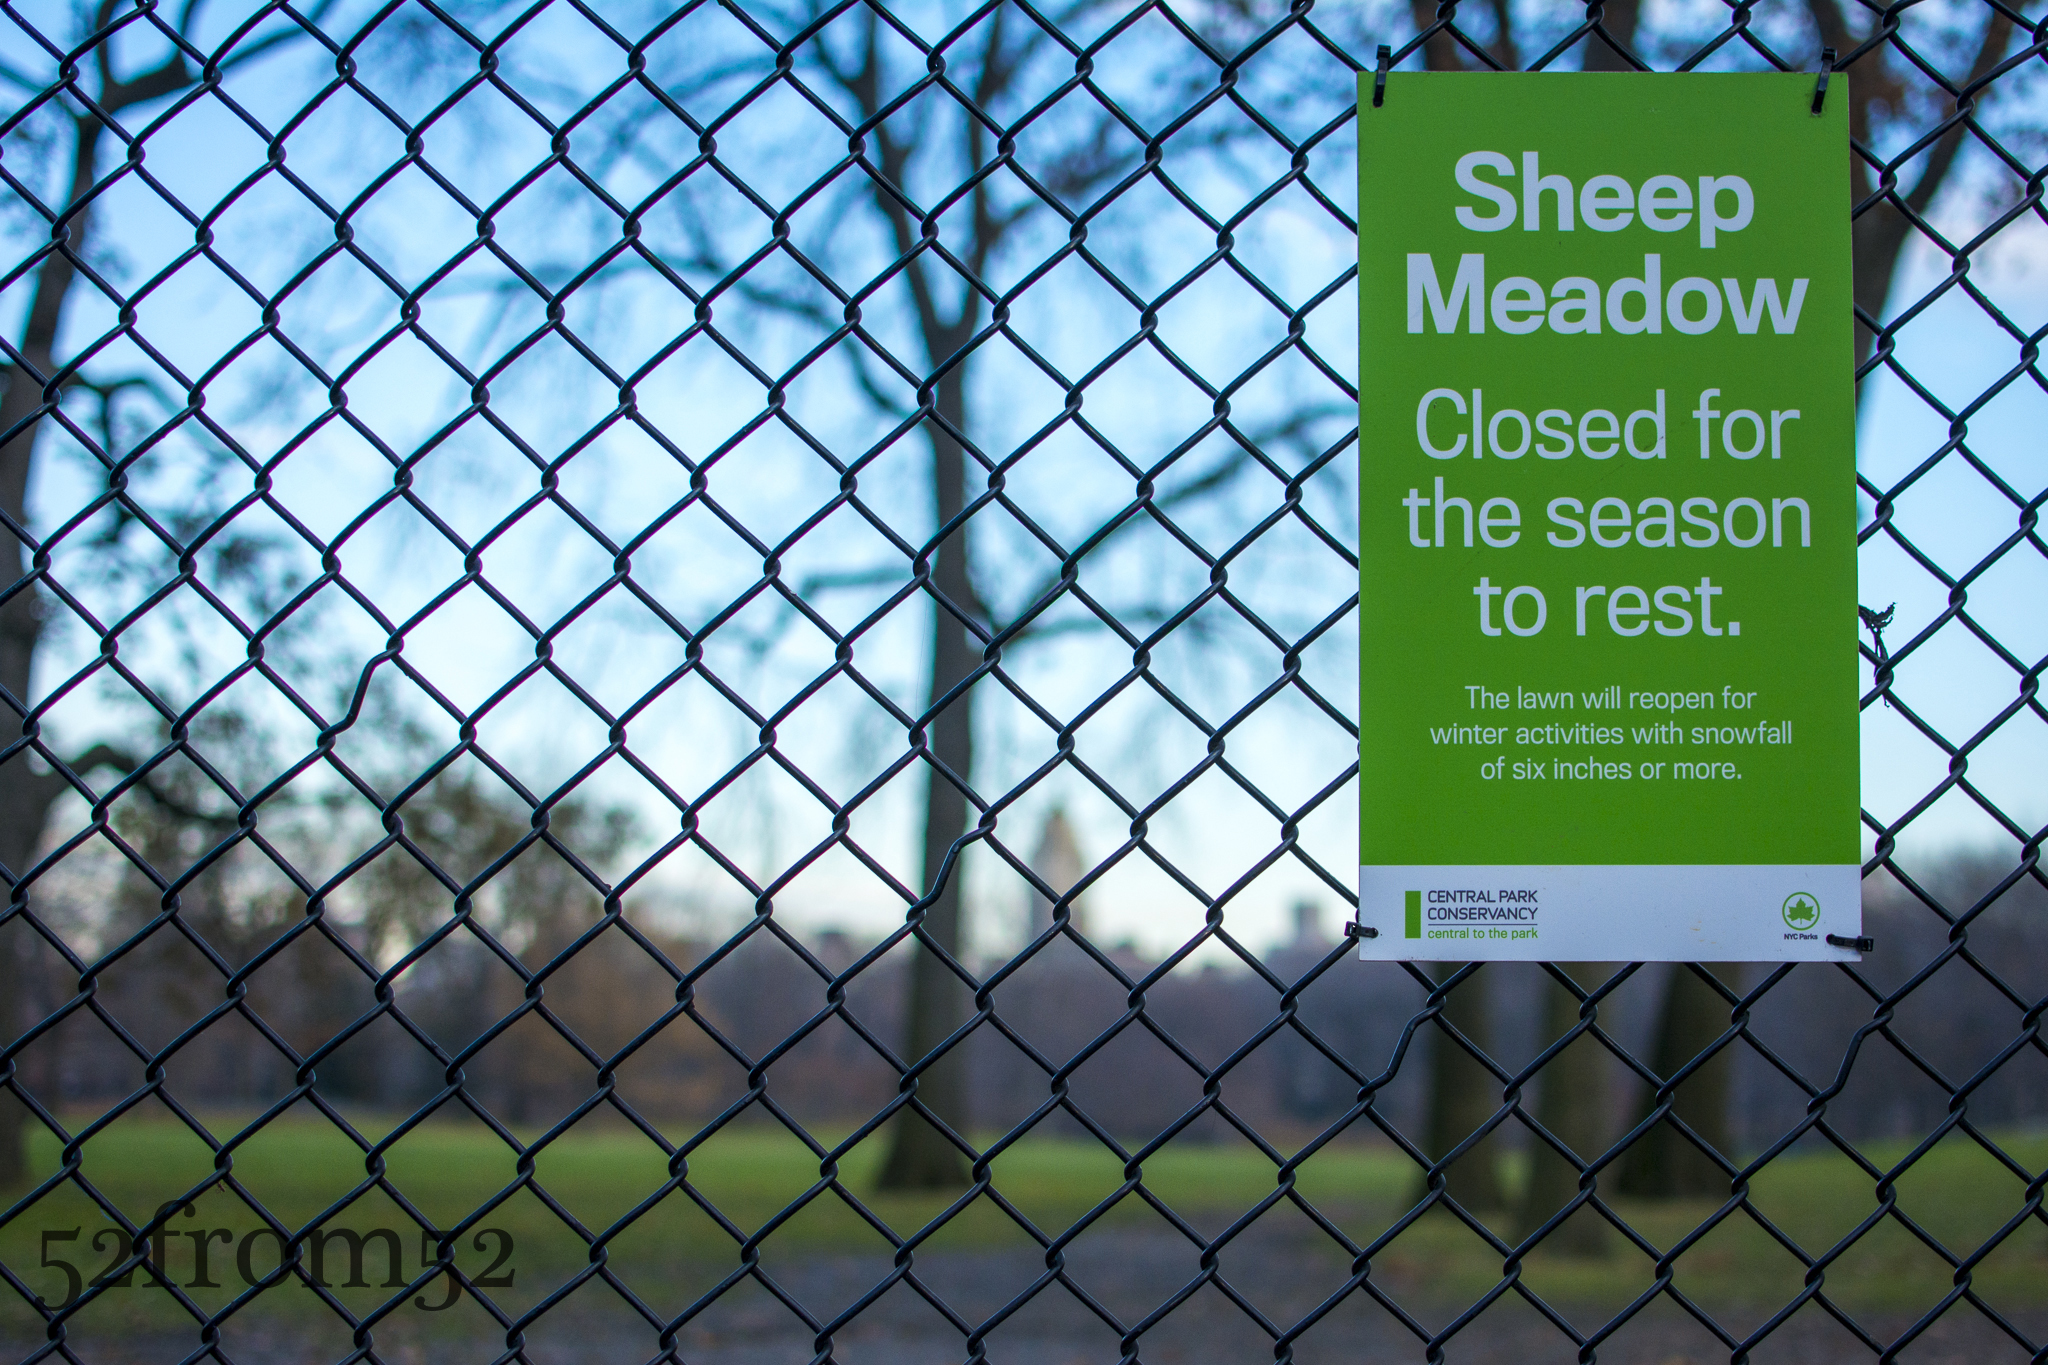
Sheep Meadow Closed!
Photography concepts:
Over the past couple of weeks I’ve been experimenting with different editing techniques and applications. I use Lightroom for all of my blog photographs but for Instagram, Facebook and Twitter I use Snapseed and VSCOCAM. The advantage of Snapseed and VSCOCAM is that I’m able to give my pictures a little more “pop” with just a few clicks. The disadvantage of both applications is that they don’t maintain the quality of the original picture, therefore they’re not suitable for editing pictures for this blog or any kind of high quality sharing. All that being said, there is no reason why I can’t create the same type of vibrant images with Lightroom, it just takes a little more work.
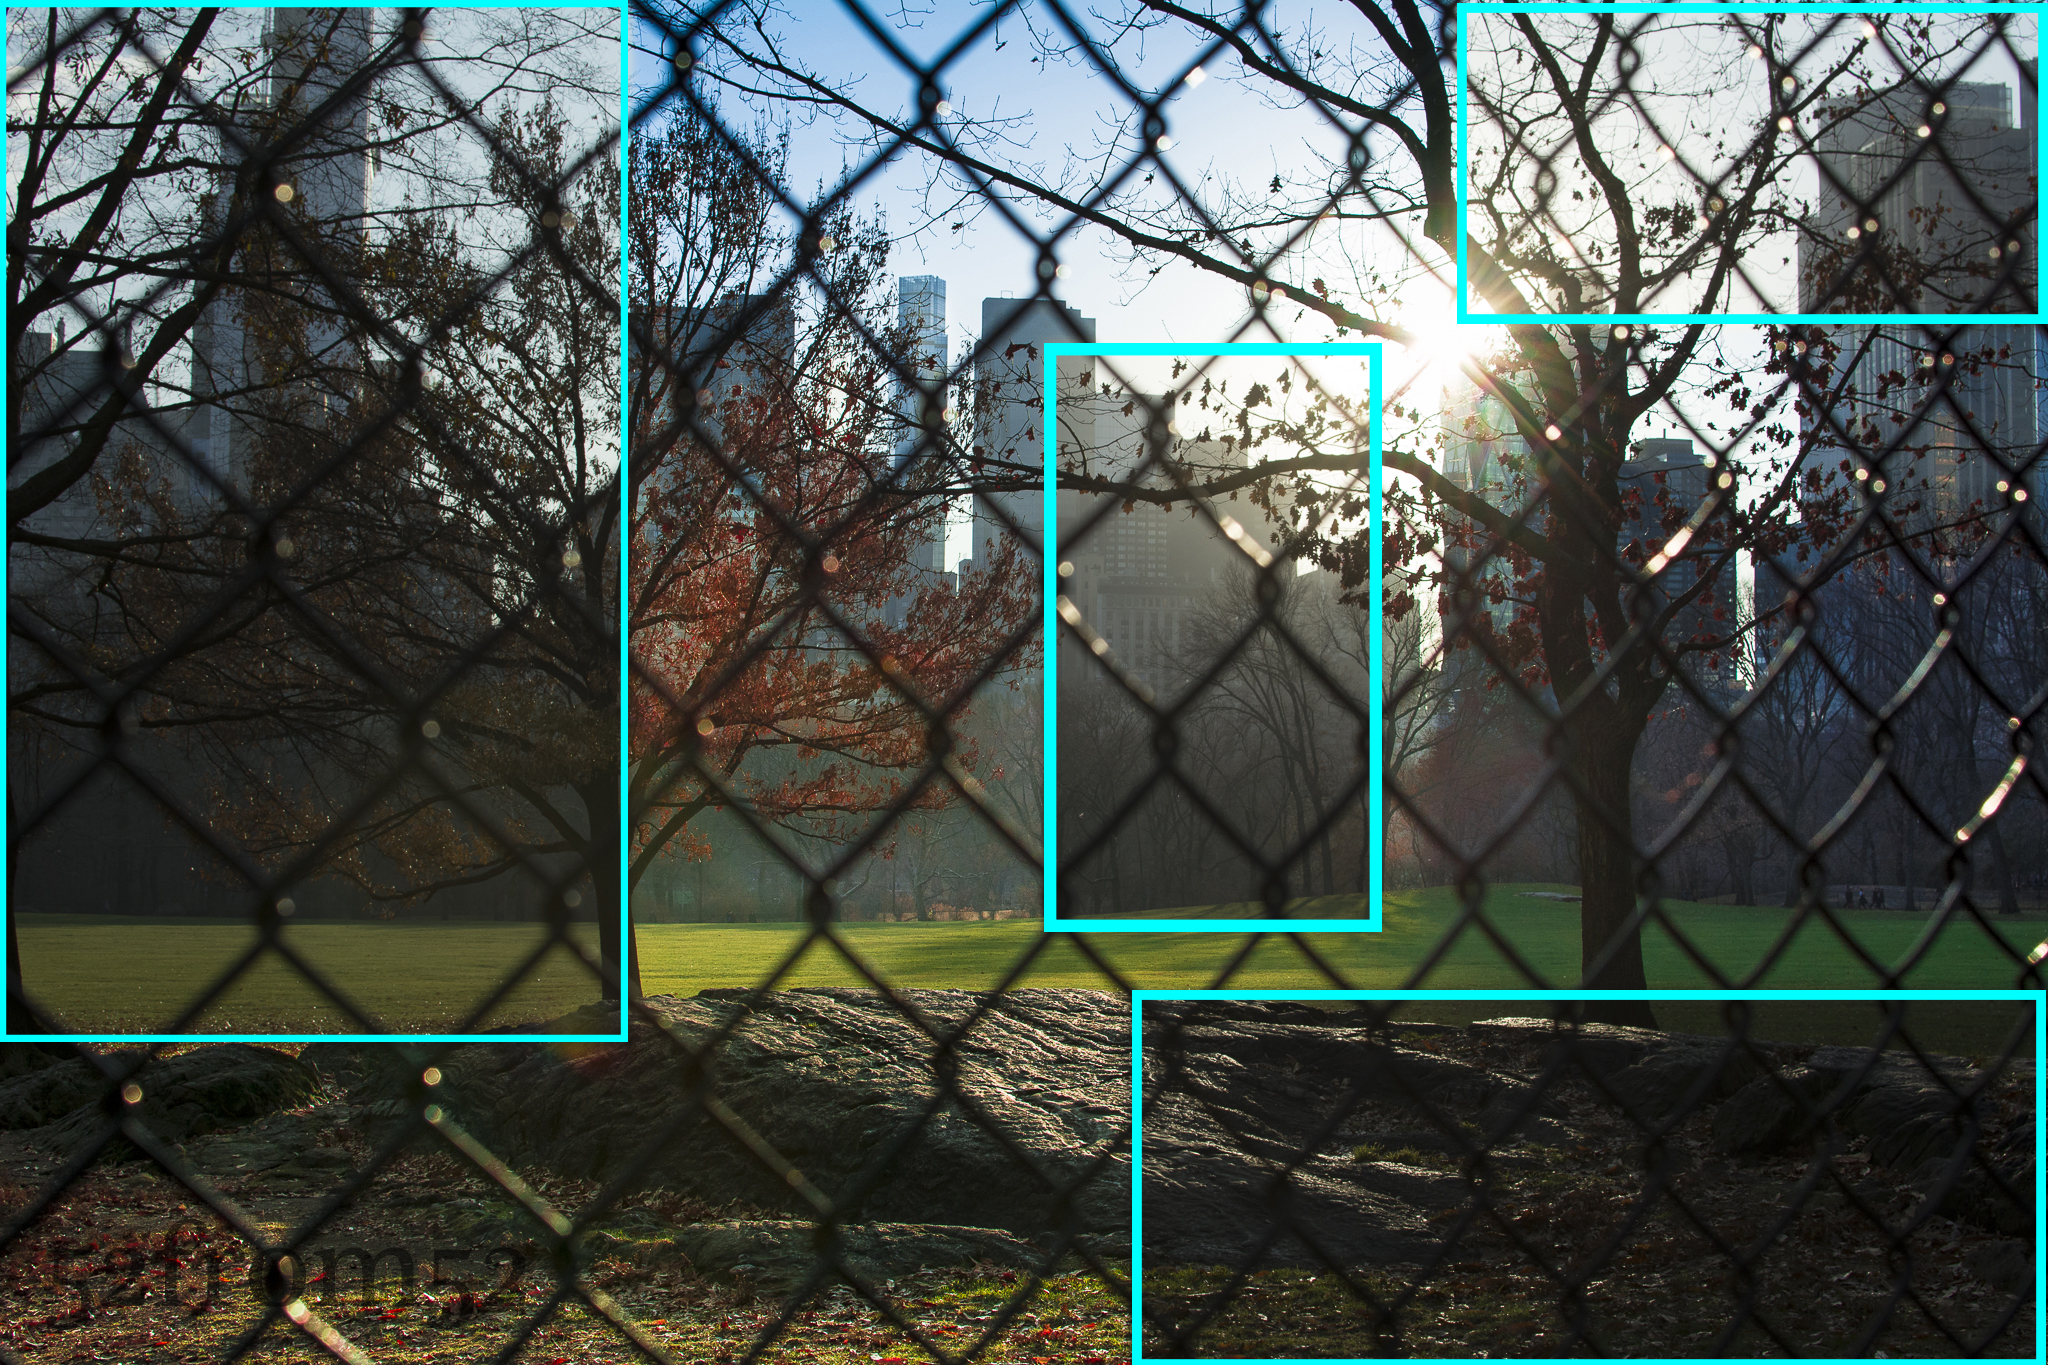
Edited Location comparison
This week I put a lot more effort into editing specific details of my photograph, with the goal of creating a more vibrant picture. I shot my picture straight into the sun which in turn caused a lot of shadows and dulled out the many of the colors in frame. The way I corrected both issues was via Lightroom’s spot correction tool. This tool allows you to do exactly what it sounds like, select certain area’s of your picture and adjust things such as color, exposure, contrast and so on. I usually do these kind of adjustments globally (to the entire picture) or through the use of gradual filters. In the past the issue I’ve run into is gradual filters aren’t good when you have to apply different settings to lots of different small areas. This is where spot editing comes in handy. The challenge that spot editing presents is keeping your picture looking a natural by manually blending your edits seamlessly into the picture. You want to avoid creating obvious edit lines and look for natural breaks in your picture to tie your edits together. Above and below are examples of before and after, along with a representation of the areas I focused in on with the spot edit tool.
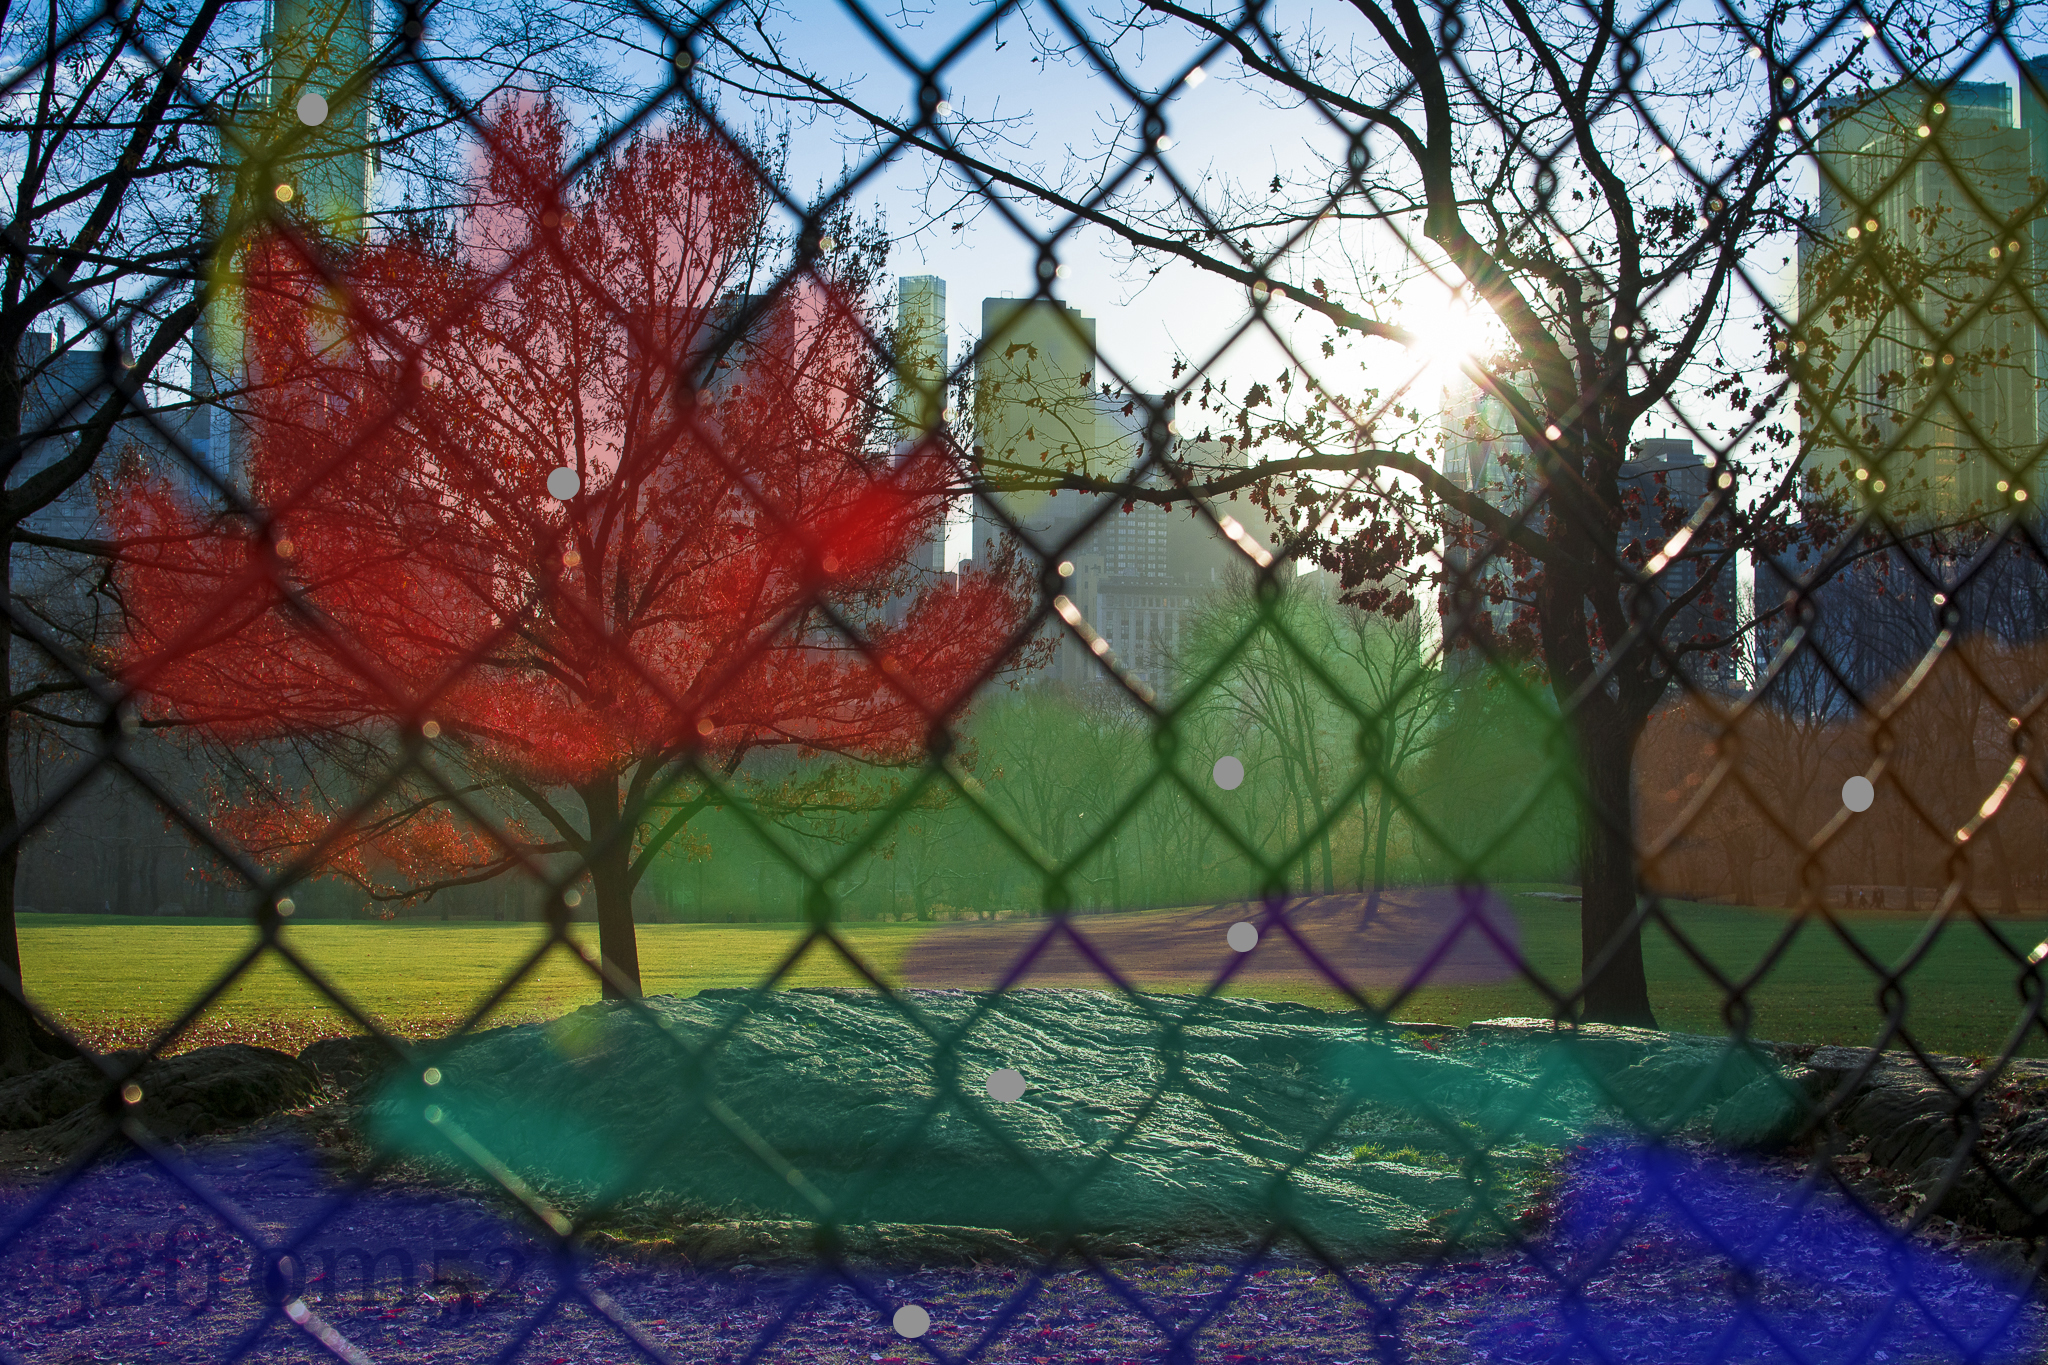
Different colors represent different spot edits/localized adjustments
Prior to editing the picture I obviously had to shoot one that was crisp and provided me with flexibility for editing. To do this I underexposed my original picture and made sure I shot with a small aperture to keep more things in focus. The last aspect of this picture I’ll briefly touch on is how lined it up. As I talked about in my week 16 post, framing a picture that’s shot into the sun can be tricky because you’re basically forced to use the live view. I really don’t like taking pictures in the live view so what I do is line up my shot via live view, then switch the camera back to through the lens and fire away. Once I get my first picture I adjust the composition via slight tilt and shift adjustments until I get the picture I want. I used this method to get this picture and I think it worked well.