A growing family

Picture Info: ISO 100, 35mm, f/3.2, 1/250 second

Picture Info: ISO 100, 35mm, f/3.2, 1/250 second

Week 35 (3/31/2014 -4/6/2014): Treasure Island Beach, FL

Picture taken on 4/6/2014 at 8:03 PM

Picture description

This past weekend brought me to Florida to celebrate my cousin Danielle’s wedding.  It was a beautiful venue filled with my beautiful family.  Originally I planned to use a picture from the wedding for this post, but due to mobile limitations I decided to hold off on posting any wedding pictures until I returned and had time to properly sort through them all.  My back-up plan was to hit the beach at sunset sometime during my trip, preferably in the area of a pier.  My goal was to shoot either a long exposure and or some kind of sunset picture.  Since getting my DSLR I’ve taken two other trips to Florida, but neither visit brought me to the beach during sunset with my Nikon.  This time around I was determined to get to the beach for magic hour.

When I pitched the beach sunset idea to my family, they were all on board and even helped research locations.  After picking a location, we quickly ate dinner and set out for  “The Long Pier” at Redington Beach.  Redington Beach was a little far which had us worried about arriving late and missing the sunset.  As we drove up the coast we decided to call an audible and stop at the location of our last family reunion, Treasure Island Beach.

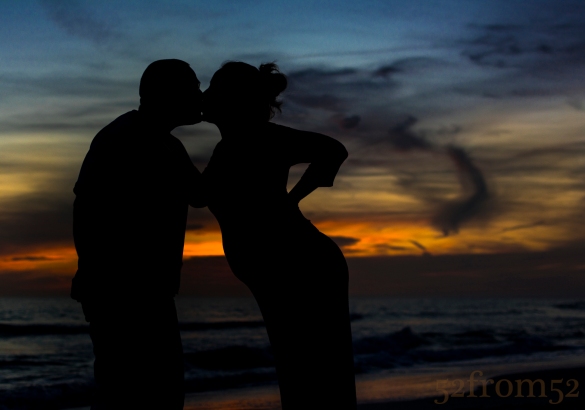
After arriving my cousin Courtney and I moved ahead of everyone else and headed towards the beach.  We moved as quickly as possible, taking into account my cousin is pregnant, but that didn’t seem to slow her down at all.  Once we reached the shoreline, Courtney and I both started assessing the sunset for the best shot.  Like me, Courtney is a photography enthusiast, and recently purchased a DSLR of her own.  We both shuffled around taking pictures until the rest of the family arrived.  When Courtney’s husband Ray arrived and stood next to her my eyes were immediately drawn to how their silhouettes contrasted against the sunsetting sky.  Their silhouettes were particularly meaningful because of Courtney’s little baby bump.  I took a couple steps back, told them to pose and three shots later had my picture.  Although I got plenty of great pictures that night, none seemed as meaningful as the one of Courtney and Ray.  To me this picture perfectly captured the essence of my trip, Florida, beaches, love and our growing family, both through marriage and pregnancy.

Photography concepts:

While in Florida I made it a point to shoot almost completely in manual.  The more I shoot in manual, the more I’m seeing how much it trumps my old technique of exposure compensation.  Yes I can fix my exposure in post (editing), but getting it right in camera feels more authentic and is definitely more gratifying.  Had I not shot this week’s picture in manual, my best option would have been to spot meter off the sunset background.  Spot metering should have done the trick for underexposing and therefore silhouetting my cousins, but I didn’t have time to test in order to prove my theory.

What made this picture was a combination of decisions involving, aperture, focus points, and composition.  First, I decided to shoot with a somewhat wide aperture (f/3.2).  The reason behind using a wide aperture was to isolate my subjects from the background.  A bonus was that I didn’t have to slow my shutter down too much, resulting in crisp edges in details such as strands of hair that were blowing in the wind.  Second, in order for me to get my cousins in focus and separate them from the background as I planned, I had to set my focus point on them.  Focusing on dark figures is difficult because your camera looks for contrasting colors to focus on.  Therefore I didn’t line my focus point up with either of their center masses, instead I hit the edges around their mouths.  The tricky part about using edges is knowing if you actually hit them or the background, it’s a very fine line.  I recommend zooming into your image after shooting and looking for some kind of detail such as hair to determine if you were successful.  The third and last point I want to mention is my composition.  I used the rule of thirds to determine both where I lined up my cousins, and the horizon.  I split my cousins between the left and middle thirds of the picture putting their kissing heads on the border line.  The reason I put them off center was because the background wasn’t symmetrical.  Had the the background been symmetrical, I think it would have looked better if they were symmetrically lined up too.  As for the horizon, the sky was more interesting than the water, so I gave the sky two thirds of the background space.

All of the decisions I just outlined are becoming very quick, almost instinctive decisions for me now.  I’m learning that the more you shoot, the more you fall back on the habits you developed in the early stages of learning your DSLR.  If you’re new to shooting with a DSLR, or you’re just applying these concepts to taking pictures with a point and shoot or camera phone, I encourage you to spend time thinking about what makes a good picture.  Before you shoot think about what you want to emphasize in the picture, then using the triangle of photography decide what settings are best.  Then determine your composition and start shooting.  The more time you spend on these decisions now, the less you’ll have to spend as you get more experience.  If you’re not new to taking pictures but never applied these concepts just slow yourself down and think.  The thing I always remind myself to do is take a picture less to “document” what’s going on and more to pass along the way I see things.  How do you see something?  Putting your creative spin on things is what makes it an art, that’s photography and that’s what people like to see.
“Snowboken”

Picture info: ISO 100, 35mm, f/11, 1/80sec

Picture info: ISO 100, 35mm, f/11, 1/80sec

Week 27 (2/3/2014 -2/9/2014): Hoboken, Maxwell Park

Picture taken on 2/3/2014 at 1:09 PM

Picture description

It’s said that the day after the Superbowl is one of the highest call out of work days of the year.  This year I was smart and decided to preemptively schedule myself for a day off on the dreaded Monday after the big game.  As it turned out I couldn’t have chosen a better day to take off, not because of a big game hangover, but because of a huge snowstorm that hit our area.  While most people were fighting both their hangovers and the weather I was relaxing comfortably in my apartment.  Even though I could spend the day sheltered from the storm, I decided it would be fun to head out into the snow with my Nikon in hand.  The only problem I faced was how to protect my camera from the wintery elements.  The solution that I came up with was simple, rubberband a ziplock bag around my camera and I was good to go, or so I thought.

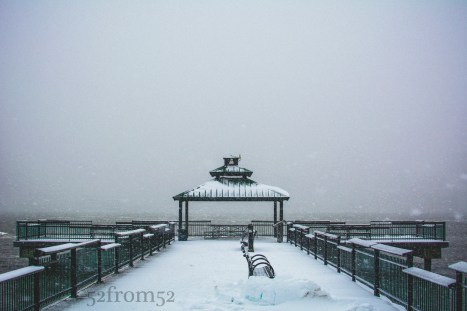
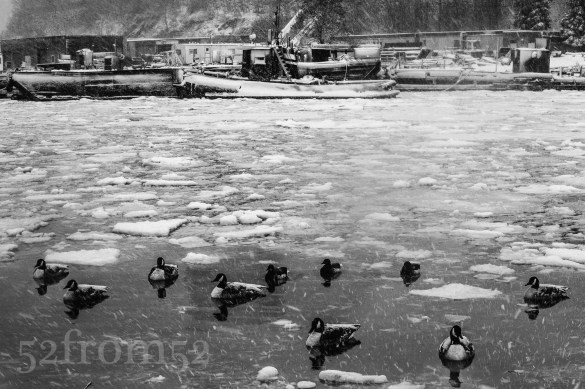
Once out in the storm my ziplock plan seemed to work in terms of protecting my camera, but it made taking photos extremely difficult.  I was able to make the best of the situation by shielding my camera within my coat until I spotted a potential picture.  Knowing that I couldn’t preserve my camera’s dryness for long, I decided to hit two nearby Hoboken locations.  First I went to my usual spot, the uptown pier at Maxwell Park.  To my surprise I spotted a family of geese trying to take refuge in the cove of the pier’s “beach area.”  They were surrounded by ice and almost seemed to be frozen themselves.  I moved around trying to shoot the geese from the best angle possible without falling into the water myself.  Next I moved to the pier on Sinatra drive by the skatepark.  Since the snow was creating a nice white out I wanted to take a picture of the gazebo on the water with nothing but a white background.  Usually the New York City skyline is the backdrop so I thought this would make for a unique picture of the area.

gazebo picture

Gazebo picture

After getting the gazebo picture I decided to head back in for the day.  I had been outside for about an hour and it seemed that my ziplock bag was close to losing it’s ability to protect my camera.  As I fought my way through the snow back to my apartment,  I said to myself next time I’ll be better prepared for the elements.

Photography concepts:

The first time out in the snow with my Nikon taught me some valuable lessons.  The first and most obvious is that you need to keep your camera dry.  Although the ziplock bag was able to protect my camera for the hour that I was out, it would have been a stretch to sustain it’s usefulness for any longer period of time.  As a result my first purchase after Monday’s snow storm was a rain cover or “rain sleeve” for my camera (link below).  They essentially work just like the ziplock bag but they’re longer and hug my arm so shooting with them is a lot less clumsy.  I was hoping for another snow storm this weekend so I could test the sleeves, but of course you never get the weather you wish for.  Expect a follow up review of the rain sleeves usefulness in a future post.   

The second lesson I learned is that you absolutely need something dry to wipe off your lens.  This seems pretty obvious as well, yet I totally forgot to bring a cloth while I was out in the snow.  I had to use some of my inner layers to wipe off my lense.  Luckily I always keep a UV filter on my camera’s lens so there was no chance of damaging the actual lens.  Using a UV filter is nothing new for me but absolutely essential when you’re out in the elements.  It’s much smarter to scratch a $10 filter than the lens of your hundred plus dollar lens.

The last lesson that’s worth noting is what I learned in post (editing).  While reviewing my pictures I noticed that I didn’t take advantage of a key feature my DSLR.  Most DSLR’s, including my Nikon, give you the ability to shoot with very fast shutter speeds.  This is a great tool to have when it’s snowing (or raining) because it allows to you seemingly freeze time and capture snow flakes or rain drops midair.  I unfortunately didn’t shoot many pictures with fast shutter speeds.   From the pictures that I so happened to have a fast shutter,  it seemed that 1/1000 – 1/2000 seconds was the ideal speed to freeze the  snowflakes.  My guess is the best lens speed probably varies depending on the wind and size of the snowflakes.  Lesson learned, my shutter speed will absolutely be on the forefront of my mind next time I go out in the snow or rain.

Taken with shutter speed 1/1000 sec

Taken with shutter speed 1/1000 sec

Rain sleeve option 1

http://www.bhphotovideo.com/c/product/469774-REG/OP_TECH_USA_9001132_18_Rainsleeve_Set_of.html

Rain sleeve option 2

http://www.bhphotovideo.com/c/product/891383-REG/ruggard_rc_p18_18_plastic_rain_cover.html

Take a Guess

Picture info: ISO 100, 35mm, f/20, 3 seconds, -2.1 ND, -1 exposure stop

Picture info: ISO 100, 35mm, f/20, 3 seconds, -2.1 ND, -1 exposure stop

Week 24 (1/13/14 – 1/19/2014):  Hoboken, Maxwell Place Park

Picture taken on 1/18/2014 at 2:41 PM

Picture description:

If you’ve read my last couple of posts you may have noticed that I’ve been alluding to different goals and projects for 2014.  One of my 2014 goals is to create a collection of “Hoboken pictures” with the ultimate goal of selling them at the festivals held in town throughout the year.  I’ve been to the last couple of art and music festivals, and one thing I’ve look for each time was good (fair priced) Hoboken art and pictures.  Unfortunately I’m yet to find a booth that has both good and reasonably priced Hoboken pictures.  Knowing that current Hoboken residents, like myself, are looking for local pictures is one of the reasons I decided to take on this project.  I think this project will be a good way to take the next step in my photography adventure.  Another reason why I decided to take on this challenge is due to all of the positive feedback and encouragement that I’ve been getting from friends and family.  You all have motivated me to keep pushing myself forward by continuing to develop my photography skills and for that I thank you!

Although I won’t feature a Hoboken picture each week I’m planning on taking a lot more pictures in Hoboken.  As I talked about last week, finding new perspectives will be one of my focal points for taking pictures in 2014.  This idea particularly applies to this Hoboken picture project since no one will want to buy pictures they could have taken themselves.  The key to being successful in this venture will be getting unique pictures that people will want to feature in their homes.

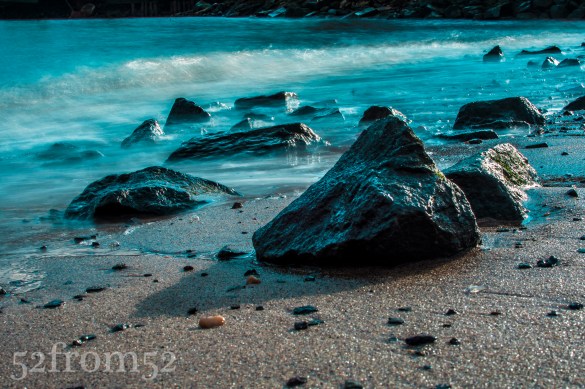
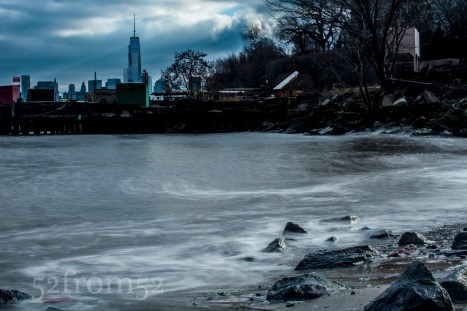
This week’s photograph is an example of finding a unique picture in Hoboken.  I’d bet that few Hoboken residents have noticed there is a beachfront in town.  During the summer the city hosts kayak and canoe days where they launch the boats from this beachhead.  It’s a wonderful location and absolutely one of the secret amenities of living in Hoboken.

20 Second exposure

20 Second exposure

Photography concepts:

It’s been a couple of weeks since I last experimented with ND filters.  Week 17’s post “One Shot” was the first and last time that ND filters played a role in my featured picture.  Unlike in week 17, this week’s picture was shot in broad daylight.  Getting a long exposure during the day would never have been possible without using ND filters.  In this picture I stacked two filters, 0.9 and 1.2, to gain the -2.1 percent neutral density level.  In case you missed my week 17 post, ND filters reduce the amount of light that hits your camera’s sensor and thus enables slower shutter speeds.

In addition to using ND filters, shooting this picture at an extremely small aperture of f/20 is also how a 3 second exposure was possible.  Taking a long exposure of the ocean or some other body of water that has lots of movement (waves) has been on my bucket list for a while.  Since it’s the winter I’m yet to make it to the actual ocean, so until then this will have to do.  The crashing of the waves is what created the motion blur effect in the water as it crashed and receding from the shoreline.  I love that ghosting look and plan on getting a lot more pictures like this over the summer.

Tripod used to take photo

Mini-Tripod used to take photo (link below)

Over the past few weeks I’ve been using Instagram and Facebook to gauge the different editing techniques that people like.  Since I’m planning on selling my pictures in the near future it’s important I know what the average person likes.  I personally tend to like more dull, low contrast pictures, while I’ve found that more of the people I come into contact with like high contrast, vivid photographs.  In an effort to hit the look that people have been liking more, I’ve been editing my photos to have more pop.  It’s really hard to describe my editing process verbally, so in the coming weeks look for me to try my hand at creating Lightroom editing videos on YouTube.  Expect a follow up edit to this post with a video on how I edited this picture.

Tripod: http://bhpho.to/1jkddfR

Springing into Winter

Picture info: ISO 250, 35mm, f/8, 1/1250 sec

Picture info: ISO 250, 35mm, f/8, 1/1250 sec, – 1 exposure stop

Week 20 (12/16/2013 – 12/22/2013): Central Park, Sheep Meadow

Picture taken on 12/21/2013 at 3:00 PM

Picture Description:

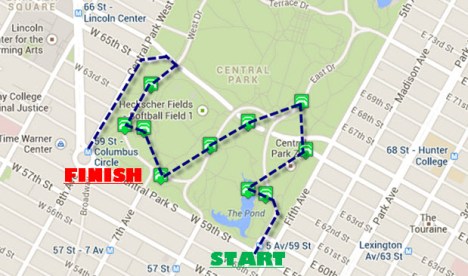
With Christmas less than a week away, New York City is buzzing with holiday festivities.  This week I decided to check out the Columbus Circle Holiday Market located at the south west corner of Central Park.  As the weekend approached, the weather forecast was calling for a warmer than usual day for December, so I decided to add a visit to Central Park to my agenda.  While visiting the Central Park website I noticed that on their map page you’re able to select specific destinations of interest within the park.  For weeks I’ve seen lots of great pictures taken of various arches and bridges in the park, which gave me an idea.  My idea was to use the map and plot out an “Arch and Bridge Tour” which would bring me to all of the southern arches and bridges, starting with the Gapstow bridge (South/East corner) which is adjacent to the ice rink.  With my plan set, all that was left was setting out on my weekend adventure.

Planned Arch/Bridge Tour

Planned Arch/Bridge Tour

My trip started with about an hour of fighting traffic and subway crowds prior to finally popping out of the 59th/5th subway tunnel.  Upon emerging from the subway  tunnel I was oddly greeted with the smell of spring.  If the streets weren’t packed with holiday decorations I would have swore to you that I had traveled back in time to April.  Even though I appreciated the nice weather I was a little disappointed, I really wanted to get some pictures of Central Park in the snow.  Later on my disappointment was cured by the much appreciated feeling in my fingers and toes I enjoyed throughout the day.

After visiting the first couple of bridges and arches, Gapstow included, I was running into issues with getting good compositions with my D5200.  The sky was getting washed out because it was earlier in the day than I usually shoot.  I also wasn’t able to fit enough of the landscapes that I was photographing into my 35mm lens frame.  Since the bridges weren’t cooperating I decided to cut my tour short and work my way to a part of the park called Sheep Meadow.  The large 15 acre “meadow” is special to me because it’s actually where I finally decided to due this blog.  Back in July I toured the park and ended up at the Meadow which I photographed and realized how fun it was to set out on photo adventures.  July’s trip cemented my idea and I moved forward with this blog, and I haven’t looked back since.

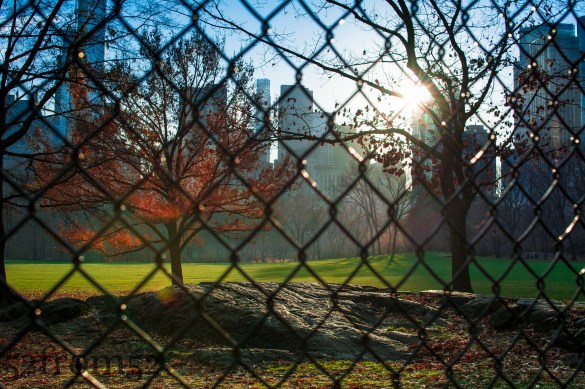
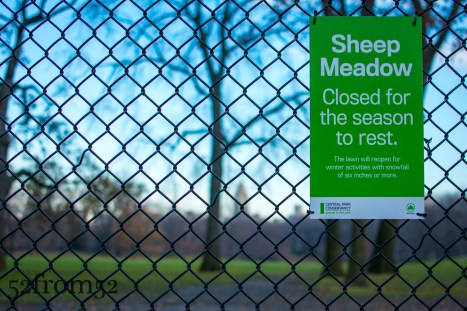
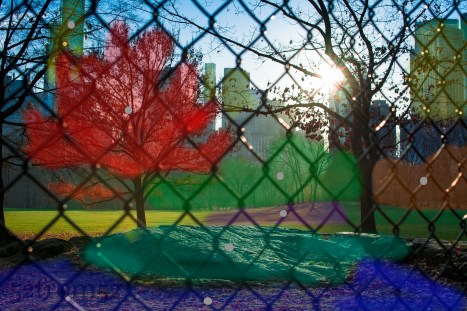
As I got closer to the Meadow I noticed that there were no visitors on the beautifully lush green lawn.  When I finally arrived at the fence surrounding the meadow I realized why it was so empty, it was closed for the winter.  Although I was disappointed this provided me with an opportunity to photograph the meadow without any visitors crashing my picture. I worked my way around the fenced perimeter shooting pictures above and through the fence. At the end of my trip around the meadow I spotted this week’s picture.  The way the rock picked up the sun with the contrasting green meadow really caught my eye.  Although the day didn’t turn out as planned, I was very pleased with this picture and really enjoyed my day in Central Park.

Sheep Meadow Closed!

Sheep Meadow Closed!

Photography concepts:

Over the past couple of weeks I’ve been experimenting with different editing techniques and applications.  I use Lightroom for all of my blog photographs but for Instagram, Facebook and Twitter I use Snapseed and VSCOCAM.  The advantage of Snapseed and VSCOCAM is that I’m able to give my pictures a little more “pop” with just a few clicks.  The disadvantage of both applications is that they don’t maintain the quality of the original picture, therefore they’re not suitable for editing pictures for this blog or any kind of high quality sharing.  All that being said, there is no reason why I can’t create the same type of vibrant images with Lightroom, it just takes a little more work.

Edited Location comparison

Edited Location comparison

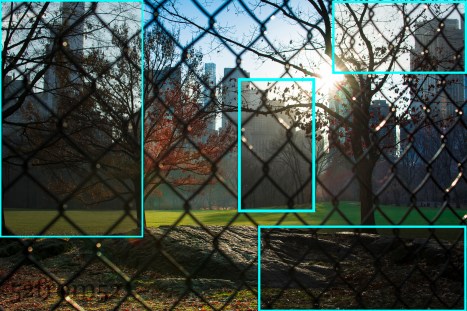
This week I put a lot more effort into editing specific details of my photograph, with the goal of creating a more vibrant picture.  I shot my picture straight into the sun which in turn caused a lot of shadows and dulled out the many of the colors in frame.  The way I corrected both issues was via Lightroom’s spot correction tool.  This tool allows you to do exactly what it sounds like, select certain area’s of your picture and adjust things such as color, exposure, contrast and so on.  I usually do these kind of adjustments globally (to the entire picture) or through the use of gradual filters.  In the past the issue I’ve run into is gradual filters aren’t good when you have to apply different settings to lots of different small areas.  This is where spot editing comes in handy.  The challenge that spot editing presents is keeping your picture looking a natural by manually blending your edits seamlessly into the picture.  You want to avoid creating obvious edit lines and look for natural breaks in your picture to tie your edits together.  Above and below are examples of before and after, along with a representation of the areas I focused in on with the spot edit tool.

Different colors represent different spot edits/localized adjustments

Different colors represent different spot edits/localized adjustments

Prior to editing the picture I obviously had to shoot one that was crisp and provided me with flexibility for editing.  To do this I underexposed my original picture and made sure I shot with a small aperture to keep more things in focus.  The last aspect of this picture I’ll briefly touch on is how lined it up. As I talked about in my week 16 post, framing a picture that’s shot into the sun can be tricky because you’re basically forced to use the live view.  I really don’t like taking pictures in the live view so what I do is line up my shot via live view, then switch the camera back to through the lens and fire away.  Once I get my first picture I adjust the composition via slight tilt and shift adjustments until I get the picture I want.  I used this method to get this picture and I think it worked well.