The Next Chapter

Picture info: ISO 100, 36mm, f/13, 1/60 second

Picture info: ISO 100, 36mm, f/13, 1/60 second

Week 52 (7/28/2014 -8/3/2014): Central Park, New York City

Picture taken on 8/2/2014 at 3:26PM

Photograph description:

A year ago when I decided to commit to doing this photoblog my goals were simple, shoot a picture each week, and learn photography.  It makes me proud to confidently say that I accomplished both goals, and in doing so accomplished so much more.  Hunting down my weekly pictures took me all over New York, New Jersey, Pennsylvania, Florida and countless more places in between.  Not only did this photoblog take me to new locations, it also helped introduce me to so many new people.  This week was no different, and perhaps it was one of my best experiences yet.

A few week’s ago my brother Ryan mentioned to me that one of his college buddies was looking to propose to his girlfriend.  Ryan had shown his friend some of my pictures, as a result, he asked Ryan if I’d be interested in photographing his proposal.  Initially I was hesitant to say yes, mainly because I don’t have much experience photographing people and I didn’t want to screw up such a special occasion.  After giving it some thought I decided what the heck, I’ll give it a shot.

This week Ryan’s friend reached out to let me know Saturday was the big day, and his location of choice was Central Park.  Coincidentally, Central Park was were I hatched the idea for this photoblog so it seemed fitting to get my last picture where it all started.

We all met this past Thursday to discuss the logistics for pulling off our covert mission.  Ryan’s friend was a military officer for 5 years so of course he showed up to the meeting with a map in hand and a plan for concealing our identity from his girlfriend.  We came up with a solid plan in a matter of minutes, the only thing left was for us to execute!

Our basic plan was to link up with my brother’s friend at the Southeast corner of the park, then follow him and his girlfriend North to the Bethesda Fountain.  Once at the fountain, the two would flip some coins into the fountain and make a wish.  They would both then walk towards the Bethesda Terrace, and just as they crossed under the inner arches Ryan’s friend would drop to a knee and tell his girlfriend what he wished for, that she would marry him.

52from52-wk52(2)

Bethesda Fountain

Saturday played out like a movie, we linked up with the couple and trailed them undetected while watching the plan play out.  Once it came time for Ryan’s friend to pop the question, I moved in for the shot.  As I crouched down to take the picture something new happened, my adrenaline pumped?  It was part nerves, part excitement but absolutely a new experience for me while taking pictures.  After taking the pictures my brother and I congratulated the newly engaged couple, took some more posed picture, then were on our way.

Bethesda Terrace

Bethesda Terrace: Proposal Location

As Ryan and I worked our way south towards Columbus circle we came across some large rocks that jutted out of the ground.  Ryan decided to climb on top of one of the rocks to get a better vantage point.  Once Ryan was at the top of the rocks I directed him to look out towards the city skyline so I could take a picture.  As Ryan turned towards the skyline, I saw it, the perfect shot, the perfect picture to close out my 52 week series.

You’re probably asking, why was the picture so perfect and what did I see?  It all happened so fast that it’s hard to describe, but as I took the picture I realized Ryan was inadvertently acting out how I was feeling.  Ryan climbing the rock represented me accomplishing my goal of completing my 52 week series.  Ryan turning around towards the city represented the idea that although I just accomplished my goal, in doing so it revealed a much bigger world full of new challenges just ahead. My unique experience while taking the proposal pictures, along with the previous 52 weeks made me realize that this is not the end of my photography journey.  Simply put, this was chapter one, and now it’s time for the next chapter.

Photography Concepts:

If someone asked me, “what do you think are the most valuable lessons that you learned of the past 52 weeks”, my answer would have to be my understanding of exposure and composition.  Understanding exposure enables you to take pictures that capture scenes as you see them.  Highlights, shadows, blacks and whites are the building blocks of a good exposure, they’re also what makes up a histogram.  Without explaining the histogram, I’ll show you how taping into the power of these attributes unlocks endless creative freedom.  If however you want to learn about the histogram, check out the link below.

Using this week’s picture as my example, in camera I wasn’t able to capture the full spectrum of highlights and shadows.  What I’ve learned to do in this situation is to take an evenly exposed picture in camera, then rework the highlights and shadows in lightroom.  Below is a split screen before and after of my picture.  In order to bring back the blue and detail of the clouds I had to almost completely drop the highlights to -90.  To compensate for dropping the highlights I raised my whites, this made sure I didn’t totally darken my image.  Next I lowered my shadows and blacks to make the trees and rocks darker, and emphasise the contrast between the city and the view inside the park.  Knowing the effect of highlights, shadows, blacks and whites is what gave me the knowledge to mold the image into exactly what I wanted.

Before and After Lightroom Edit

Before and After Lightroom Edit

Just like with exposure, understanding composition enables you to capture a scene and pass on what you see to a viewer.  As I talked about in the photograph description, the site of Ryan up on the rock was very symbolic to me.  Much of what created the symbolism was the composition of the picture.  Ryan’s position in the image, and orientation of his body were the two keys to creating the powerful image.  As I’ve talked about countless times over the past 52 weeks, the rule of thirds is what guides most of my composition decisions.  I’ve practiced the rule of thirds so much that I lined Ryan up on intersection point between the right and middle thirds basically without even thinking.  Next, when I told Ryan to turn and face the buildings, I shot my picture before he completely turned and presented me with his whole back.  To me , this half turned orientation gives the feeling that he just got to the top and is just looking out for the first time.  As a comparison, I took a picture of Ryan with his back completely turned to me, and for me that seemed like the body language of someone that was deep in thought.  He might have been standing on that rock for minutes, hours or even days?  His body orientation doesn’t show motion so it seemed boring.  These are just a few examples of things to think about when you’re lining up your subjects.

Rule of Thirds Applied

Rule of Thirds Applied

Now that I explained some of the ways that I use exposure and composition to get creative, it’s your turn. I’ve spent the past 52 weeks showing you my perspective, perhaps it’s time you get out there and show me yours.  Start a blog, post more actively on Instagram, shoot YouTube videos explaining how and why you take pictures.  Do whatever it takes to share your creativity and I guarantee, you won’t regret it, I know that I don’t.

Alternate view: Ryan's back turned

Alternate view: Ryan’s back turned

Links: 

Histogram Article – Click here


Redux


Picture Info: ISO 100, 36mm, f/9, 1/40 sec

Picture Info: ISO 100, 36mm, f/9, 1/40 sec

Week 48 (6/30/2014 -7/6/2014): Shipyard Park, Hoboken NJ

Picture taken on 7/6/2014 at 6:29 PM

Photograph description:

With the summer now in full swing, it’s become difficult to find the time to shoot new locations.  Don’t get me wrong, I’ve spent plenty of time outside of Hoboken, but I’m not always in a position to take my camera.  The past few weekends have brought me to places like Atlantic City, to the beach aka “DTS” for you locals, Pennsylvania, and lots of places in between.  All of these places offered plenty of great photographic opportunities, but bringing my camera would have added a layer of complexity I wasn’t comfortable with.  One of the few negatives of having a nice camera, is that it’s a nice camera, and you don’t want to risk messing it up or getting it stolen.  Luckily not every trip I have planned for this summer falls into ‘danger’ category,  I have a few trips in August that I’ll be able to bring my Nikon on.  This 52 week photoblog might be coming to an end, but that doesn’t mean I’ll stop posting once I’ve completed the year commitment.  I’m still kicking around ideas for my next theme but you can bank on the fact that I’ll still be posting and sharing my photography long after this photoblog theme wraps up.

Since I haven’t had time to  get out and explore new places with my Nikon, I thought it might be a good idea to revisit the locations of my earlier posts.  If you’ve been with me since the beginning you might remember my week three post “unplanned destiny” where I photographed the same fountain as this week’s picture.  If you missed it here is your chance to go check it out!

Photography concepts:

In my week three post I talked about the settings I used in order to achieve my camera’s fastest shutter speed of 1/4000 of a second.  Previously I chose a fast shutter speed so that I could freeze the water droplets that were spraying from the fountain.  This time around I decided to go with the opposite strategy and slow my shutter down so I would catch more of the water’s motion.

Just like in my week three post I had a regret after shooting my picture.  This time around rather than wishing I used flash to freeze the water’s motion, I regretted not using my ND filter to help slow my camera’s shutter down and pick up even more of the water’s motion.  You might have noticed the aperture I chose (f/9) and said well if you wanted a slower shutter you could have shrunk your aperture down beyond f/9.  If that was your thought, you were right, however the reason I stuck with f/9 was so the sun’s flare would stay relatively blown out and soft.  If you remember back in my week 38 post “beaming” I talked about how the aperture you choose when shooting into the sun has a big effect on the way the sun’s flares look.  Check out “beaming” if you want to get a better understanding about why I didn’t choose a smaller aperture.

Besides my shutter speed, the other big change I made from my week three post was the composition of my picture.  This week I took about 20 steps back from my original spot, and placed my camera on the ground while shooting.  In part, I used the ground to help stabilize my camera since I was shooting with a slow shutter.  I also wanted to make sure the clearing between the trees which the sun was shining through was lined up directly behind the fountain to backlight everything.  I may have looked like a fool getting so low, but I was very happy with the end result.


A Year Down the Road

Picture Info: ISO 100, 36mm, f/22, 5.0 seconds

Picture Info: ISO 100, 36mm, f/22, 5.0 seconds

Week 42 (5/19/2014 -5/25/2014): “The Farm” PA

Picture taken on 5/25/2014 at 9:00PM

Photography Description:

Progress, it’s something that is noticeable but not always easy to measure.  Some progress is tangible while other progress is more metaphysical.  When it comes to metaphysical progress, the question is how can you measure the progress of something that doesn’t have a scale of measure.  Take for example a picture, how can you scale a picture’s quality?  Is a picture measured by the number of “likes”, the price tag someone can sell it for, or is it the satisfaction the photographer get’s after taking it?  The concept of measuring my own progress in the world of photography is one that I’ve been dwelling on recently.  I feel like I’m getting better, but how can I truly measure my progress?

This past week presented the perfect opportunity for me to try and measure my progress in the world of photography.  For me, one of the key metrics in progress is difference over time.  In terms of photography this means you need to take the same picture or shoot the same subject at two intervals of time.  How does this relate to last week? Well last week marked the one year anniversary of purchasing my camera.  I couldn’t think of a better way to gauge my progress than comparing pictures I took in the first week of owning my camera, to ones I took one year later.

During the week I went out and tried to recreate some of my first attempted “night photography” pictures.  After successfully recreating one of the pictures I took on the first night of owning my camera, the progress was pretty clear.  However, after looking at my recreation I realized one nuance in my recreation idea.  I couldn’t limit myself to taking the “exact” picture, I needed to place myself at the same location but then shoot freely choosing whatever composition I liked.  Since composition is such a large component of photography, it seemed silly to force myself into recomposing images that might have been better from another perspective.

On Friday, I set out for my traditional Memorial Day weekend trip to “The Farm,” which is my friend Bob’s PA house.  While in route I was excited knowing “The Farm’s” rural landscape would act as the perfect testing ground for my progress.

Recreation of a shot from 2013

Recreation of a shot from 2013

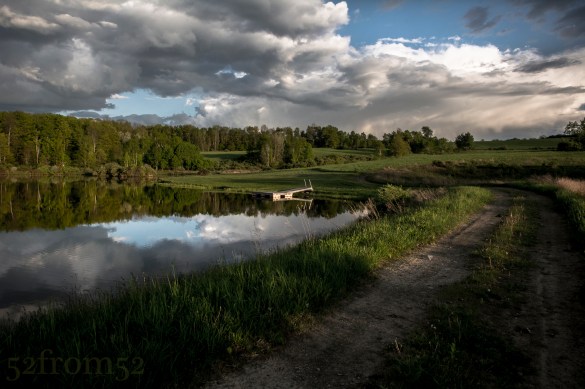
Without getting into the technical aspect of my progress (I’ll cover that in the next section), let me just say WOW, I saw a whole new side to the Farm.  It’s worth noting that I’ve been going to the Farm for 11 years, so something new totally blew my mind!  Take this week’s picture for example.  Never before have I thought to walk down this road during sunset.  It wasn’t until this year that it dawned on me, this road, sunset and mountain background would make for the perfect leading line composition.  The new perspectives didn’t stop at this road.  The entire weekend I was shown how photography has unlocked a whole new world for me visually.  That’s progress, and although it’s not entirely measurable it’s certainly noticeable to me and hopefully everyone else. Seeing the progress that I’ve made in a year makes me excited to think about where I’ll be another year down the road.  Only time will tell…

The last night's sunset

The last night’s sunset

Photography Concepts:

There are three major differences between the way I shoot now, versus how I shot a year ago.  First and probably the most important is the picture format that I shoot in.  Last year I had no clue about RAW vs. JPEG, so I shot in JPEG to give myself more pictures per SD card.  Had I shot this week’s picture in JPEG, I never would have been able to edit it the way I did.  This week’s picture was shot in Nikon’s RAW “.NEF” format.  While shooting, I purposely underexposed my image by a few stops knowing that it would better retain the detail in the sky, and I would be able to recover the lost detail in the foreground.  Simply put, last year I was unaware of the RAW power of shooting in .NEF…pun intended.

The second major difference between last year and now, is that I now mainly shoot in manual mode instead of aperture priority.  Manual mode is what enabled me to under expose my image to my desired level.  I made the jump to shooting more in manual a few weeks ago and I can tell you it’s been paying off in almost every one of my pictures.  Not only do I have more control, but I’m getting quicker at determining what settings are best for specific lighting or subject scenarios. Using this picture as an example, I instantly knew I wanted almost everything in focus so I shot at f/22.  Initially I didn’t have my tripod when I show this picture.  Last year I might have opened my aperture to f/2.8 so I could shoot with a fast enough shutter.  This year I knew f/2.8 wouldn’t let me capture the image I wanted, so I ran back to the house grabbed my tripod and tapped into the power of f/22’s large plane of focus.

Last but definitely not least is what I touched on in the previous section, composition.  Before taking the trip to the Farm this year I reviewed some of my pictures to see how I shot things.  What I noticed was that I wasn’t composing my pictures to take advantage of the full scene.  This year I focused more on lining things up or positioning myself at a location that gave me the best angle.  As often as you can, while out shooting mentally take a step back and think to yourself where is the best angle?  On top of that don’t fall in love with one location, move around!  Last year I was one of the biggest offenders of getting concrete shoes.  I picked a spot and took countless pictures.  This year I took 5-10 pictures ranging in aperture from a location, then moved to the next spot.  When you get home the last thing you want to see is 200 of the same picture.  Variety is good so don’t forget to move.

That about wraps up my review of the differences between this year and last year.  There were other things that I noticed, such as how I edit now, but it’s far too much to fit into one post.  As I get closer to the end of this blog you can expect more then and now comparisons.  Until then, I’m gone for now…


A shot I never saw before

Leading Lines Pt2

Bloomfield in Bloom

Picture info: ISO 250, 36mm, f/11, 1/80sec

Picture info: ISO 250, 36mm, f/11, 1/80sec

Week 39 (4/28/2014 -5/4/2014): 10th & Bloomfield, Hoboken

Picture taken on 5/3/2014 at 9:13 AM

Photograph description

Last week I mentioned that one of the biggest challenges for my Hoboken streets project would be to taking pictures that don’t in some way involve the sun .  Naturally I’m drawn towards taking pictures that utilize some kind of light source to create contrast.  In order to keep improving my photography, it’s important that I constantly challenge myself to go outside of my comfort zone.  It’s as the saying goes, “variety is the spice of life”

This week’s picture was taken while I was on my Saturday morning bagel run…for those of you that don’t know, I’m a bagel addict.  Moving on though. It was still early enough that the sun wasn’t high in the sky but it was still filling the day with plenty of natural light.  Although my usual Hoboken bagel spot is on Washington street, I decided to walk down Bloomfield instead so I could photograph the cherry blossoms that line the street.  It only seemed fitting that bloomfield would be filled with so many blooming trees.  Early into my trip I came across an apartment building that had a pinkish tint which acted as the perfect backdrop for the cherry blossom.  I shuffled around for a few minutes trying to find the best angle to fit everything in frame at ~35mm.  Eventually I found the spot and the here you have it!

Photography concepts:

One of the advantages of taking pictures with even light is that it’s easier to set your exposure for the entire scene.  When you include a bright light source in your picture (e.g. the sun) you have to worry about some or all of the image getting blown out (overexposed) or underexposed.  I usually worry more about overexposing the image because it’s harder to recover overexposed areas, than underexposed areas.  Since this week’s picture had no harsh light source setting my exposure was a breeze!

The hardest part of shooting this picture was capturing what I considered to be the good part of the scene at ~35mm.  The reason I’m saying approximately (~) is because I’ve been shooting more and more with my 17-50mm Sigma lens.  Yes 35mm is within the range of my lens, but for some reason the lens never seems to settle on 35mm exactly.  Any picture I take at 35mm usually reads as 34mm or 36mm when I review the image.  I’m not sure why this happens, but it’s not really a big deal.

If there is one thing I learned this week it’s evenly lit pictures are relatively easy to shoot, if you can find interesting ones.  The last part of that statement is the key, “if you can find interesting ones.”  My usual move in the absence of contrasting light is to find a unique angle or move in close and use a wide aperture to tap into a depth of field element.  I did neither this week and that again plays into my desire to shoot more variety.  Variety should be everyone’s goal.  Flip through the pictures on your computer, facebook or instagram and I bet you’ll see a trend.  Hopefully the trend isn’t selfies, but even if it is, this week try to shoot something new.  Find something you don’t usually photograph and get to it!

Beaming

Picture info: ISO 250, 36mm, f/14, 1/100 second

Picture info: ISO 250, 36mm, f/14, 1/100 second

Week 38 (4/21/2014 -4/27/2014): 9th & Park, Hoboken

Picture taken on 4/22/2014 at 6:40 PM

Photograph description:

If you have ever scrolled through my instagram gallery, you probably noticed that I enjoy taking pictures featuring the sun.  When posting to Instagram, the sun is a little bit of a photo hack. What do I mean by photo hack?  It’s been my experience that people tend to give more likes to pictures that have nice contrast, especially when that contrast is created from the sun’s beaming light.  Featuring the sun might be a bit of a cheat, but there still is an art to it.  I’ll give some tips on how I feature the sun with my phone and camera in the next section.

This week’s picture was shot while I was out hunting down material for my “Hoboken Streets” project.  The biggest challenge of the project will be to find unique ways to photograph the “streets,” without featuring the sun in each picture.  On top of avoiding too many sun shots I’m also going to avoid taking any of the pictures along the waterfront.  Yes the waterfront is still in Hoboken, but I’d like this project to feature more of the interior sections of Hoboken.  If you have any suggestions for locations shoot me an email.  This project is all about exploring the streets so the more unique the better!

Photography Concepts:

The main thing you have to think about when you’re taking pictures directly into the sun is setting the right exposure.  When you’re shooting the sun with your phone your exposure is typically locked to wherever your focus point is.  My recommendation is to set your pictures exposure on a darker area.  When you select a darker area your phone’s sensor will adjust the exposure to make the dark area evenly exposed.  With the darker area exposed properly the sun should be overexposed and appear to be very bright.  If you want to apply some kind of HDR setting to your picture in post, then meter the pictures exposure by focusing on the sun.  This will make your image look very dark but the HDR will bring back most of the detail.  I recommend going with the first exposure setup, overexposing the sun makes it look better.

Setting your exposure is obviously different with a DSLR and is done by making adjustments to your ISO, Shutter speed and aperture.  When shooting the sun with a DSLR your ISO should be as low as it can go, which is typically 100.  Choose your aperture based on how you want the sun to look in the picture.  If you use an aperture of f/22 the sun will look almost like a star with very sharply pointed flares.  The wider the aperture the softer the flares will become.  This week’s picture was shot at f/14 which is a good middle ground.  My beams (flares) have nice lines that fade into the picture smoothly.

Selecting your shutterspeed is easy if you’re in aperture priority, because the camera will do it for you.  If you’re shooting in manual, like I did for this picture, then you should start with a quick shutter and work your way down until your image is exposed to your liking.  The reason you should start with a quick shutter is so you don’t burn out your sensor with the sun.  I can only imagine the damage that would be done to your sensor with a 30 second sun exposure….ouch.

Two more quick tips.  One when you’re lining everything up, try to put the sun on either the left or right thirds intersection line.  This not only follows the rule of thirds, it also will make for better sun beams shooting through your picture.  My second tip is to find something like a tree, flower or cloth material that you can backlight with the sun.  Backlighting things that let some light through give your picture some nice texture.  If you backlight something that lets no light through, as in people, walls or buildings you’re left with a nice silhouette.  The choice is up to you, get creative and more importantly have fun!

Reflecting on Goals

Picture info: ISO 100, 34mm, f/2.8, 1/500sec

Picture info: ISO 100, 34mm, f/2.8, 1/500sec

Week 37 (4/14/2014 -4/20/2014): 8th Street, Hoboken

Picture taken on 4/19/2014 at 7:33 PM

Picture description:

What do I want to accomplish? This is a question that often keeps me awake at night.  I’m all about setting goals and  doing whatever it takes to complete them.  Step one of having a goal oriented mindset is obvious, set some kind of goal.  If you don’t know what you want to accomplish, how can you achieve it?  This “goal oriented process” is the concept I applied after purchasing my camera, my goal was to learn photography.  After setting my goal, step two was figuring out a way to achieve my goal, which led me to create this photoblog.  With the end of this photoblog quickly approaching, I’ve been spending time thinking about what will be my next step in achieving my overall goal of learning photography.   Learning photography is hard to measure though, one can argue that you can never fully learn photography.  There will always be  some new camera, some new technique or just something new to learn.  Knowing that I’ll never be able to measure my original goal has made me think, perhaps it’s time I expand my goal and decide what I’d like to do with my newly found photography knowledge?  I’m now asking myself, what do I want to use my photography to accomplish?  Is my passion for photography just a hobby, or do I want to take it further?

This past weekend I set aside some time to think about the questions I’ve raised about my next steps.  While kicking around ideas I decided to throw on a YouTube video from one of my favorite photography resources, “CamerRec Toby.”  Toby is a photography pro out in Vermont with his own YouTube channel devoted to reviews and tips about photography gear and techniques .  I’ve cited Toby’s videos before but this week one of his videos really caught my attention.  In the video (link below) Toby and his co-host Christina discussed an article “7 Reasons why most Photographers and Videographers don’t Reach their Goals” (link below).  The article was so relevant to what I was currently thinking about it almost seemed like it was targeted directly at me.  In the article the author talks about photographers setting too general of goals  (e.g. Learning photography), and how it’s important to have measurable goals. The article helped put things in perspective and made me realize it’s time for me to set some measurable goals.  The article and Toby’s video also motivated me to push forward on one of the smaller goals that I’ve been toying with.  As of this past weekend, I’ve decided that I’m going to participate in the next Hoboken Art & Music festival in September.  My main goal isn’t to make money (though that’s always a bonus), my main goal is to meet lots of people and seeing who and what might help me decide where to take my photography next.

With a new goal (participate in the Art & Music Festival) set, step two was to figure out a way to accomplish it.  There are many things that will go into preparing for the festival, but one of the most basic things is having plenty of pictures.  As a result, this weekend I also decided to start a new project called “Hoboken Streets.”  Since the festival is held in Hoboken, it seems logical to think many of the attendees will be Hoboken residents.  Having a geographically targeted audience means I should have geographically targeted pictures, hence my “Hoboken Street” idea.

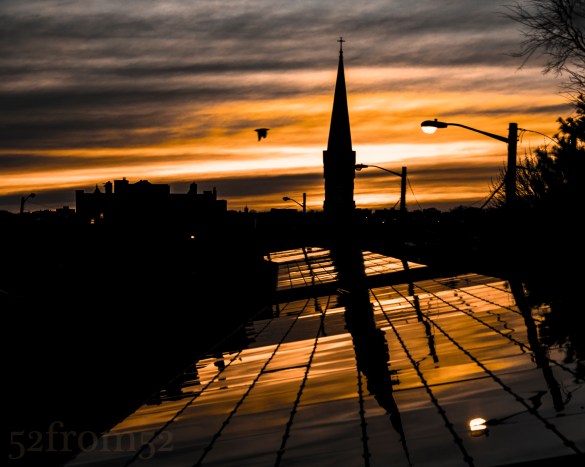
If you’re still with me, you’re probably asking, “how in the world does all this related to this week’s picture?”  Well, even before officially deciding on the idea of doing a “Hoboken Streets” project, I wanted to explore more of Hoboken.  Over the past few weeks I’ve changed up my nightly running route and began zig zagging around town looking for pictures.  This past week one of my runs led me up 8th street towards Stevens around sunset, where I found this location.  It might come as a surprise but I don’t run with my camera, so a few days later I circled back with my Nikon and got the shot.

Photography concepts:

I wrote a little too much in the previous section, and the article I referenced could somewhat fall into this section so this week I’ll keep this section short.  Two keys to this picture were composition and editing.  In terms of composition, I wanted to have an equal balance between the sky/silhouette and the solar panels which were reflecting the sky/silhouettes.  Instead of following the usual rule of thirds guidelines I split my image in two halves horizontally (top/bottom).  The bottom half was focused on the reflection which was meant to lead your eyes down the path to the top half, which was meant to feature the sky and silhouettes.

Editing was key for this image because I wanted to emphasize the contrast between the dark silhouettes and light from the sunset.  In order to do create a nice contrast, I dropped the overall vibrancy of the image while boosting the saturation of specific colors.  After my color adjustments, I was left with the contrasting image that I was looking for.  Of course there were some other adjustments (e.g spot adjustments, highlights, clarity, ect.) but nothing more than I’ve talked about in previous weeks.  If you haven’t already, circle back and read some of my earlier weeks posts to get some more in depth tips on editing and composition.

Article:

http://theslantedlens.com/2014/7-reasons-photographers-videographers-dont-reach-goals/

CameraRec Toby Video:

https://www.youtube.com/watch?v=IhGUyD2g7Eo


Fighting Light

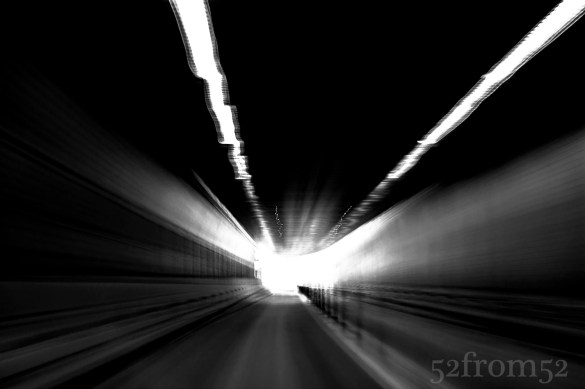
Picture info: ISO 100, 35mm, f/22, 6 seconds

Picture info: ISO 100, 35mm, f/22, 6 seconds

Week 34 (3/24/2014 -3/30/2014): Lincoln Tunnel, NJ Exit

Picture taken on 3/28/2014 at 4:44 PM

Photography description:

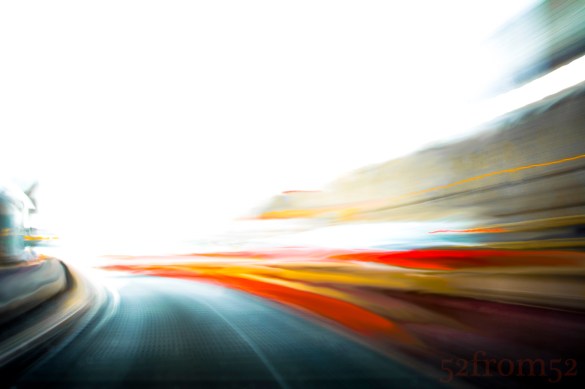
Long exposure photography has been a passion of mine since day one of purchasing my Nikon DSLR.  Most recently, my favorite subject for long exposures have been tunnels.  The effects that result from shooting with slow shutter speeds while driving in a tunnel are truly amazing.  My interest in tunnel/driving long exposures started after seeing a stunning picture posted on Instagram.  Some photographer wedged his DSLR in the back of his car and triggered it remotely.  The final image looked like something out of Star Wars.  All of the lights streaked, giving the feeling of motion to the viewer.  The concept captured my attention not only because it was visually beautiful, but because I like the idea of portraying a feeling through photography.  After seeing the picture on Instagram I knew that I had to try my hand at that type of picture.

Over the past couple of months I’ve had a couple opportunities to try out a tunnel long exposure.  Thus far I’ve only experimented in the Lincoln and Battery tunnels, but both have provided great images.  I haven’t strapped my camera to the back of the car yet, instead I came up with my own method.  I sit in the passenger seat and use a mini tripod to stabilize my camera on the dashboard.

Prior to this week, most of my tunnel pictures were shot using aperture priority, with an exposure time of under one second.  As I’ve mentioned over the past few weeks one of my new goals is to shoot in manual more often, so this weeks tunnel picture was shot in manual.  I’ll talk more about why I chose specific settings in the photography concepts section.

This week’s capture was the last picture I took before exiting the Lincoln tunnel during my Friday commute home.  I previously shot a picture that I really liked at the exit of the Battery tunnel, so my goal was to shoot something similar inn the Lincoln.  The contrasting or “fighting light” (dark/bright) that exists at a tunnels exit presents the perfect scenario for an interesting photograph.

Battery Tunnel Long Exposure

Battery Tunnel Long Exposure

Photography concepts:

As the end of the tunnel approached, it felt like a race to get my camera’s settings right for my photograph.  The stress and potential for a mistake that exists while shooting is the main negative about being in manual mode, but the risk is worth the reward.  Shooting in manual was the key to this week’s picture because I didn’t want to lose control of my shutter speed.  In order to get the picture looking as I imagined, I needed a slow shutter and for it to close right as I exited the tunnel.  Had my shutter stayed open too long after exiting, my entire image would have been blown out.  The aperture I selected (f/22) was more of an experiment than something I knew would work.  Previously I shot most of my tunnel pictures with a wide aperture, the smallest being about f/7.  Post picture, I’m happy with the look that f/22 generated.  Although mostly everything is blurred, the texture of the road at the tunnel exit is still visible, and that’s due to shooting at f/22.  Shooting at such a small aperture also enabled me to hit a slower shutter while maintaining the exposure that I wanted.  In my mind I wanted the exit of the tunnel to be completely blown out (white) so I purposely overexposed my image.  The result of all these things turned out to be almost exactly what I was looking for.

This week was the first time that my post production led me to doing photoshop manipulation.  I’m not a fan of “editing” an image in the way of changing what you originally shot.  I don’t mind editing the raw images attributes (contrast, clarity, hue, ect.) to modify an image, but I usually feel changing the structure of an image in photoshop is cheating.  In my opinion once you start changing your image, you move out of the photography world, and more into the art realm of painting and or drawing.  This week however I made an exception to my rule.  As a result of my longer shutter speed, some of the light blur in my image became choppy.  The choppiness was due to the car’s vibrations which usually aren’t as obvious with quicker shutters ( < 1 second).  What I decided to do was use the smudge and blur tools in photoshop to smoothing things out.  The result of my photoshop manipulations left my image looking more like a painting than an actual photograph.  As I said I’m usually not a big fan of doing this, but I’m really happy with the way this image came out this week.  I’m not planning on making a habit of manipulating my photo’s like this, but it’s nice knowing that I can with some sort of success.

Sounds like home

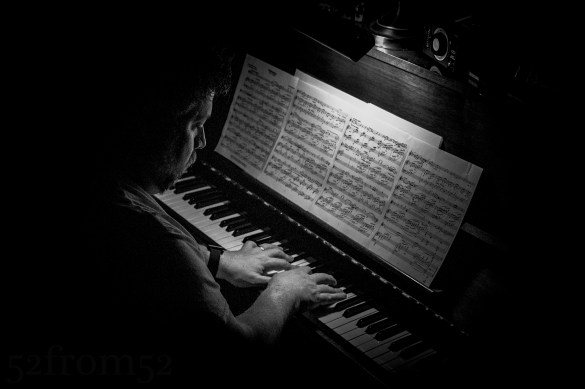
Picture info: ISO 3200, 36mm, f/4.5, 1/320 seconds

Picture info: ISO 3200, 36mm, f/4.5, 1/320 seconds

Week 31 (3/3/2014 -3/9/2014): Wood-Ridge NJ

Picture taken on 3/6/2014 at 6:59 PM

Photography description:

It all started about 26 years ago on one seemingly regular afternoon.  I was too young to remember but I’ve been told the story hundreds of times.  My mother left me (then a baby) with my dad as she went out to run some errands.  A few hours later my mom returned to a house filled with the sound of music.  Figuring I was asleep in my room she went to check on me, to her surprise I was not in my crib!?  She scrambled around looking for me and immediately ran towards my father who was still playing the piano.  “Louis! Where is Anthony?!” my mother said, as my father turned around from the piano to answer she saw that I was sound asleep strapped to my father’s stomach.  I believe that in that moment my love for music was born.  From that day on music has been a source of comfort for me and always reminds me of home.  

As the years passed my father continued playing the piano and my love for listening never faded.  Though I’ll admit there were times where I didn’t agree with the music selection which usually led to a clash between my father and I.  Overall the amount of times I enjoyed listening to my father play far outnumbered the times I wanted to hit the mute button.

Fast forward to this past Wednesday, I was taken back to my childhood through the sound of the piano.  Visiting my parents is always nice but this time was especially great.  As my mother prepared a delicious meal, my father treated us to some musical entertainment.  Talk about sensory overload.  Between the sounds of the piano and the smell from the kitchen it was hard to not soak up the feeling of being home.  Luckily I had my camera on hand to capture a moment that I’ll always remember.

Photography concepts:

Light and how it fills a room is something that I always try to focus on in my pictures.  During my father’s mini concert all of the lights were off, with the exception of the one piano light.  The single light source enabled me to focus in on my father with everything else faded to black.  

Initially I set my camera to manual (M) to give me full control over the exposure.  The picture that I had in mind was one where my father was surrounded by darkness with only him and the piano softly illuminated.   While in manual I had two options for how to expose my picture.  One option was the shutter speed, the other option was my aperture.  The hardest part was finding the perfect equilibrium between the both the shutter speed and aperture.  If I shot with a wide open aperture it was hard to keep everything in focus (small plan of focus).  Meanwhile if I shot with a small aperture and a slow shutter my fathers hands began to blur.  Although the motion blurred hands looked interesting, it wasn’t exactly what I was going for plus it was hard to keep everything else from blurring too.  If I had my tripod I may have set that up and tried to get a nice motion blur image.  Unfortunately I left my tripod at my apartment so long exposures were out of the question.

Alternate view

Alternate view

Eventually I flipped my camera into aperture priority (A on Nikon) and used the exposure compensation feature to adjust my image’s exposure.  In order for me to get the picture to look the way I wanted, I had to underexpose the image by -2.3 stops.  After finding the right exposure it was all about finding the best composition to capture the moment.

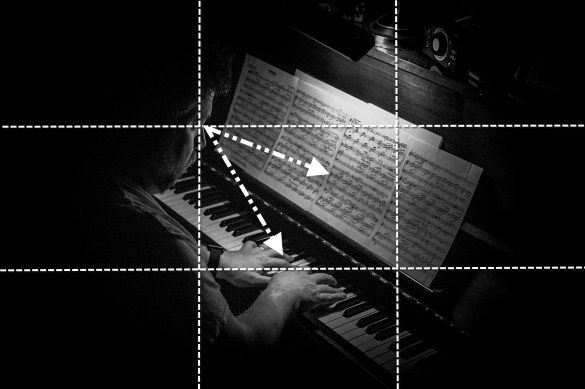
Keeping the rule of thirds in mind as a guide, I moved around firing off shots from different angles.  I tried everything, directly behind my father, from the side, low angle, eye level, up close on his hands but nothing seemed to fit.  Then I remembered one of the handy features of my D5200, the rotating screen.  I flipped out my screen tilted it down and held my camera high above my head to line up my shot.  Finally I found the right angle which captures everything, the piano, my father and the sheet music.  This week I shot my picture pretty close to what I wanted in Camera so there wasn’t too much editing required.  I’ve talked about editing a lot over the past few weeks so this week I’ll skip it.   It makes me happy to say that thanks to the skills I’ve learned over the past 31 weeks,  I was able to create the image that I originally had in mind.

Rule of Thirds

Rule of Thirds

Time Flies

Picture Info: ISO 100, 35mm, f/1.8, 1/4000 sec

Picture Info: ISO 100, 35mm, f/1.8, 1/4000 sec

Week 30 (2/24/2014 -3/2/2014): Hoboken Waterfront

Picture taken on 3/2/2014 at 12:14 PM

Photograph description

Wow week 30 and I can’t believe how fast time has flown since I started this project.  Doing this photoblog is one of the best decisions I’ve ever made.  I have learned so much, made some new friends and have become even more hooked on photography.  That being said, I’m excited to see what the next 22 weeks will bring!

I was a little off my game this week when it came to taking pictures.  Usually I get out about 1-2 times per week, this way once Sunday hits I have some options for my post.  I’d like to say my lack of photo time was because it was hard to find time, but it was mainly hard to find the motivation to get out and fight the cold.  Waking up Sunday I felt the pressure to find a good picture to feature and lucky for me it wasn’t too cold.  As I have so often this winter, I went out along the Hoboken waterfront to see what I could find.

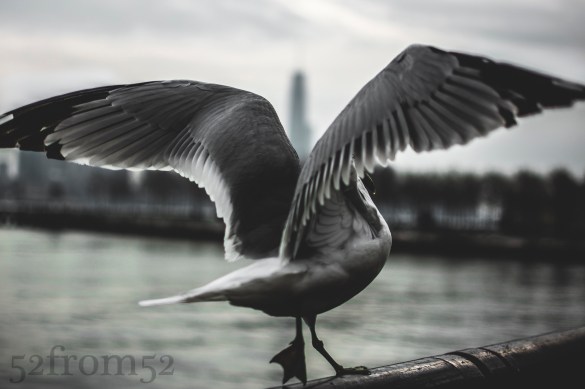
To get in the mood I threw on some headphones and lost myself in the hypnotic beats of Armin Vann Burren on SiriusXM’s electronic area.  Oddly enough electronic music has the ability to both get me amped and sooth me, sometimes simultaneously.  This time around Armin’s mix had more of a relaxing effect as I strolled around in the cloudy day.  After looping around the newly opened walkway that encircles the 4th street field, I came upon a surprisingly brave seagull.  No matter how quickly I moved towards him the seagull would only fly out a few feet then perch right back on the railing.  This seagull’s challenging attitude provided me with a unique opportunity to adjust my camera settings to find the ideal exposure and composition.

Photography concepts:

Shooting fast, shooting often and anticipating movement are the keys to photographing birds and most animals.  Shooting fast and often seems pretty obvious but the trick is knowing how to set up your camera to do so.  Ideally you want to use your camera’s fastest shutter speed.  The easiest way to get a fast shutter speed is to shoot with a large aperture.  The aperture will vary based on available light, but in most cases your safest bet is to shoot wide open at your lenses largest aperture.  My lenses widest aperture is f/1.8.  Shooting at my lenses maximum aperture allowed me to achieve a super fast shutter of 1/4000 of a second.  You may have noticed that even with shooting as fast as I did, the seagulls wings are still a just a little blurry.  It’s possible the blur is due to a little lag in focus but I’m pretty happy with my camera’s ability to focus quickly so it’s more likely due to a small plane of focus.

Now how to shoot often? My camera and most other DSLR’s have different shooting modes which allow for faster frames per second.  The fastest my camera will shoot is 5 frames per second.  This allowed me to hold down my shutter release button and let my camera fire off lots of consecutive bursts to capture all the action.

Now even with a fast shutter and my camera firing off almost continuous bursts, all would have been lost had I not positioned myself correctly.  Birds and other animals usually give away their next move by the way they orient their body or with their body language.  In the case of this seagull when he was about to fly he usually dipped his head and obviously started ruffling his wings.  I took his flight cues and  body orientation as my cue for where to lead my camera and when to start shooting.

One  last point worth noting, although I shot at f/1.8 I could have shot with a smaller aperture by increasing my ISO.  The reason that I shot at f/1.8 was to get the background totally blurred.  If you don’t want the background blurred raise your ISO and shoot with a smaller aperture.  Shooting with a smaller aperture will also give you a bigger margin of error in terms your plane of focus.  Don’t take my word for it, play around with your settings to find the look that you like.  Just remember you might only get one shot at the picture so practice and know what your settings are before you approach your subject.

Center of Attention

Picture Info: ISO 200, 35mm, f/8, 1/320sec

Picture Info: ISO 200, 35mm, f/8, 1/320sec

Week 16 (11/18/2013 – 11/24/2013): Wagner Park, New York City
Picture taken on 11/23/2013 at 5:04 PM

Picture description:

Back in September I discovered the beautiful location that is Wagner Park.  After getting the picture for my week 5 post, Never Forget, at the Freedom Tower, I had dinner with my wonderful mother for her birthday at a place that had long been on my “To Try” Yelp list.  The restaurant I’m talking about is Gigino at Wagner Park and let me tell you put it on your to do list.   Gigino has outdoor seating (weather permitting) which provided us with one of the best sunsets I’ve ever seen while we ate a delicious dinner.  After dinner I knew that I’d have to make a return trip in the near future, if not for a date, I’d absolutely have to take my camera to capture the scenic views at Wagner Park.

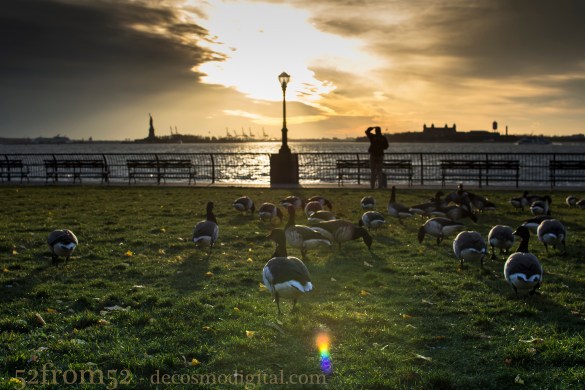
Since September I haven’t made it back to Gigino, mainly because it’s gotten far too cold to take anyone on a date there.  That being said I can handle the cold on my own so this past Saturday I decided to take a trip to Wagner Park around sunset to see what kind of pictures I could get.  Luckily as it turned out I chose a great night that provided a really interesting and vivid sunset.  Out of all the sunset pictures there was one picture that really caught my attention during editing.  It’s pretty obvious which picture I’m talking about, look up, but let me give you the quick story behind it.

After arriving at Wagner Park I noticed that I wasn’t the only one that decided today was a good day to hang out in the park.  No I’m not talking about a person, although they were there too, I’m talking about a brace of ducks.  Yes, a group of ducks is called a “brace” look it up, I did.  As I walked around the park trying to figure out where would be the best place to get my sunset shot I kept glancing over to the ducks.  Eventually I decided why not see if I can creep up on the group and snap a birds eye view?  Since the sun was so strongly beaming down from the horizon I couldn’t use the viewfinder (I’ll explain this more later) I blindly lined up my shot and fired away.  With each picture I adjusted my shot based off the last picture’s preview.  After a couple shots I finally “walked in” my picture’s composition to something that I liked, and here you have it.

Photography concepts:

As I mentioned in the description section this picture was shot basically blind and through a series of picture to picture adjustments.  The reason I did this is first because I could not use the viewfinder.  It might seem obvious but when you’re taking a picture directly into the sun you can’t look through the viewfinder.  Why? Well the sun is dangerous enough to look at with the naked eye, forget about through essentially a magnifying glass.  Since I value my eyesight I won’t even risk getting flashed with the sun’s blinding light.   For shot’s into the sun this leaves the live-view option which is the back screen.  Although I could have used the live-view I don’t like how it focuses, it’s not fast enough for moving objects.  With the ducks moving around I wanted to be able to fire quick shots and thus did not use the live view.

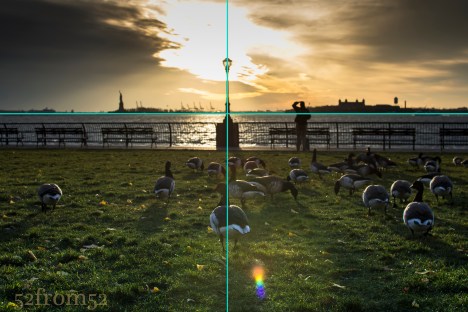
A concept I tend to mention in almost every post is the rule of thirds.  This time though I want to highlight how I didn’t exactly follow the rules.  In this picture I had three things that I considered the focus of my shot, or my main subjects.  One was the sun, two was the light post and the third the ducks, more specifically the one duck that was closest to me in the foreground.  When it came time to align my shot rather than put the sun on one of the left or right third lines like I usually do I centered it.  I also centered the main duck and the light poll, which only further highlighted the sun.  Aligning the sun with the light post gave off the effect that the light post is the reason the sky is so illuminated.    The reason I said I did’t exactly follow the rule was because I did follow it for some other parts of the picture.  For example, I did not put the horizon in the absolute center of my picture.  I gave more weight to the ducks/grass rather than the sky to further emphasize them in the picture. Another way I loosely followed the rule of thirds was putting some of my  secondary subjects close to the cross points of the upper thirds line on the left and right.  I’m talking about the Statue of Liberty and Ellis Island.  Although this falls under the rule, it was more of an accident but I’m glad everything lined up with such great symmetry.

Center Vs. Rule of Thirds

Center Vs. Rule of Thirds

The last thing I want to mention real quick is how I edited the sky.  In the unedited photo the sky was really blown out from the sun.  As I’ve mentioned before since I shoot in a RAW format I’m able to recover some of the detail even when images get over or under exposed.  Below is a comparison of how the image originally looked and how it did after I dropped the exposure for just the sky by about 2 steps.  One way I might have been able to avoid doing this is shooting in HDR mode or creating one via bracketing and photo merging.  I haven’t talked a lot (if at all) about HDR but it’s something I plan to in some future posts.  Right now I’m still in the experimental stages with my Nikon as far as HDR but it’s one of my favorite effects with my iPhone 5s.  More to come on this subject soon!

Edited (via Lightroom) vs Unedited

Edited (via Lightroom) vs Unedited