Picture info: ISO 3200, 35mm, f/1.8, 1/200sec, -1 Exposure step
Week 19 (12/9/2013 – 12/15/2013): Top of the Rock Observation Deck
Picture taken on 12/12/2013 at 5:15 PM
Picture description:
This week I finally got the chance to make a return visit to Top of the Rock. My first visit was six months ago and was only two weeks after I purchased my Nikon. Since my last visit I’ve often looked back at the pictures I took and thought about the many things that I could have done better. I’ve learned many lessons over the past six months, in part because of this blog but also because I’ve immersed myself in photography. Articles, YouTube tutorials and experimenting with different techniques have been my main sources for learning. One other source of learning that might surprise you is instagram. I often flip through different hashtags looking for ideas of what to shoot or to see how people photograph certain subjects or places. Instagram has photographers of every level ranging from the professional to amateur, and or dare I say serial selfie taker. Before and after my trip I looked through the hashtag #topoftherock to see the kind of pictures people took during their visit. Besides the selfies and couple pictures I noticed that nearly all of the pictures looked identical with the exception of changes to the sky or filter the person used on the picture. After seeing how people have been over-sharing the same picture I knew that I had to find some way to differentiate mine from the rest.
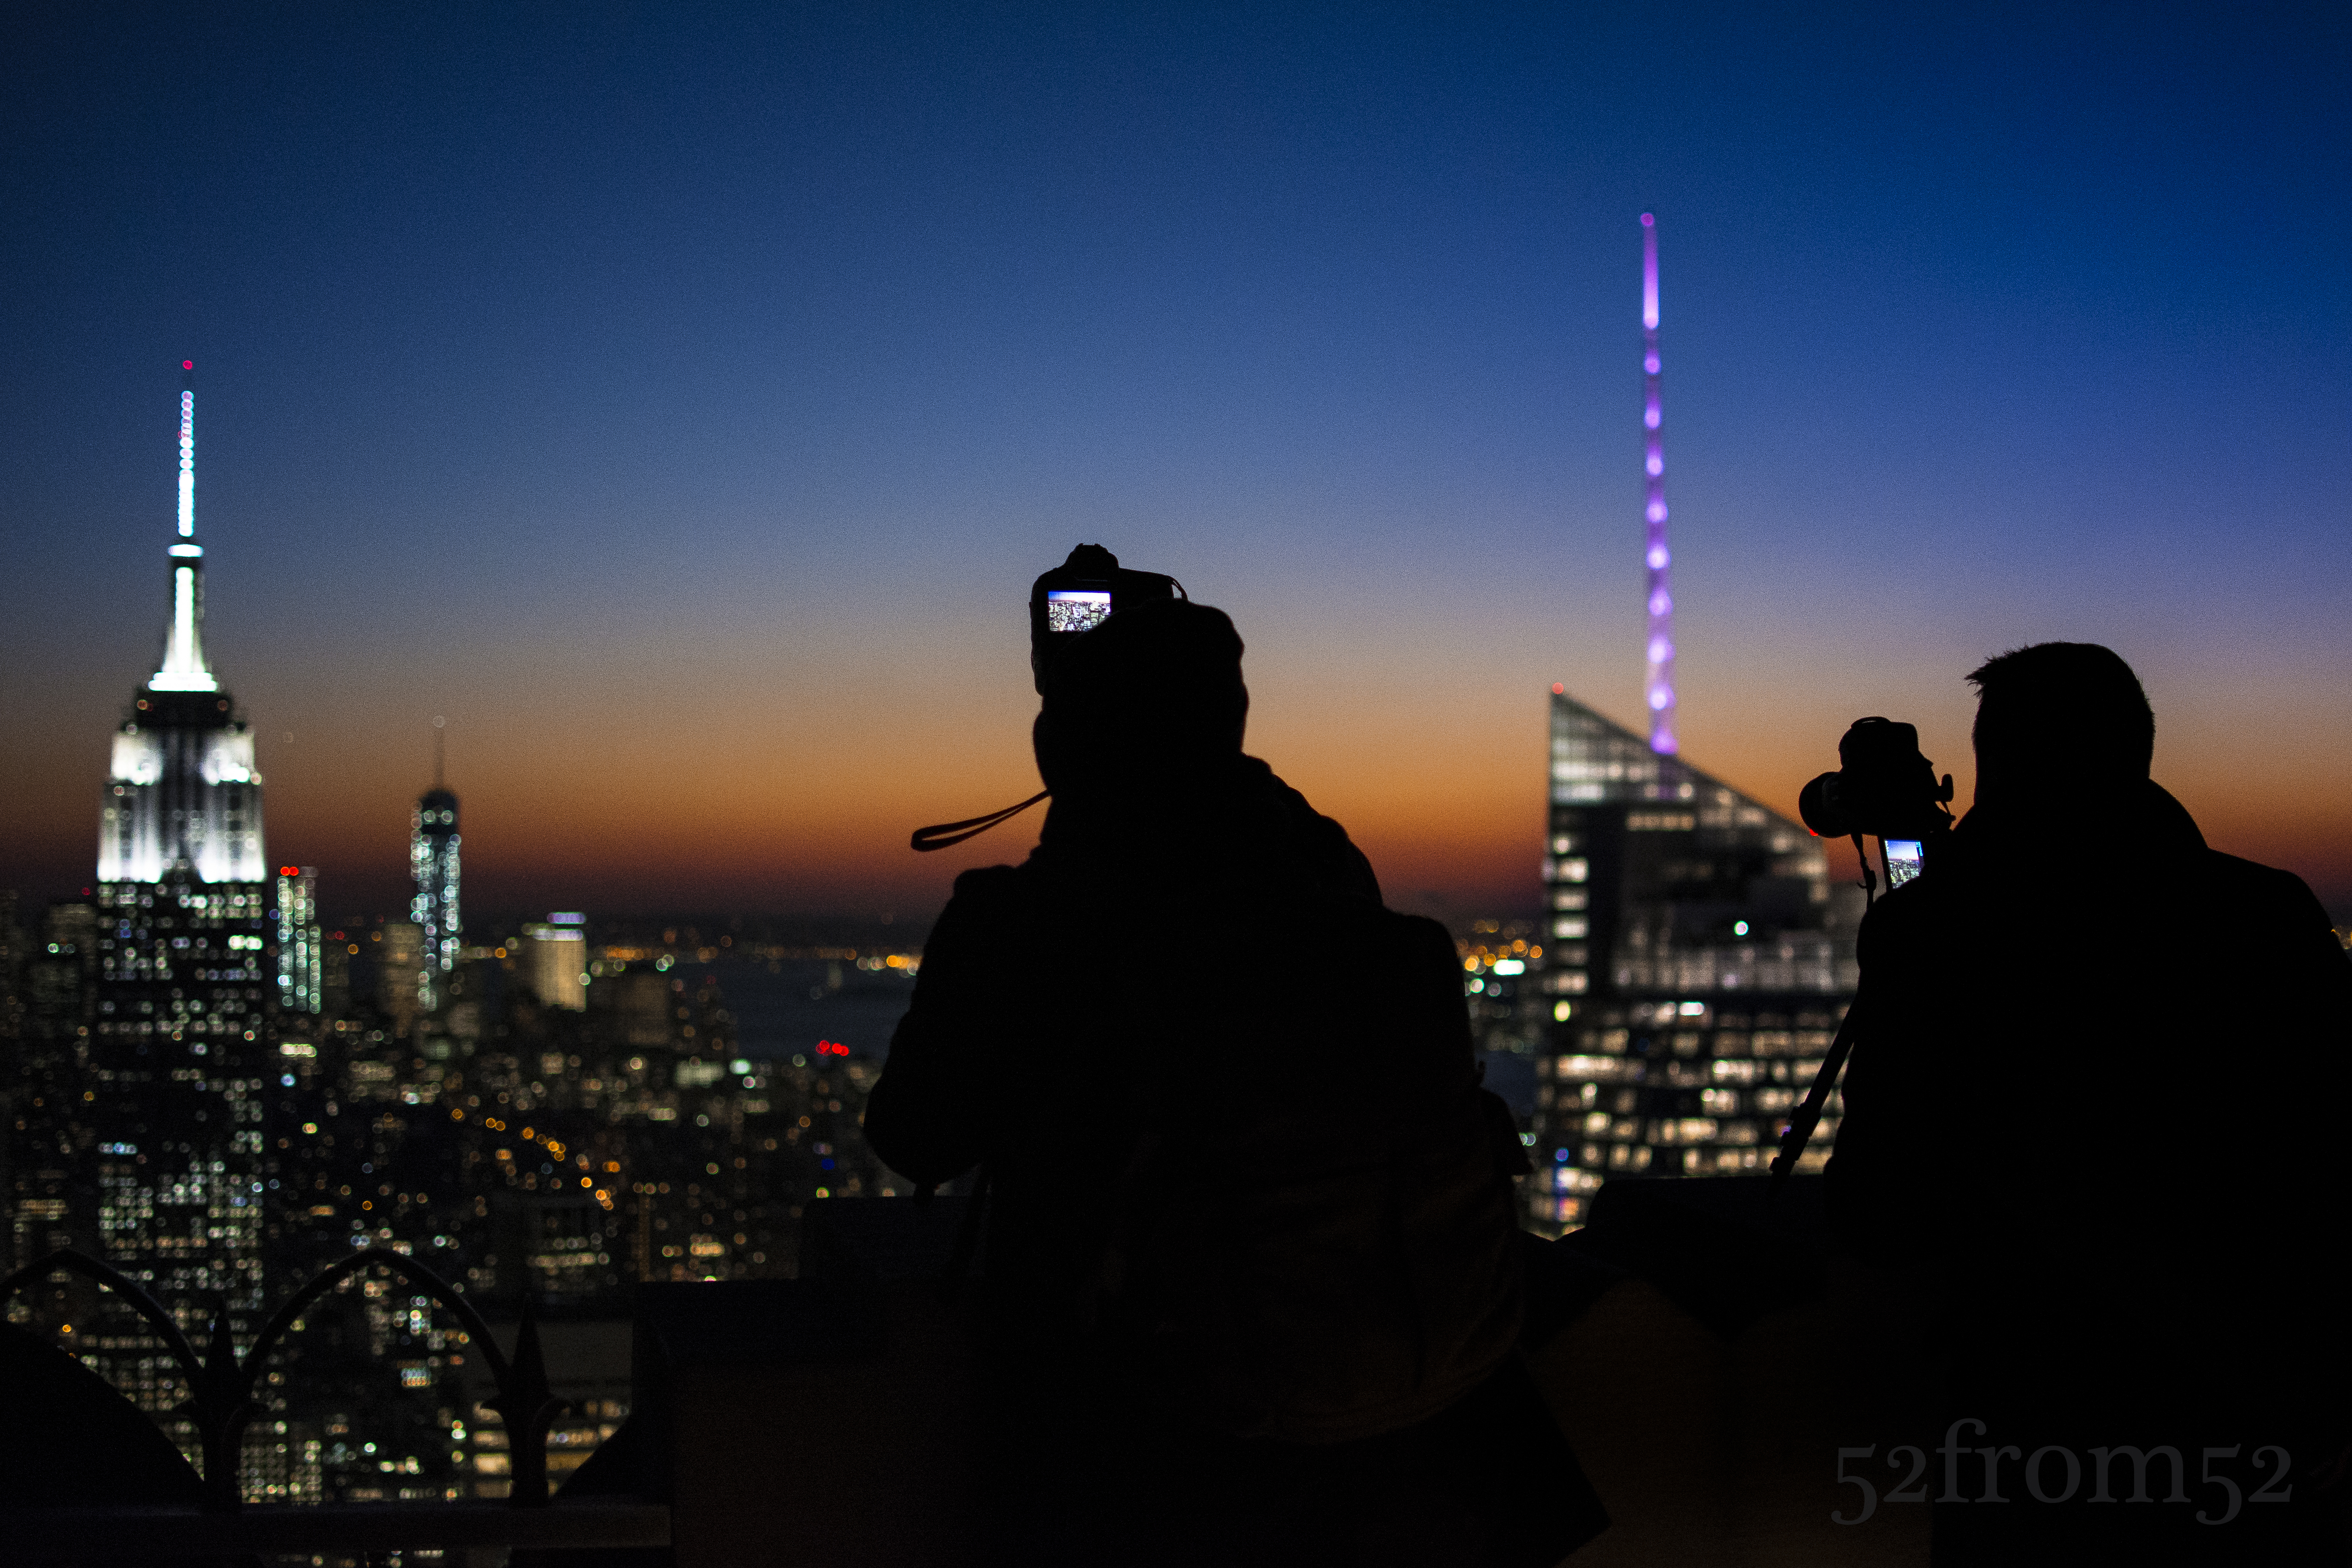
During my visit even though my goal was to take an original picture, I couldn’t help myself from taking the classic Top of the Rock picture. I found myself taking the same kind of picture over and over again partially to make sure I got a good one, but also because in person it’s just that hypnotizing of a view. After about an hour of scanning the horizon for a unique view I came to the conclusion that from my vantage point there really was none. It didn’t matter where I aligned the buildings, I had already seen that picture, or one very similar, shared countless times. At that moment I decided to take a step back from my coveted position to see what new perspectives I could find. Within a matter of seconds I was rewarded for my decision. After stepping back I saw that all the people taking pictures were casting silhouettes in front of the very same view I was just photographing. I spent the next couple of minutes wading in and out of the crowd to try and get the a picture that met my satisfaction. Eventually the 20 degree weather got the best of me and I decided to call it a night. On my way home while thinking about my night, I realized the valuable lesson that I just learned. It’s very easy to get drawn into taking the obvious picture. The only way my photography is going to continue to improve or “move forward” is if I regularly remind myself to take a “step back” and find a new perspective on what’s right in front of me.
Photography Concepts:
Although I used the previous section to talk about avoiding the obvious shot, it doesn’t mean the classic Top of the Rock pictures aren’t good ones. For the purpose of this blog I wanted to challenge myself to get something unique but it leaves the question, how do you take a good picture at Top of the Rock? As I mentioned earlier I often look back at the pictures I took during my first visit and dwell on what I could have done better. Let me share with you some of the lessons I learned between my two visits in terms of taking pictures at Top of the Rock.
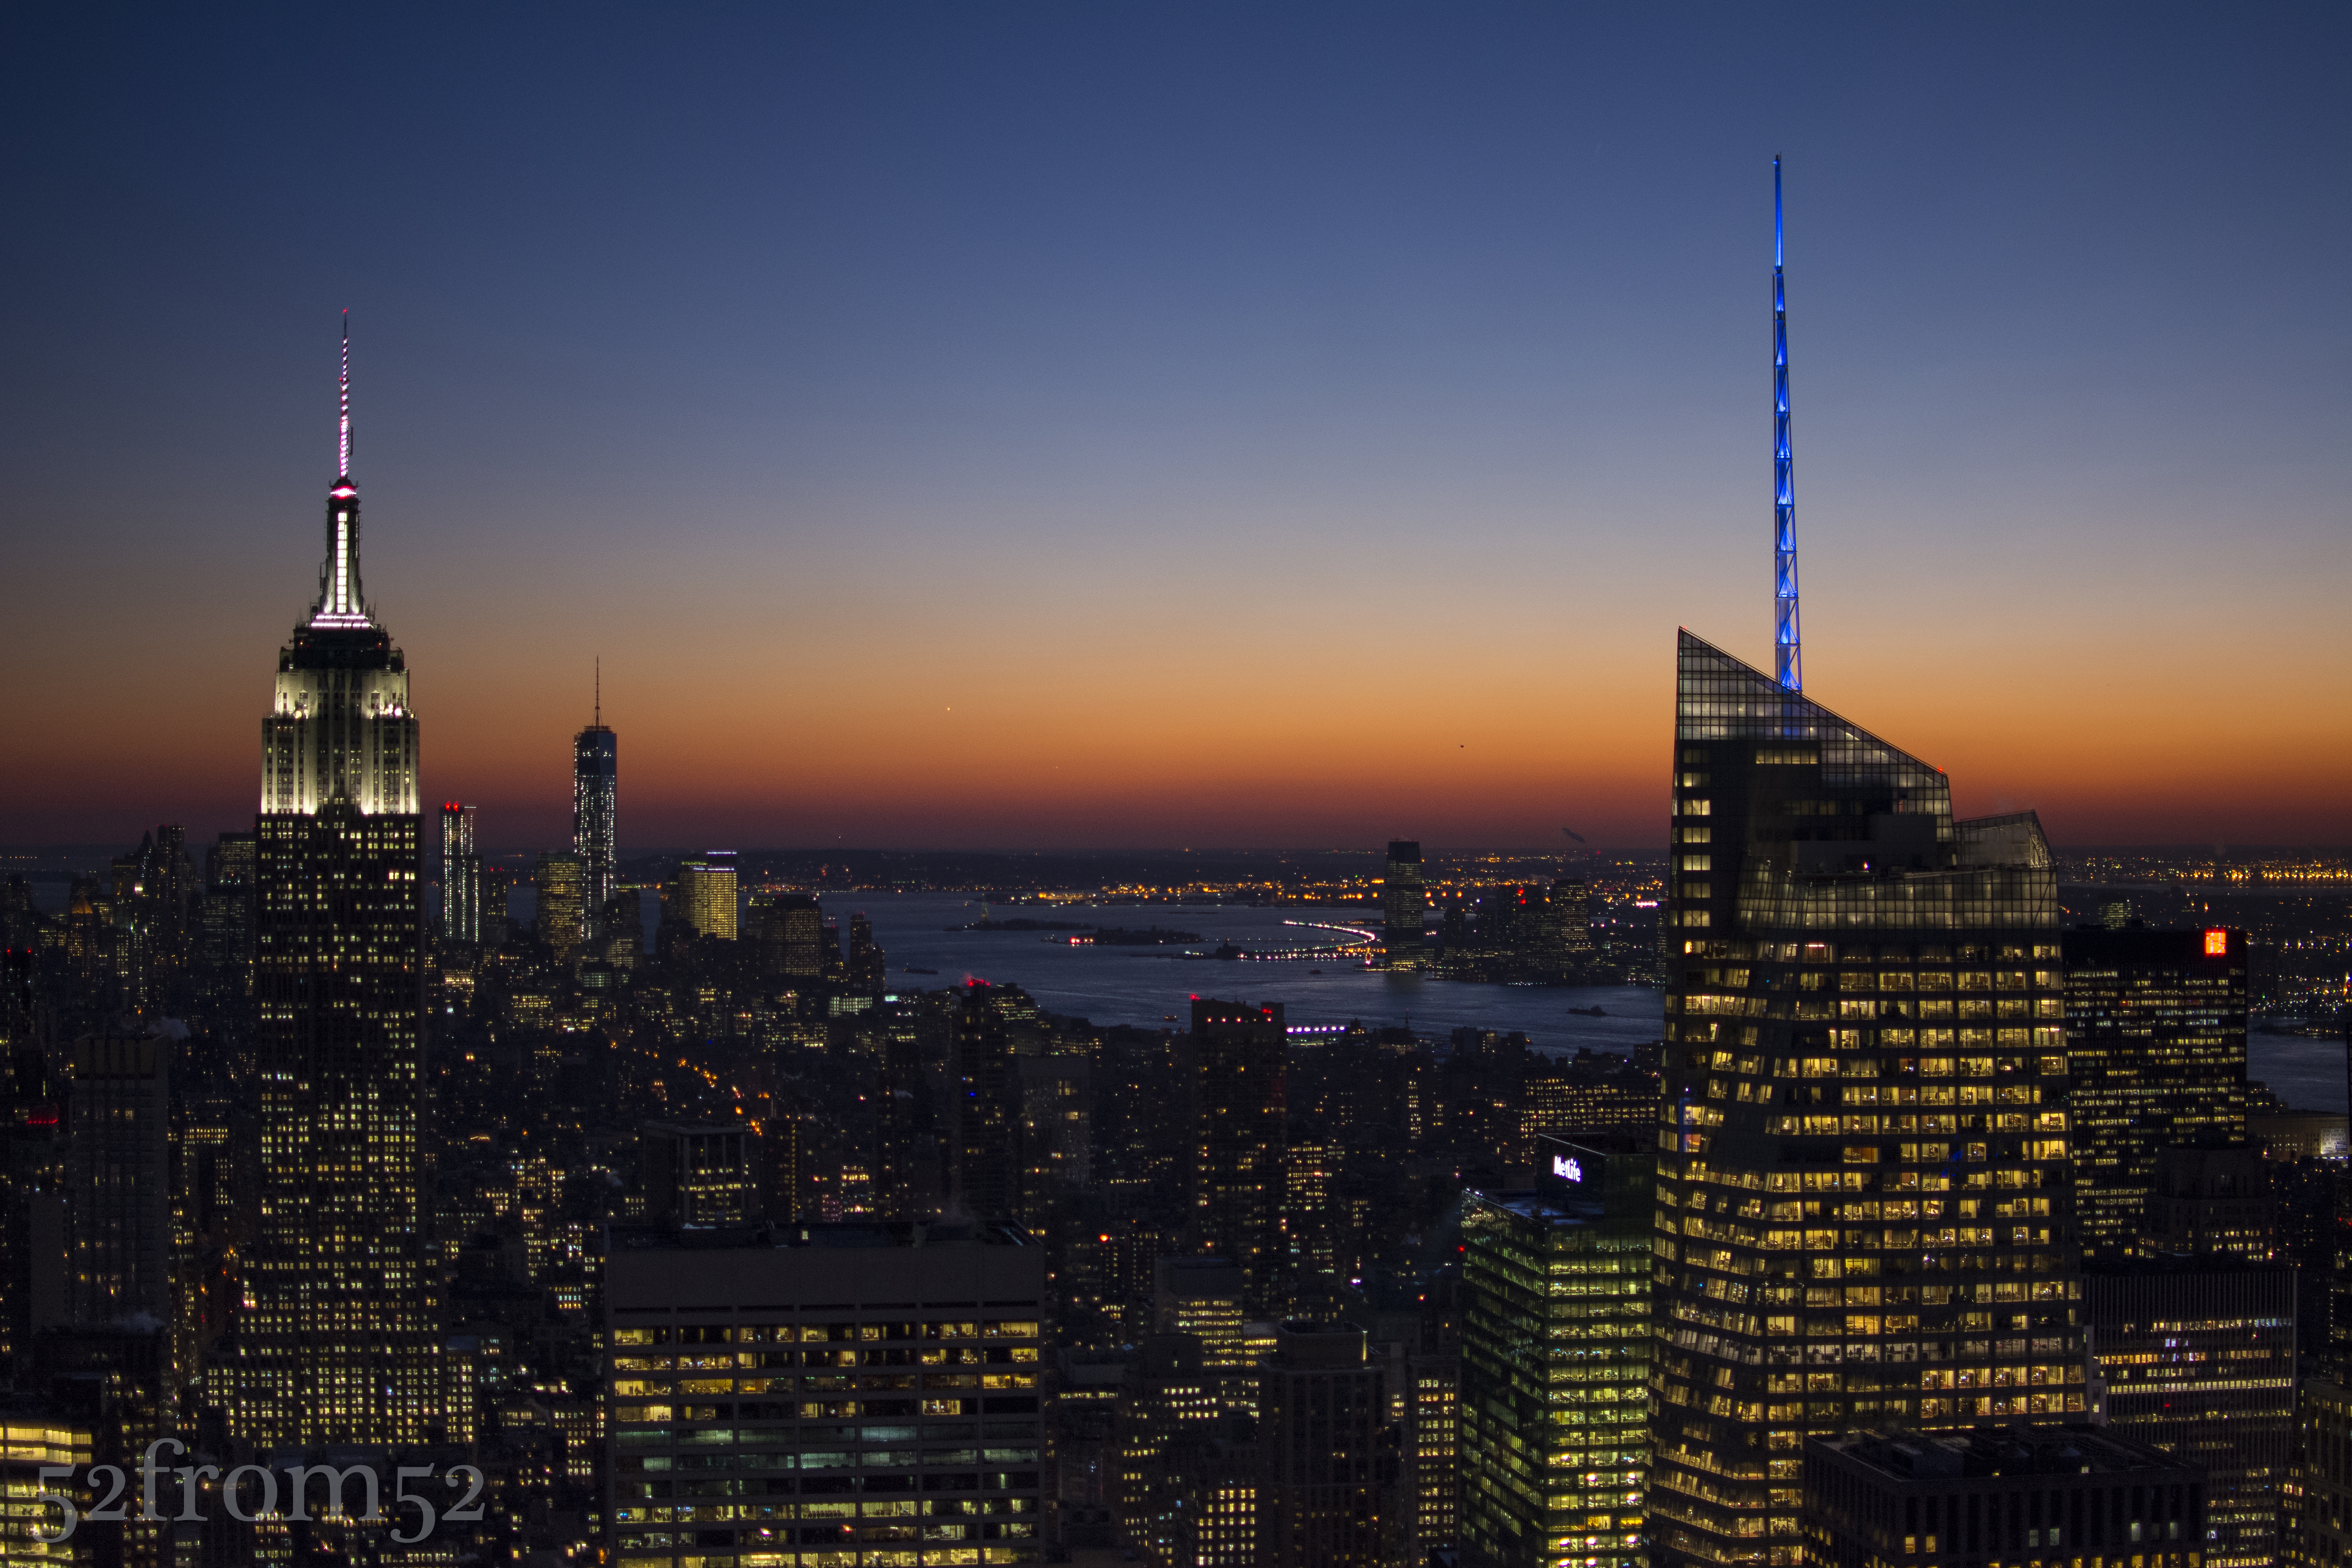
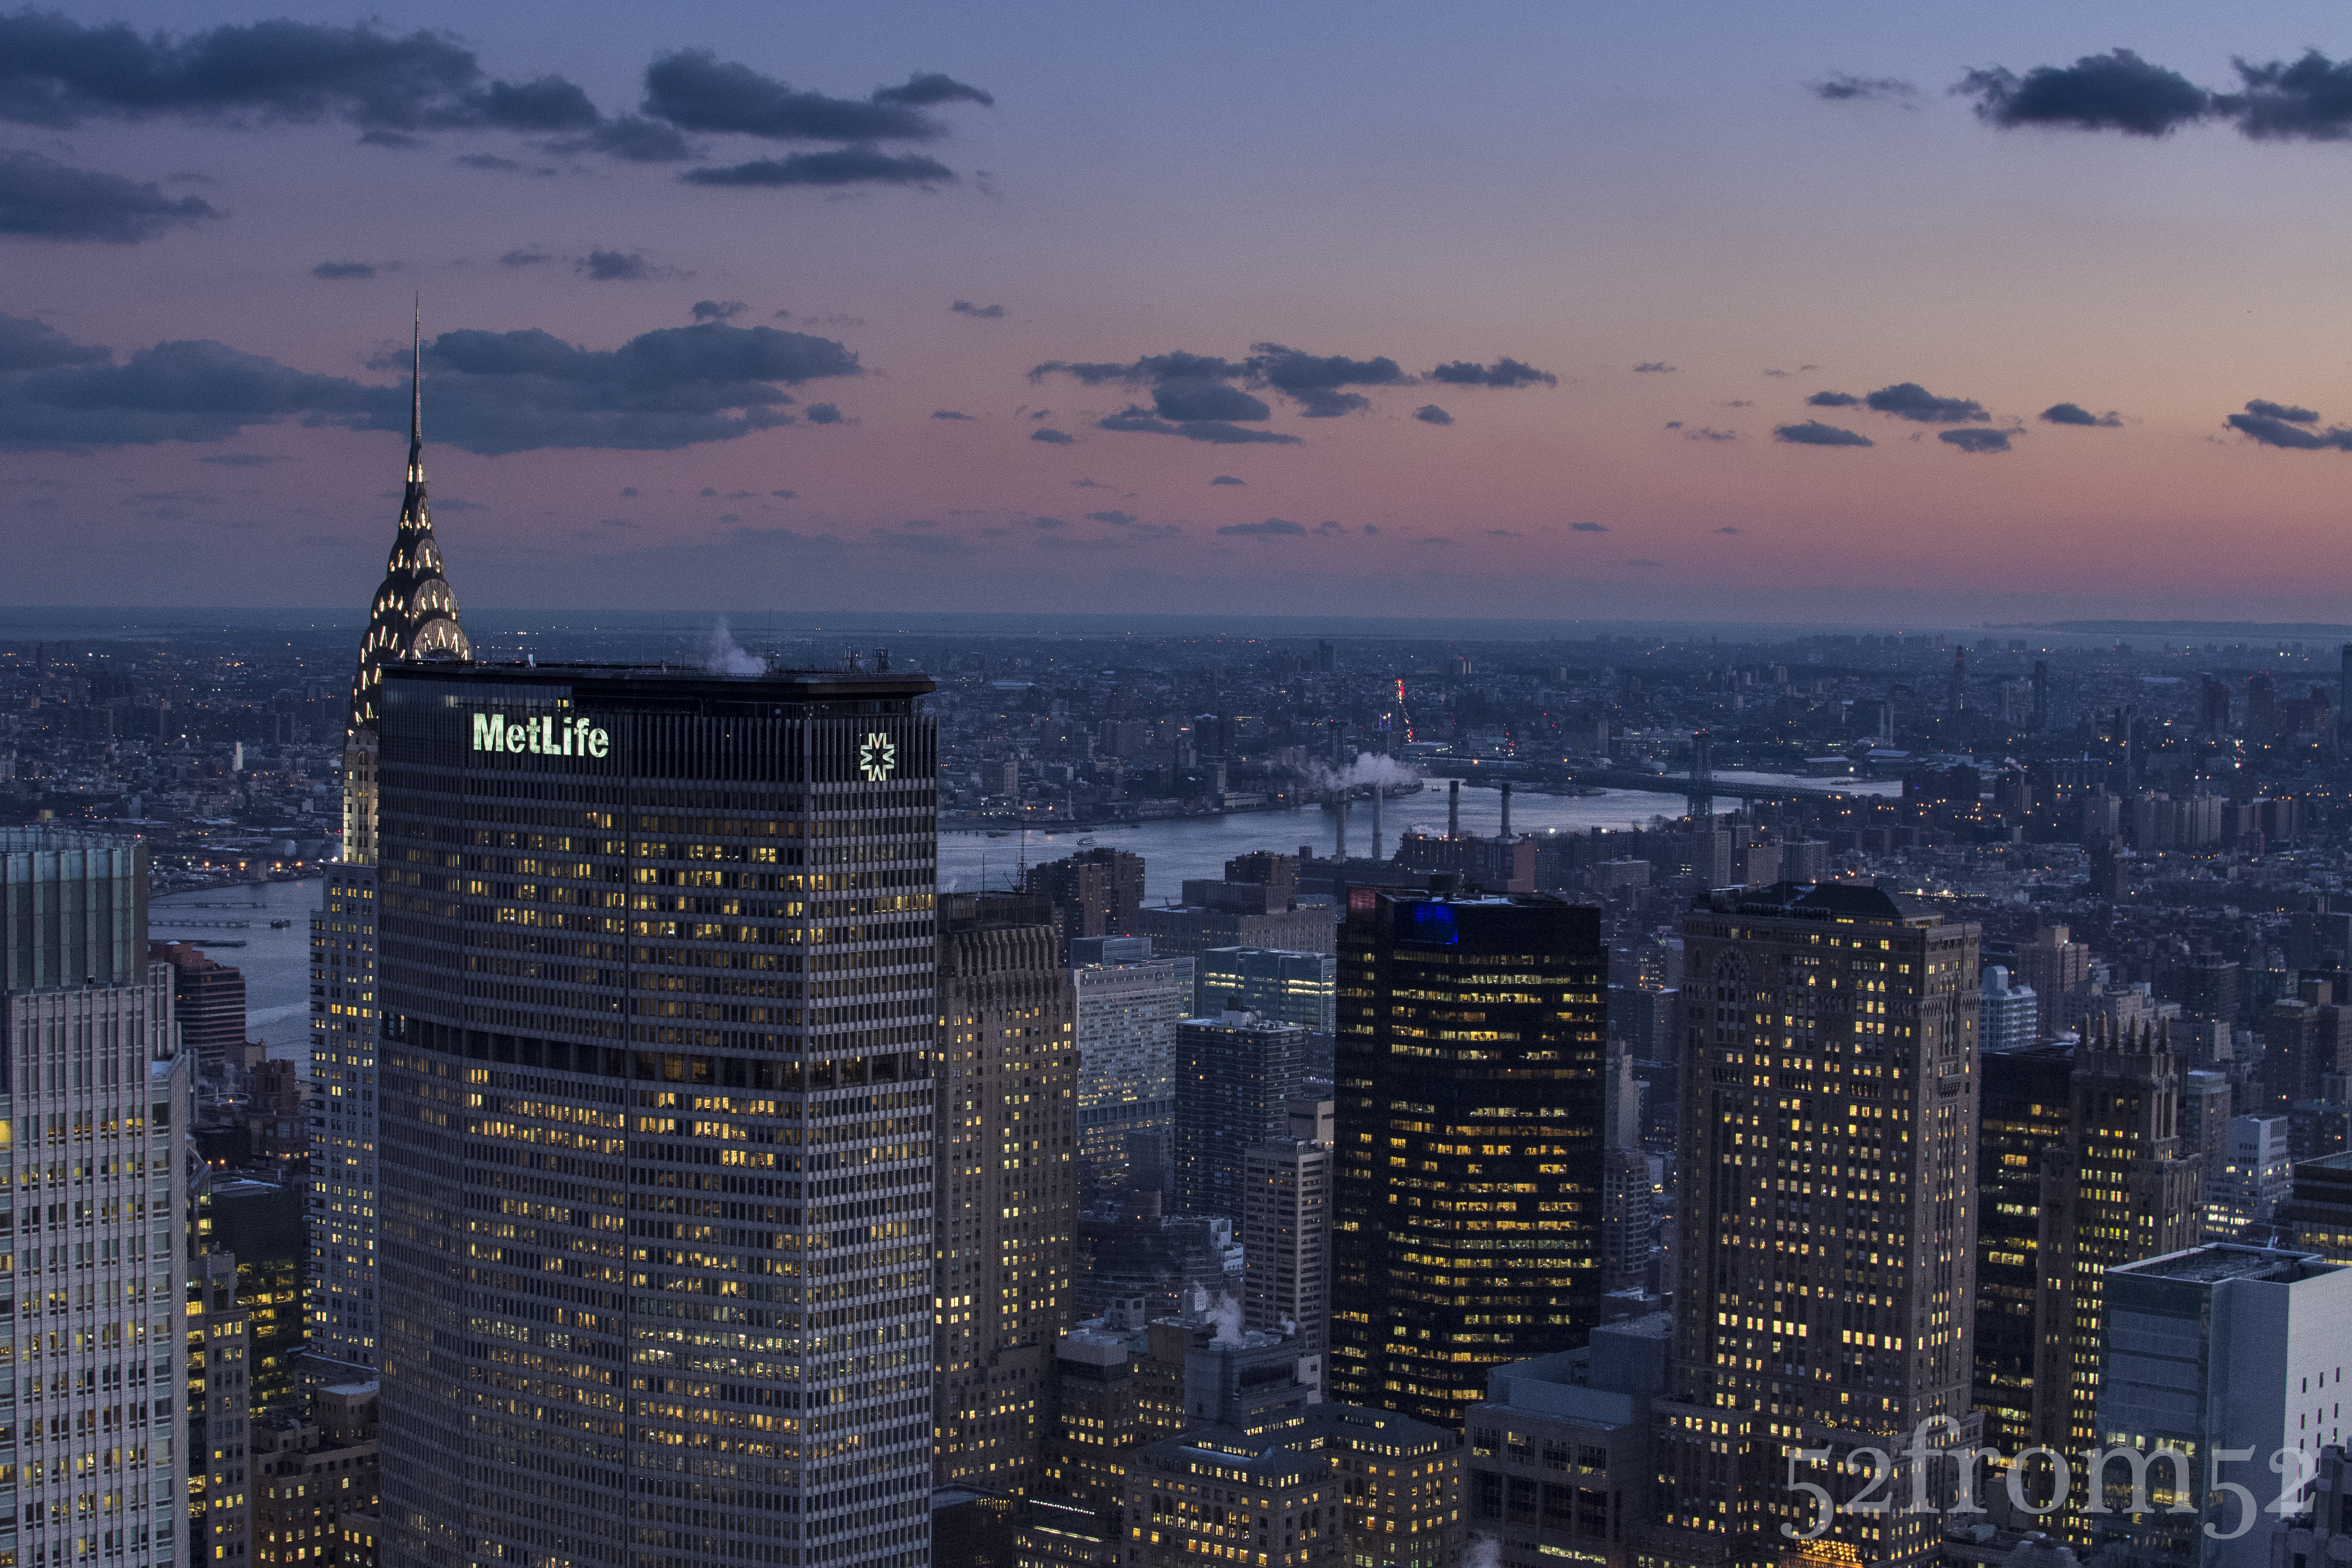
Example of the classic Top of the Rock Pic
The first thing you have to ask yourself is what kind of picture are you looking to take? Do you want take pictures of only the buildings or are you planning on featuring yourself or friends in the picture with the buildings in the background? Knowing your subject is important to so you can determine the time you’re going to go and where you should set up shop once you’re there. Let’s start with talking about taking pictures of people. If you’re taking pictures that will feature yourself or your friends the location is less critical but the time that you arrive is important. In this case you’ll want to go about an hour before sunset this way you have time to take nice pictures in softer light and without flash. In my opinion flash is the worst when taking pictures at Top of the Rock. Unless you’re an absolute pro and know how to compensate correctly flash tends to wash out the city backdrop, which is one of the main reasons you’re at Top of the Rock right? In order to feature the cityscape behind you, don’t use flash, especially if you’re taking pictures on the 68-69th floor behind the glass. Once you find a nice location play around, take pictures of you subjects looking out towards the buildings or doing some forced perspectives (google it). If you want to get more original, take pictures of your subjects from a distance. Perhaps have your subject stand looking out towards the city and snap your picture focusing on them through the busy crowd? As was the theme of this blog, once you take a step back you’ll be surprised what new perspectives you’ll see.
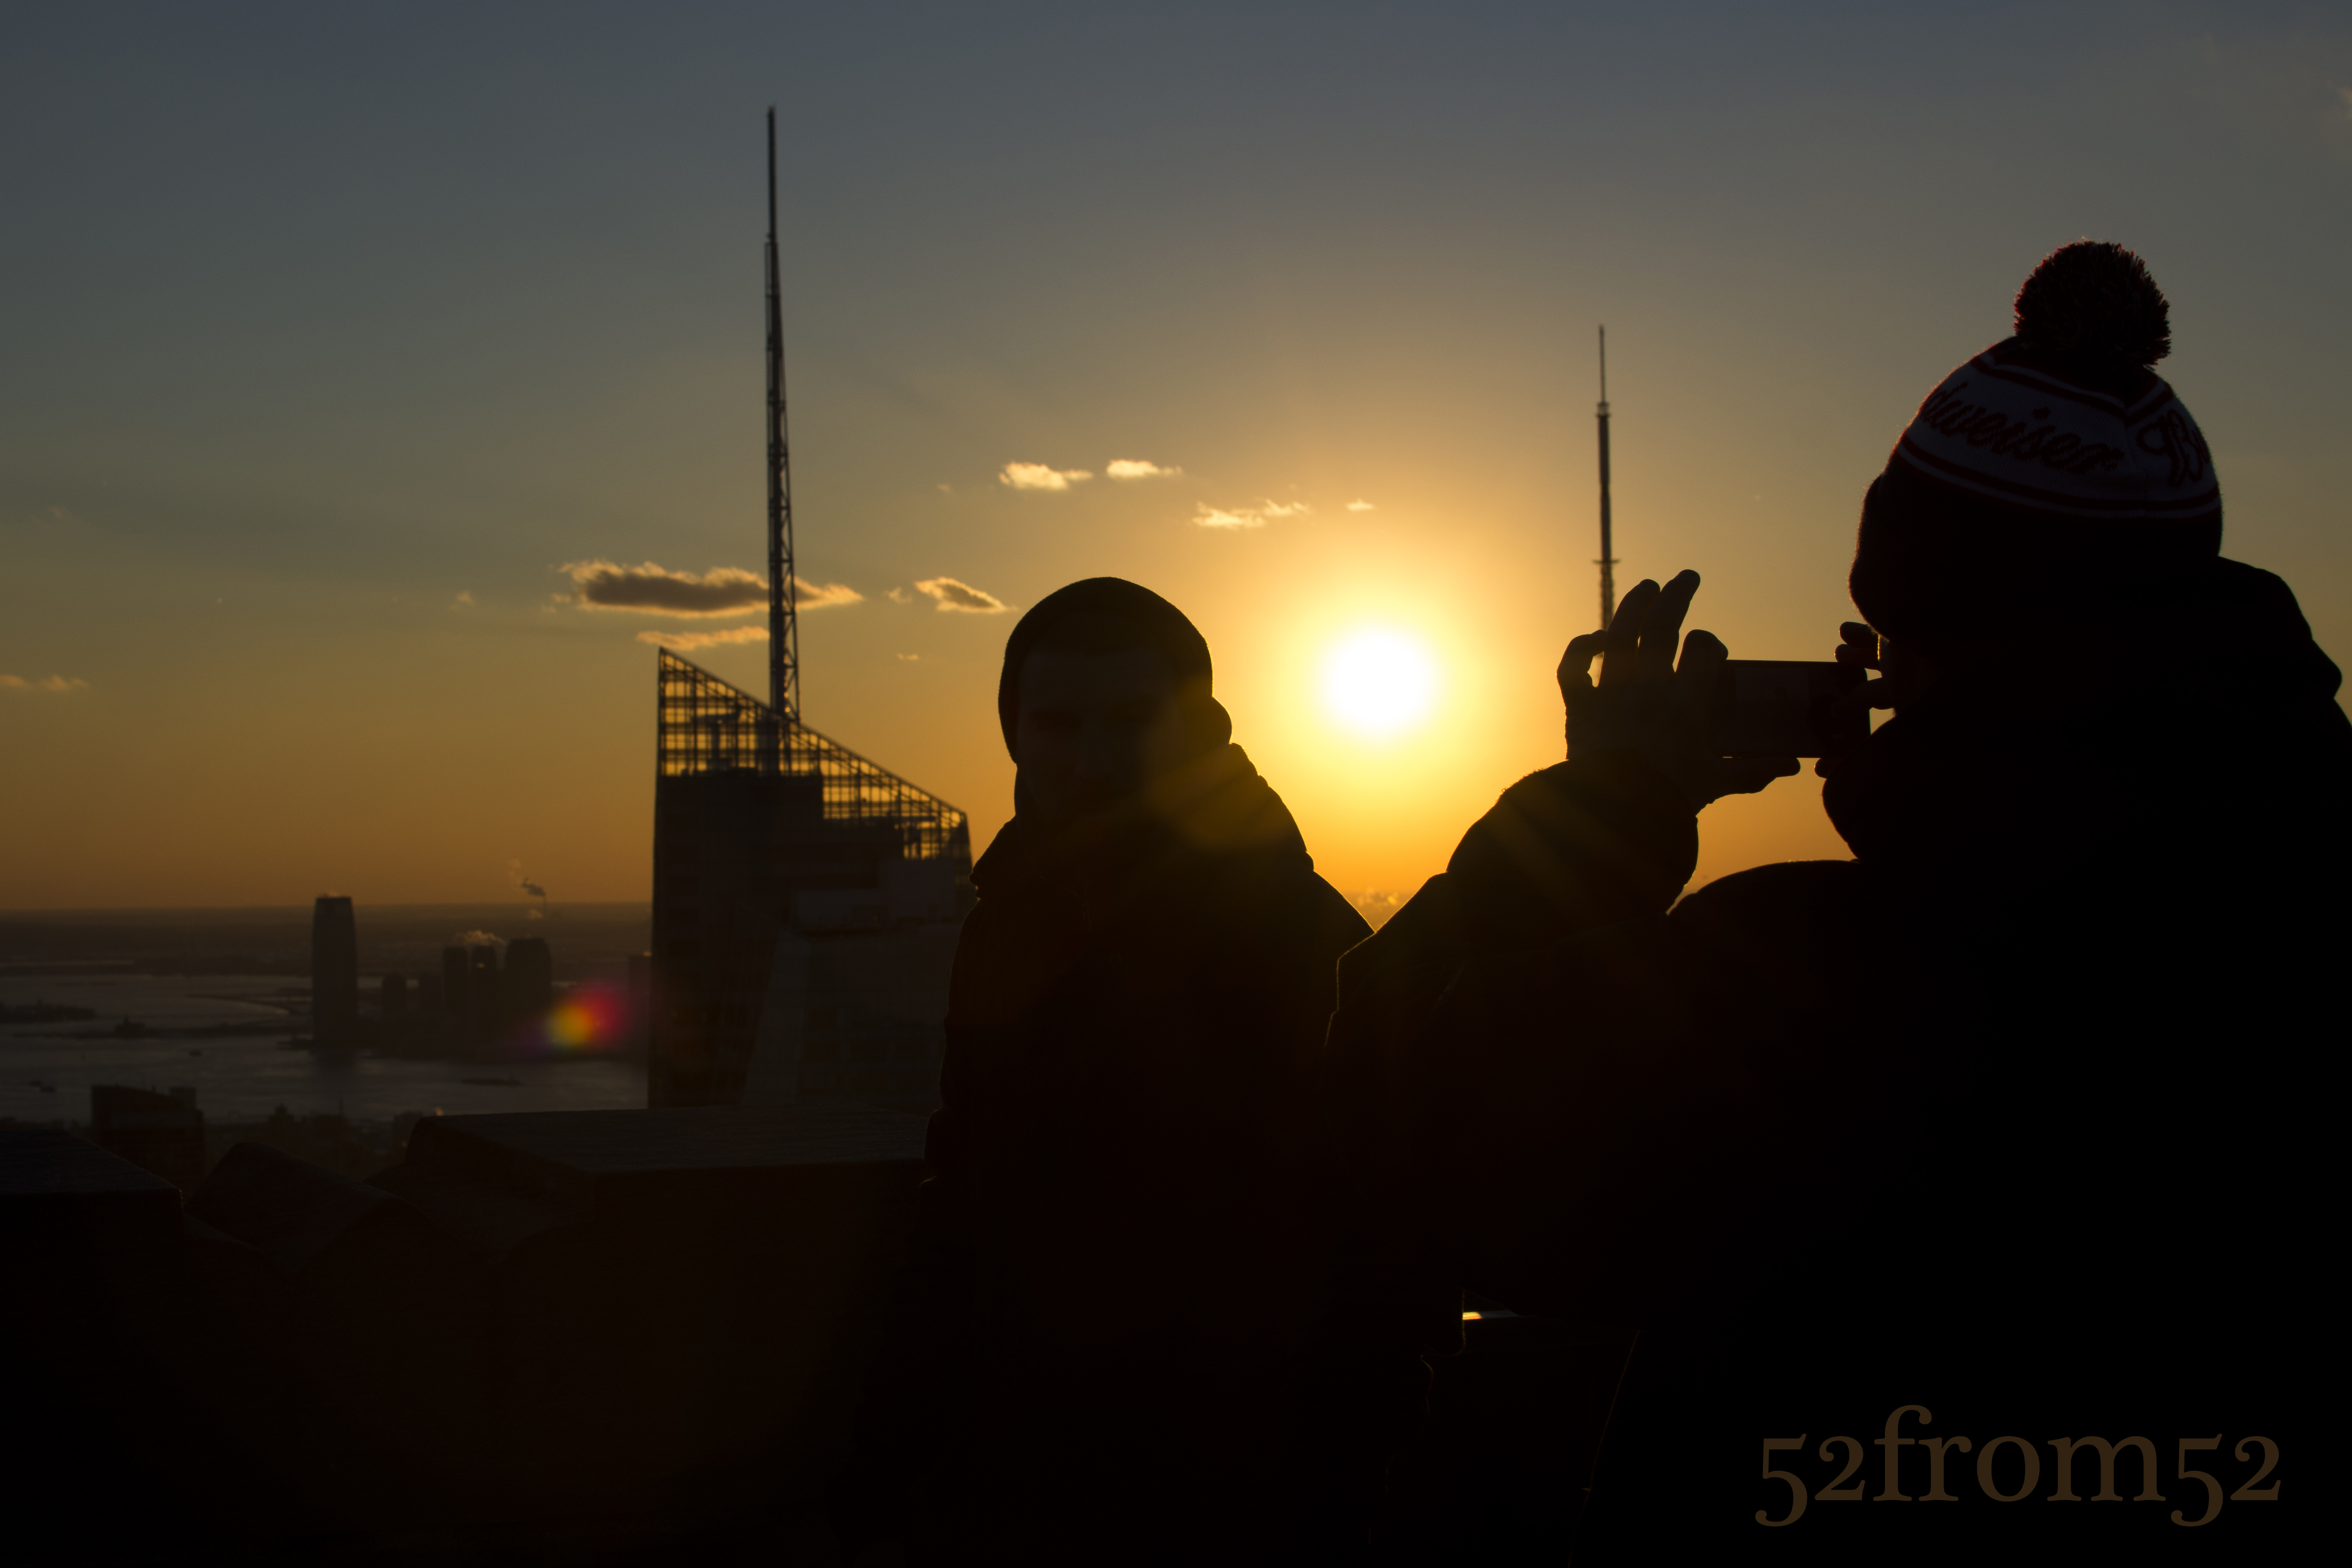
Example of a unique Top of the Rock Picture
What about the settings to use or not use when taking pictures of people, other than flash? One option is to use the smallest aperture your camera will allow which will give you nice background blur and permit you to use a low ISO. The negatives of this is the exposure of your cityscape background might be overexposed. The solution, shoot your picture in such a way that you’ll be able to only edit the background later to correct the overexposure (don’t forget to shoot in RAW to enable this). Option two in terms of aperture would be to use a small aperture which if you took my advice and came close to sunset, is going to force you to use a high ISO. The negatives, you’ll have a grainer photo but the positive is you will have a more detailed cityscape background. If you’re only looking to share this picture on something like instagram a high ISO image is fine. Even with the wide aperture you still might have an issue with overexposure for the background so compose your picture accordingly. The last setting I mention is try to use a focal length of 50mm+, I won’t go into detail about why but if you want to know why check out the video below from one of my favorite YouTube sources.
Now let me talk about what to do if you’re looking to take pictures of the buildings. First, I recommend going to the 70th floor and trying to lock down a position in the center area where you don’t have the bottom floors jutting into your picture. Getting this prime location is even more important if you’re using a wide angle lens. Just like shooting people, I think the best time to take pictures of buildings is right before and during sunset but you can go any time especially if there are nice mid-day clouds. For now I’ll talk about what to do at sunset. Going at sunset or at night really forces your hand in terms of camera settings. Unlike taking pictures of people, when you use a small aperture there aren’t many positives. Your plane of focus is going to be narrow even with the buildings being far away. What’s going to happen is one building might appear in perfect focus while the others are a little blurry. You can still take a good picture using small apertures but if your goal is to get a crisp image that you can blow up on perhaps a canvas, I don’t recommend using small apertures. What are your options then? Option one, you can boost your ISO but this is going to still leave you with the problem of not having a crisp image for enlarging later. Option two, bring a tripod and shoot with a small aperture and slow shutter speed. This seems simple right? Well tripods are not allowed at Top of the Rock but there are ways around this rule. As you can see in this week’s featured picture people bring tripods. The key is to bring one small enough to fit in your bag, and one that has a small leg spread so it can sit on top of the cement pillars. This is also why getting a good location is critical, there are a limited number of cement pillars and or locations that can facilitate the use of a tripod. I’m not going to go into the all settings specific to tripods because if it’s pretty simple, small aperture, low ISO, slow shutter. Two things I will recommend though is use the multiple focus point setting which will grab more buildings in focus, and underexpose your image. One thing not to do, which believe it or not I saw someone do, don’t use flash while you’re shooting buildings on a tripod. Maybe I’m missing something and if I am please comment and correct me, but I don’t see any positive in using flash on a tripod when you’re not taking pictures of motion or people.
ISO 2500, 35mm, f/7.1, 1/40 sec, no tripod
These are some of the lessons/tips I’ve learned from my two trips to Top of the Rock. I still haven’t gotten what I would consider a great classic Top of the Rock picture, but that’s mainly because I haven’t brought a tripod or wide angle lens. I think I’ll take at least one more trip in a few months and try my hand using more than just my 35mm lens and perhaps a tripod. Until then I hope the lessons I’ve learned and shared so far help you shoot some great pictures at Top of the Rock, have fun and remember take a step back!
Big Head Focal Length by CameraRecToby: