Being an admitted cornball, I couldn’t pass up the opportunity to work “hoot” into this week’s title. This Saturday marked the first time that I participated in what is often referred to as a “photowalk” in the photography world. The idea was hatched by two of my friends, one a photography enthusiast like myself, and the other a professional photographer. We kicked around some location ideas and eventually settled on DUMBO since it’s one of the more interesting and subject rich locations in the New York area. DUMBO, located in Brooklyn, stands for Down Under the Manhattan Bridge Overpass. Before Saturday I had never been to DUMBO so it was nice to finally cross it off my location bucket list. The area can get touristy not only because of the beautiful views but also because it’s home to the famous “Grimaldi’s Pizza”. Though not the original, there is a Grimaldi’s located in Hoboken so standing in line for pizza was not part of Saturday’s agenda.
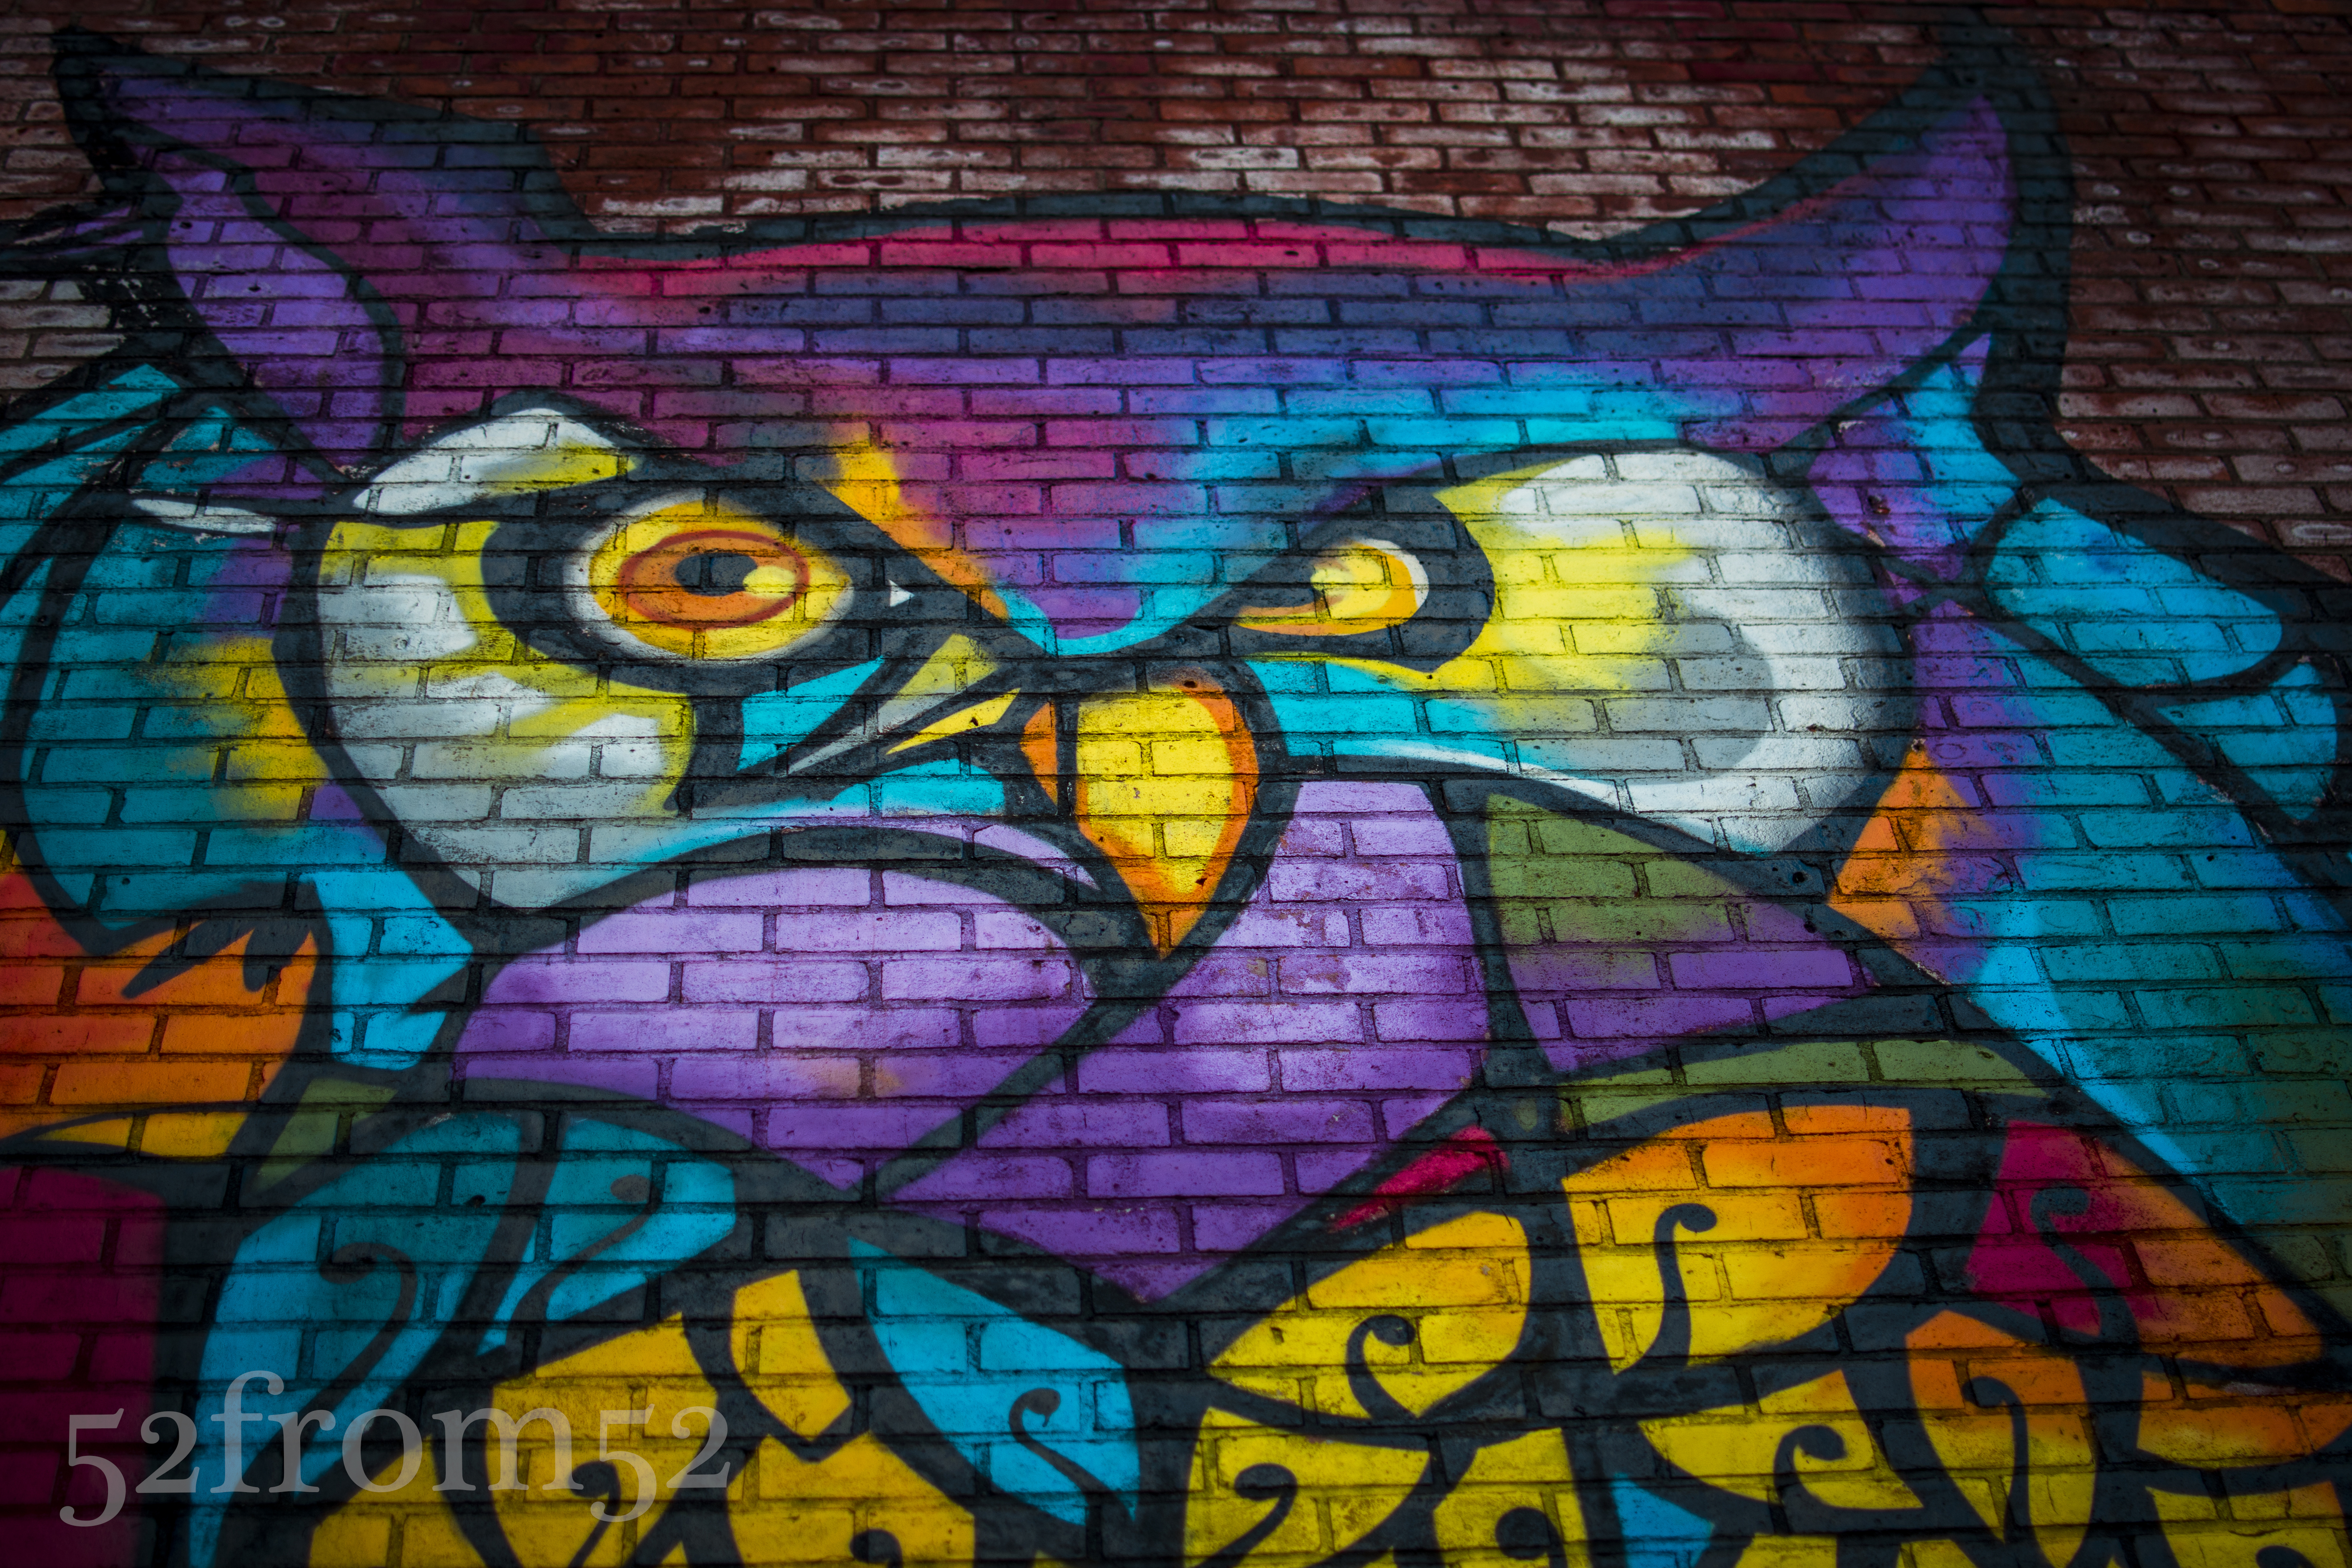
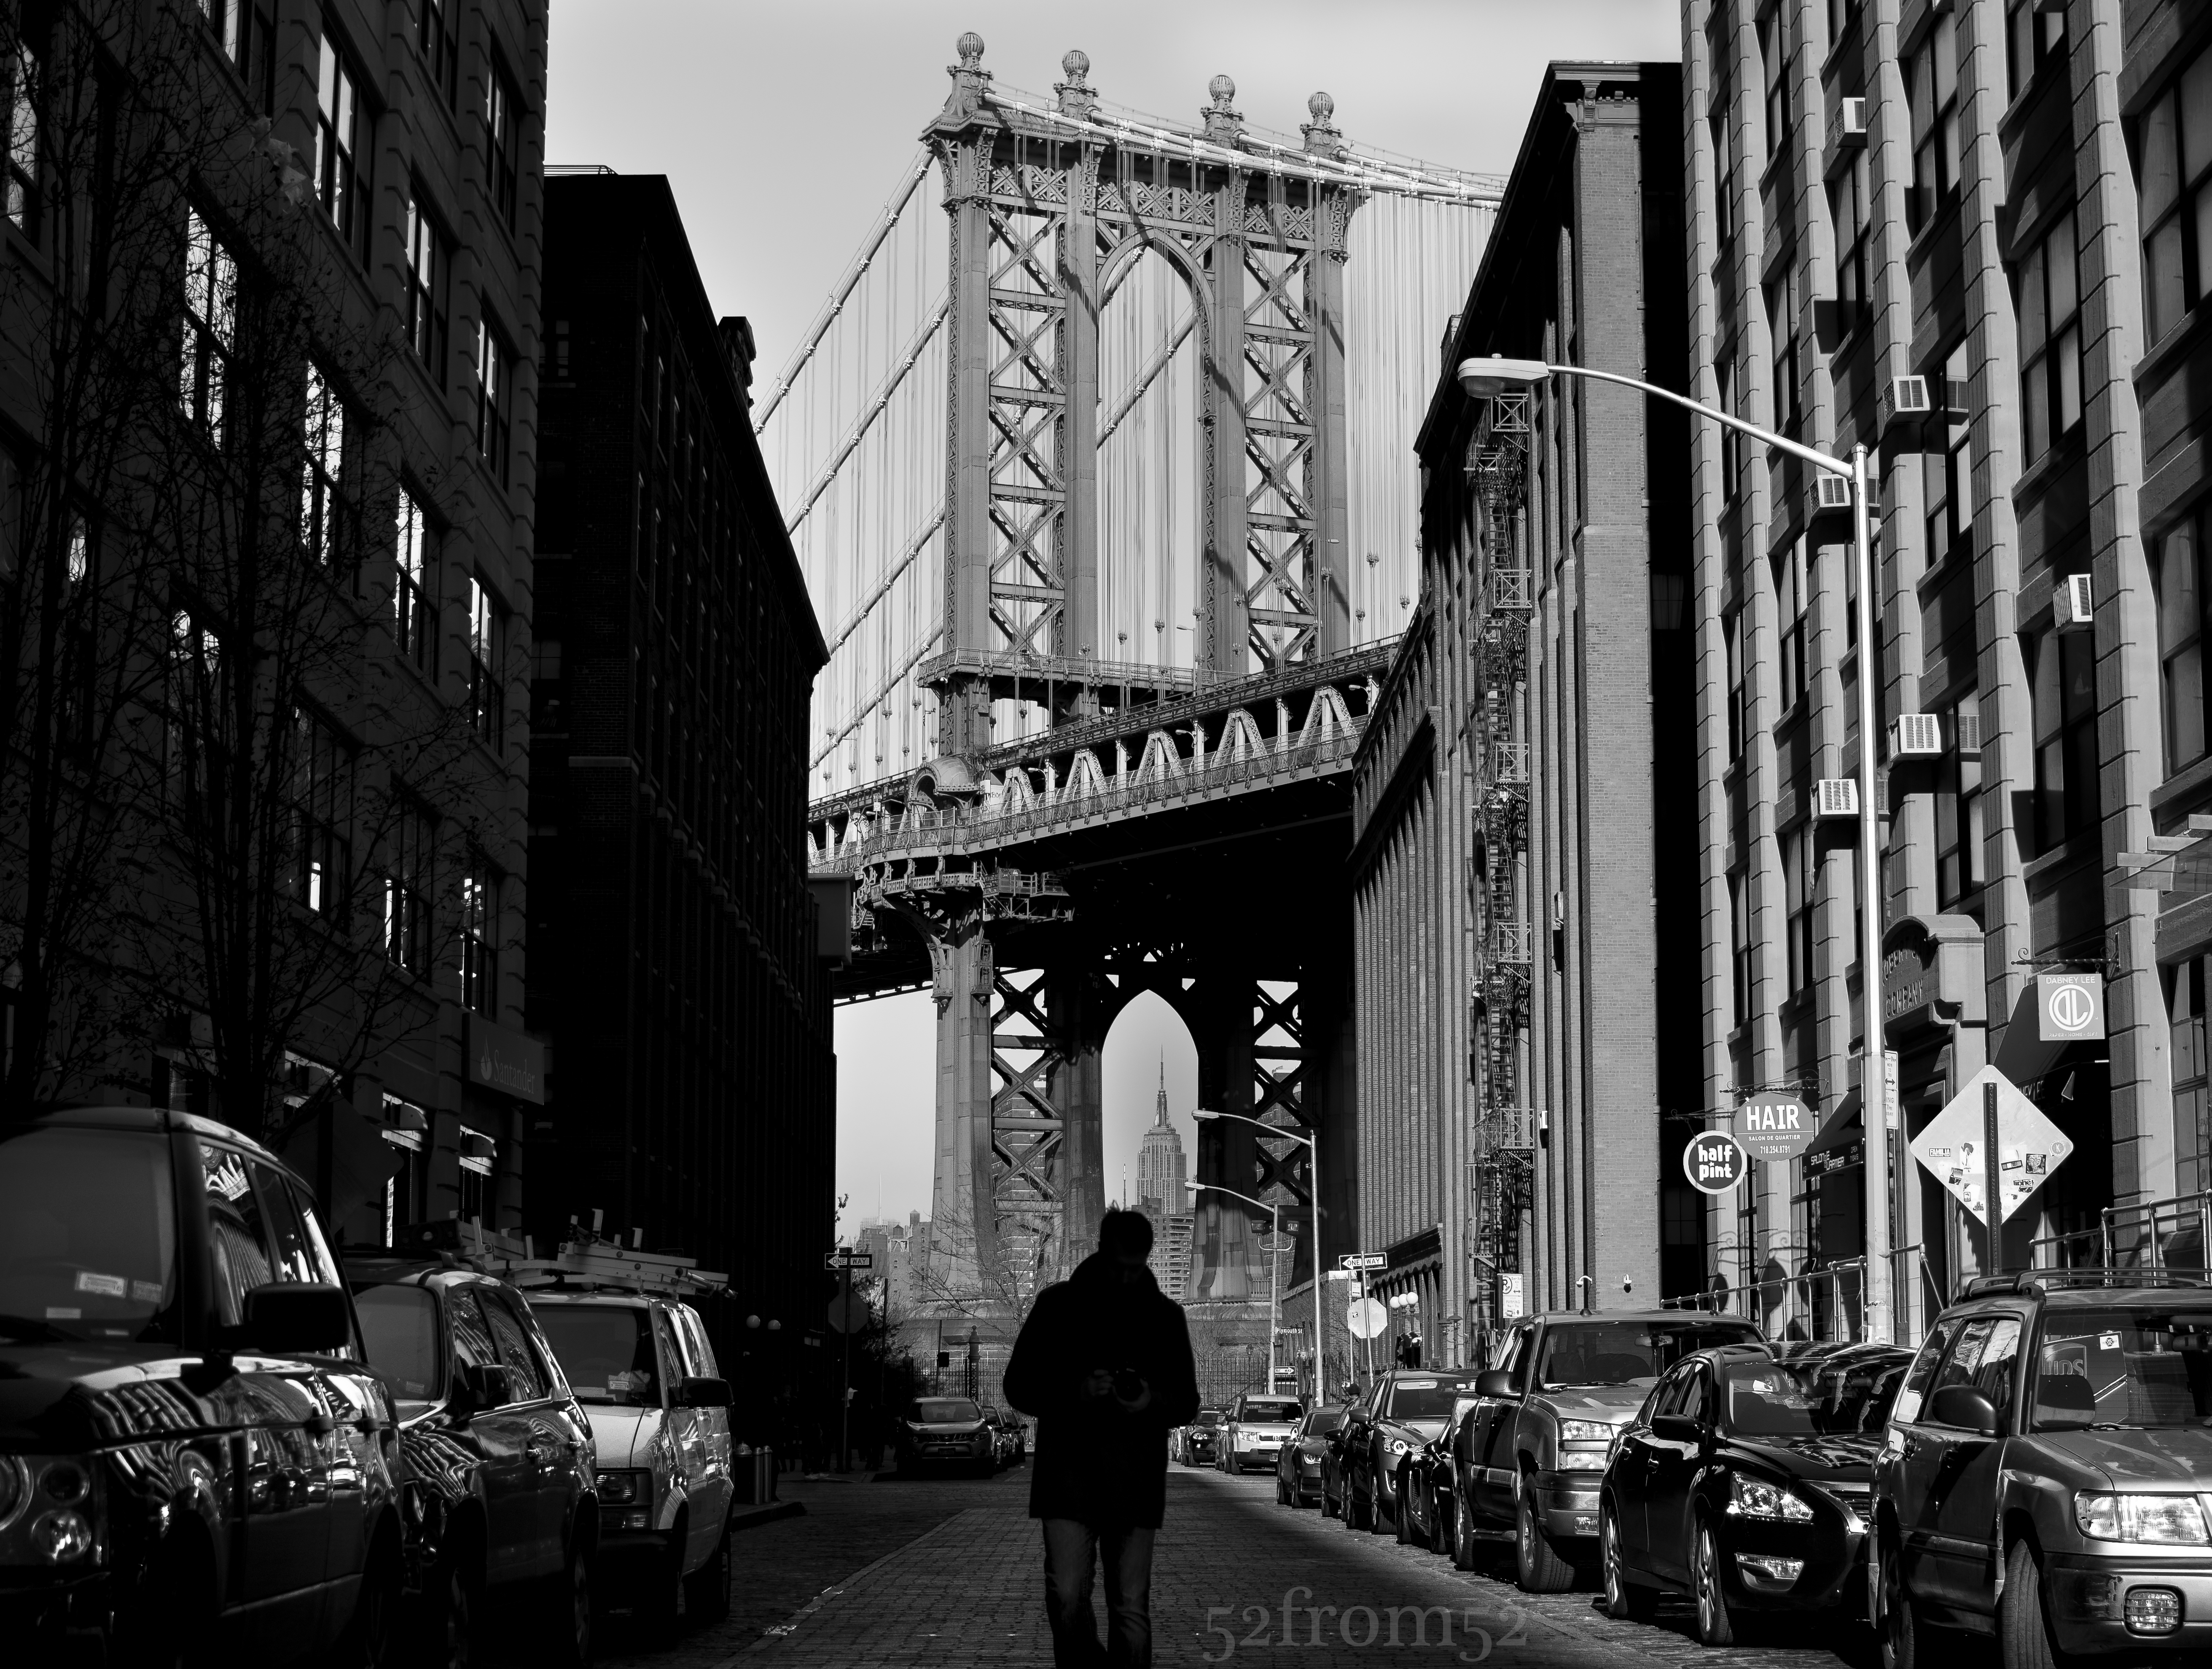
Classic DUMBO Picture
Shortly after arriving on location I spotted what I consider to be the classic DUMBO picture. Although I didn’t want to use this as my featured picture, I couldn’t pass up the opportunity to take the shot. We spent the morning walking around discussing different techniques, equipment and comparing pictures. After walking around the east river’s shore line we decided to head into the streets to see if we could find some lunch and perhaps some graffiti. Post lunch we stumbling upon the brick wall that contained this weeks picture. All three of us worked the wall individually to find what we thought would be the best way to photograph it. It was interesting seeing how other photographers approached shooting the same subject and how each of us had our own unique view. After a few minutes of working on our own we compared pictures and tried our hand at duplicating each others shots. We continued doing this for a little while then eventually decided to call it a day. While driving back to New York City we came to the conclusion that this shouldn’t be our first and only photowalk. In the coming week’s expect more posts chronicling different “photowalks” and if you’re interested in participating in one shoot me an email.
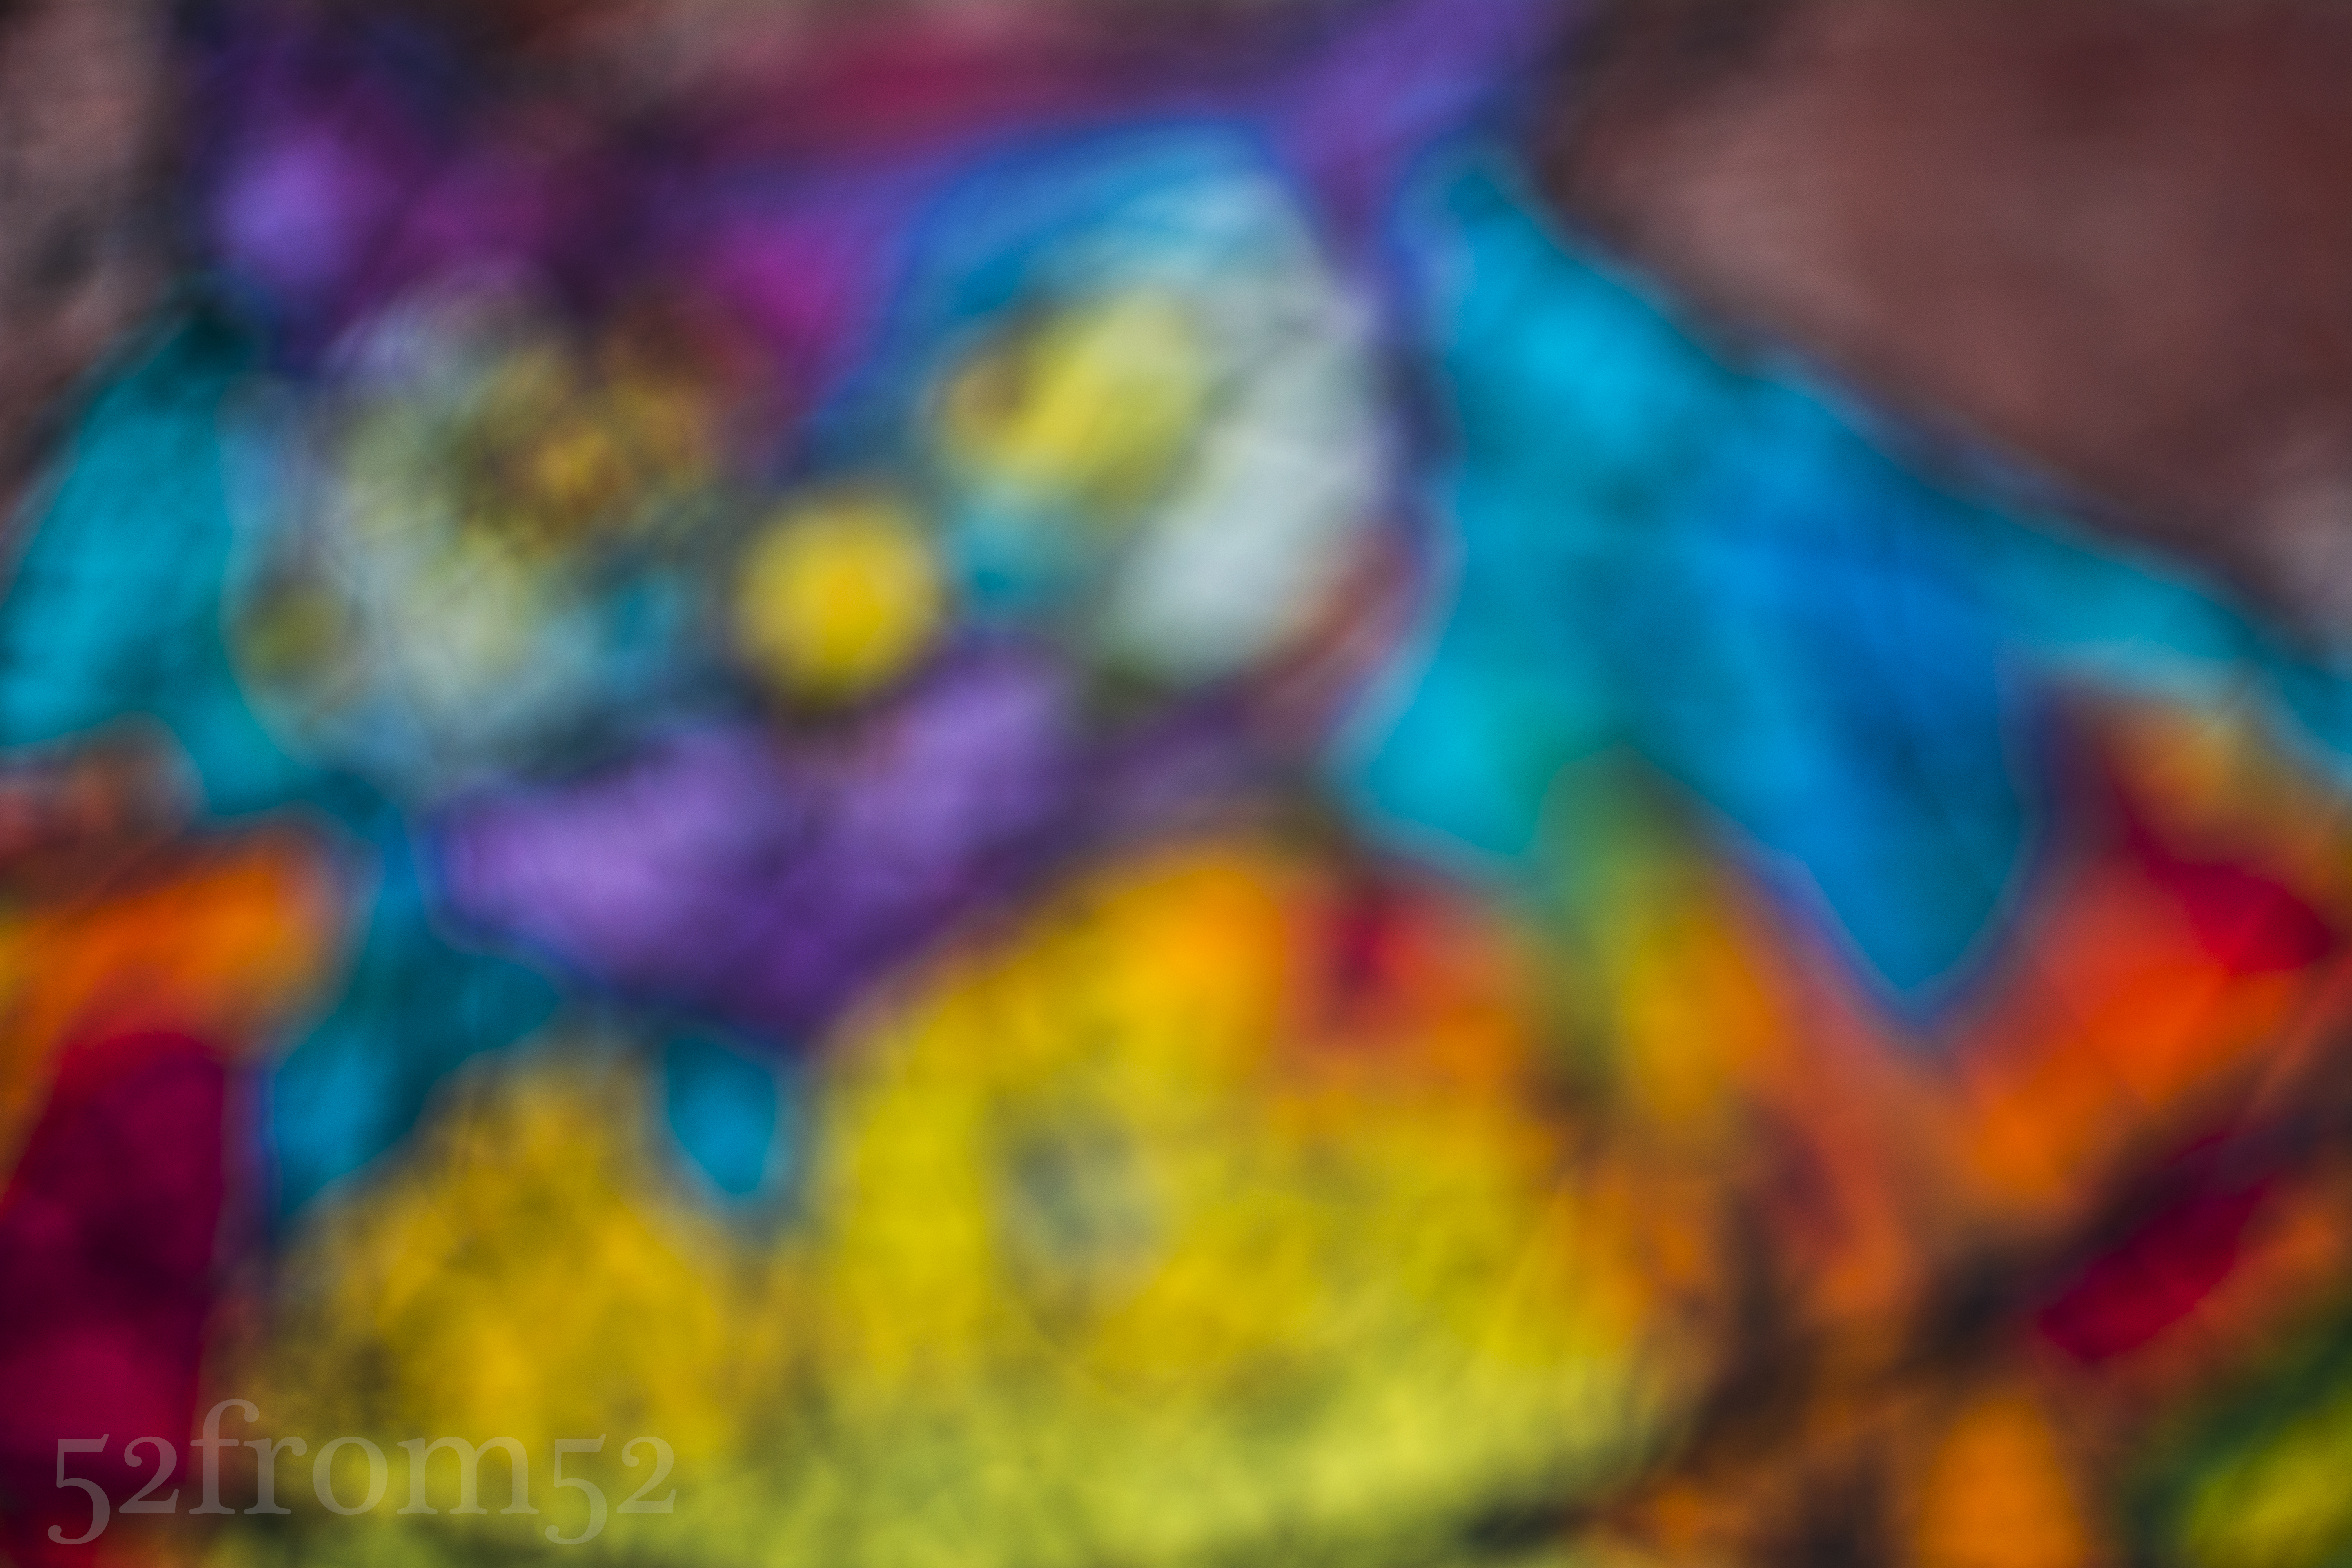
Bokeh Owl Version
Photography Concepts:
This week I learned less from my own shooting and more from the discussions and tips that were traded during the photowalk. One of the biggest takeaways, which might come as a surprise to anyone familiar with photography, was the concept of spot metering. Prior to this weekend I heard the term before but never really understood what it meant or where it would be applicable. In a nutshell spot metering allows you to lock in the exposure you want then recompose and shoot your picture. I didn’t get any good photo example for spot metering this weekend but you can bet I’ll be experimenting more with this in the future and do a post on it.
Another subject that came up worth noting was white balance and the importance of doing it in camera. I always thought that I could do white balancing during editing and there was minimal to no trade offs. This however was not entirely true. Essentially although you can fix white balance after shooting, by getting the correct white balance in camera I’ll have more flexibility in editing later. I mainly shoot landscape and outdoors pictures, so luckily white balance hasn’t come into play that much for me thus far. In 2014 my goal is to take more pictures of people so expect more posts on white balancing now that the subject is a lot less murky.
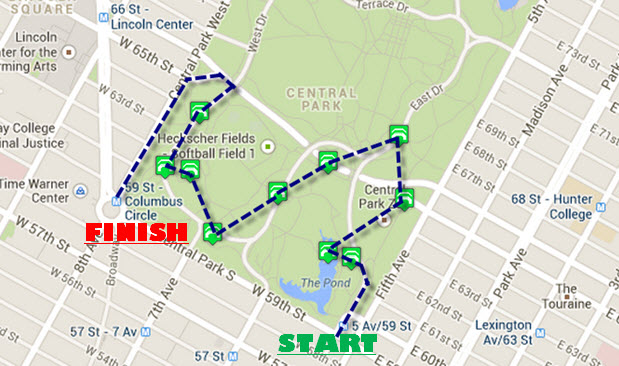
With Christmas less than a week away, New York City is buzzing with holiday festivities. This week I decided to check out the Columbus Circle Holiday Market located at the south west corner of Central Park. As the weekend approached, the weather forecast was calling for a warmer than usual day for December, so I decided to add a visit to Central Park to my agenda. While visiting the Central Park website I noticed that on their map page you’re able to select specific destinations of interest within the park. For weeks I’ve seen lots of great pictures taken of various arches and bridges in the park, which gave me an idea. My idea was to use the map and plot out an “Arch and Bridge Tour” which would bring me to all of the southern arches and bridges, starting with the Gapstow bridge (South/East corner) which is adjacent to the ice rink. With my plan set, all that was left was setting out on my weekend adventure.
Planned Arch/Bridge Tour
My trip started with about an hour of fighting traffic and subway crowds prior to finally popping out of the 59th/5th subway tunnel. Upon emerging from the subway tunnel I was oddly greeted with the smell of spring. If the streets weren’t packed with holiday decorations I would have swore to you that I had traveled back in time to April. Even though I appreciated the nice weather I was a little disappointed, I really wanted to get some pictures of Central Park in the snow. Later on my disappointment was cured by the much appreciated feeling in my fingers and toes I enjoyed throughout the day.
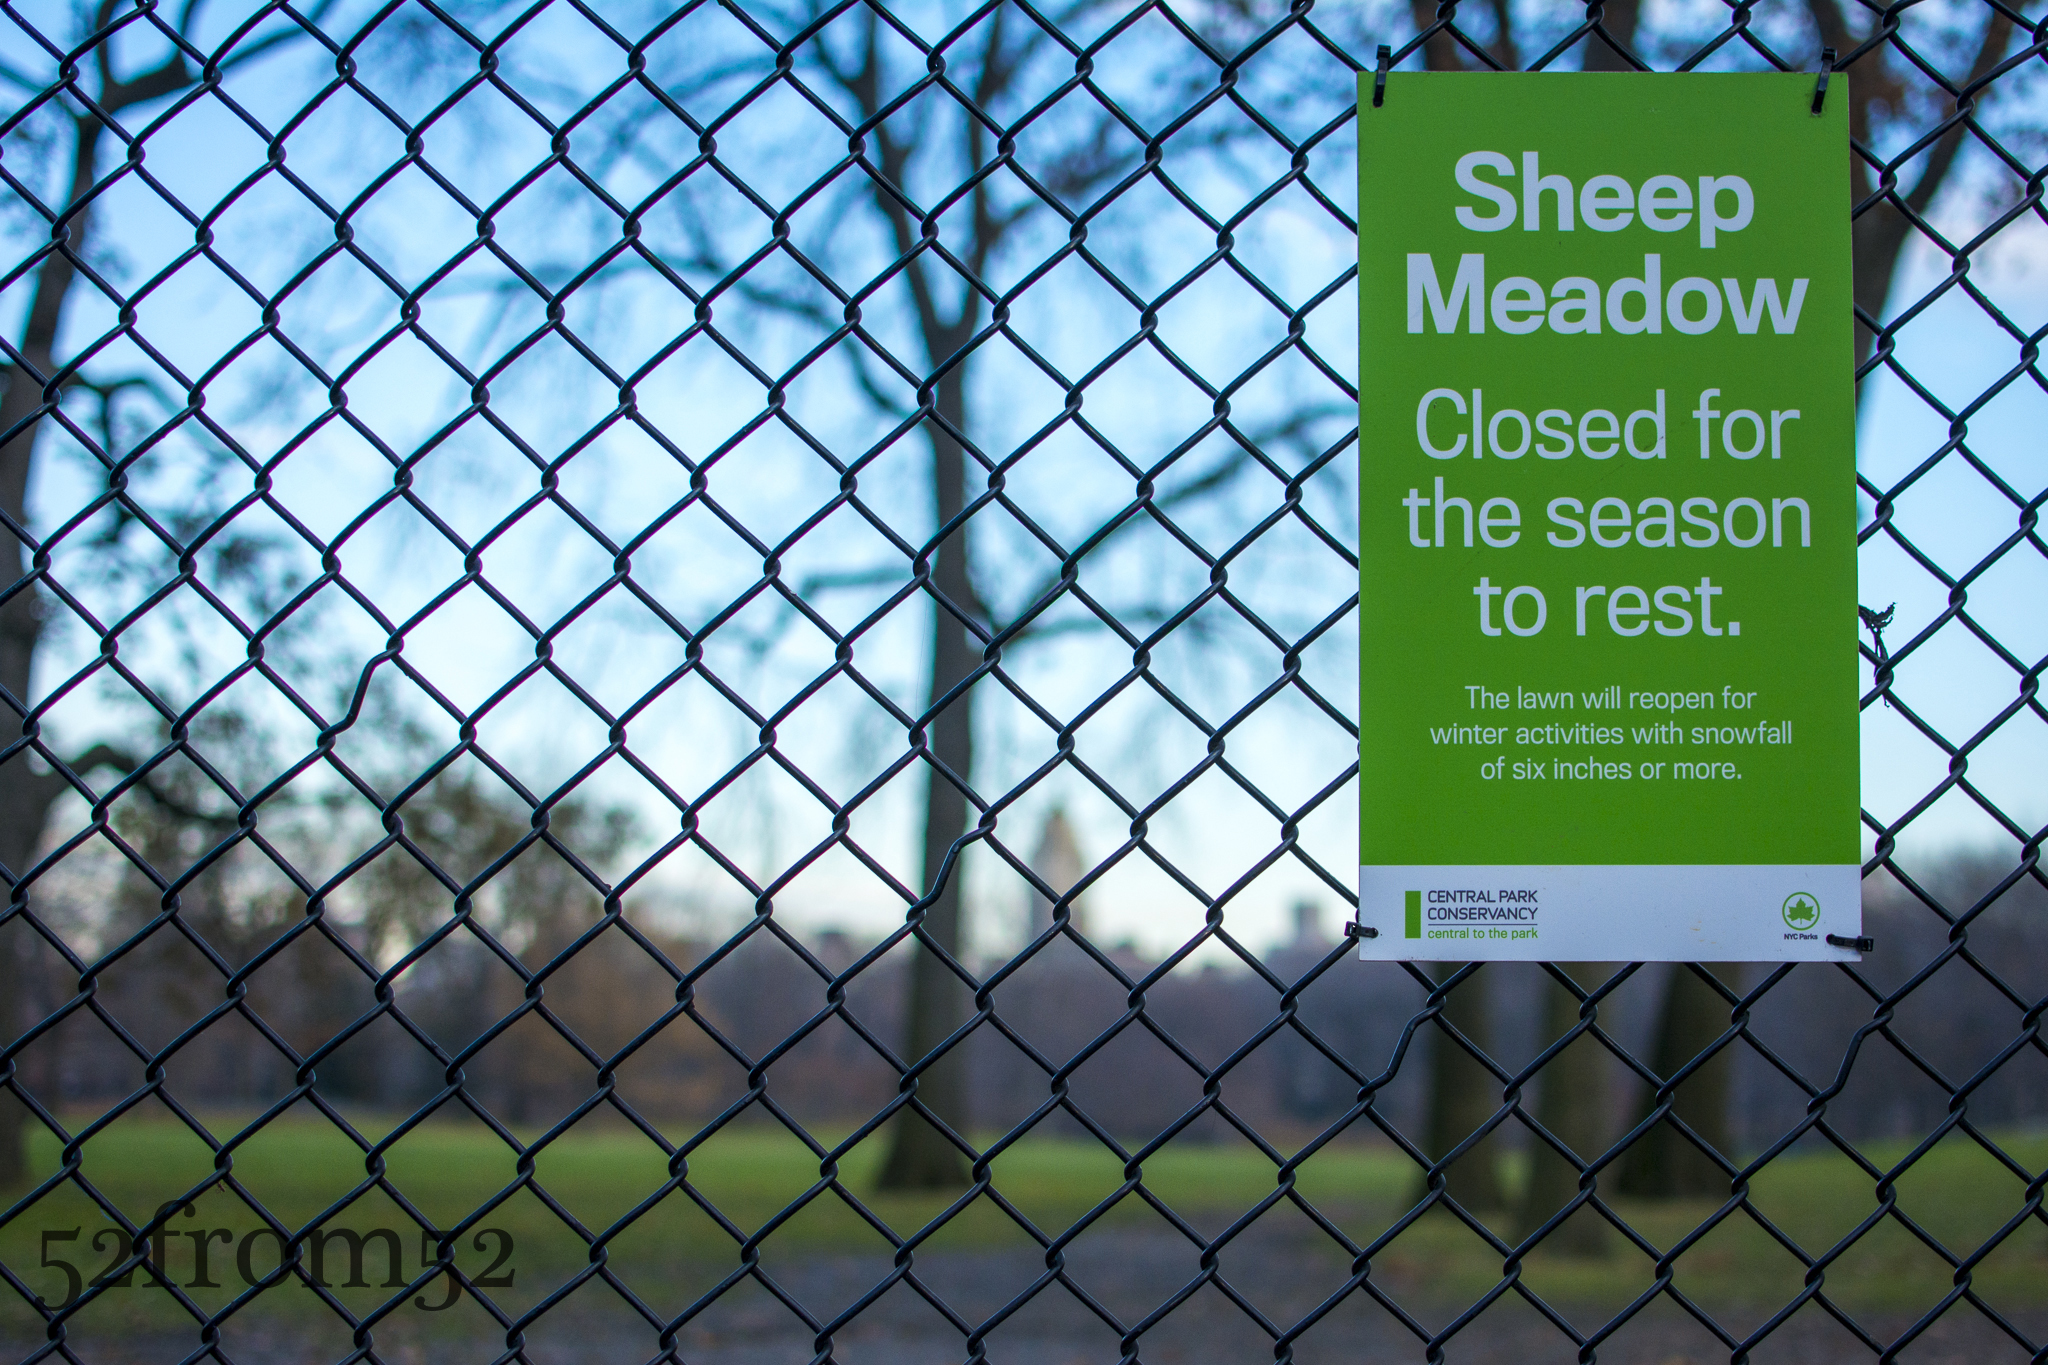
After visiting the first couple of bridges and arches, Gapstow included, I was running into issues with getting good compositions with my D5200. The sky was getting washed out because it was earlier in the day than I usually shoot. I also wasn’t able to fit enough of the landscapes that I was photographing into my 35mm lens frame. Since the bridges weren’t cooperating I decided to cut my tour short and work my way to a part of the park called Sheep Meadow. The large 15 acre “meadow” is special to me because it’s actually where I finally decided to due this blog. Back in July I toured the park and ended up at the Meadow which I photographed and realized how fun it was to set out on photo adventures. July’s trip cemented my idea and I moved forward with this blog, and I haven’t looked back since.
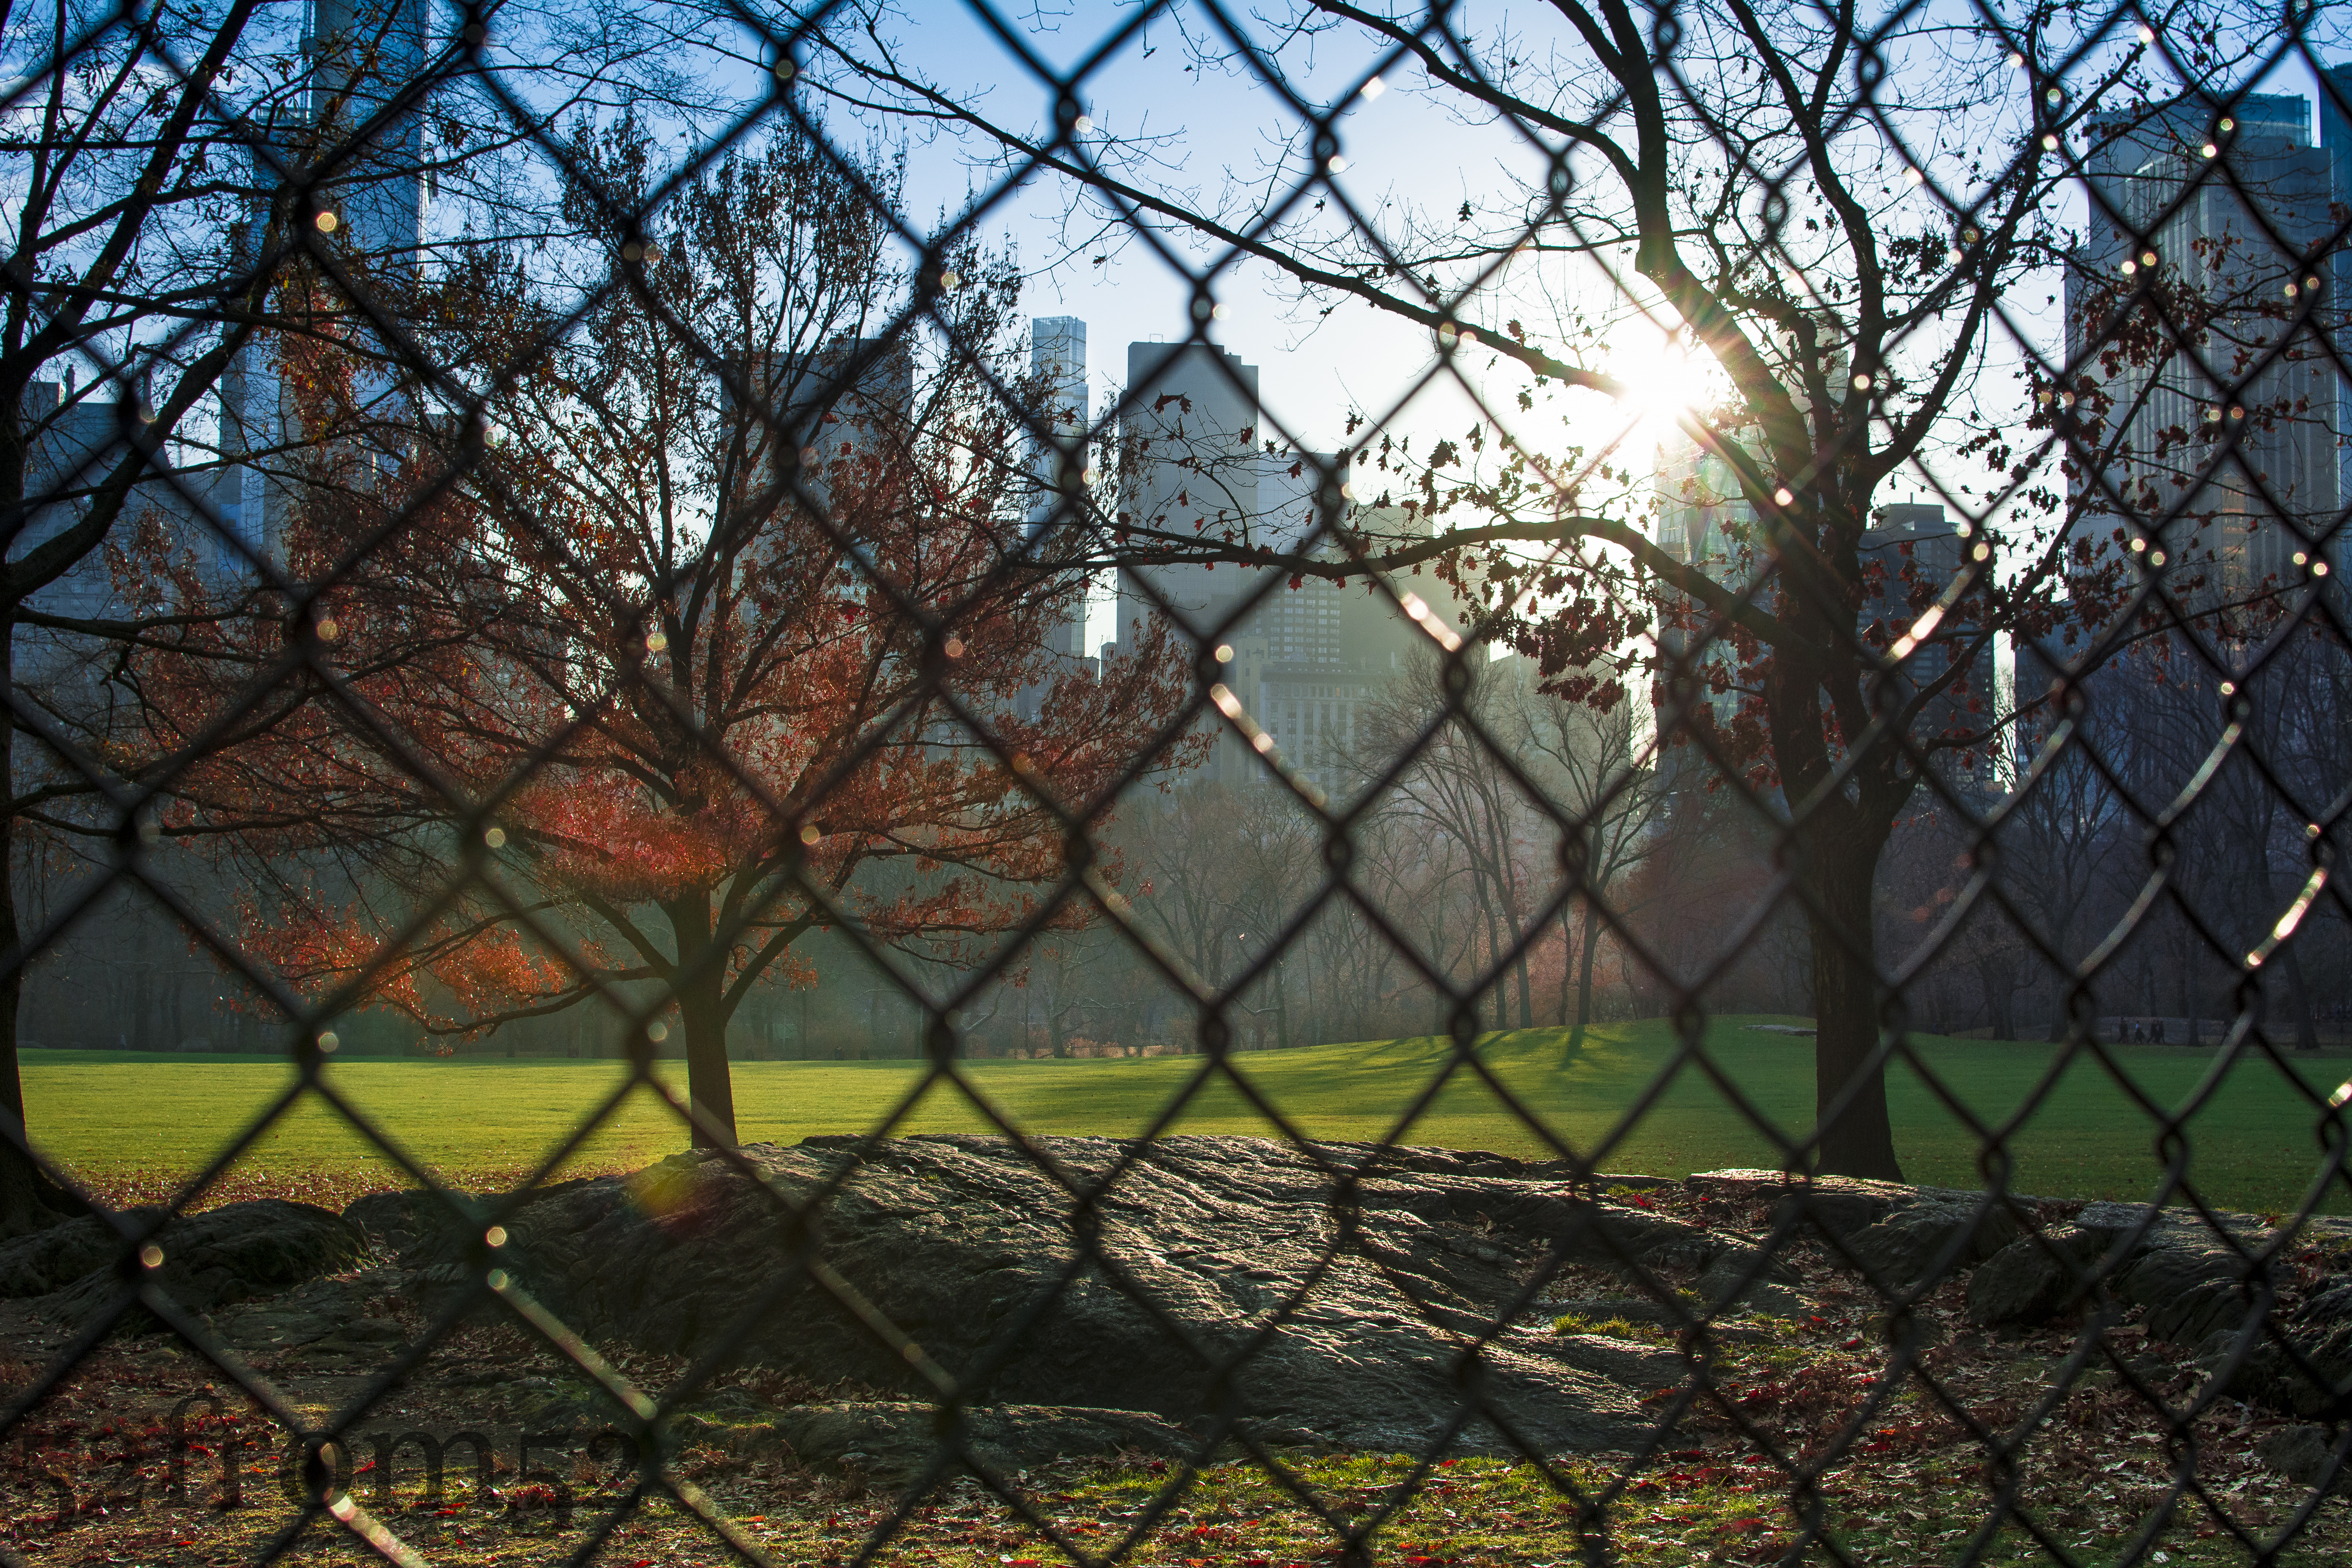
As I got closer to the Meadow I noticed that there were no visitors on the beautifully lush green lawn. When I finally arrived at the fence surrounding the meadow I realized why it was so empty, it was closed for the winter. Although I was disappointed this provided me with an opportunity to photograph the meadow without any visitors crashing my picture. I worked my way around the fenced perimeter shooting pictures above and through the fence. At the end of my trip around the meadow I spotted this week’s picture. The way the rock picked up the sun with the contrasting green meadow really caught my eye. Although the day didn’t turn out as planned, I was very pleased with this picture and really enjoyed my day in Central Park.
Sheep Meadow Closed!
Photography concepts:
Over the past couple of weeks I’ve been experimenting with different editing techniques and applications. I use Lightroom for all of my blog photographs but for Instagram, Facebook and Twitter I use Snapseed and VSCOCAM. The advantage of Snapseed and VSCOCAM is that I’m able to give my pictures a little more “pop” with just a few clicks. The disadvantage of both applications is that they don’t maintain the quality of the original picture, therefore they’re not suitable for editing pictures for this blog or any kind of high quality sharing. All that being said, there is no reason why I can’t create the same type of vibrant images with Lightroom, it just takes a little more work.
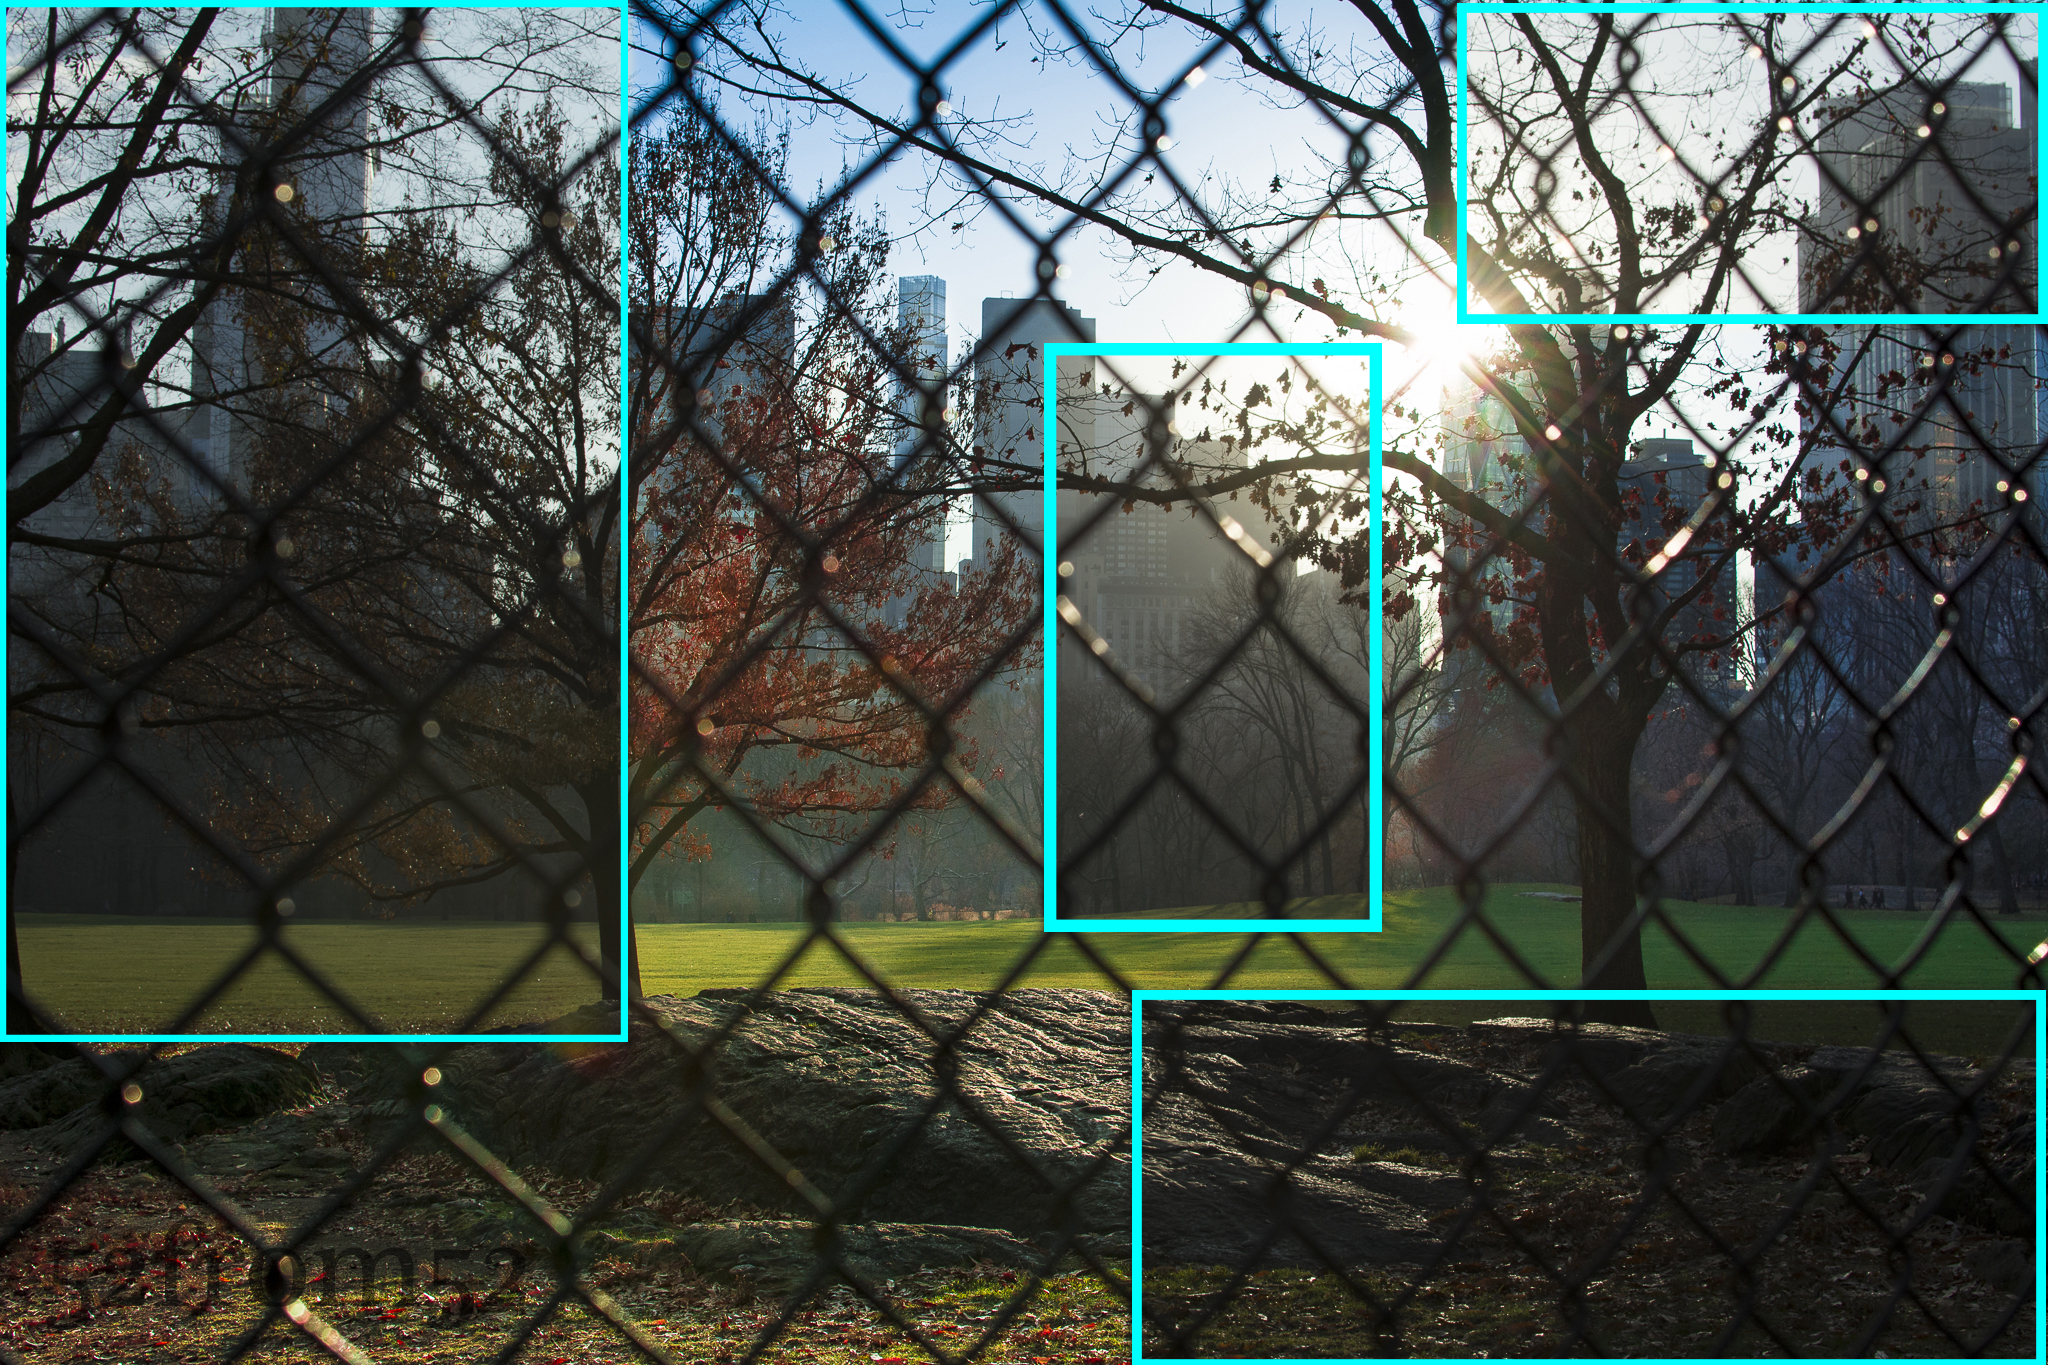
Edited Location comparison
This week I put a lot more effort into editing specific details of my photograph, with the goal of creating a more vibrant picture. I shot my picture straight into the sun which in turn caused a lot of shadows and dulled out the many of the colors in frame. The way I corrected both issues was via Lightroom’s spot correction tool. This tool allows you to do exactly what it sounds like, select certain area’s of your picture and adjust things such as color, exposure, contrast and so on. I usually do these kind of adjustments globally (to the entire picture) or through the use of gradual filters. In the past the issue I’ve run into is gradual filters aren’t good when you have to apply different settings to lots of different small areas. This is where spot editing comes in handy. The challenge that spot editing presents is keeping your picture looking a natural by manually blending your edits seamlessly into the picture. You want to avoid creating obvious edit lines and look for natural breaks in your picture to tie your edits together. Above and below are examples of before and after, along with a representation of the areas I focused in on with the spot edit tool.
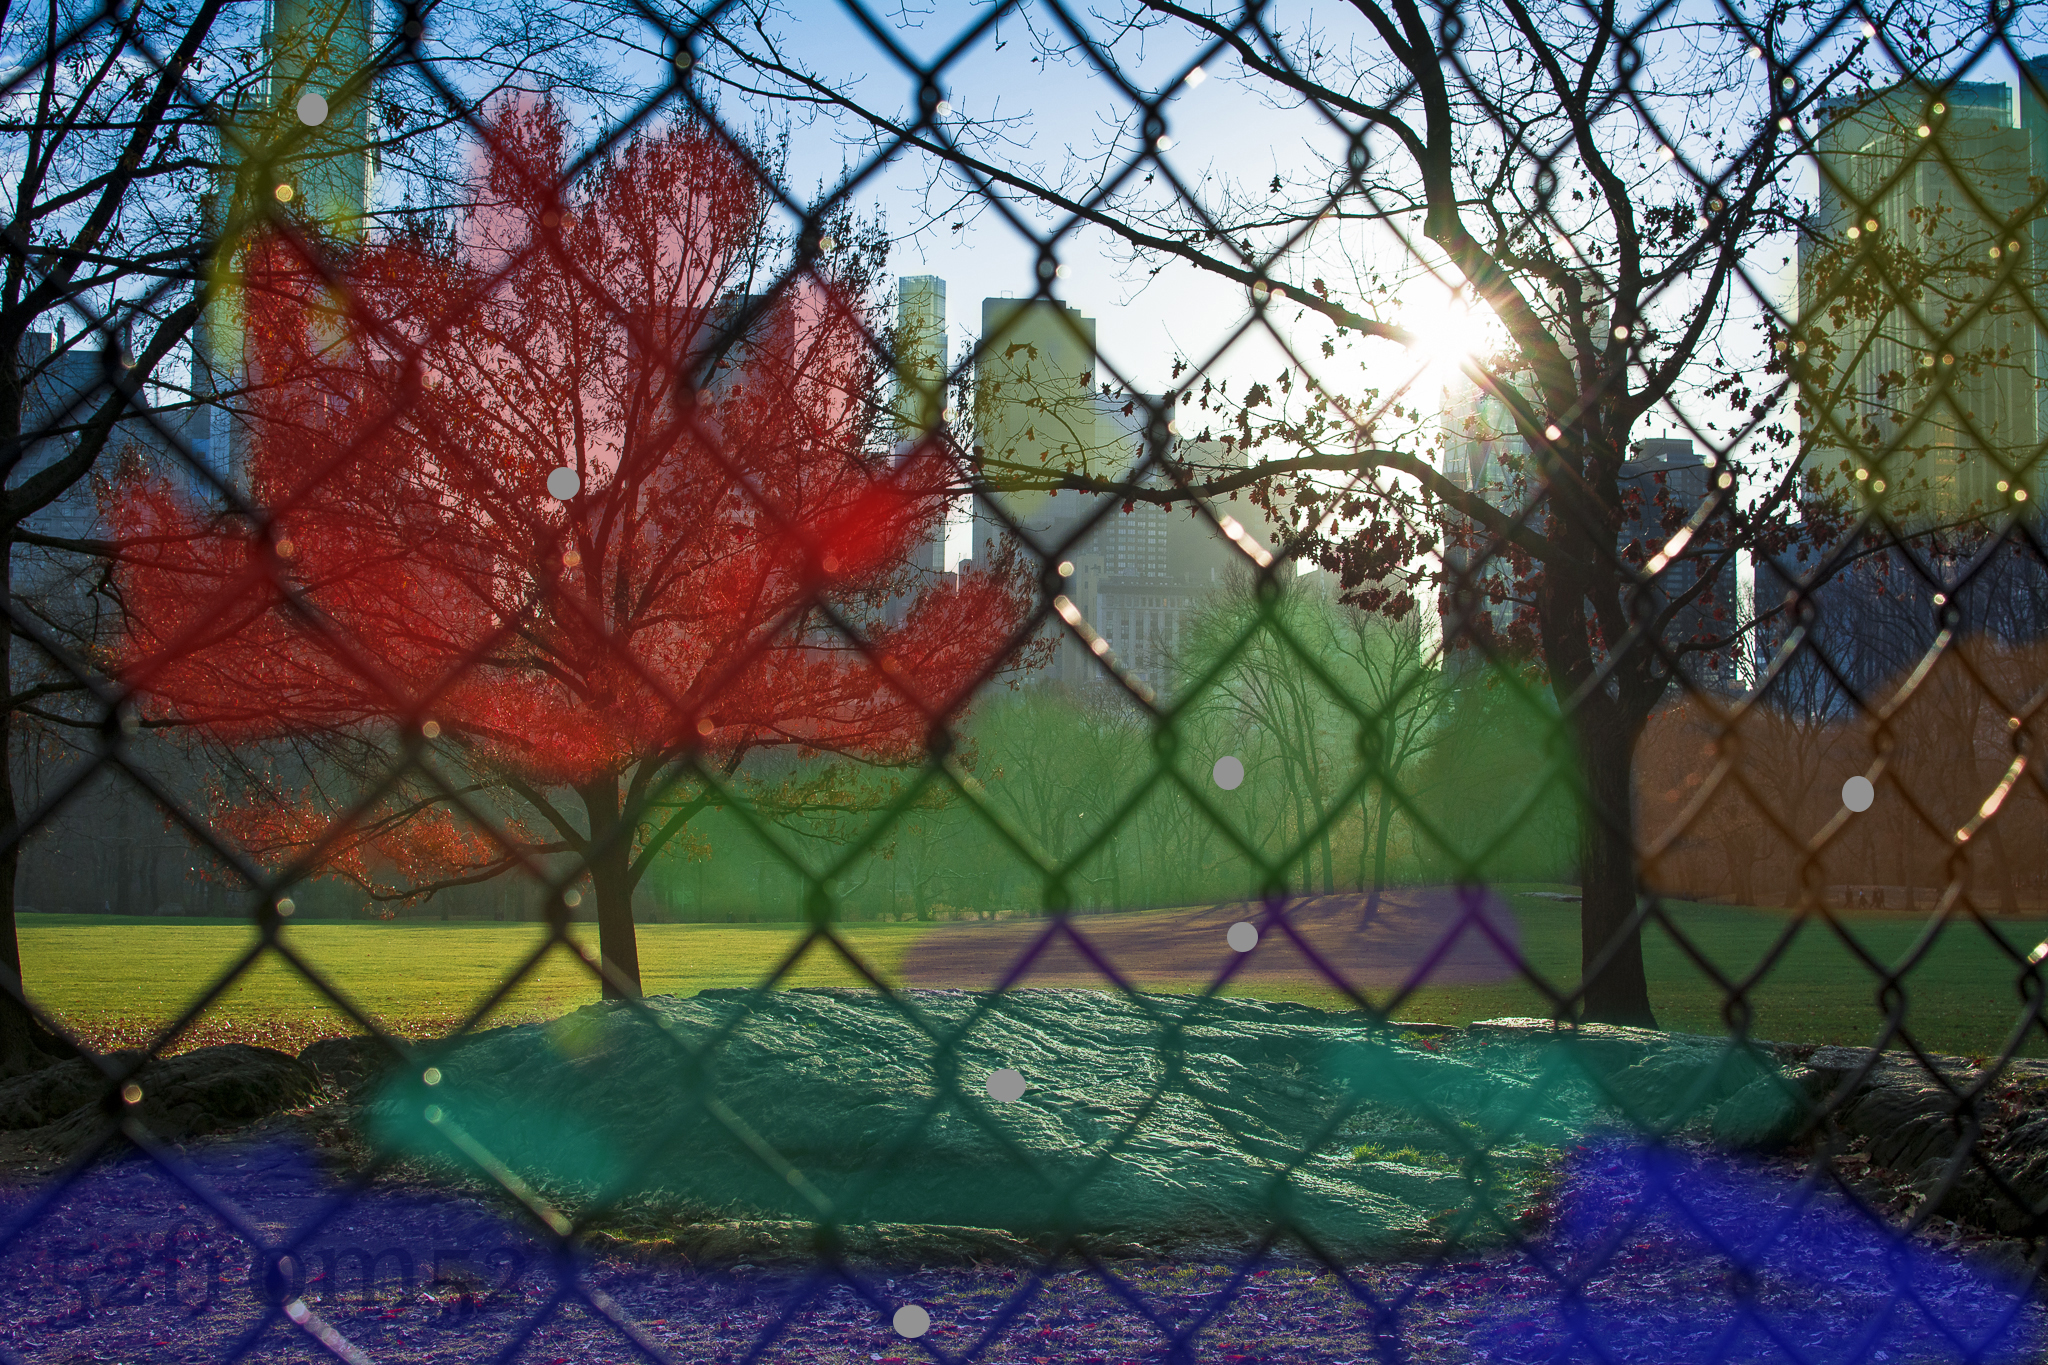
Different colors represent different spot edits/localized adjustments
Prior to editing the picture I obviously had to shoot one that was crisp and provided me with flexibility for editing. To do this I underexposed my original picture and made sure I shot with a small aperture to keep more things in focus. The last aspect of this picture I’ll briefly touch on is how lined it up. As I talked about in my week 16 post, framing a picture that’s shot into the sun can be tricky because you’re basically forced to use the live view. I really don’t like taking pictures in the live view so what I do is line up my shot via live view, then switch the camera back to through the lens and fire away. Once I get my first picture I adjust the composition via slight tilt and shift adjustments until I get the picture I want. I used this method to get this picture and I think it worked well.
Picture info: ISO 3200, 35mm, f/1.8, 1/200sec, -1 Exposure step
Week 19 (12/9/2013 – 12/15/2013): Top of the Rock Observation Deck
Picture taken on 12/12/2013 at 5:15 PM
Picture description:
This week I finally got the chance to make a return visit to Top of the Rock. My first visit was six months ago and was only two weeks after I purchased my Nikon. Since my last visit I’ve often looked back at the pictures I took and thought about the many things that I could have done better. I’ve learned many lessons over the past six months, in part because of this blog but also because I’ve immersed myself in photography. Articles, YouTube tutorials and experimenting with different techniques have been my main sources for learning. One other source of learning that might surprise you is instagram. I often flip through different hashtags looking for ideas of what to shoot or to see how people photograph certain subjects or places. Instagram has photographers of every level ranging from the professional to amateur, and or dare I say serial selfie taker. Before and after my trip I looked through the hashtag #topoftherock to see the kind of pictures people took during their visit. Besides the selfies and couple pictures I noticed that nearly all of the pictures looked identical with the exception of changes to the sky or filter the person used on the picture. After seeing how people have been over-sharing the same picture I knew that I had to find some way to differentiate mine from the rest.
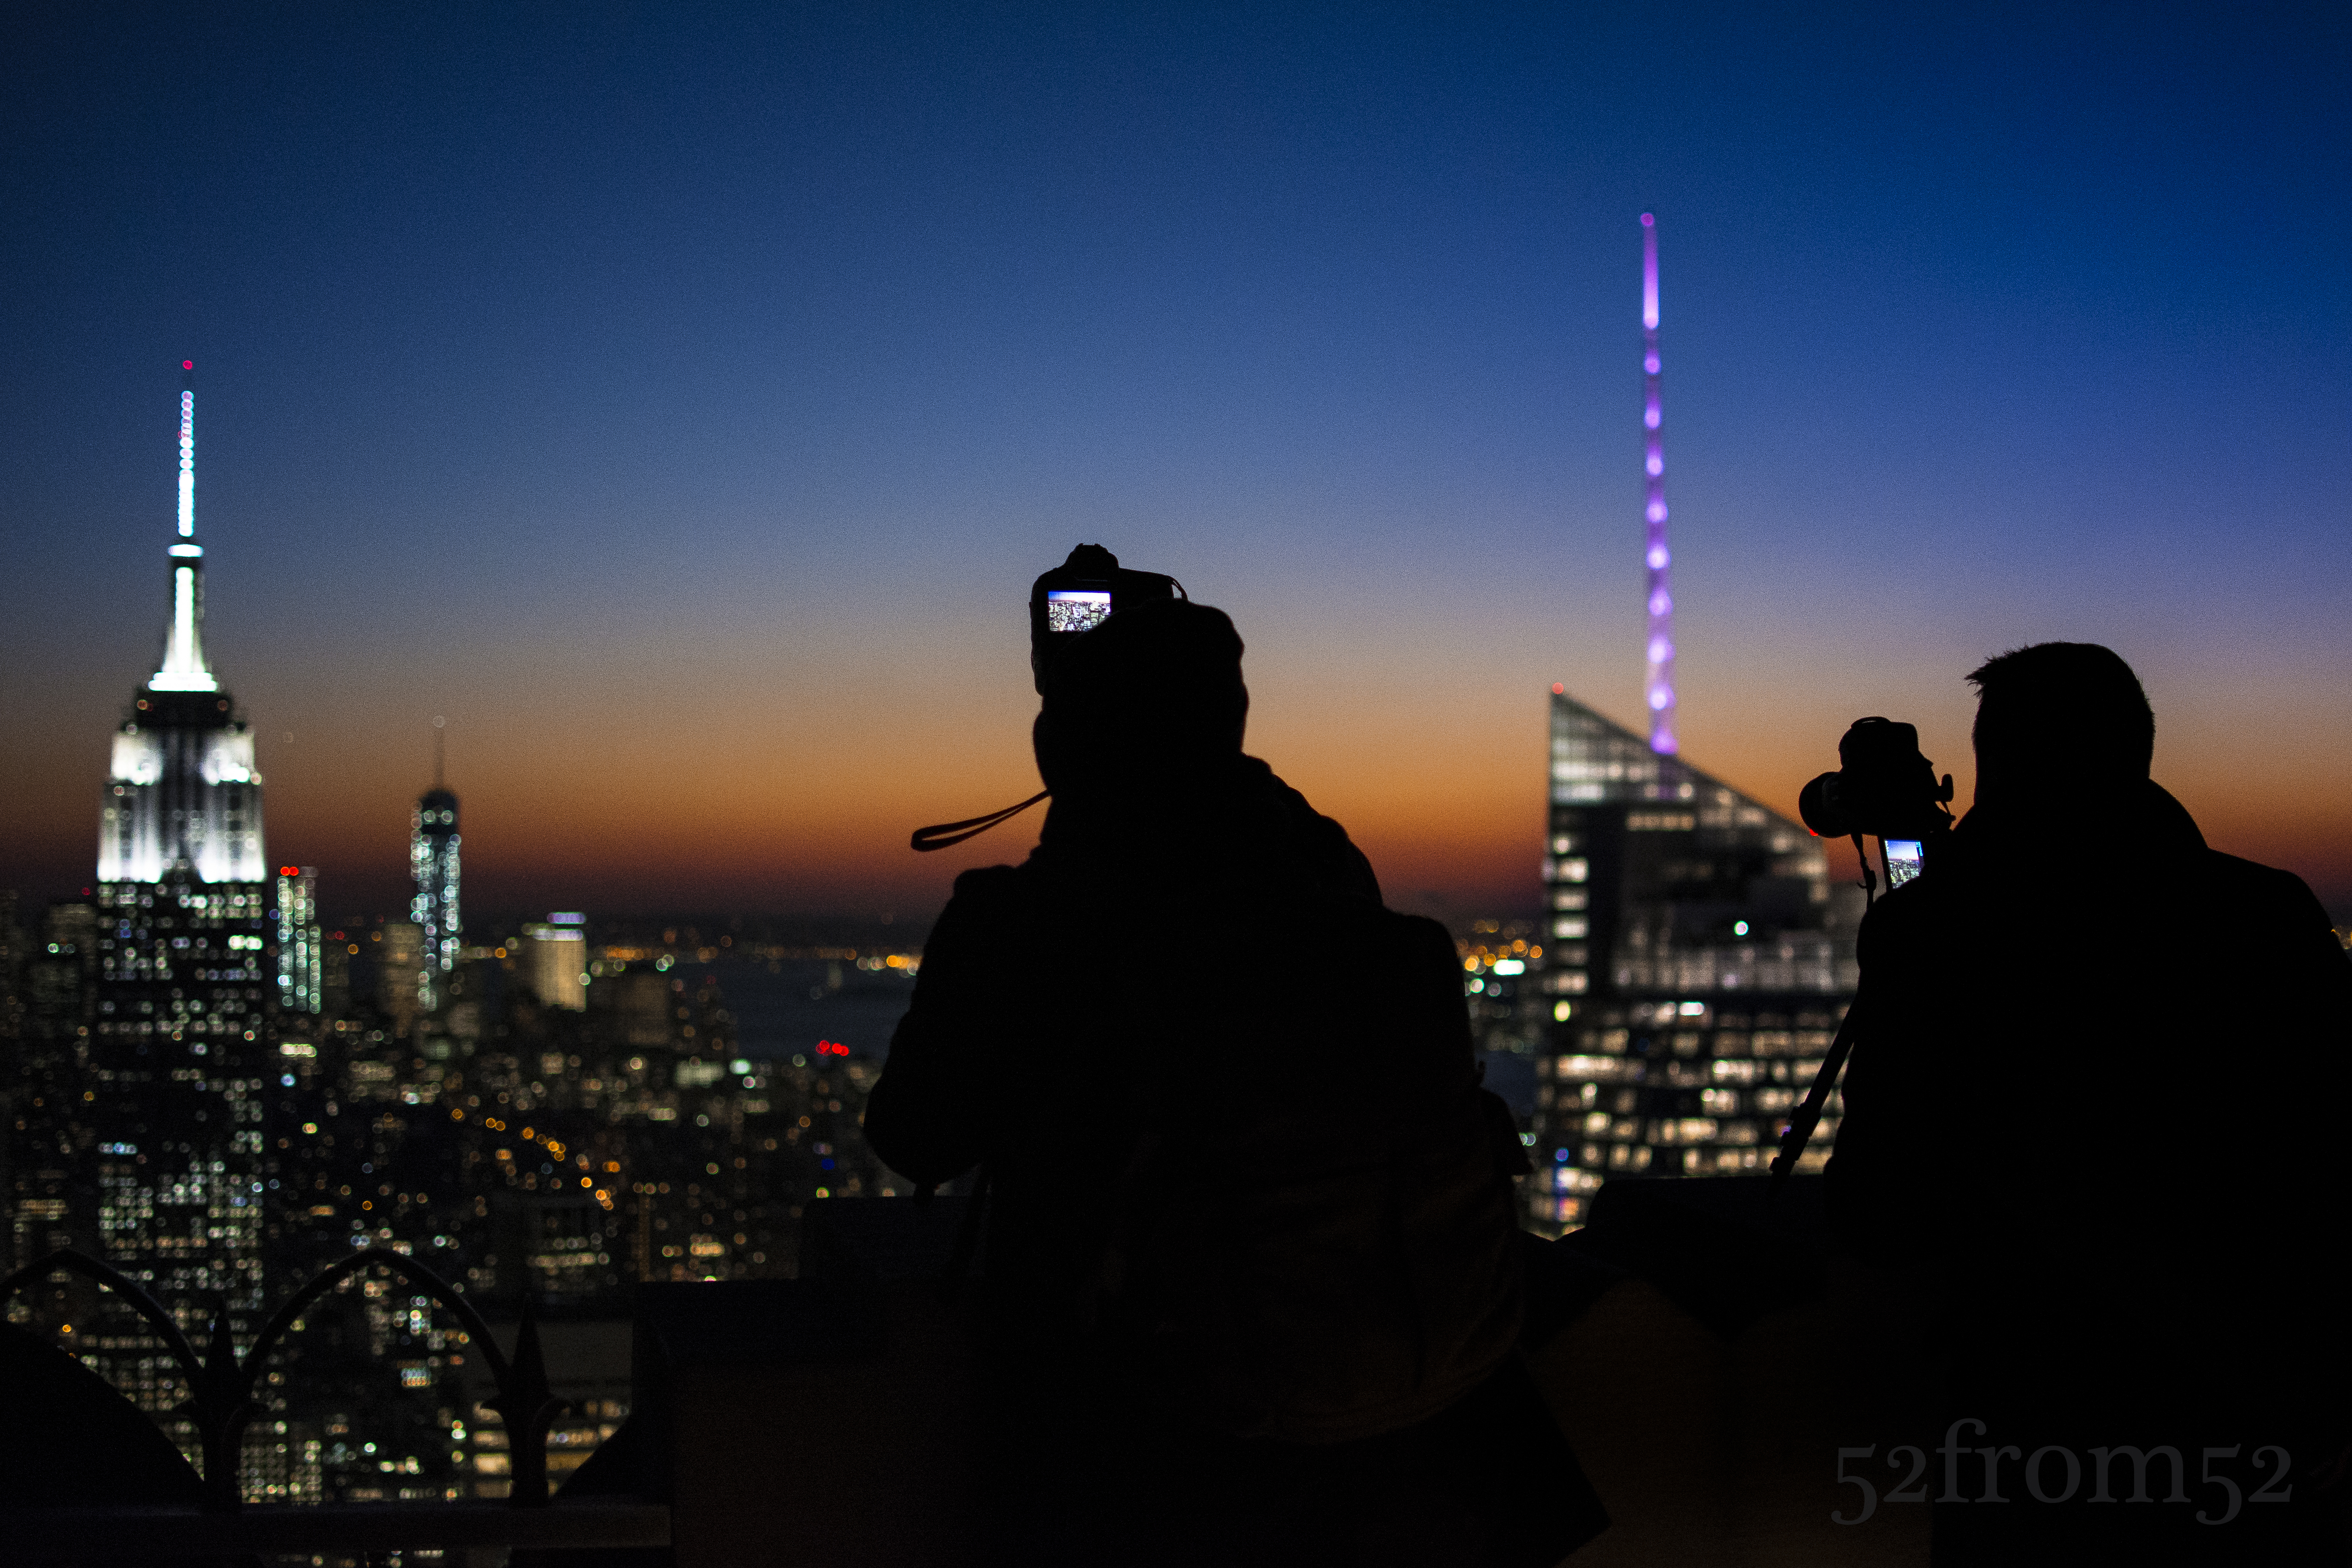
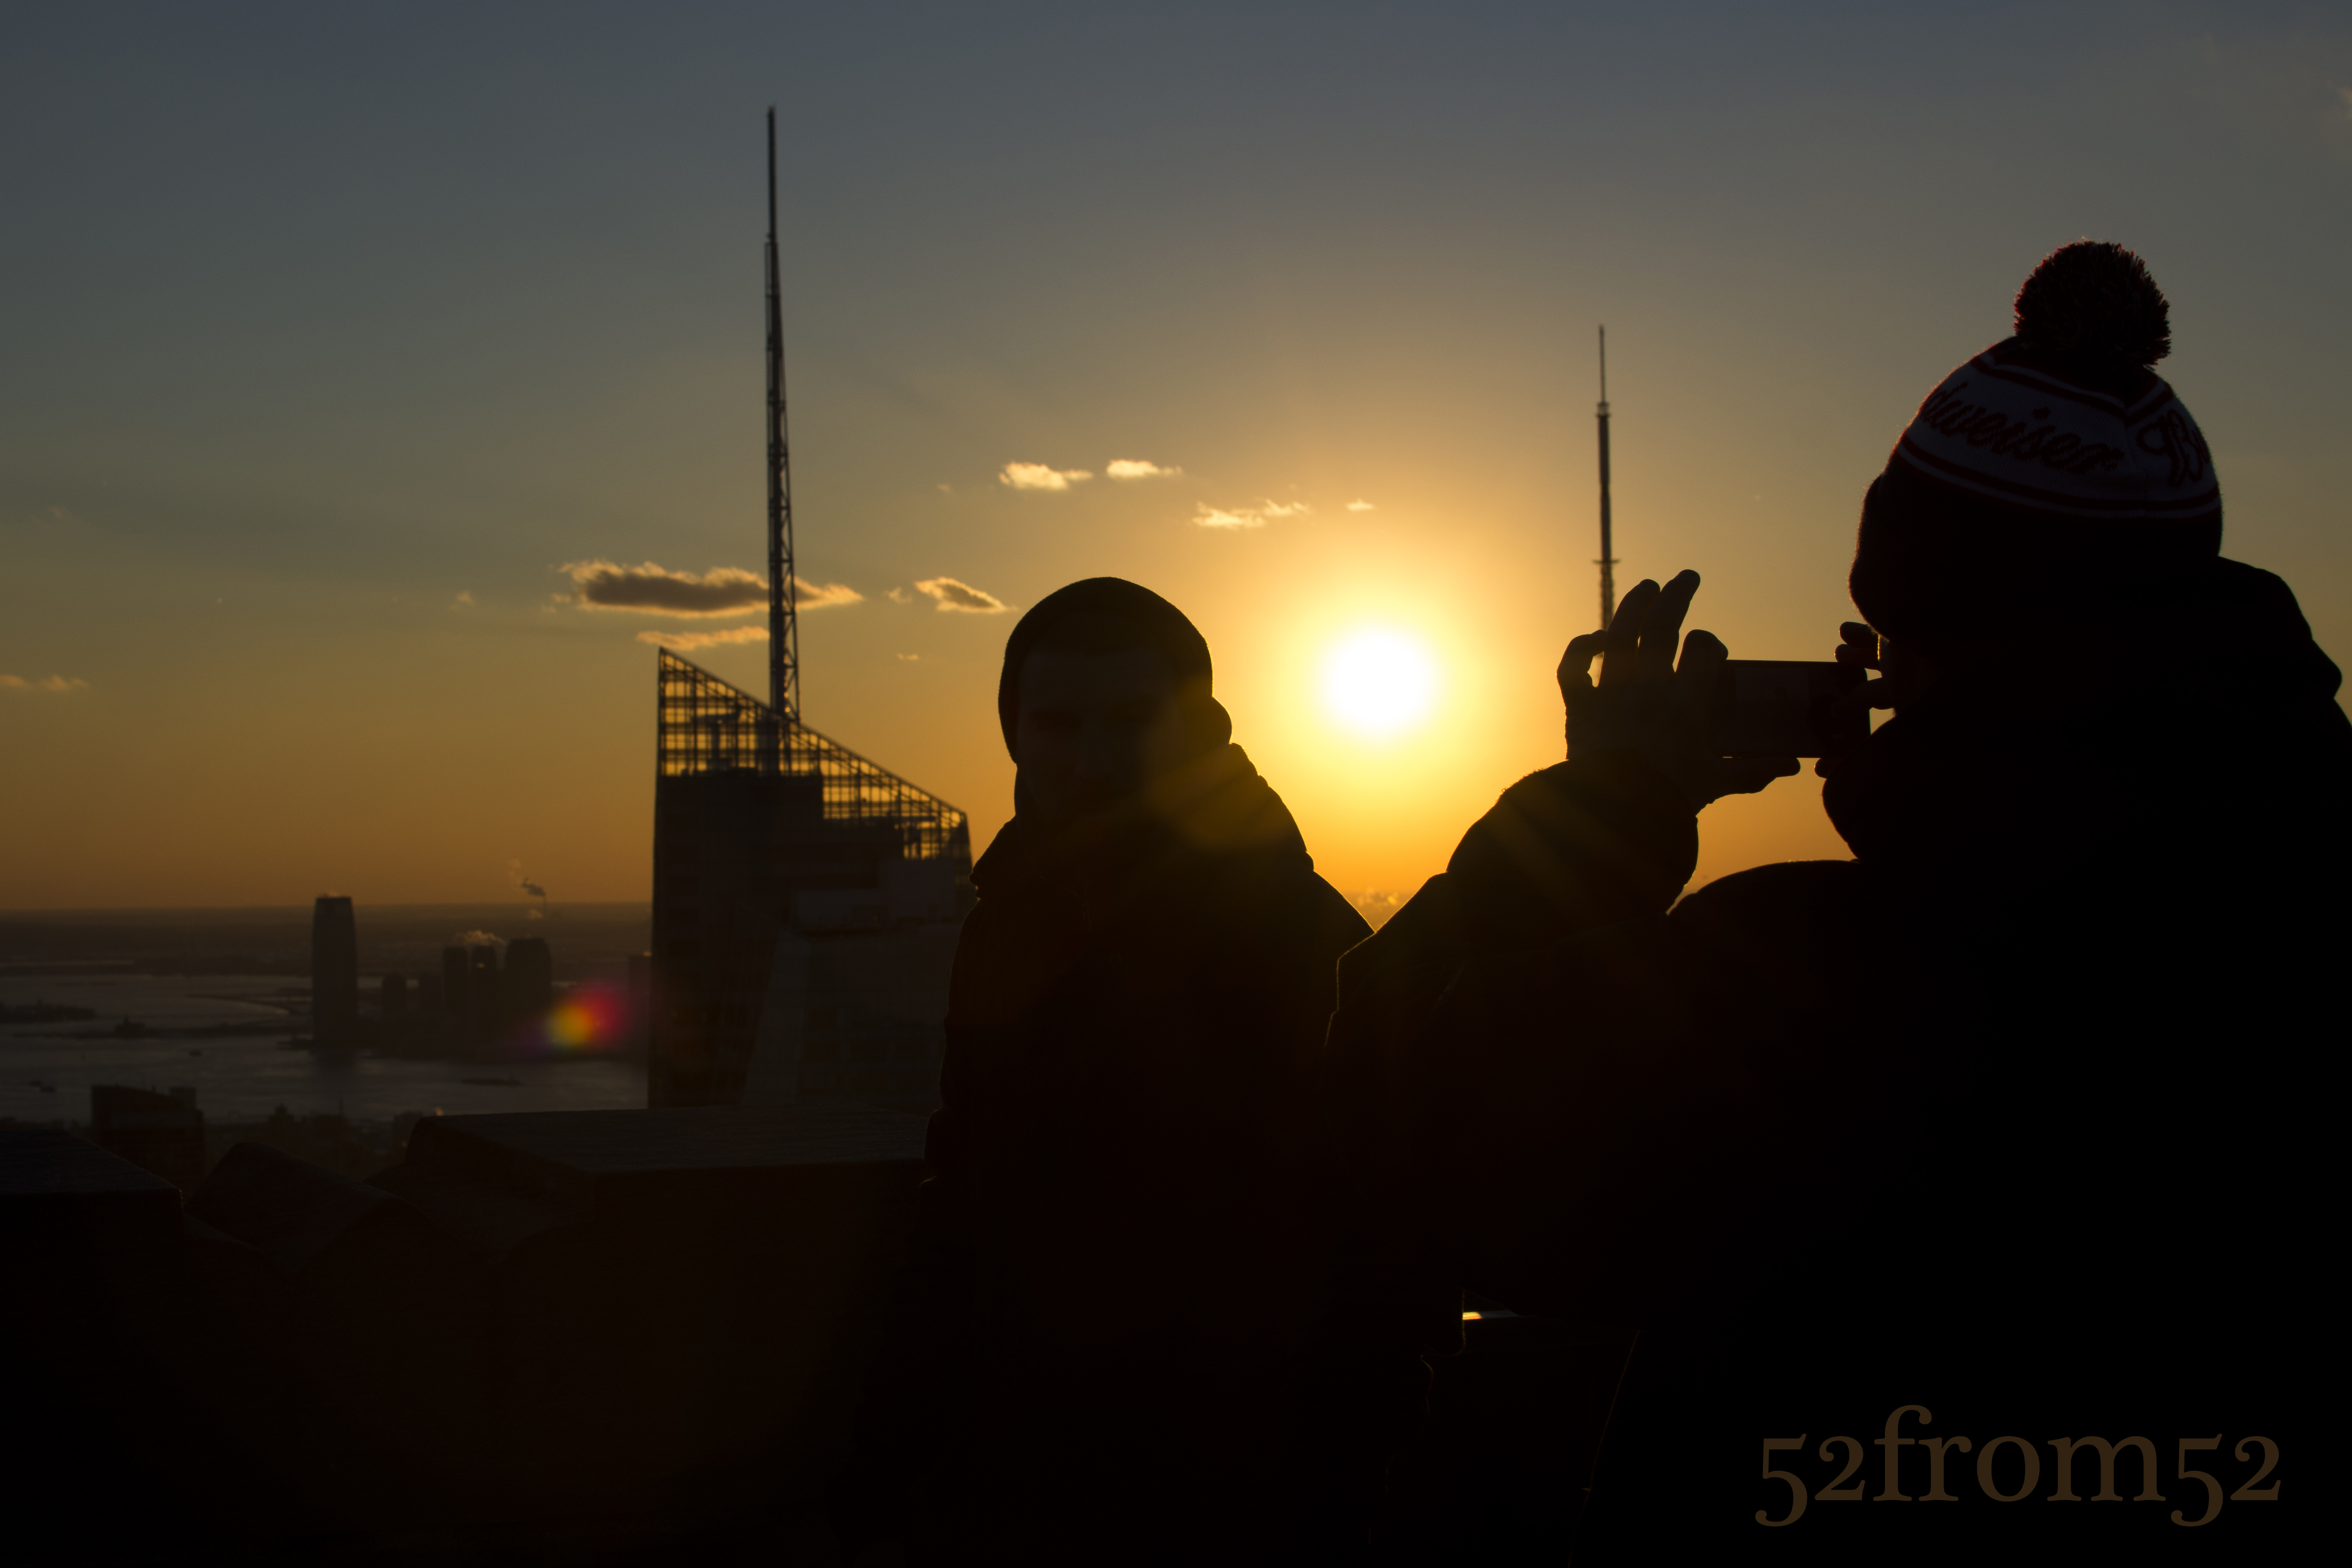
During my visit even though my goal was to take an original picture, I couldn’t help myself from taking the classic Top of the Rock picture. I found myself taking the same kind of picture over and over again partially to make sure I got a good one, but also because in person it’s just that hypnotizing of a view. After about an hour of scanning the horizon for a unique view I came to the conclusion that from my vantage point there really was none. It didn’t matter where I aligned the buildings, I had already seen that picture, or one very similar, shared countless times. At that moment I decided to take a step back from my coveted position to see what new perspectives I could find. Within a matter of seconds I was rewarded for my decision. After stepping back I saw that all the people taking pictures were casting silhouettes in front of the very same view I was just photographing. I spent the next couple of minutes wading in and out of the crowd to try and get the a picture that met my satisfaction. Eventually the 20 degree weather got the best of me and I decided to call it a night. On my way home while thinking about my night, I realized the valuable lesson that I just learned. It’s very easy to get drawn into taking the obvious picture. The only way my photography is going to continue to improve or “move forward” is if I regularly remind myself to take a “step back” and find a new perspective on what’s right in front of me.
Photography Concepts:
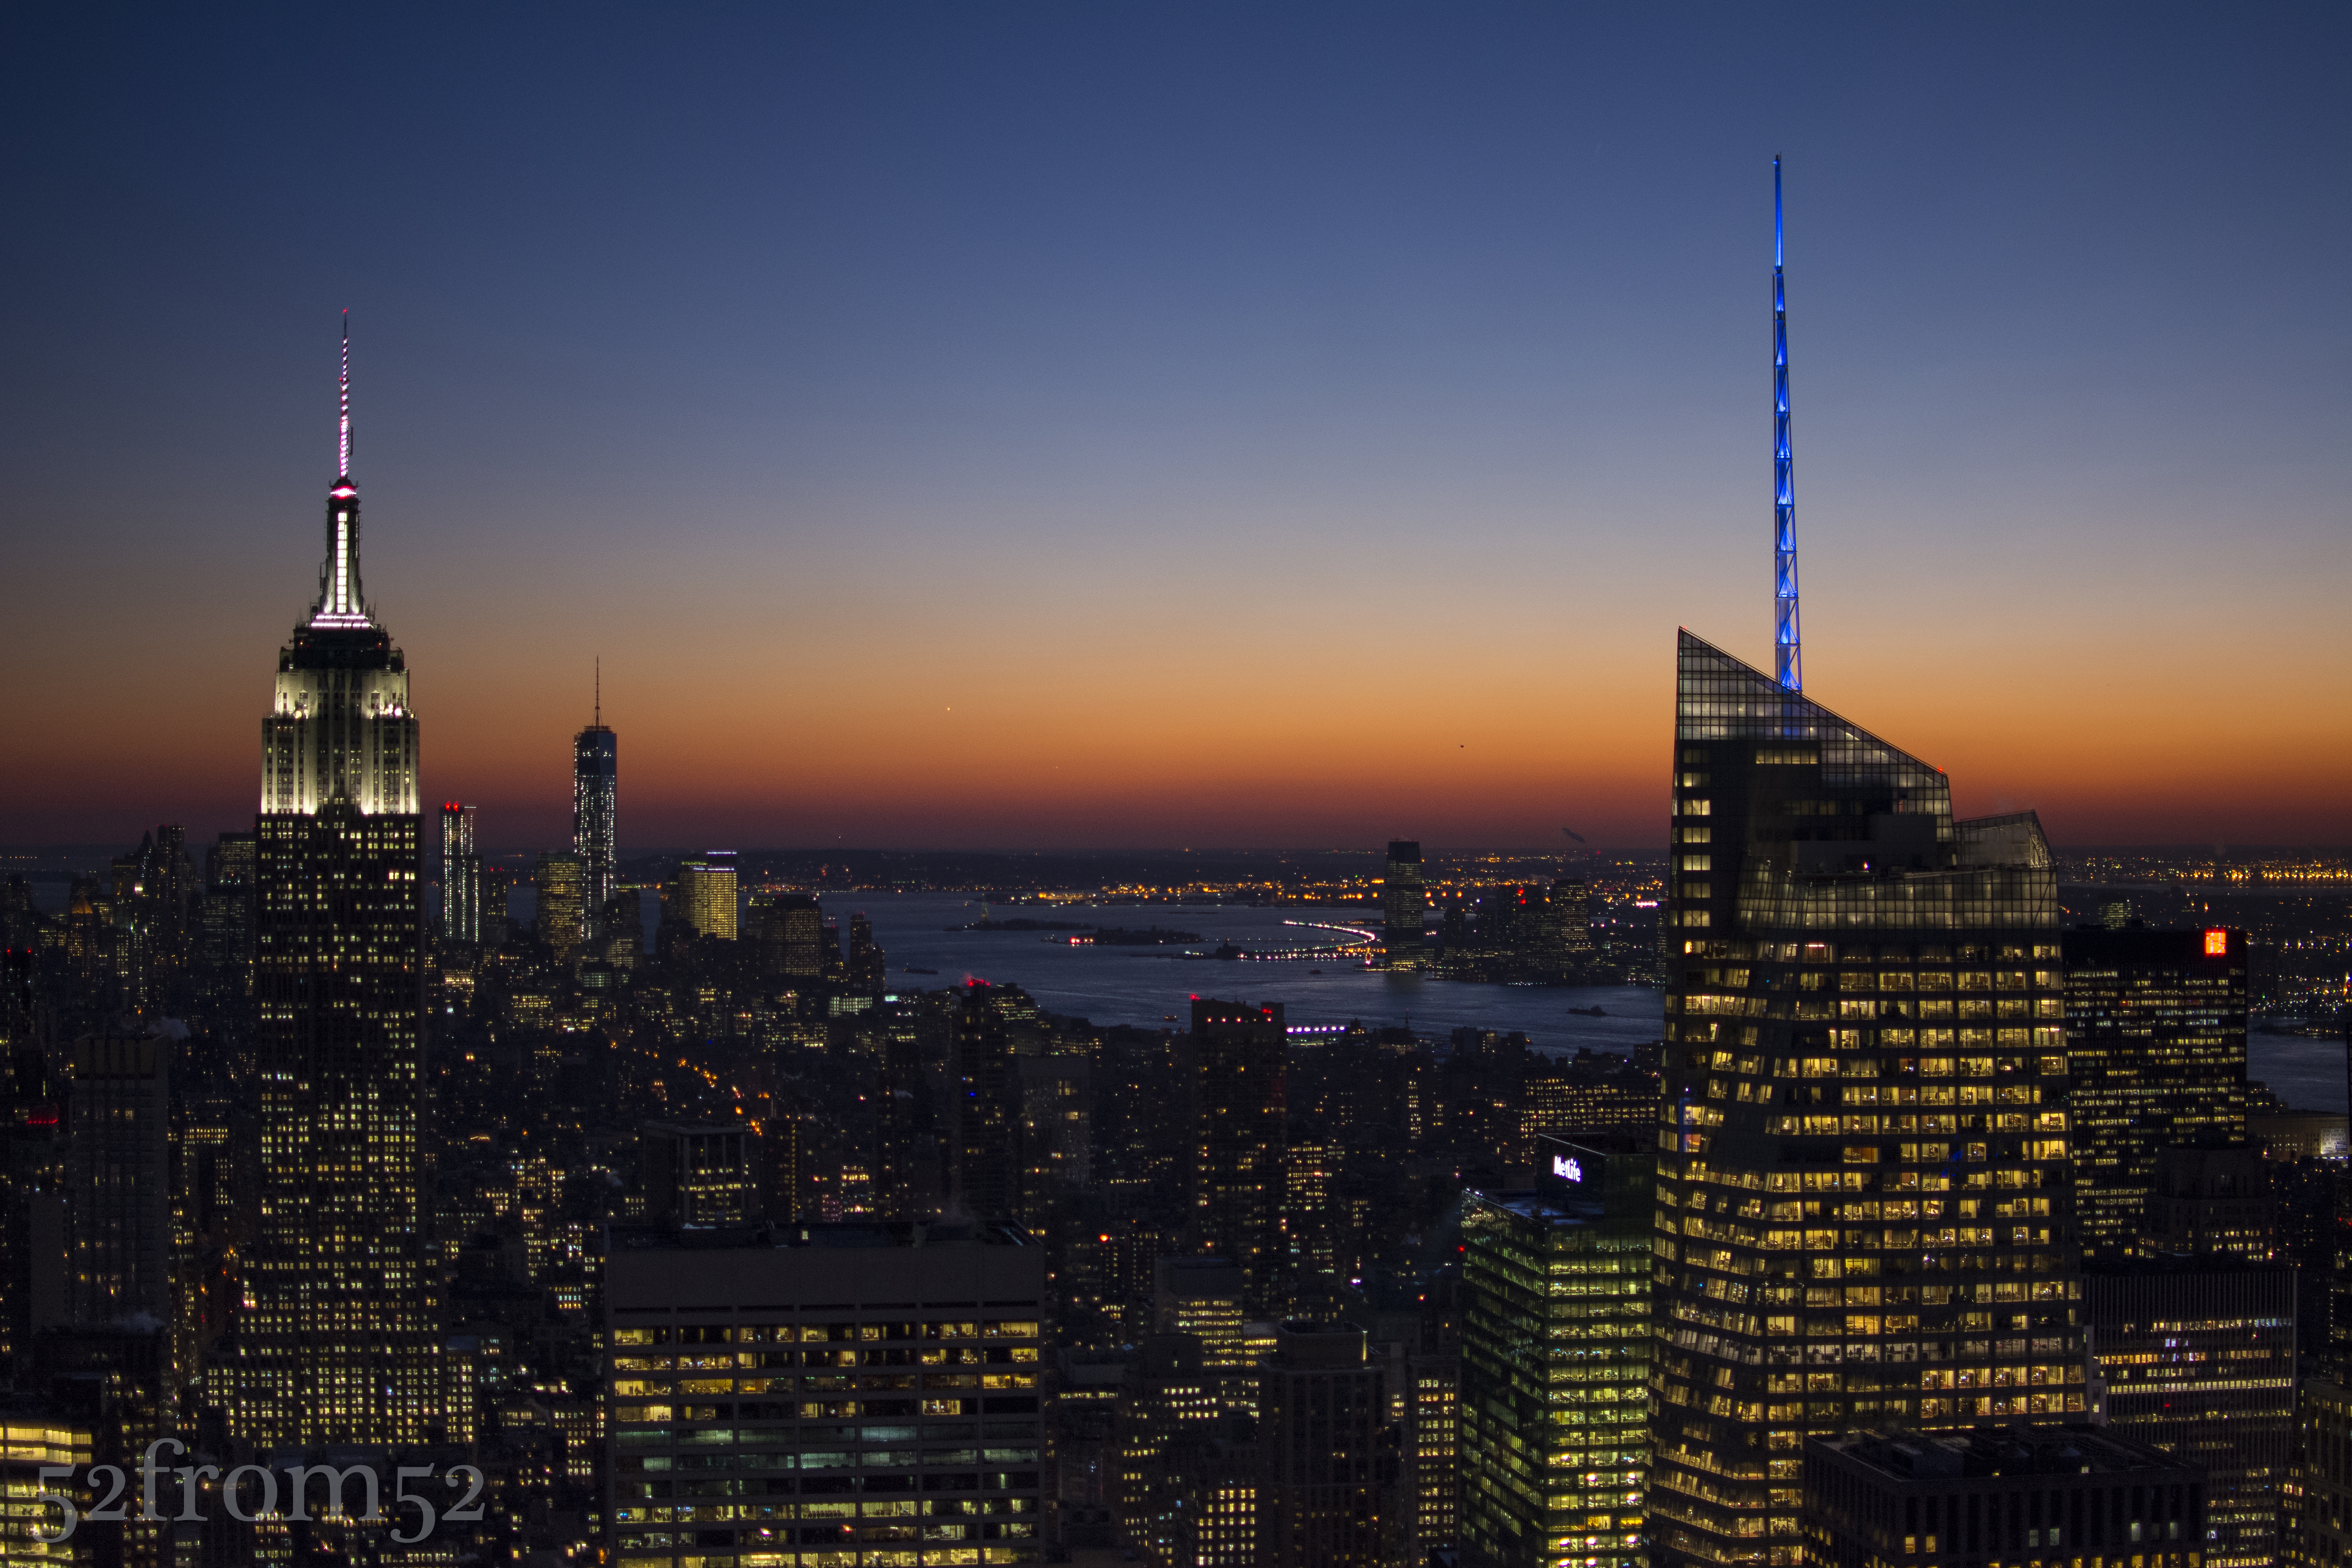
Although I used the previous section to talk about avoiding the obvious shot, it doesn’t mean the classic Top of the Rock pictures aren’t good ones. For the purpose of this blog I wanted to challenge myself to get something unique but it leaves the question, how do you take a good picture at Top of the Rock? As I mentioned earlier I often look back at the pictures I took during my first visit and dwell on what I could have done better. Let me share with you some of the lessons I learned between my two visits in terms of taking pictures at Top of the Rock.
Example of the classic Top of the Rock Pic
The first thing you have to ask yourself is what kind of picture are you looking to take? Do you want take pictures of only the buildings or are you planning on featuring yourself or friends in the picture with the buildings in the background? Knowing your subject is important to so you can determine the time you’re going to go and where you should set up shop once you’re there. Let’s start with talking about taking pictures of people. If you’re taking pictures that will feature yourself or your friends the location is less critical but the time that you arrive is important. In this case you’ll want to go about an hour before sunset this way you have time to take nice pictures in softer light and without flash. In my opinion flash is the worst when taking pictures at Top of the Rock. Unless you’re an absolute pro and know how to compensate correctly flash tends to wash out the city backdrop, which is one of the main reasons you’re at Top of the Rock right? In order to feature the cityscape behind you, don’t use flash, especially if you’re taking pictures on the 68-69th floor behind the glass. Once you find a nice location play around, take pictures of you subjects looking out towards the buildings or doing some forced perspectives (google it). If you want to get more original, take pictures of your subjects from a distance. Perhaps have your subject stand looking out towards the city and snap your picture focusing on them through the busy crowd? As was the theme of this blog, once you take a step back you’ll be surprised what new perspectives you’ll see.
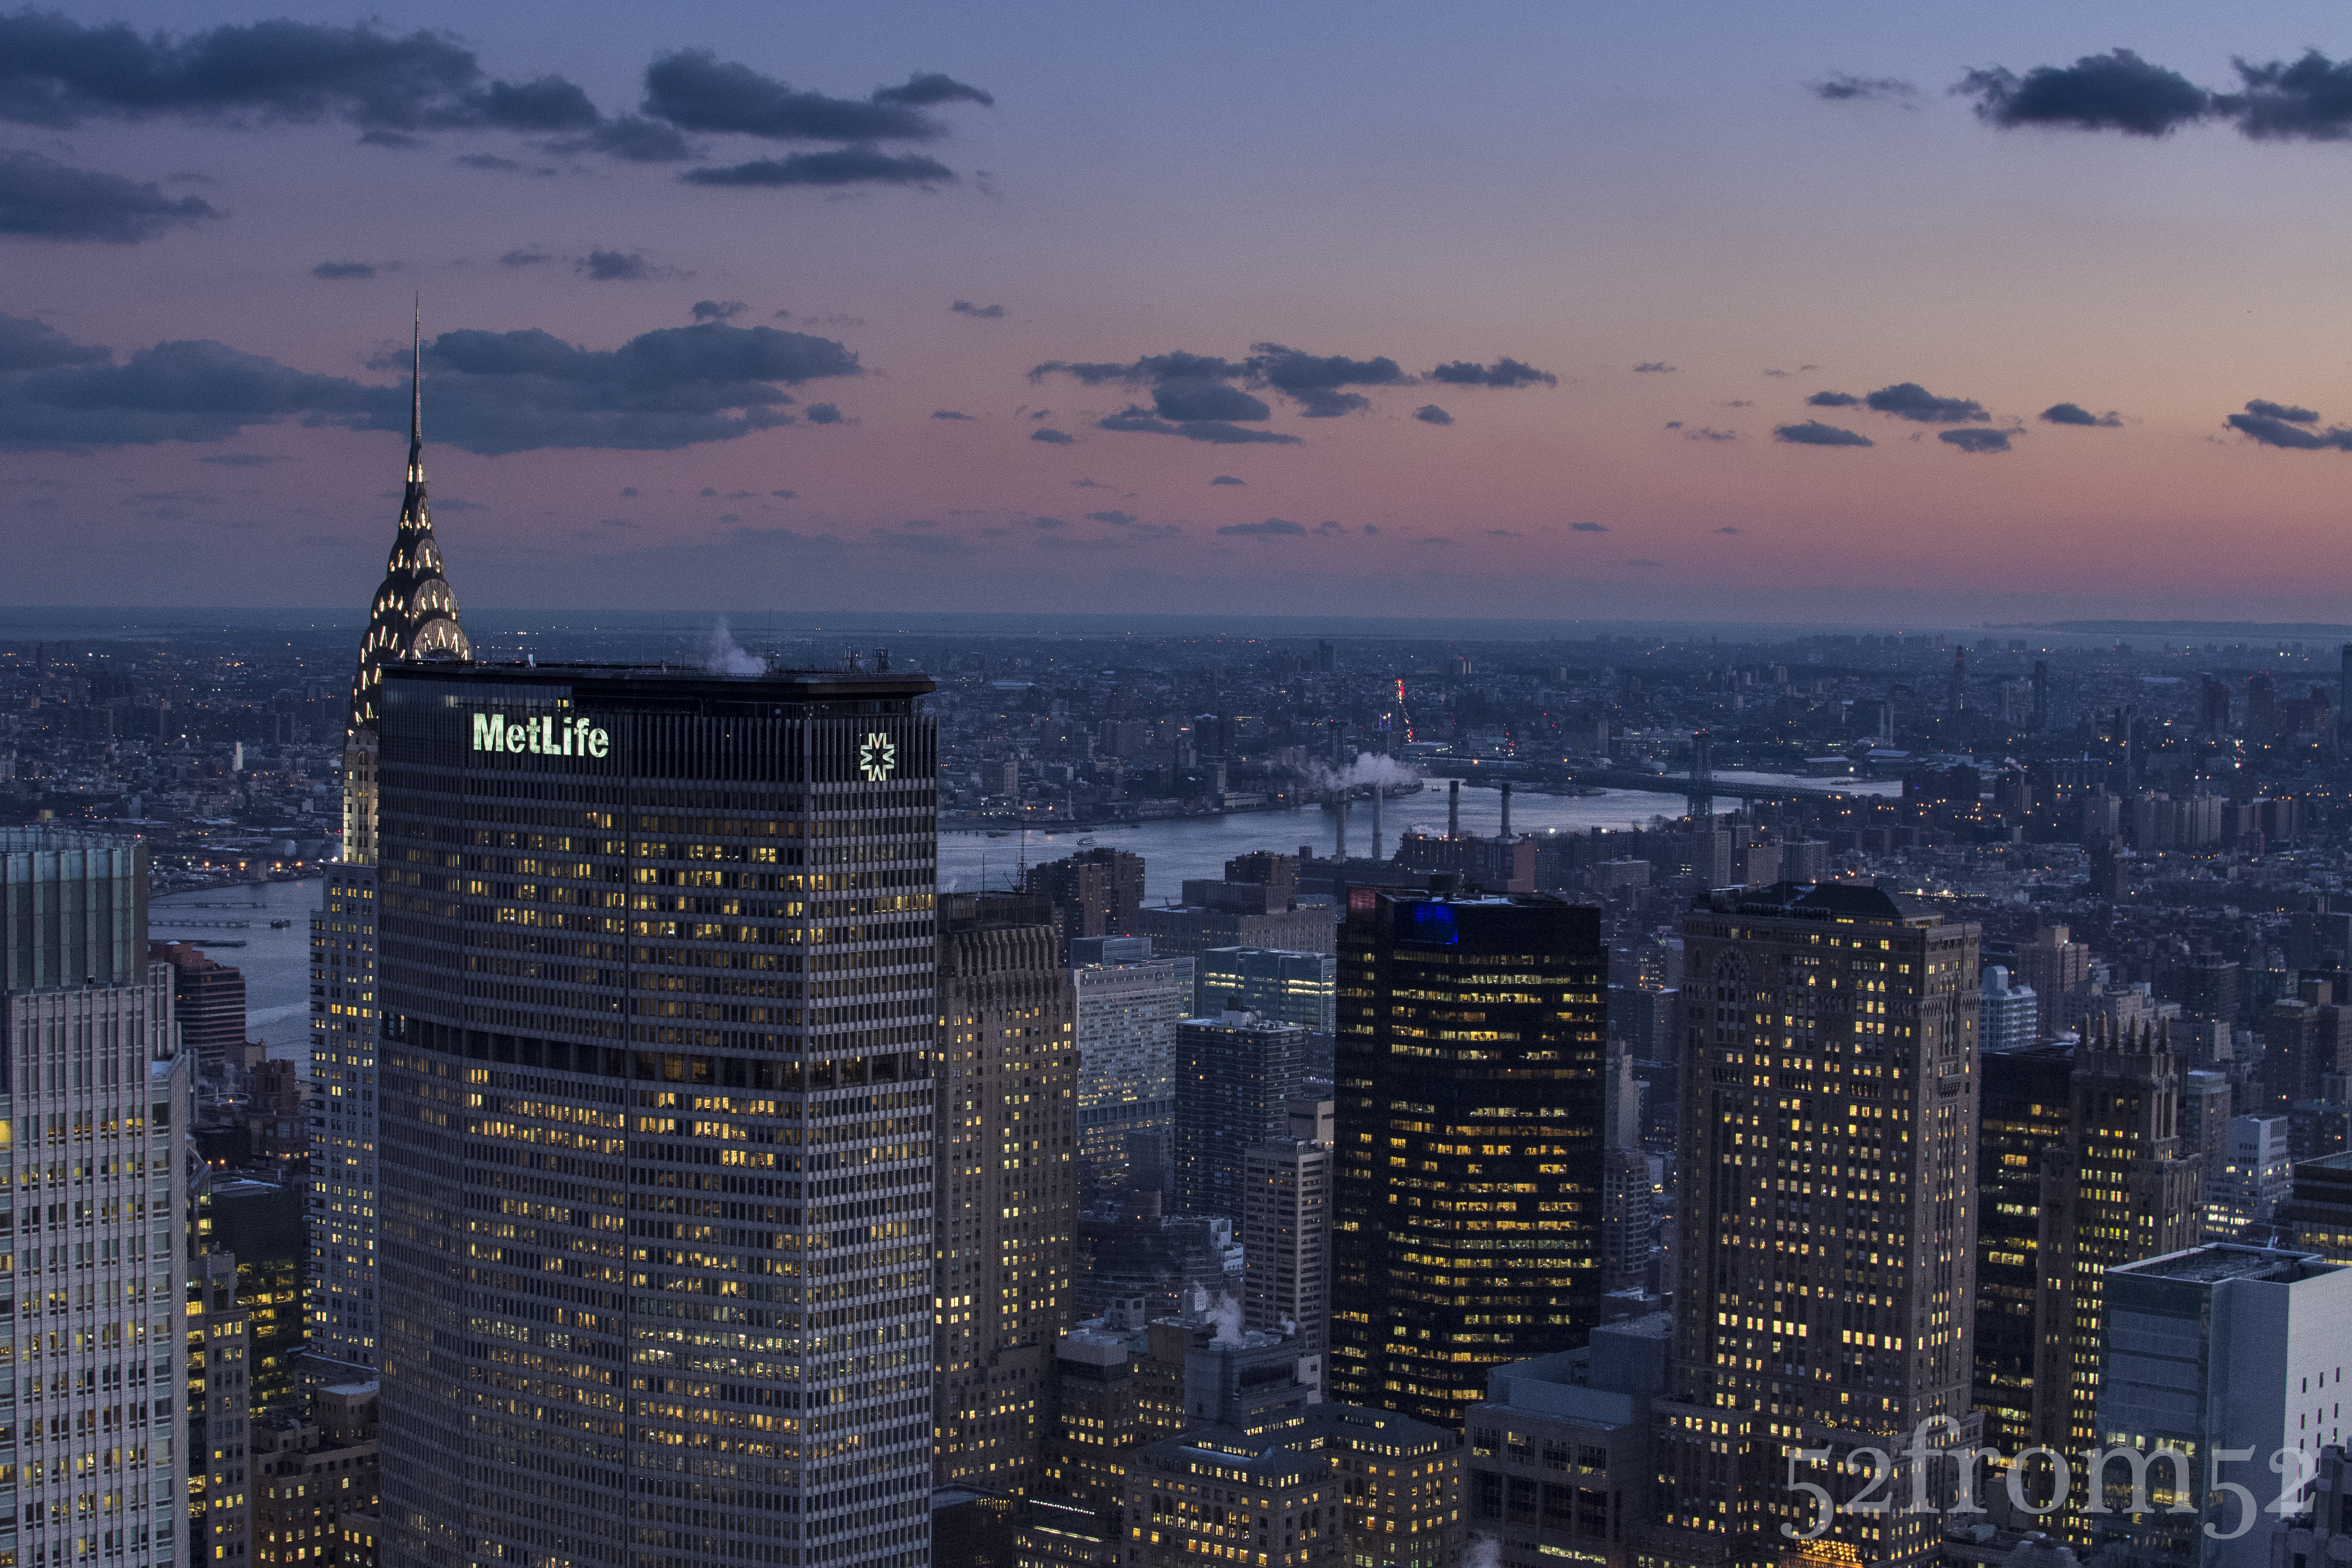
Example of a unique Top of the Rock Picture
What about the settings to use or not use when taking pictures of people, other than flash? One option is to use the smallest aperture your camera will allow which will give you nice background blur and permit you to use a low ISO. The negatives of this is the exposure of your cityscape background might be overexposed. The solution, shoot your picture in such a way that you’ll be able to only edit the background later to correct the overexposure (don’t forget to shoot in RAW to enable this). Option two in terms of aperture would be to use a small aperture which if you took my advice and came close to sunset, is going to force you to use a high ISO. The negatives, you’ll have a grainer photo but the positive is you will have a more detailed cityscape background. If you’re only looking to share this picture on something like instagram a high ISO image is fine. Even with the wide aperture you still might have an issue with overexposure for the background so compose your picture accordingly. The last setting I mention is try to use a focal length of 50mm+, I won’t go into detail about why but if you want to know why check out the video below from one of my favorite YouTube sources.
Now let me talk about what to do if you’re looking to take pictures of the buildings. First, I recommend going to the 70th floor and trying to lock down a position in the center area where you don’t have the bottom floors jutting into your picture. Getting this prime location is even more important if you’re using a wide angle lens. Just like shooting people, I think the best time to take pictures of buildings is right before and during sunset but you can go any time especially if there are nice mid-day clouds. For now I’ll talk about what to do at sunset. Going at sunset or at night really forces your hand in terms of camera settings. Unlike taking pictures of people, when you use a small aperture there aren’t many positives. Your plane of focus is going to be narrow even with the buildings being far away. What’s going to happen is one building might appear in perfect focus while the others are a little blurry. You can still take a good picture using small apertures but if your goal is to get a crisp image that you can blow up on perhaps a canvas, I don’t recommend using small apertures. What are your options then? Option one, you can boost your ISO but this is going to still leave you with the problem of not having a crisp image for enlarging later. Option two, bring a tripod and shoot with a small aperture and slow shutter speed. This seems simple right? Well tripods are not allowed at Top of the Rock but there are ways around this rule. As you can see in this week’s featured picture people bring tripods. The key is to bring one small enough to fit in your bag, and one that has a small leg spread so it can sit on top of the cement pillars. This is also why getting a good location is critical, there are a limited number of cement pillars and or locations that can facilitate the use of a tripod. I’m not going to go into the all settings specific to tripods because if it’s pretty simple, small aperture, low ISO, slow shutter. Two things I will recommend though is use the multiple focus point setting which will grab more buildings in focus, and underexpose your image. One thing not to do, which believe it or not I saw someone do, don’t use flash while you’re shooting buildings on a tripod. Maybe I’m missing something and if I am please comment and correct me, but I don’t see any positive in using flash on a tripod when you’re not taking pictures of motion or people.
ISO 2500, 35mm, f/7.1, 1/40 sec, no tripod
These are some of the lessons/tips I’ve learned from my two trips to Top of the Rock. I still haven’t gotten what I would consider a great classic Top of the Rock picture, but that’s mainly because I haven’t brought a tripod or wide angle lens. I think I’ll take at least one more trip in a few months and try my hand using more than just my 35mm lens and perhaps a tripod. Until then I hope the lessons I’ve learned and shared so far help you shoot some great pictures at Top of the Rock, have fun and remember take a step back!
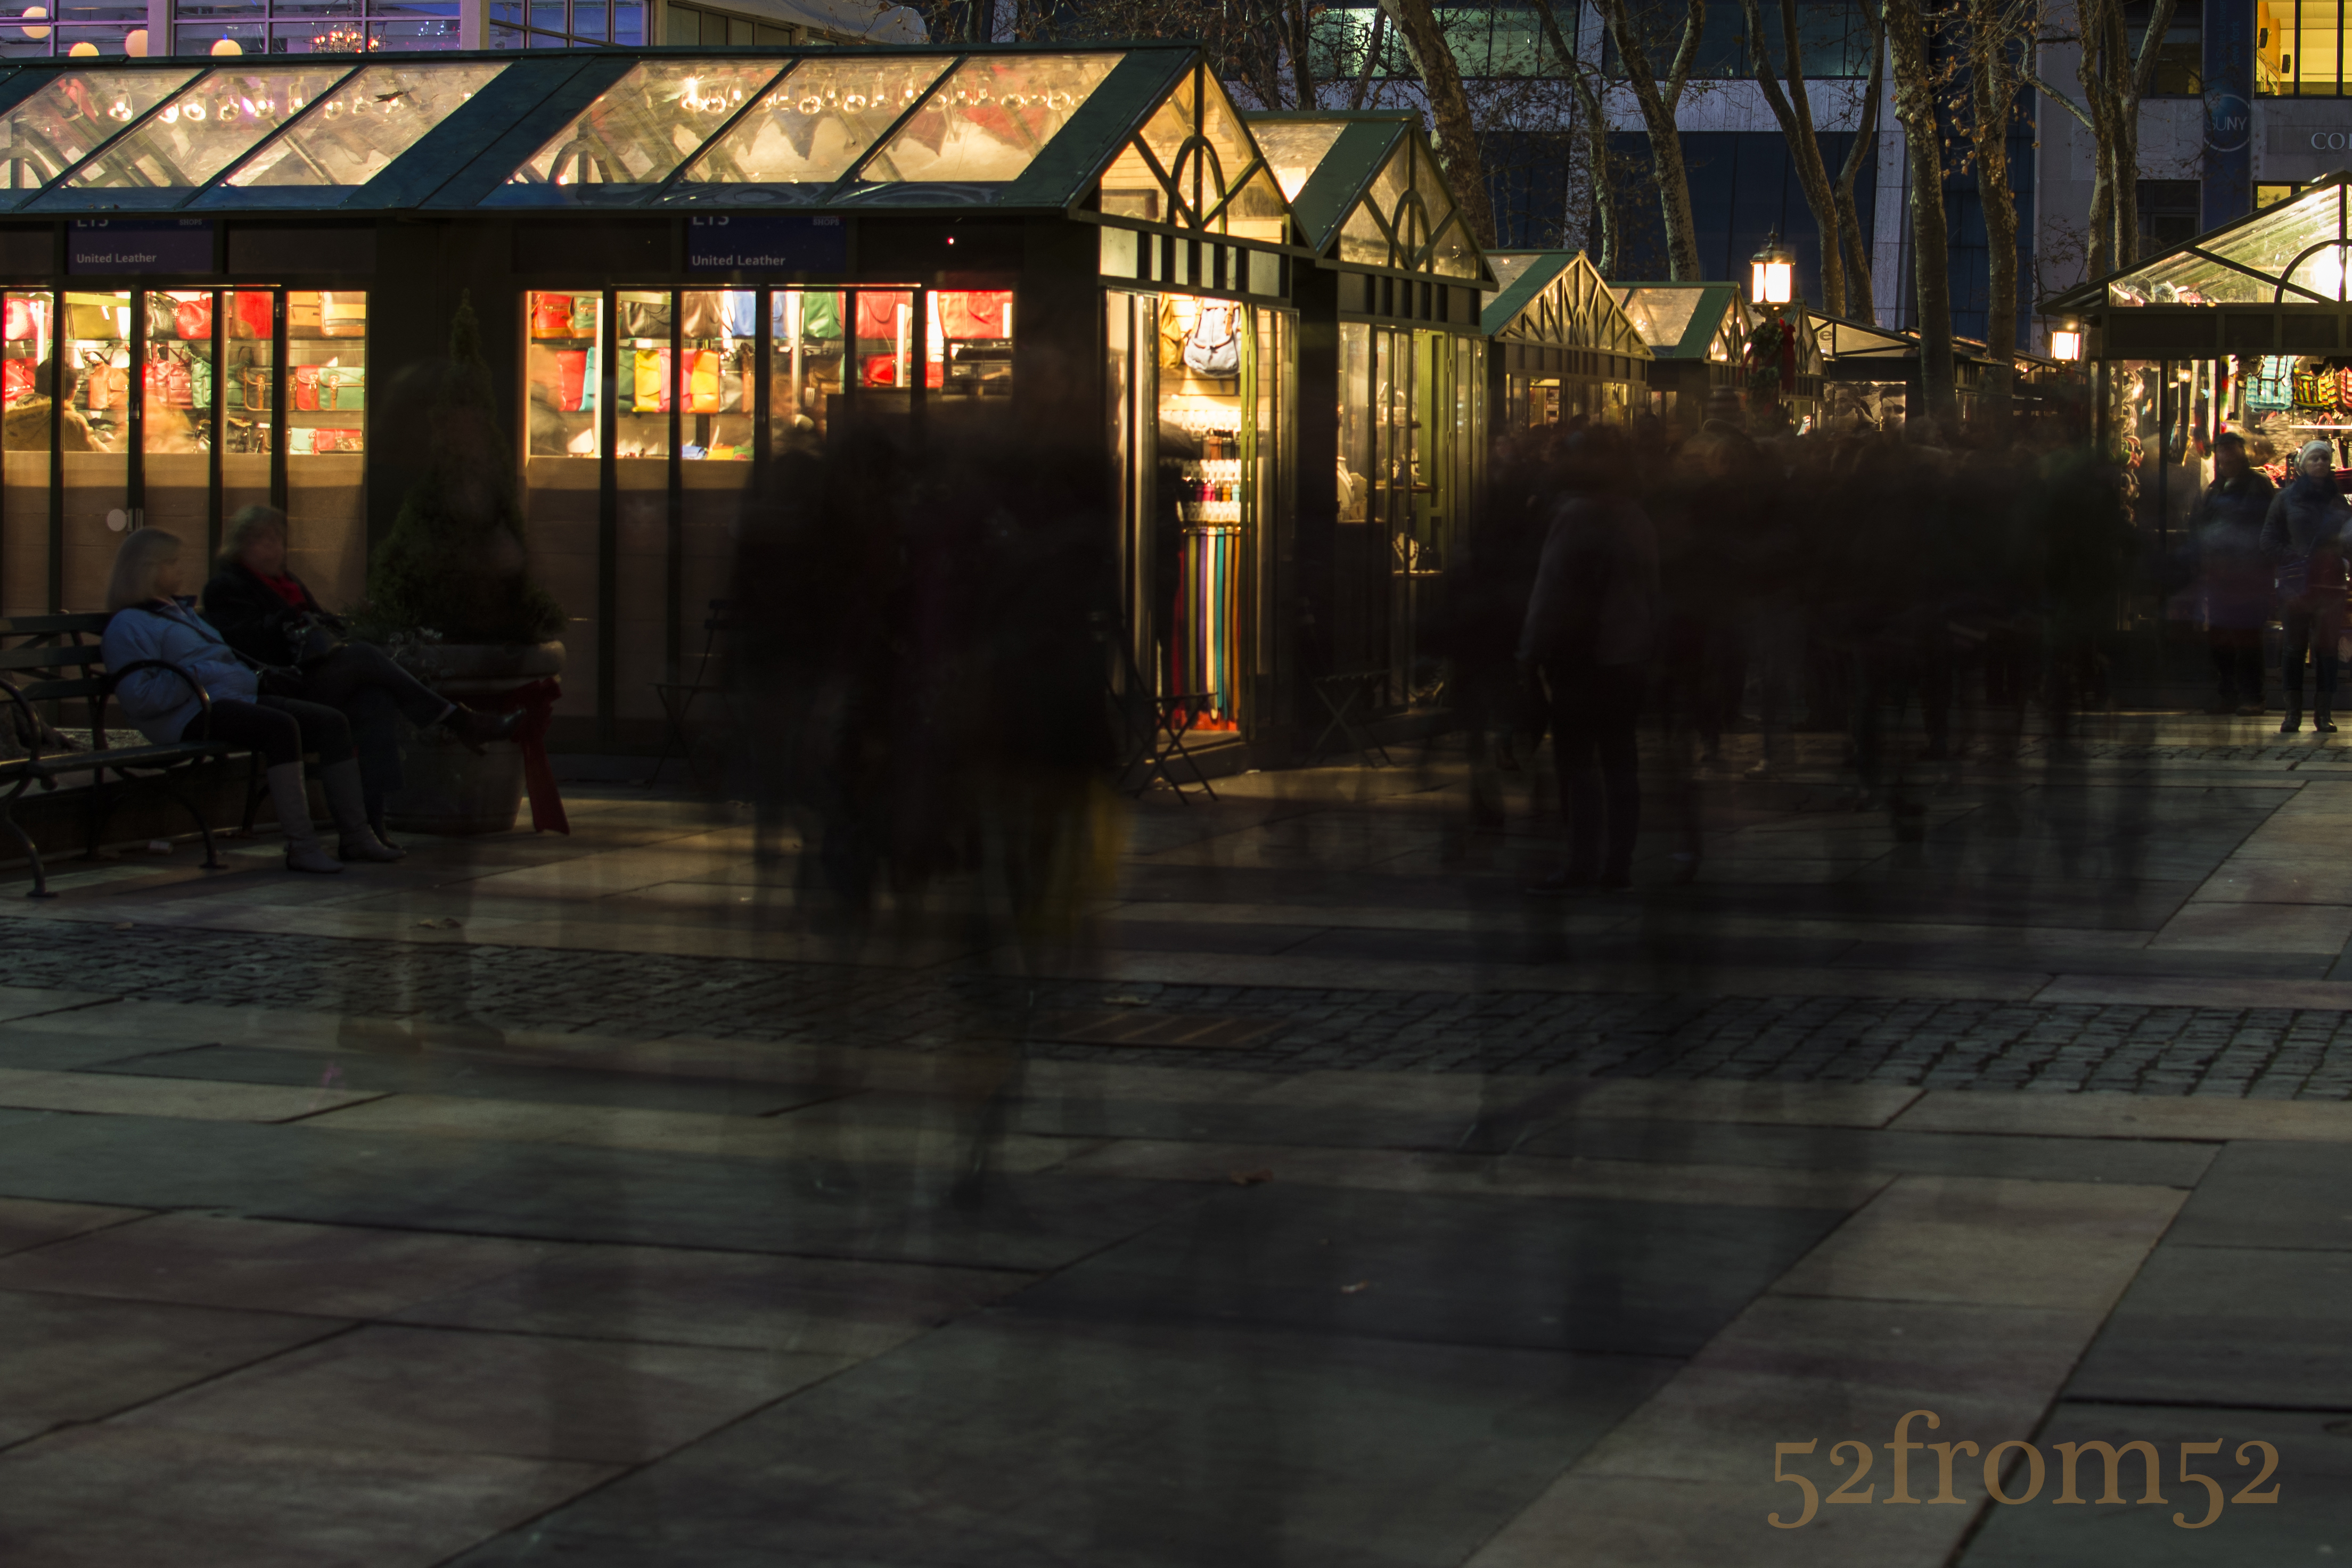
Week 18 (12/2/2013 – 12/8/2013): Bryant Park, New York City
Picture taken on 12/7/2013 at 4:46 PM
Picture description:
It’s hard to top New York City during the Holiday season. Everywhere you turn there are festive window displays, giant Christmas trees and glowing lights filling the night sky. If you’ve been reading my blog from the beginning you might remember my week 2 post, “A Day of Reflection” where I visited Bryant Park. As I said in week 2, Bryant Park is one of my favorite locations in New York City. One of the best things about Bryant Park is how it transforms throughout the year with each season. During the winter months the center grass area turns into an ice skating rink with a beautiful panoramic view of midtown New York. Surrounding the rink is a network of stores in in the form of tiny huts. As you can imagine this winter wonderland attracts visitors from all over. In case you didn’t guess by now Bryant Park is obviously where I got this week’s photo, but before I talk about my time in the park let me tell you how I ended up there.
In the beginning of the week I wasn’t sure what to photograph so I threw out a status on Facebook to get some ideas. One of the suggestions I got was to capture the “hustle and bustle” of holiday shoppers, thanks Laura! After getting this suggestion Bryant Park and its “Winter Village” instantly came to mind. Since I pass the park during my commute to work I stopped in on the way home to scout for a good picture. After briefly walking around I found what I thought would be a great angle for a long exposure. The picture I had in mind would feature the Christmas tree centered between the store huts and shoppers in the foreground. The reason I had a long exposure in mind was so I could get all of the shoppers in the foreground to blur as they moved around. With my picture planned there were only two more questions I needed answered, could I use a tripod in the park, and could I fit everything in the frame of my 35mm lens? I got one of my questions answered the next day after emailing the company that manages Bryant Park. The tripod was permitted; I just couldn’t use it on the ice, too bad right? The last question wouldn’t be answered until I got on location with my camera.
This brings me to the day of the picture. Let me give you some advice, if you’re ever in New York City during December; don’t walk up 42nd street unless you want the full tourist experience. I usually avoid 42nd street but for some reason I decided to take it after getting out of port authority, bad move! I literally felt like I was an extra in the Walking Dead. The streets were so packed that you couldn’t move any faster than at a zombie pace. I fought through the crowd thinking it’s okay I’ll have space once I get to the park, wrong. When I finally got to the park I was greeted with an even larger crowd than was on 42nd street. I knew this might be a problem for my picture but I remained optimistic until I got to my spot. Once I fought my way to my planned location it was time to answer my last question, will everything fit in frame…and the answer was no. As you can imagine this was very disappointing, but I couldn’t give up so I starting thinking how I could still get this picture but from another angle? I started walking around, and then while I was standing in front of the tree it hit me. Just like in my last visit to Bryant Park, why not use a reflection to capture my subject? Look closely at the Christmas ball and you’ll see the reverse angle of my original picture. Now it’s your turn, try to capture a creative reflection shot! When you do use the hashtag #52from52_wk18 and post it on Instagram.
Photography Concepts:
There wasn’t really anything tricky about capturing this picture from a photography technique standpoint. This week’s picture was made mostly via creativity which is less of a concept and more of an attribute that each individual photographer possesses. This is why I threw out the challenge for people to take their own reflection shots, I’d like to see them and see how your creativity is displayed. All that being said even though this week’s picture wasn’t too technical I can still briefly talk about the picture I was originally going to take and some of the lessons I learned.
Original Picture Idea
Above is picture from the position I originally planned to take a this week’s photograph from. As you can see it took a portrait composition to capture the tree and the crowd in one frame. I could have taken two pictures and stitched them together via photoshop (definitely a future blog subject) but I didn’t know if that would work well with a long exposure. I also could have tried to get my long exposure from this portrait composition but I wasn’t happy with the way the stores were getting cut off. There was also one more issue with my long exposure idea that I didn’t learn until after the fact. Dealing with a crowd of this density doesn’t really provide the look I was going for when using a long exposure. Of the pictures I did take via long exposure, I learned that at 30 seconds the crowd disappeared and just blotched out the area they were standing in. Even when I took shorter exposures (4-10 seconds) the crowd’s density still didn’t allow you to clearly see these were people I was photographing. Below is an example of a 5 second exposure . This concept of using long exposures to capture the movement of people is something I’m going to experiment with more in the future so stay tuned.
Picture info: ISO 100, 35mm, f/9, 30sec, 0.6 neutral density filter, -2 exposure stops
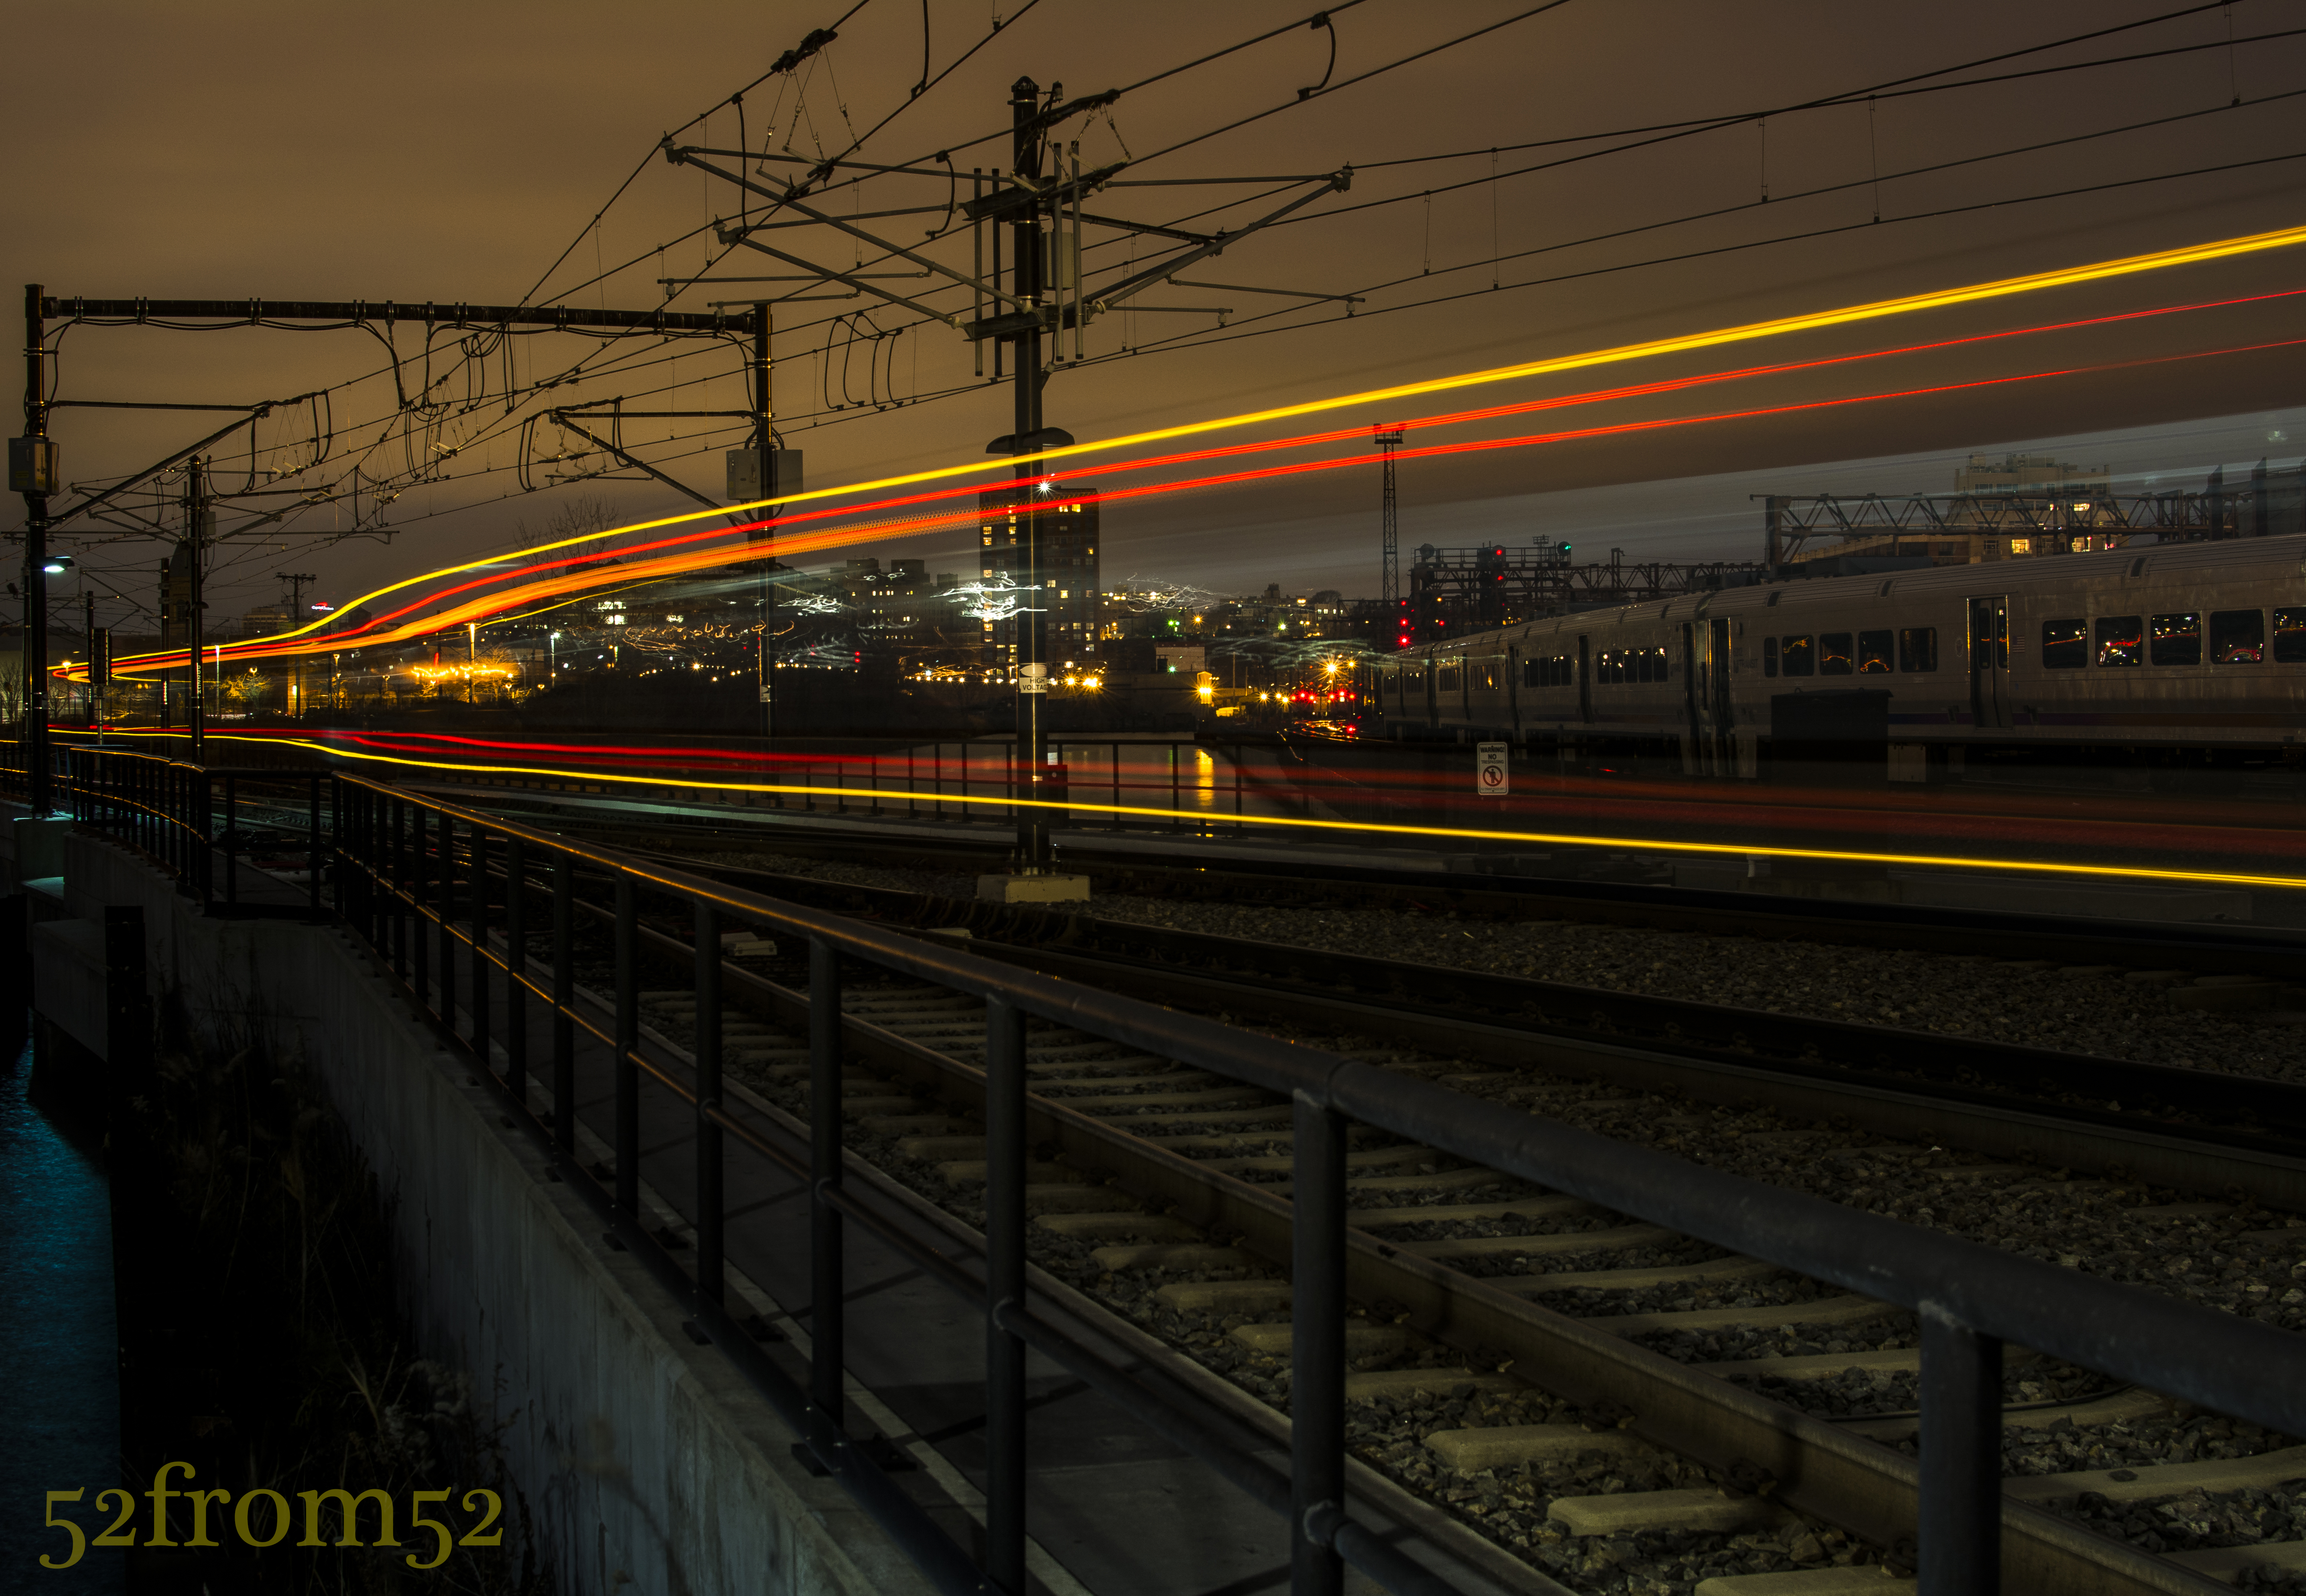
Week 17 (11/25/2013 – 12/1/2013): Hoboken Light Rail Station
Picture taken on 11/30/2013 at 5:12 PM
Picture description:
Opportunities come and go, and sometimes you only have one shot to take advantage of them. That was absolutely the case for my week 17 picture. This week I picked up some neutral density filters (I’ll explain what these are in the concepts section) which I wanted to experiment with. Coming into the week my goal was to venture into the city to get some kind of street shot/long exposure. When it came time to go out and shoot on Saturday I was a bit demotivated due to two things. First it was really cold outside, and the second reason was because of the conflicting online posts about wether or not it’s okay to use a tripod in New York City. Since I wasn’t in the mood to argue my way out of a ticket I decided to play it safe and set out for an area in Hoboken that I have been meaning to photograph for a while.
The location I chose for this week’s shoot was a walkway between the Hoboken train station and Newport, Jersey City. I’ve seen some really nice pictures on Flickr that were taken from this seemingly hidden location. Many of the pictures featured old dock posts of a broken down pier with either the Jersey City or New York city skylines in the background. With a couple clear pictures in mind I set up my tripod and started taking some long exposures.
After spending about 2 hours taking long exposures and chasing lots of seagulls I decided to call it a night. As I started to pack up my gear I spotted a potential picture which would feature the light-rail train as it left the station. I figured why not give it a shot? I quickly set up my tripod on the edge of the tracks in preparation for the next train. The trains were coming about every 30 minutes, so unless I wanted to wait out in the cold for the next one, I’d have only one shot at capturing a good picture. From the distance I heard the bell sound announcing the train’s pending departure, I quickly clicked my camera’s shutter release, sat back and watched as the light-rail moved in and out of the frame. After what seemed like an eternity, but really was only 30 seconds, my camera finished taking the picture and I eagerly awaited seeing what it captured. Once the preview came up on the screen I immediately knew this was the picture I had to feature in this week’s post.
Photography concepts:
This is the second “long exposure” post that I’ve done, the first being my week 6 picture “Night Light.” Since week 6 I’ve learned some new tricks for taking and editing long exposure pictures. As I am becoming better from past lessons, I’m able to add more moving parts and that’s what spurred on this week’s experiment with neutral density filters.
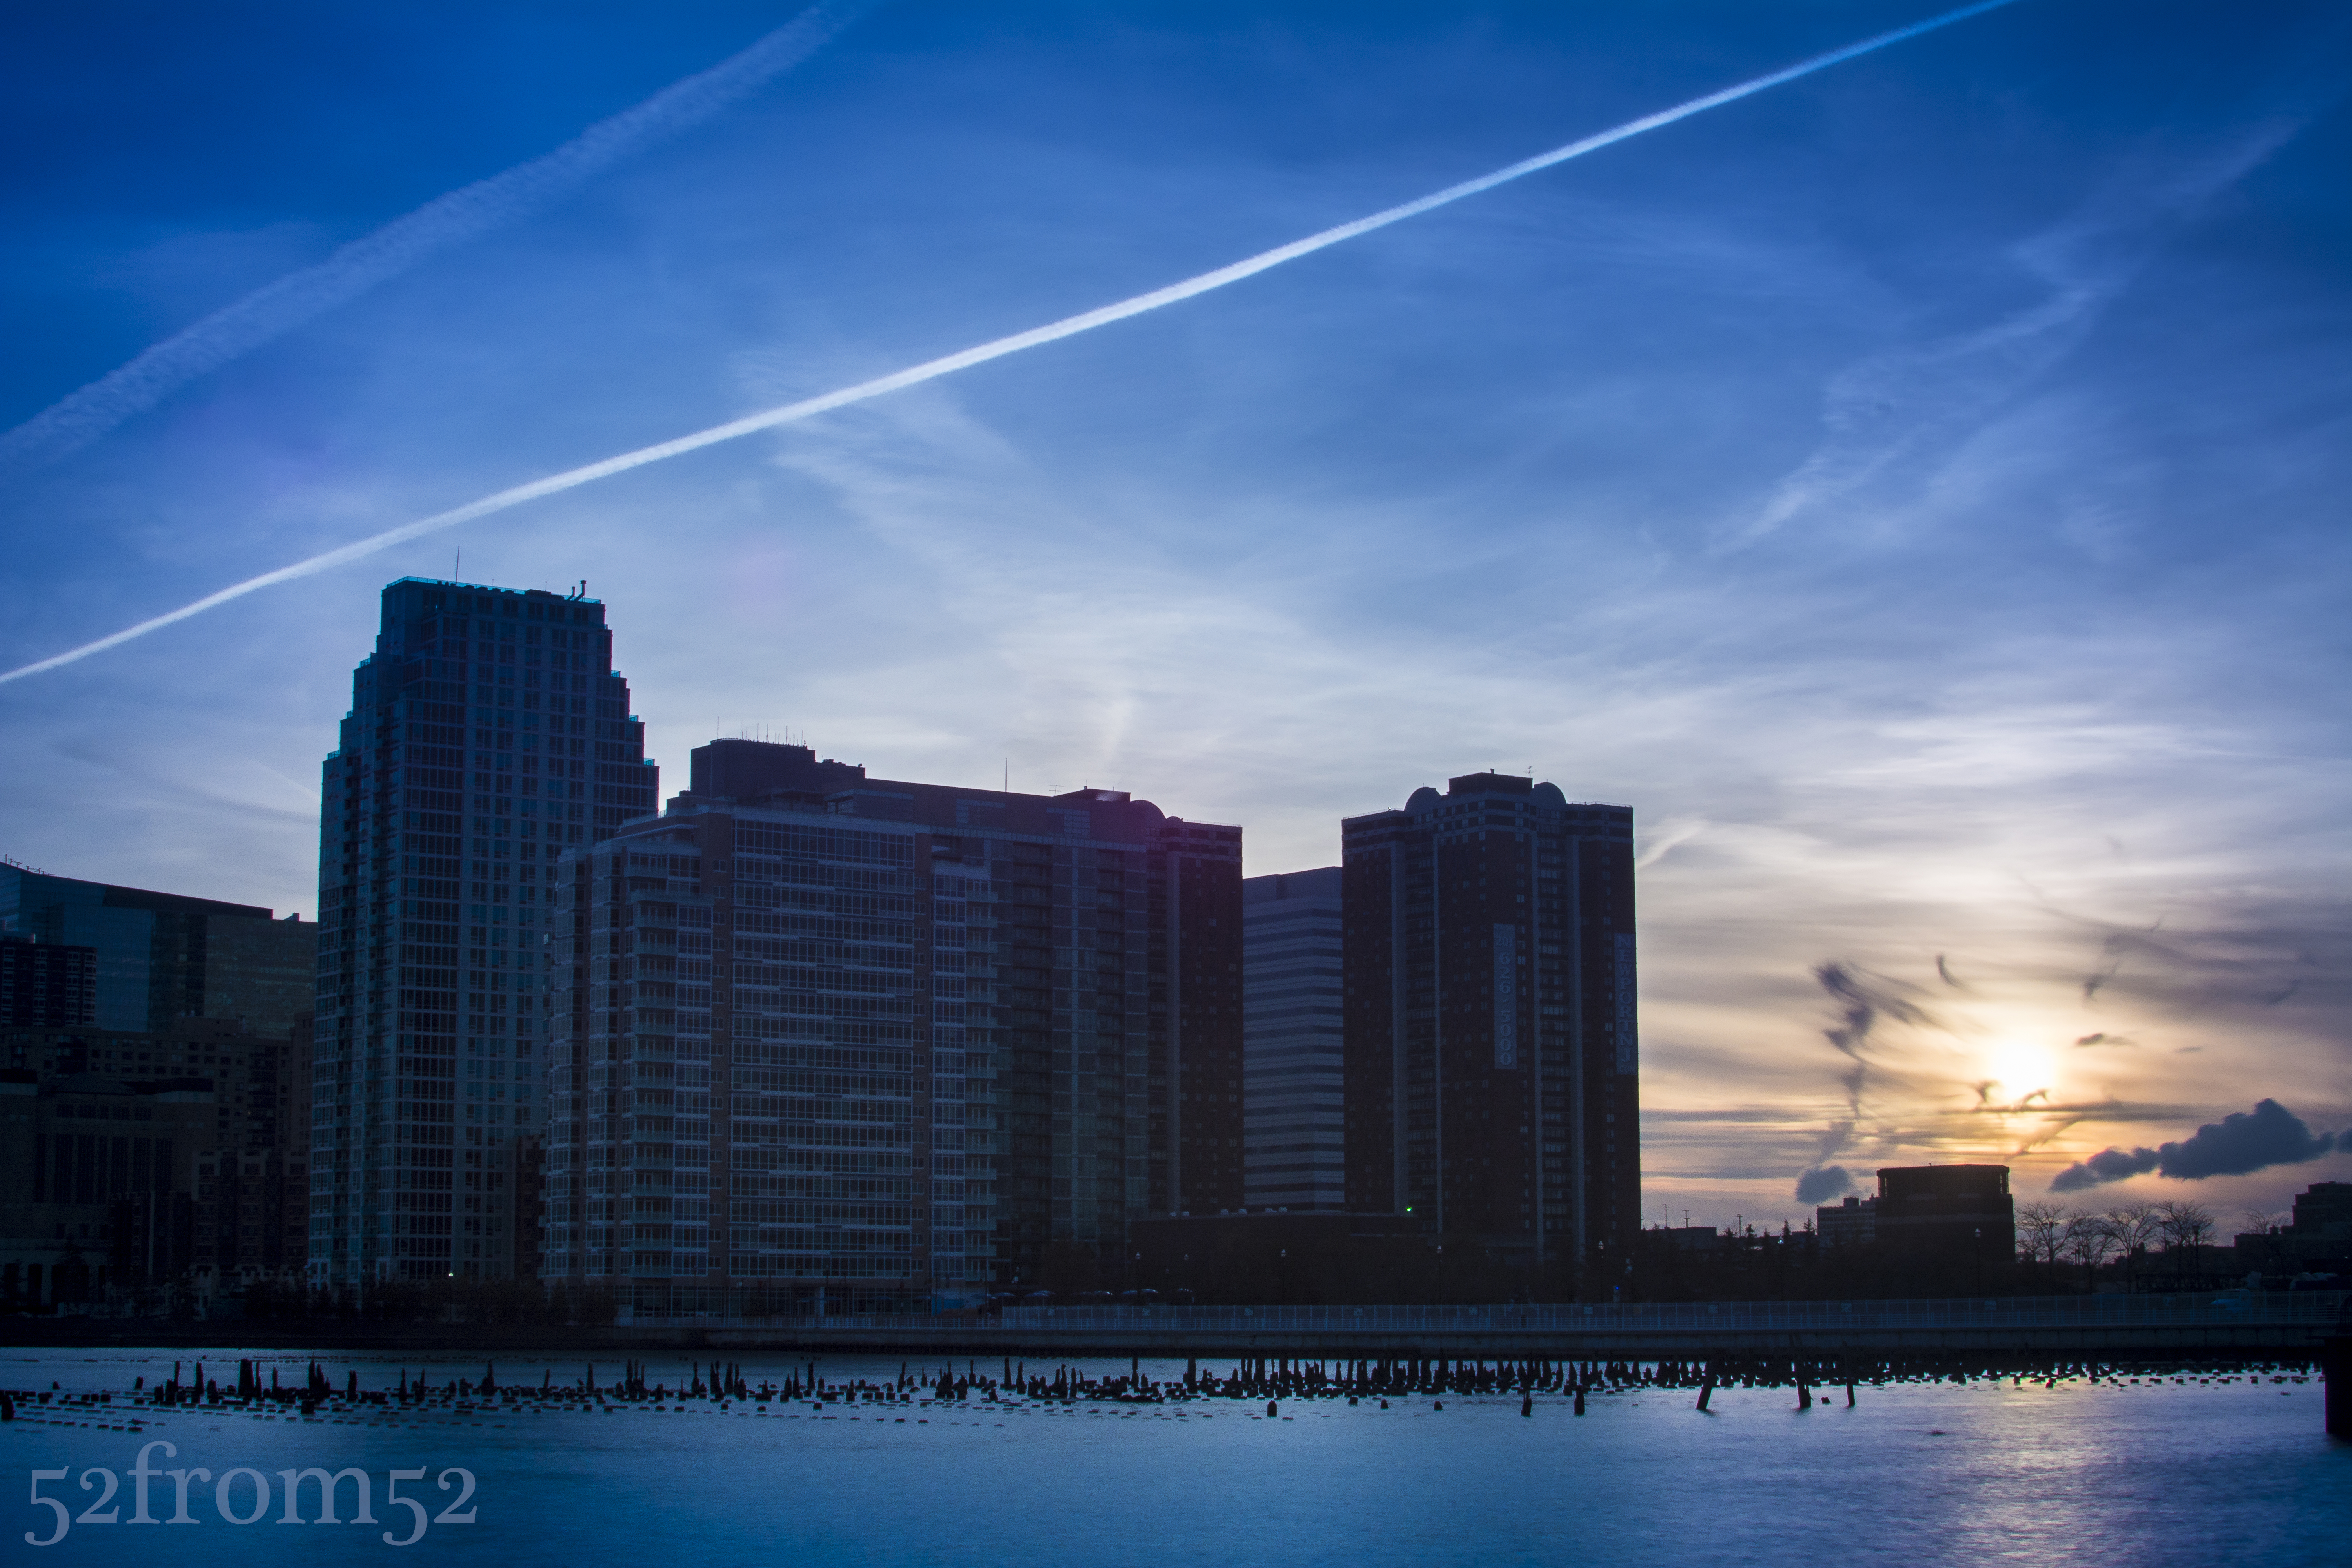
Neutral density filters, commonly called ND filters are pieces of glass that come in many shapes and sizes but ultimately block light from hitting your camera’s sensor. As I mentioned in this weeks description, my goal for the week was to get a long exposure but you don’t need an ND filter to do this. Although ND filter’s are not required for all long exposures, they are if you want to take a long exposure during the day or anytime there are bright light sources. With the use of ND filters you’re able to use settings that would usually not be feasible in certain conditions or due to other selected camera settings such as wide apertures. Usually when you use slow shutter speeds (20-30 second) you have to shrink your aperture to f/13-f/20 to limit the amount of light. f/13 isn’t bad but once you start approaching f/20 pictures lose their crispness, this is where the ND filters come in handy. Take the below picture for example. The sun was setting behind the buildings and flooding my camera’s sensor with light. Given the amount of light, and having already maxed out at the smallest aperture my lens can shoot with (f/20), I would usually only be able to use a fast shutter. With the use of the ND filters I was able to shoot with a 4 second shutter speed. For the below picture I used a combination of ND filters which totaled out at a 2.7 density rating, which is equivalent to -9 exposure stops.
Now you’re probably asking why would you want to do a long exposure for a picture such as this, and what are the effects? One reason/effect is the smooth and very reflective water. Notice how the water has begun to almost look like ice in the above picture. The smoothing effect is even more prevalent in the below picture where I used a 30 second exposure and a 0.6 ND filter.
All this being said, how did the ND filter help me with this week’s picture? In order for me to capture the train’s full movement from right to left I needed to use a 30 second shutter speed. As mentioned in previous blogs, night pictures look better when under exposed but even with dropping the exposure down 2 stops I still wasn’t able to hit the 30 second shutter speed mark. Add in the fact that once the train passed by my camera’s sensor was going to get a burst of light it was very important to somehow compensate. I didn’t want to shoot with too small of an aperture so here is where the ND filter came in. I used a 0.6 ND filter which is equivalent to -2 exposure stops, this allowed me to maintain a good night exposure, use an aperture of f/9 and hit my 30 second shutter speed. The result of the 30 second exposure was the very vivid light trail that’s featured in this week’s picture. This was my first time experimenting with the ND filters so expect some more pictures and feedback in some coming blogs. For more info on ND filters check out the below link.