Bloomfield in Bloom

Picture info: ISO 250, 36mm, f/11, 1/80sec

Picture info: ISO 250, 36mm, f/11, 1/80sec

Week 39 (4/28/2014 -5/4/2014): 10th & Bloomfield, Hoboken

Picture taken on 5/3/2014 at 9:13 AM

Photograph description

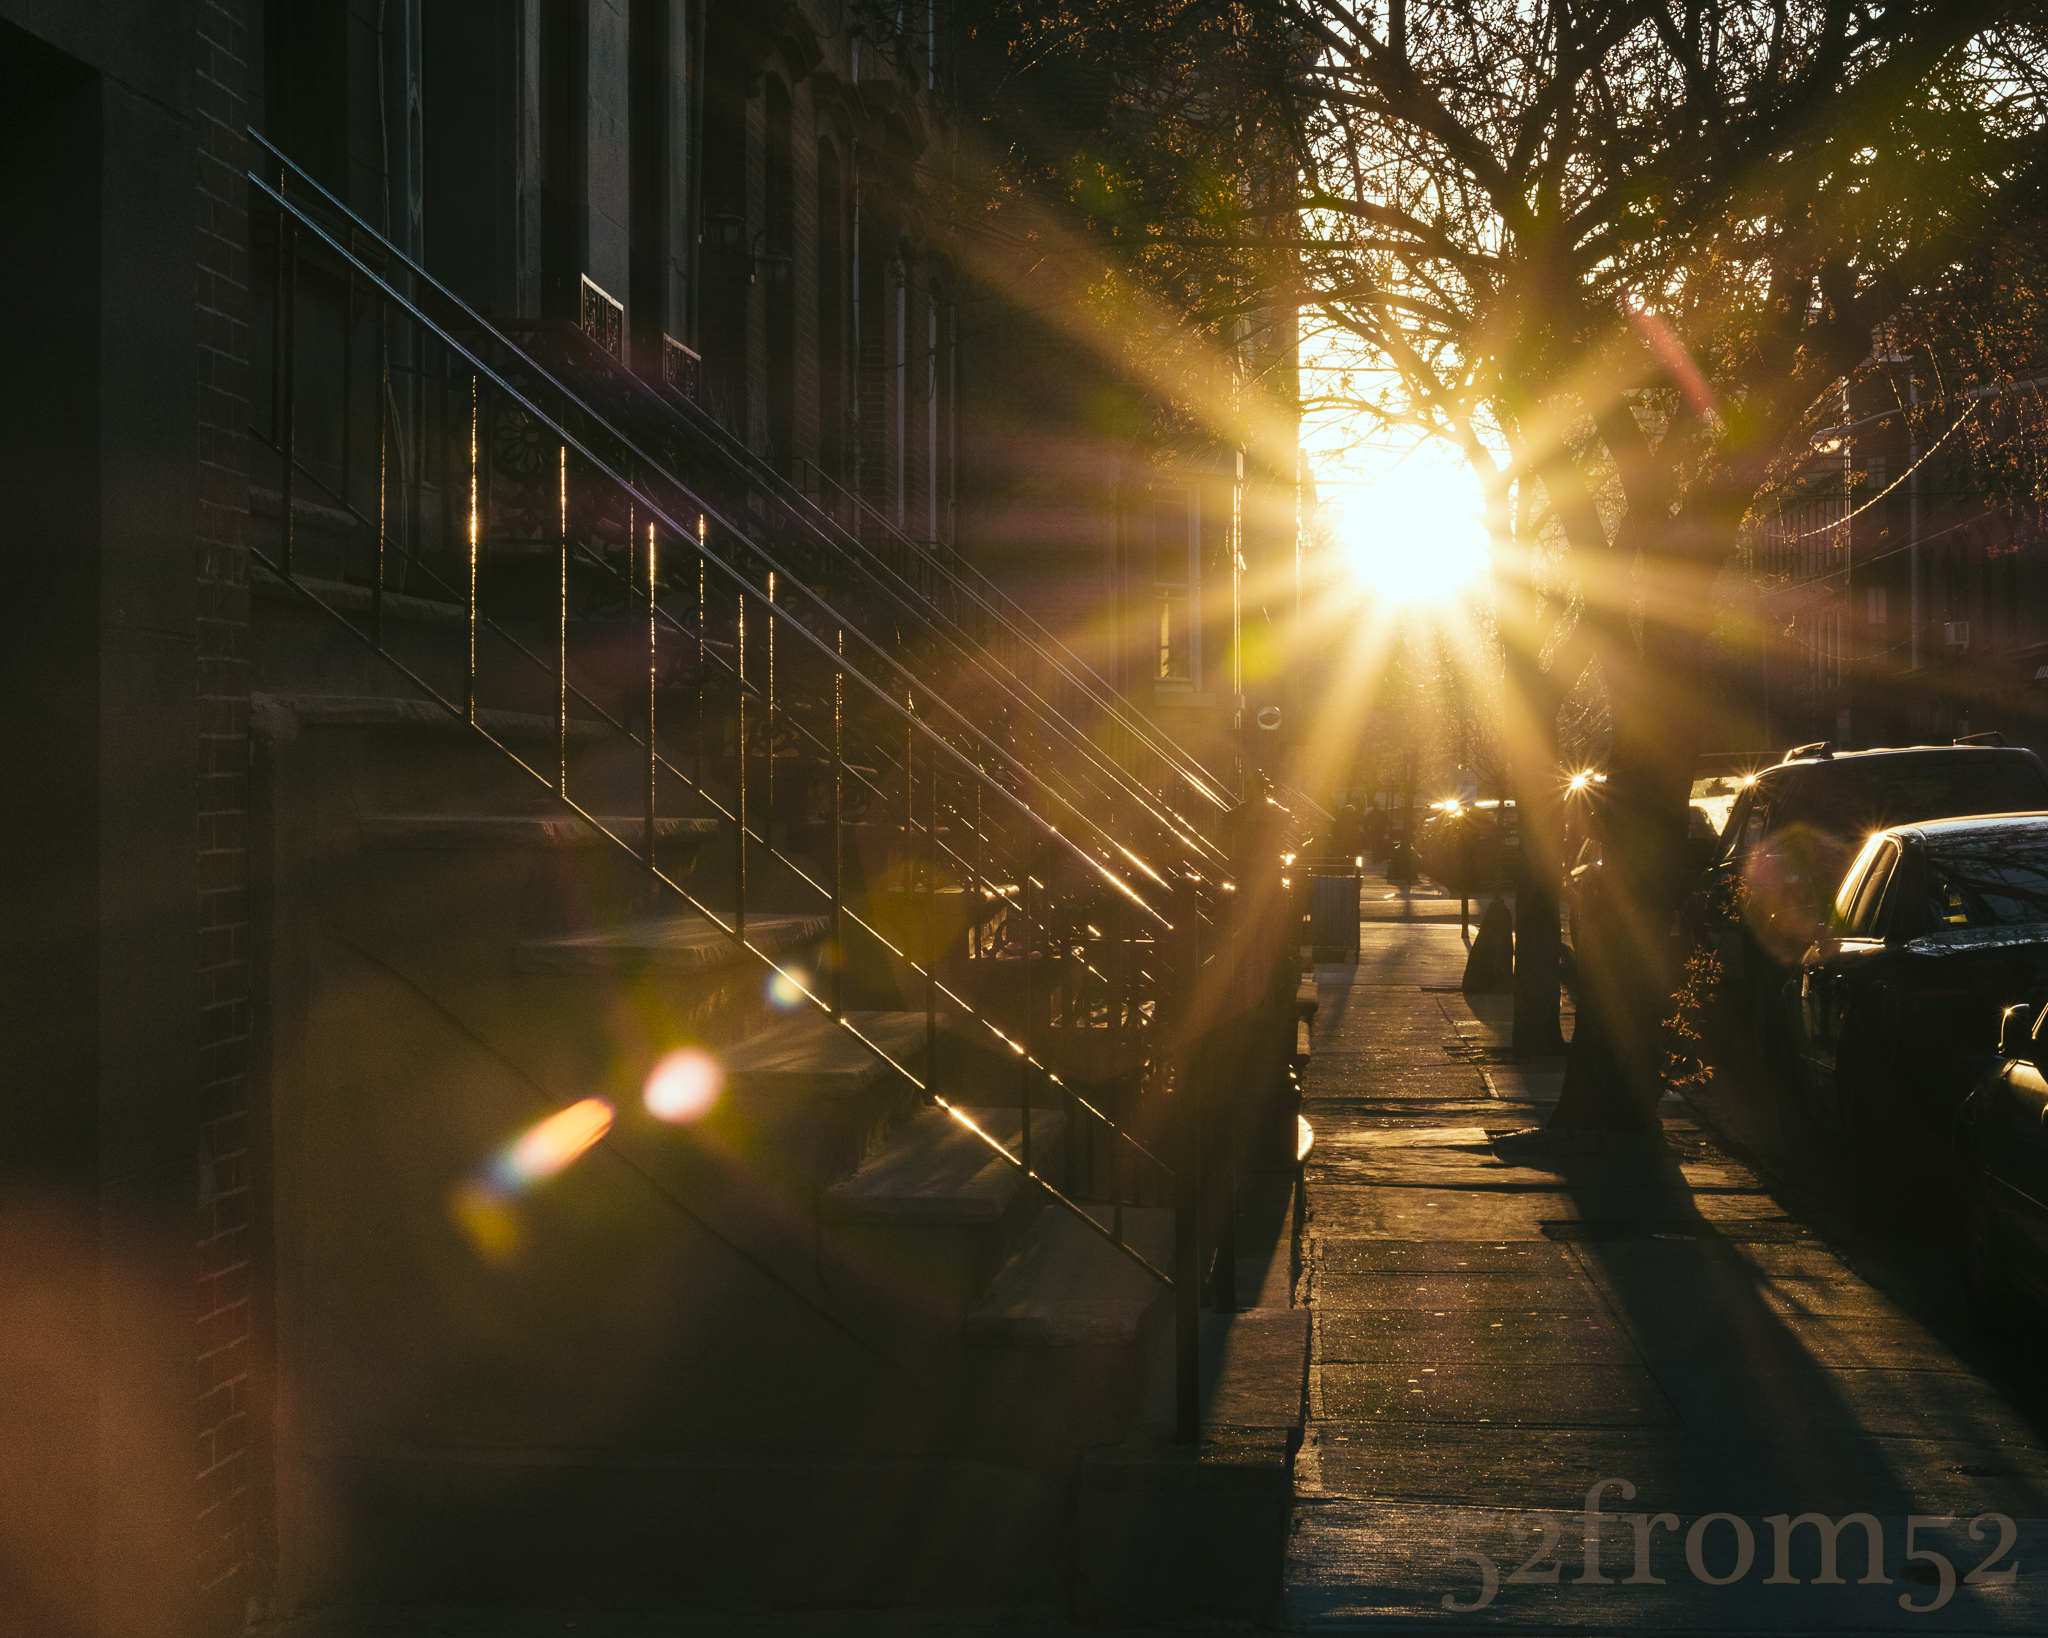
Last week I mentioned that one of the biggest challenges for my Hoboken streets project would be to taking pictures that don’t in some way involve the sun .  Naturally I’m drawn towards taking pictures that utilize some kind of light source to create contrast.  In order to keep improving my photography, it’s important that I constantly challenge myself to go outside of my comfort zone.  It’s as the saying goes, “variety is the spice of life”

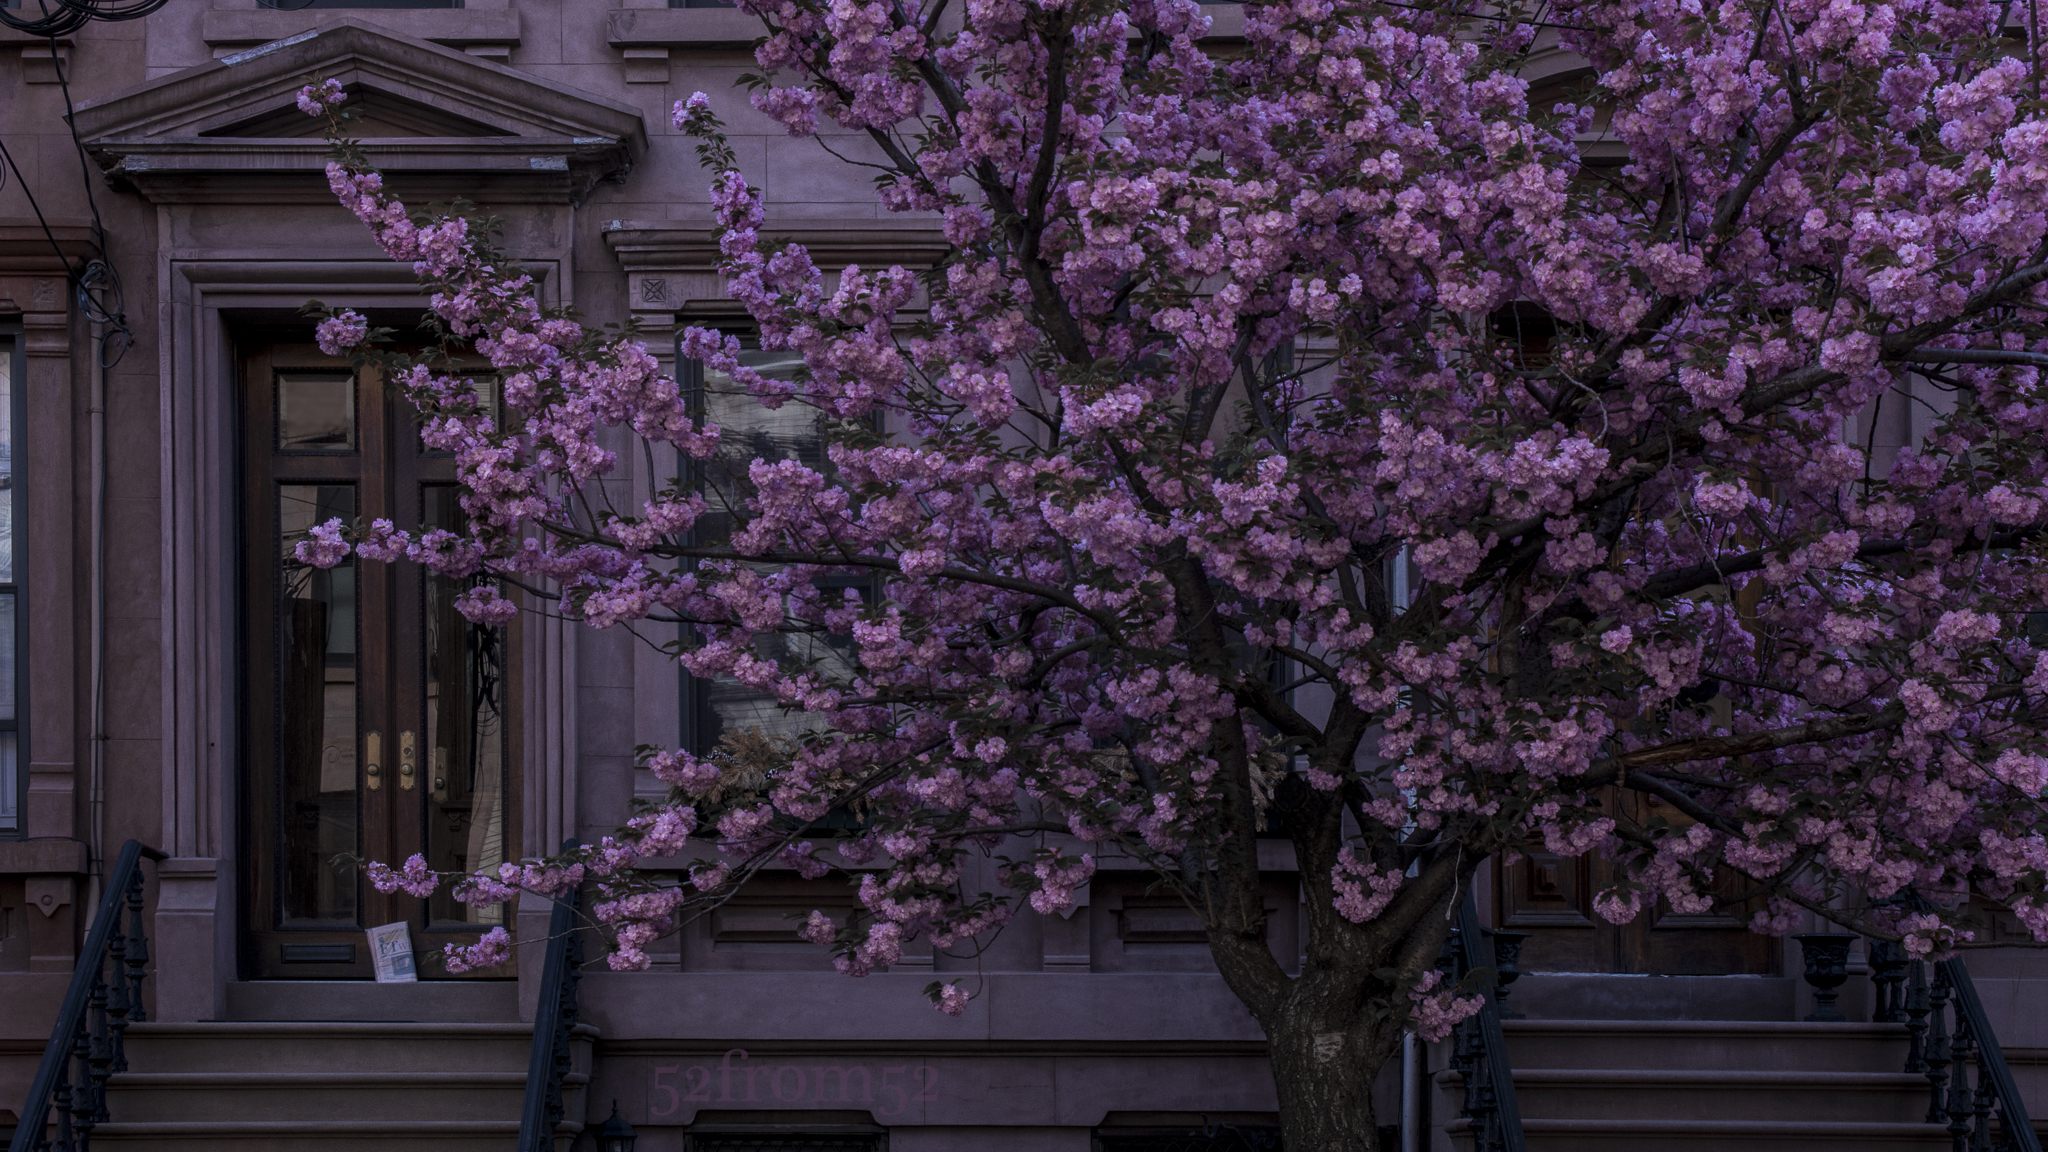
This week’s picture was taken while I was on my Saturday morning bagel run…for those of you that don’t know, I’m a bagel addict.  Moving on though. It was still early enough that the sun wasn’t high in the sky but it was still filling the day with plenty of natural light.  Although my usual Hoboken bagel spot is on Washington street, I decided to walk down Bloomfield instead so I could photograph the cherry blossoms that line the street.  It only seemed fitting that bloomfield would be filled with so many blooming trees.  Early into my trip I came across an apartment building that had a pinkish tint which acted as the perfect backdrop for the cherry blossom.  I shuffled around for a few minutes trying to find the best angle to fit everything in frame at ~35mm.  Eventually I found the spot and the here you have it!

Photography concepts:

One of the advantages of taking pictures with even light is that it’s easier to set your exposure for the entire scene.  When you include a bright light source in your picture (e.g. the sun) you have to worry about some or all of the image getting blown out (overexposed) or underexposed.  I usually worry more about overexposing the image because it’s harder to recover overexposed areas, than underexposed areas.  Since this week’s picture had no harsh light source setting my exposure was a breeze!

The hardest part of shooting this picture was capturing what I considered to be the good part of the scene at ~35mm.  The reason I’m saying approximately (~) is because I’ve been shooting more and more with my 17-50mm Sigma lens.  Yes 35mm is within the range of my lens, but for some reason the lens never seems to settle on 35mm exactly.  Any picture I take at 35mm usually reads as 34mm or 36mm when I review the image.  I’m not sure why this happens, but it’s not really a big deal.

If there is one thing I learned this week it’s evenly lit pictures are relatively easy to shoot, if you can find interesting ones.  The last part of that statement is the key, “if you can find interesting ones.”  My usual move in the absence of contrasting light is to find a unique angle or move in close and use a wide aperture to tap into a depth of field element.  I did neither this week and that again plays into my desire to shoot more variety.  Variety should be everyone’s goal.  Flip through the pictures on your computer, facebook or instagram and I bet you’ll see a trend.  Hopefully the trend isn’t selfies, but even if it is, this week try to shoot something new.  Find something you don’t usually photograph and get to it!

Beaming

Picture info: ISO 250, 36mm, f/14, 1/100 second

Picture info: ISO 250, 36mm, f/14, 1/100 second

Week 38 (4/21/2014 -4/27/2014): 9th & Park, Hoboken

Picture taken on 4/22/2014 at 6:40 PM

Photograph description:

If you have ever scrolled through my instagram gallery, you probably noticed that I enjoy taking pictures featuring the sun.  When posting to Instagram, the sun is a little bit of a photo hack. What do I mean by photo hack?  It’s been my experience that people tend to give more likes to pictures that have nice contrast, especially when that contrast is created from the sun’s beaming light.  Featuring the sun might be a bit of a cheat, but there still is an art to it.  I’ll give some tips on how I feature the sun with my phone and camera in the next section.

This week’s picture was shot while I was out hunting down material for my “Hoboken Streets” project.  The biggest challenge of the project will be to find unique ways to photograph the “streets,” without featuring the sun in each picture.  On top of avoiding too many sun shots I’m also going to avoid taking any of the pictures along the waterfront.  Yes the waterfront is still in Hoboken, but I’d like this project to feature more of the interior sections of Hoboken.  If you have any suggestions for locations shoot me an email.  This project is all about exploring the streets so the more unique the better!

Photography Concepts:

The main thing you have to think about when you’re taking pictures directly into the sun is setting the right exposure.  When you’re shooting the sun with your phone your exposure is typically locked to wherever your focus point is.  My recommendation is to set your pictures exposure on a darker area.  When you select a darker area your phone’s sensor will adjust the exposure to make the dark area evenly exposed.  With the darker area exposed properly the sun should be overexposed and appear to be very bright.  If you want to apply some kind of HDR setting to your picture in post, then meter the pictures exposure by focusing on the sun.  This will make your image look very dark but the HDR will bring back most of the detail.  I recommend going with the first exposure setup, overexposing the sun makes it look better.

Setting your exposure is obviously different with a DSLR and is done by making adjustments to your ISO, Shutter speed and aperture.  When shooting the sun with a DSLR your ISO should be as low as it can go, which is typically 100.  Choose your aperture based on how you want the sun to look in the picture.  If you use an aperture of f/22 the sun will look almost like a star with very sharply pointed flares.  The wider the aperture the softer the flares will become.  This week’s picture was shot at f/14 which is a good middle ground.  My beams (flares) have nice lines that fade into the picture smoothly.

Selecting your shutterspeed is easy if you’re in aperture priority, because the camera will do it for you.  If you’re shooting in manual, like I did for this picture, then you should start with a quick shutter and work your way down until your image is exposed to your liking.  The reason you should start with a quick shutter is so you don’t burn out your sensor with the sun.  I can only imagine the damage that would be done to your sensor with a 30 second sun exposure….ouch.

Two more quick tips.  One when you’re lining everything up, try to put the sun on either the left or right thirds intersection line.  This not only follows the rule of thirds, it also will make for better sun beams shooting through your picture.  My second tip is to find something like a tree, flower or cloth material that you can backlight with the sun.  Backlighting things that let some light through give your picture some nice texture.  If you backlight something that lets no light through, as in people, walls or buildings you’re left with a nice silhouette.  The choice is up to you, get creative and more importantly have fun!