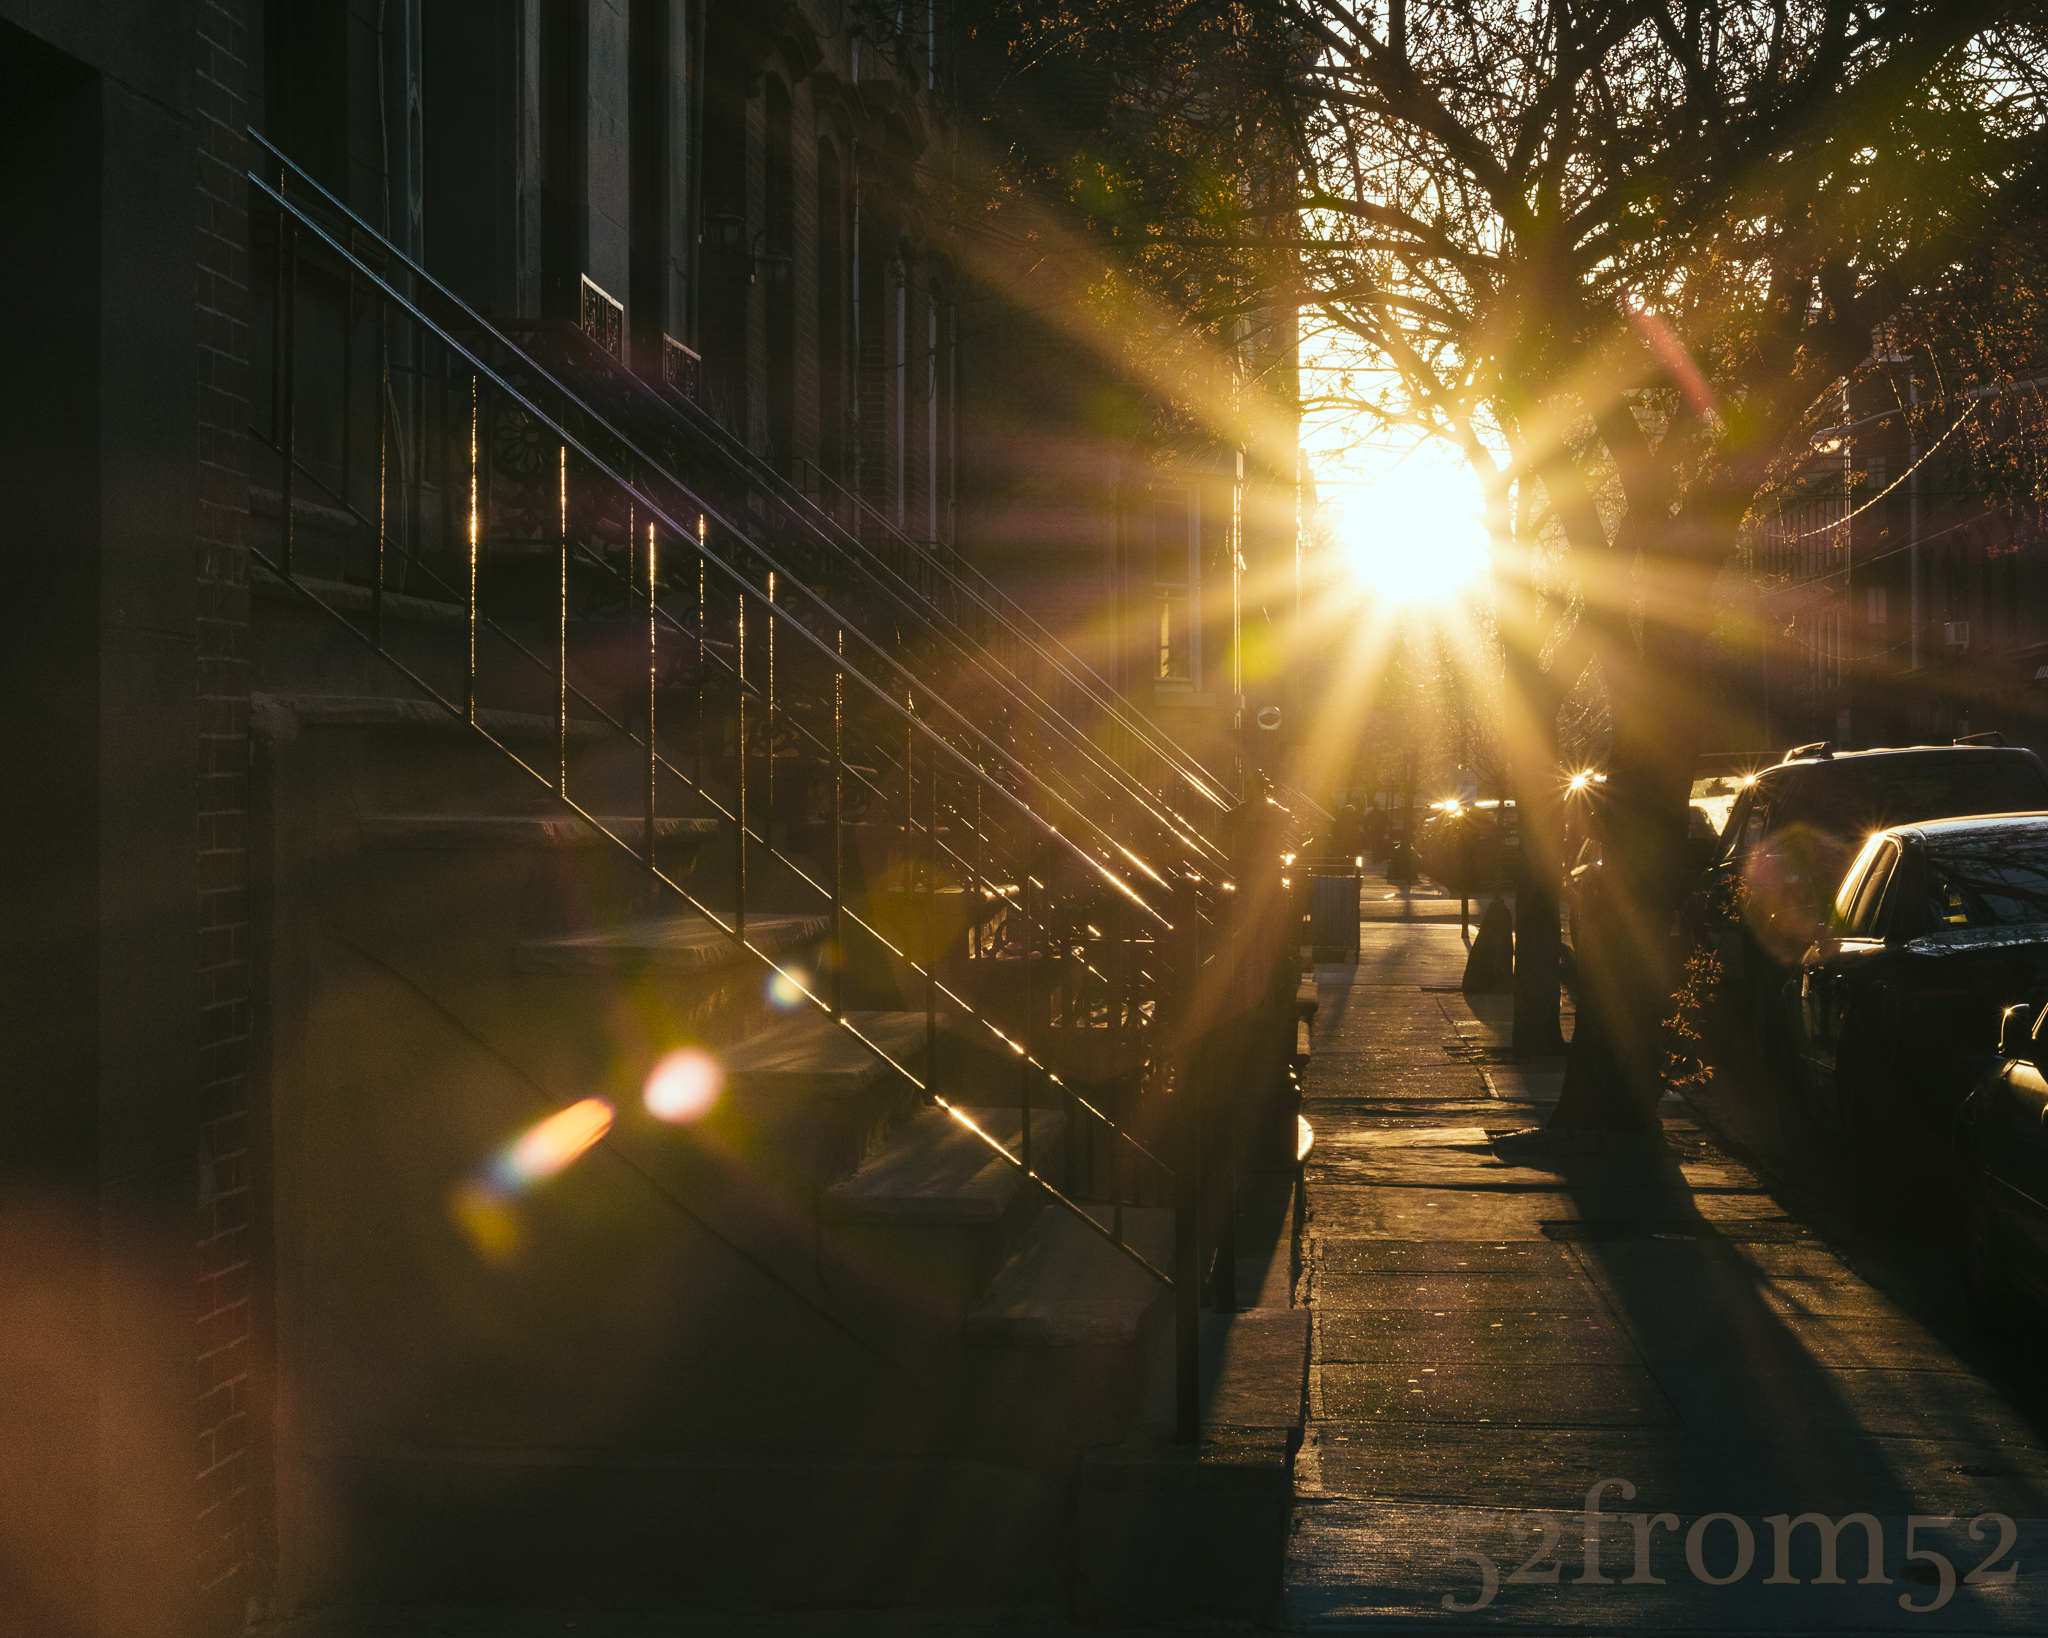
Picture info: ISO 250, 36mm, f/14, 1/100 second
Week 38 (4/21/2014 -4/27/2014): 9th & Park, Hoboken
Picture taken on 4/22/2014 at 6:40 PM
Photograph description:
If you have ever scrolled through my instagram gallery, you probably noticed that I enjoy taking pictures featuring the sun. When posting to Instagram, the sun is a little bit of a photo hack. What do I mean by photo hack? It’s been my experience that people tend to give more likes to pictures that have nice contrast, especially when that contrast is created from the sun’s beaming light. Featuring the sun might be a bit of a cheat, but there still is an art to it. I’ll give some tips on how I feature the sun with my phone and camera in the next section.
This week’s picture was shot while I was out hunting down material for my “Hoboken Streets” project. The biggest challenge of the project will be to find unique ways to photograph the “streets,” without featuring the sun in each picture. On top of avoiding too many sun shots I’m also going to avoid taking any of the pictures along the waterfront. Yes the waterfront is still in Hoboken, but I’d like this project to feature more of the interior sections of Hoboken. If you have any suggestions for locations shoot me an email. This project is all about exploring the streets so the more unique the better!
Photography Concepts:
The main thing you have to think about when you’re taking pictures directly into the sun is setting the right exposure. When you’re shooting the sun with your phone your exposure is typically locked to wherever your focus point is. My recommendation is to set your pictures exposure on a darker area. When you select a darker area your phone’s sensor will adjust the exposure to make the dark area evenly exposed. With the darker area exposed properly the sun should be overexposed and appear to be very bright. If you want to apply some kind of HDR setting to your picture in post, then meter the pictures exposure by focusing on the sun. This will make your image look very dark but the HDR will bring back most of the detail. I recommend going with the first exposure setup, overexposing the sun makes it look better.
Setting your exposure is obviously different with a DSLR and is done by making adjustments to your ISO, Shutter speed and aperture. When shooting the sun with a DSLR your ISO should be as low as it can go, which is typically 100. Choose your aperture based on how you want the sun to look in the picture. If you use an aperture of f/22 the sun will look almost like a star with very sharply pointed flares. The wider the aperture the softer the flares will become. This week’s picture was shot at f/14 which is a good middle ground. My beams (flares) have nice lines that fade into the picture smoothly.
Selecting your shutterspeed is easy if you’re in aperture priority, because the camera will do it for you. If you’re shooting in manual, like I did for this picture, then you should start with a quick shutter and work your way down until your image is exposed to your liking. The reason you should start with a quick shutter is so you don’t burn out your sensor with the sun. I can only imagine the damage that would be done to your sensor with a 30 second sun exposure….ouch.
Two more quick tips. One when you’re lining everything up, try to put the sun on either the left or right thirds intersection line. This not only follows the rule of thirds, it also will make for better sun beams shooting through your picture. My second tip is to find something like a tree, flower or cloth material that you can backlight with the sun. Backlighting things that let some light through give your picture some nice texture. If you backlight something that lets no light through, as in people, walls or buildings you’re left with a nice silhouette. The choice is up to you, get creative and more importantly have fun!
