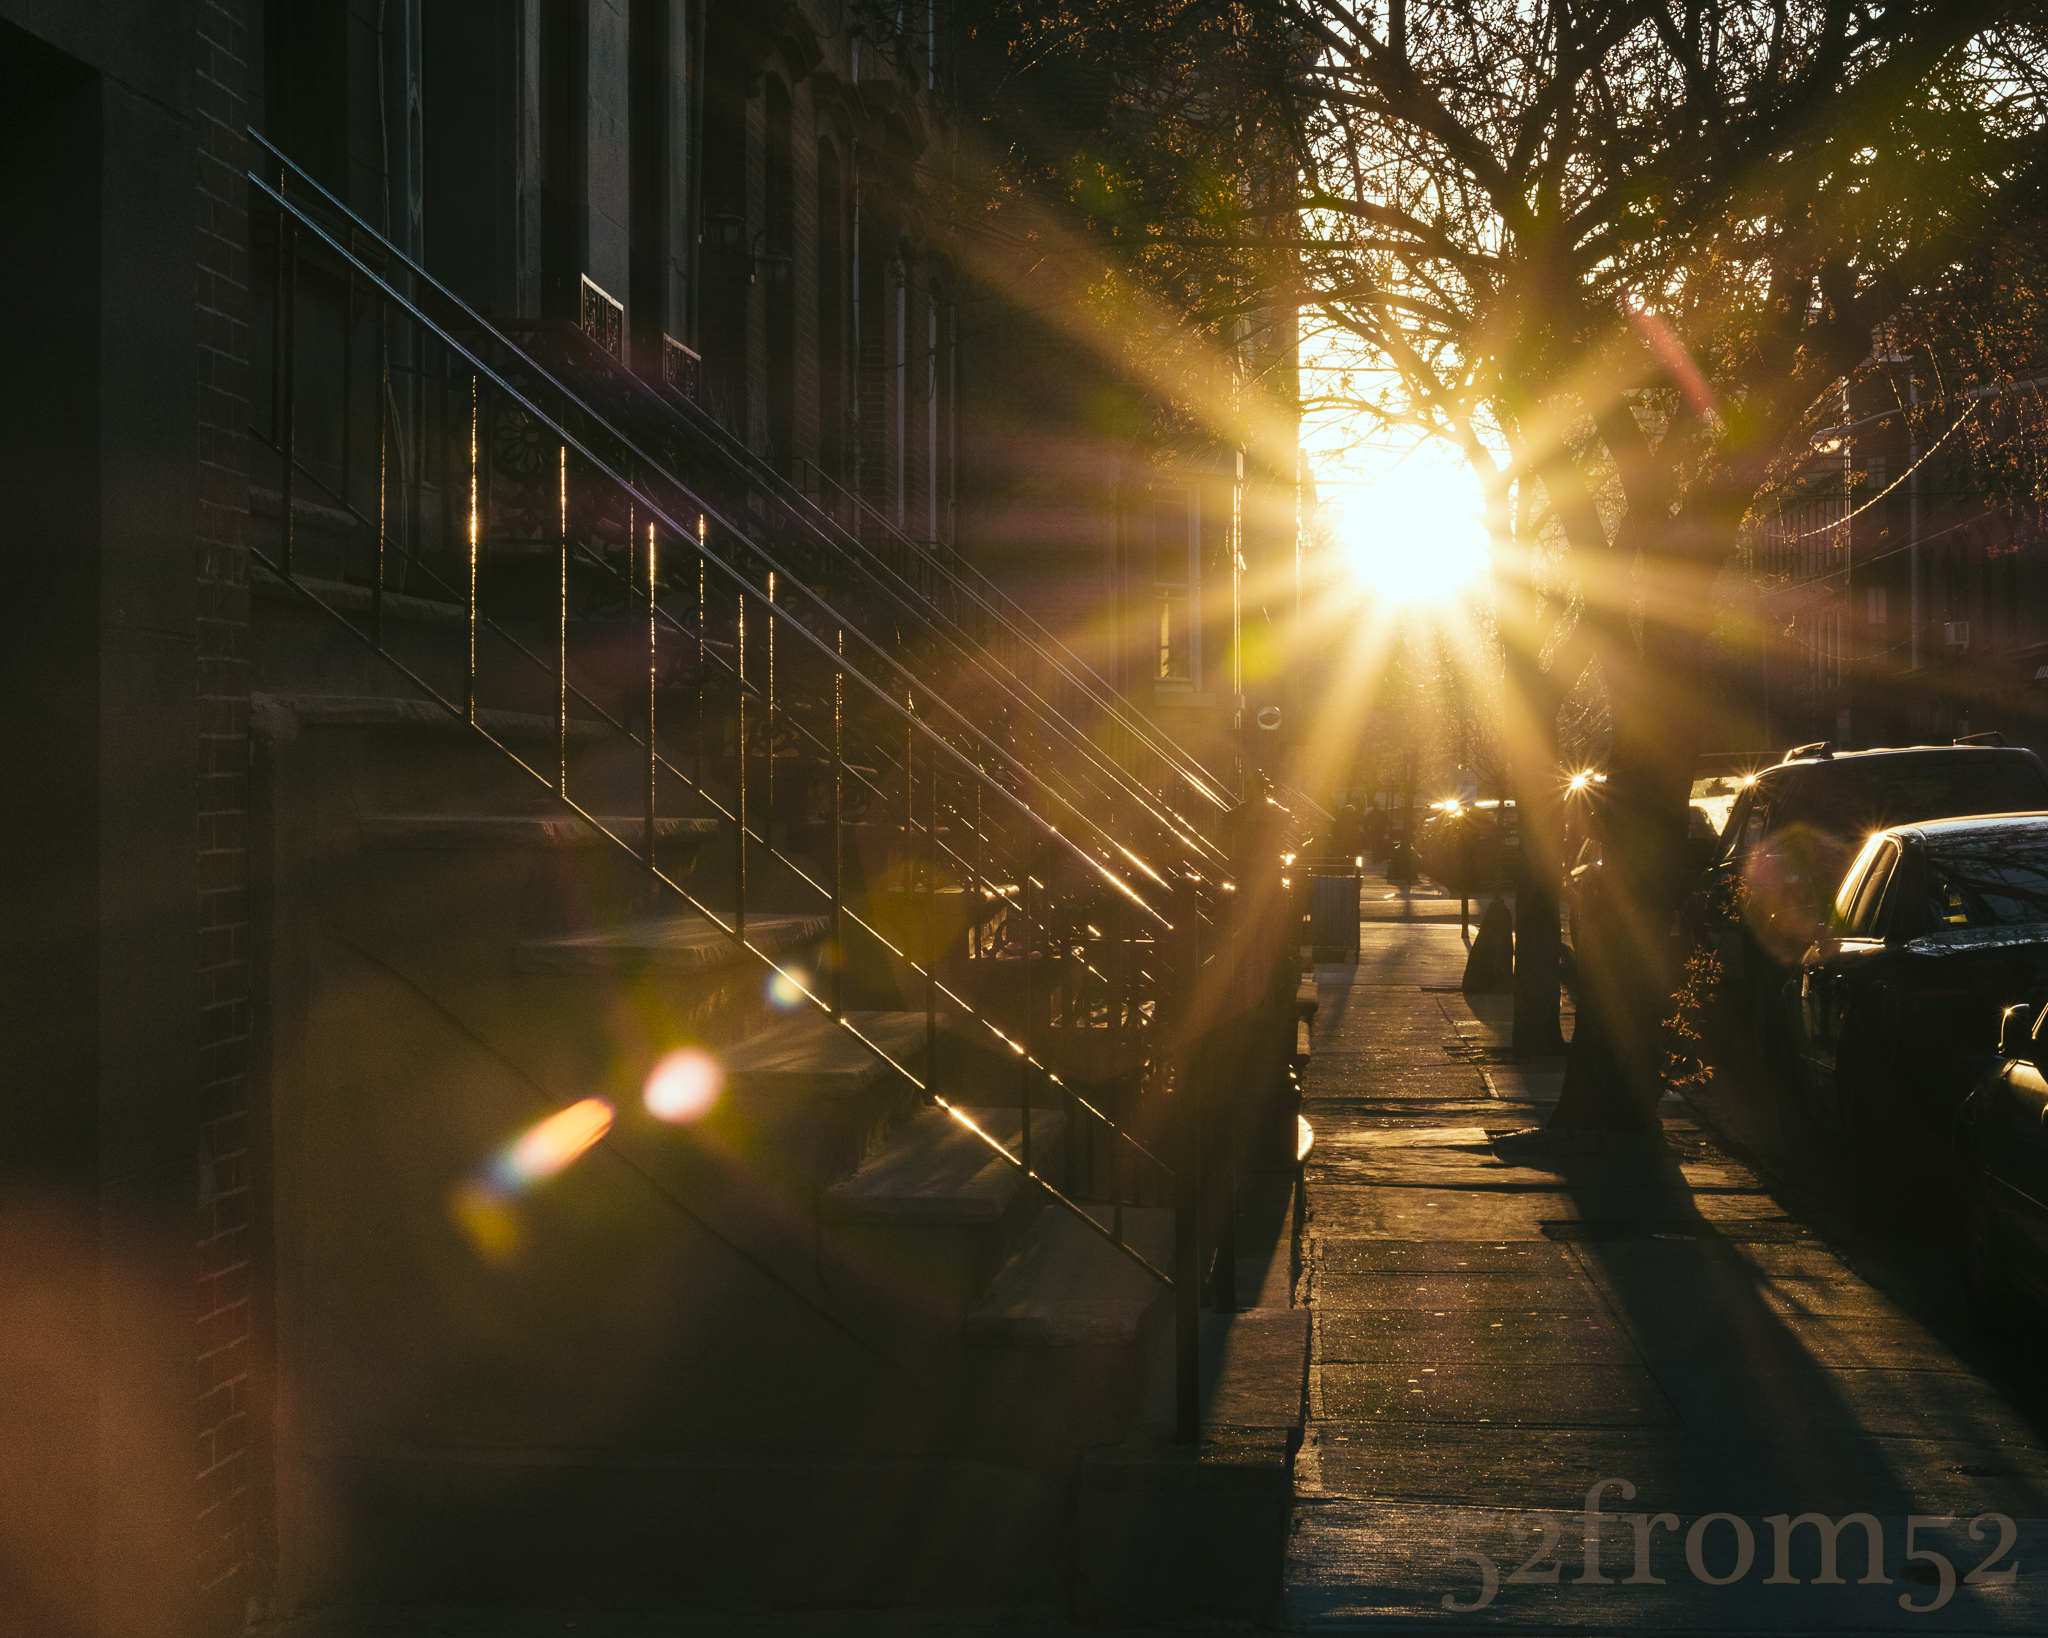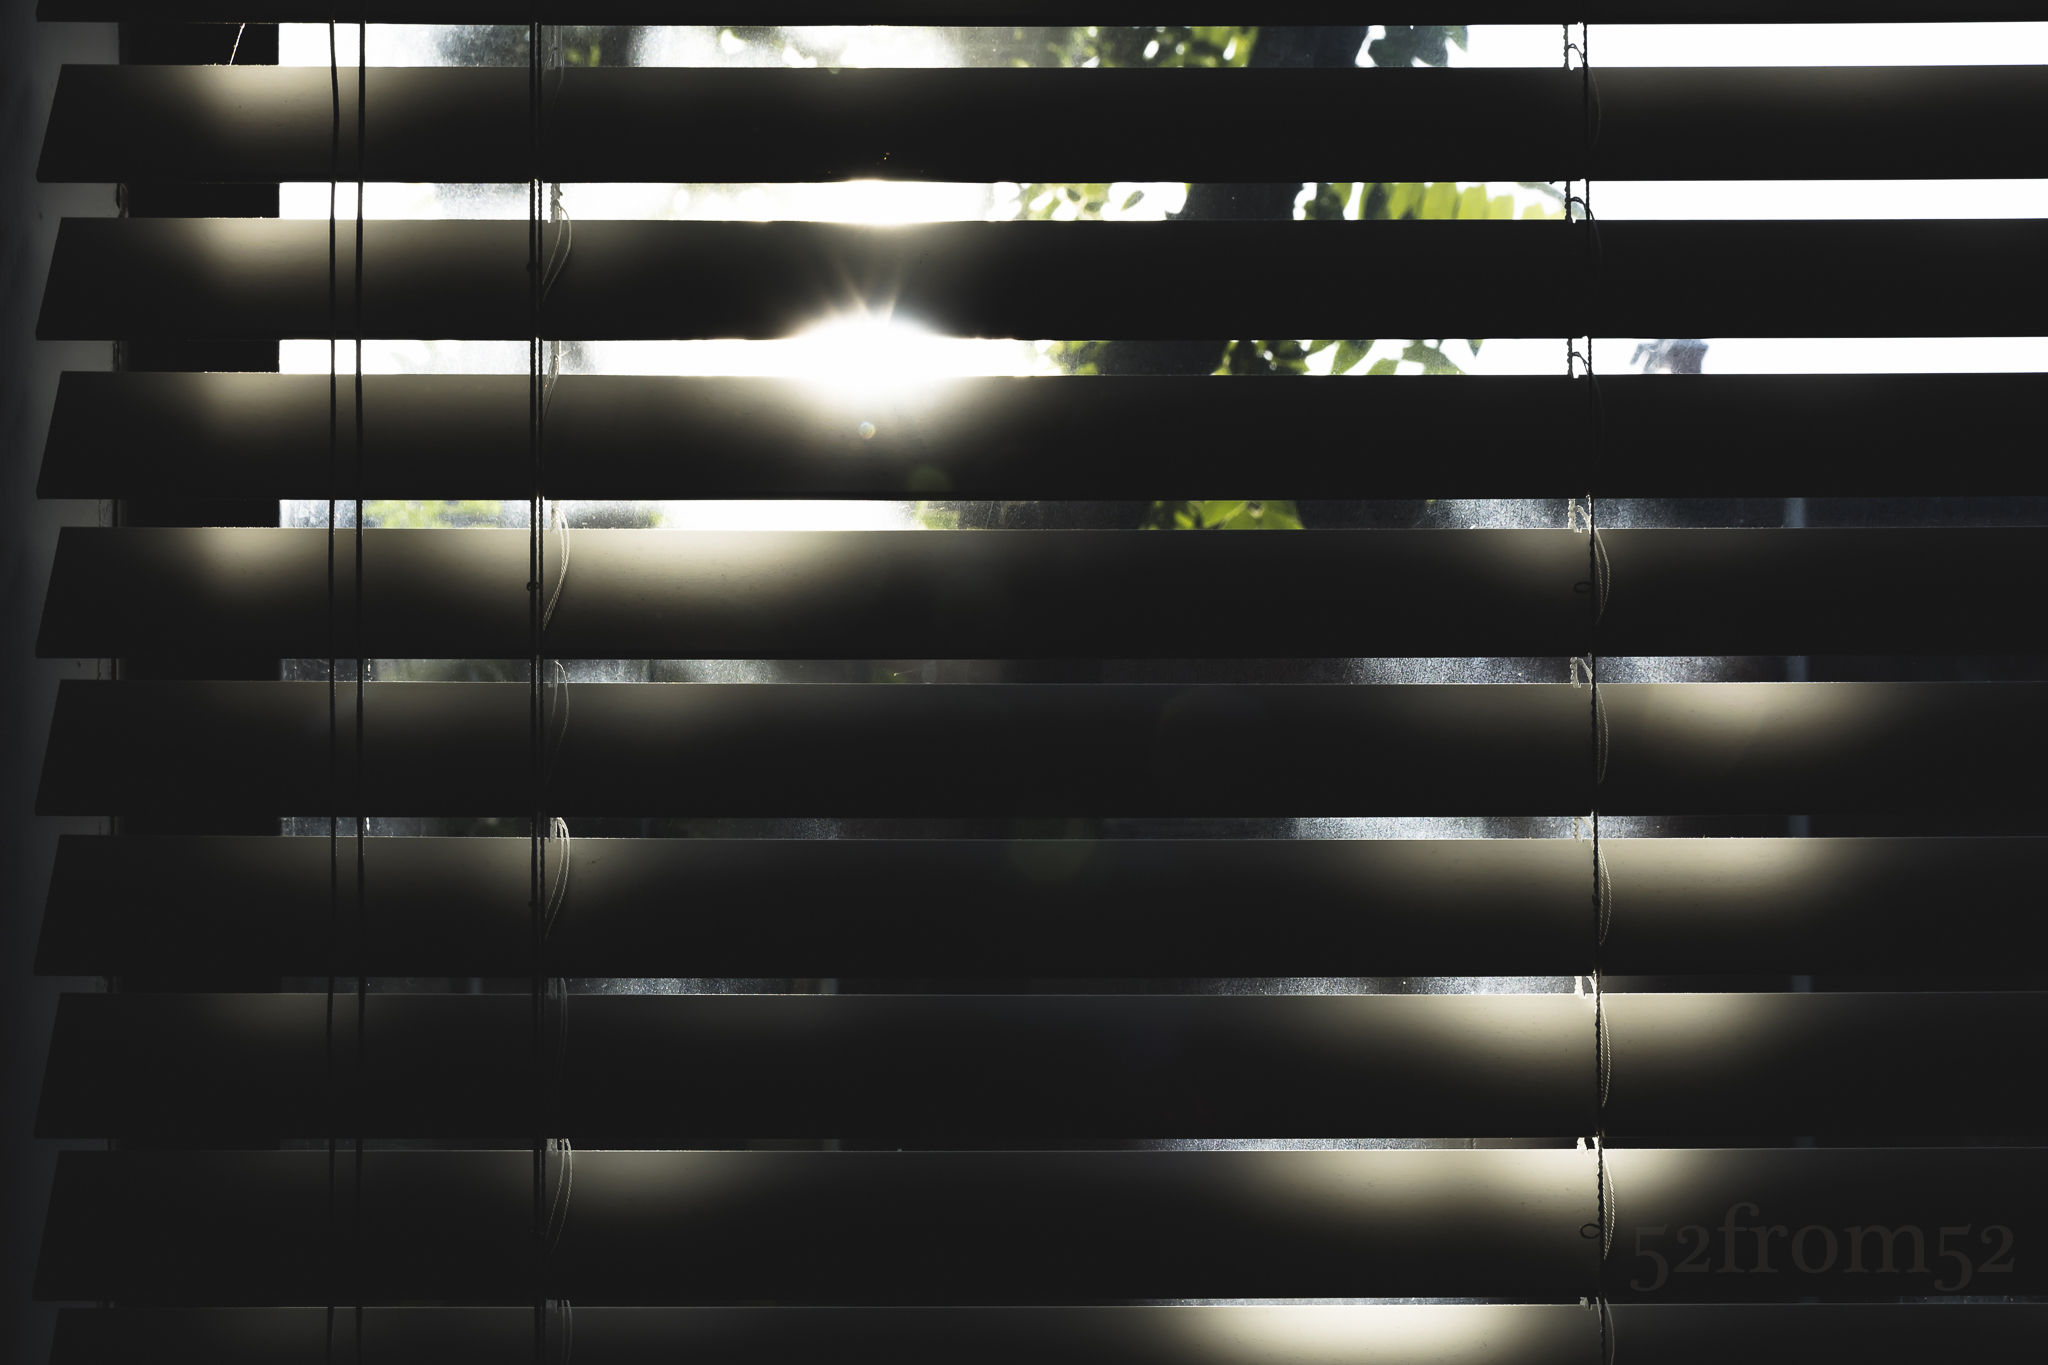
Picture info: ISO 100, 36mm, f/13, 1/60 sec
Week 45 (6/92014 -6/15/2014): My Apartment
Picture taken on 6/15/2014 at 6:05 PM
Photograph description
A recent YouTube video gave me the idea about trying to photograph things in my everyday life. The challenge with photographing everyday life is finding ways to creatively photograph your surroundings. This past sunday, as I laid on my couch post Father’s day brunch thinking about what I could photograph, I realized my subject was literally right in front of me. Right next to the couch in my room is a 6 foot high inset window that captures the most amazing afternoon light. The time and angle of which the sun hits my window varies throughout the year, but during the summer it’s light starts around 5PM and lasts until about 630PM. As the sun moves left to right across the sky it’s light bleeds through the cracks of room’s blinds creating different shades of light minute to minute. Adding to the shading complexity is a tree that sits in my backyard. Depending on the day’s wind, the tree’s leaves are typically swaying creating a constantly shifting wave of shaded patterns. This daily afternoon dance of shade and light has captured my attention countless times and is ultimately why I chose to feature it as this week’s picture.
Photography concepts
Manual, manual, manual, that is how I was able to shoot this week’s image. Shooting in manual over the past few months has unlocked a whole new world when it comes to photographing light. It took a few times of shooting then adjusting to find the exposure that I thought best captured the moment. The tricky part was not moving away from an aperture that captured the sun’s light appropriately. In week’s past I’ve often spoken about what apertures are best for making the sun look a certain way. This week I didn’t wanted the sun to softly peak form the blinds so kept my aperture in the range of f/11-f/15. I’ve found that those apertures produce nice soft sun beams. Anything larger (f/1.8-f/10) starts to make the sun look like one giant blob of light, and anything smaller (f/16+) make the sun’s beam have a sharpness to them. I’ve taken a picture of the sun peaking through my blinds at f/22 and it didn’t create an image that’s true to the way I see it.
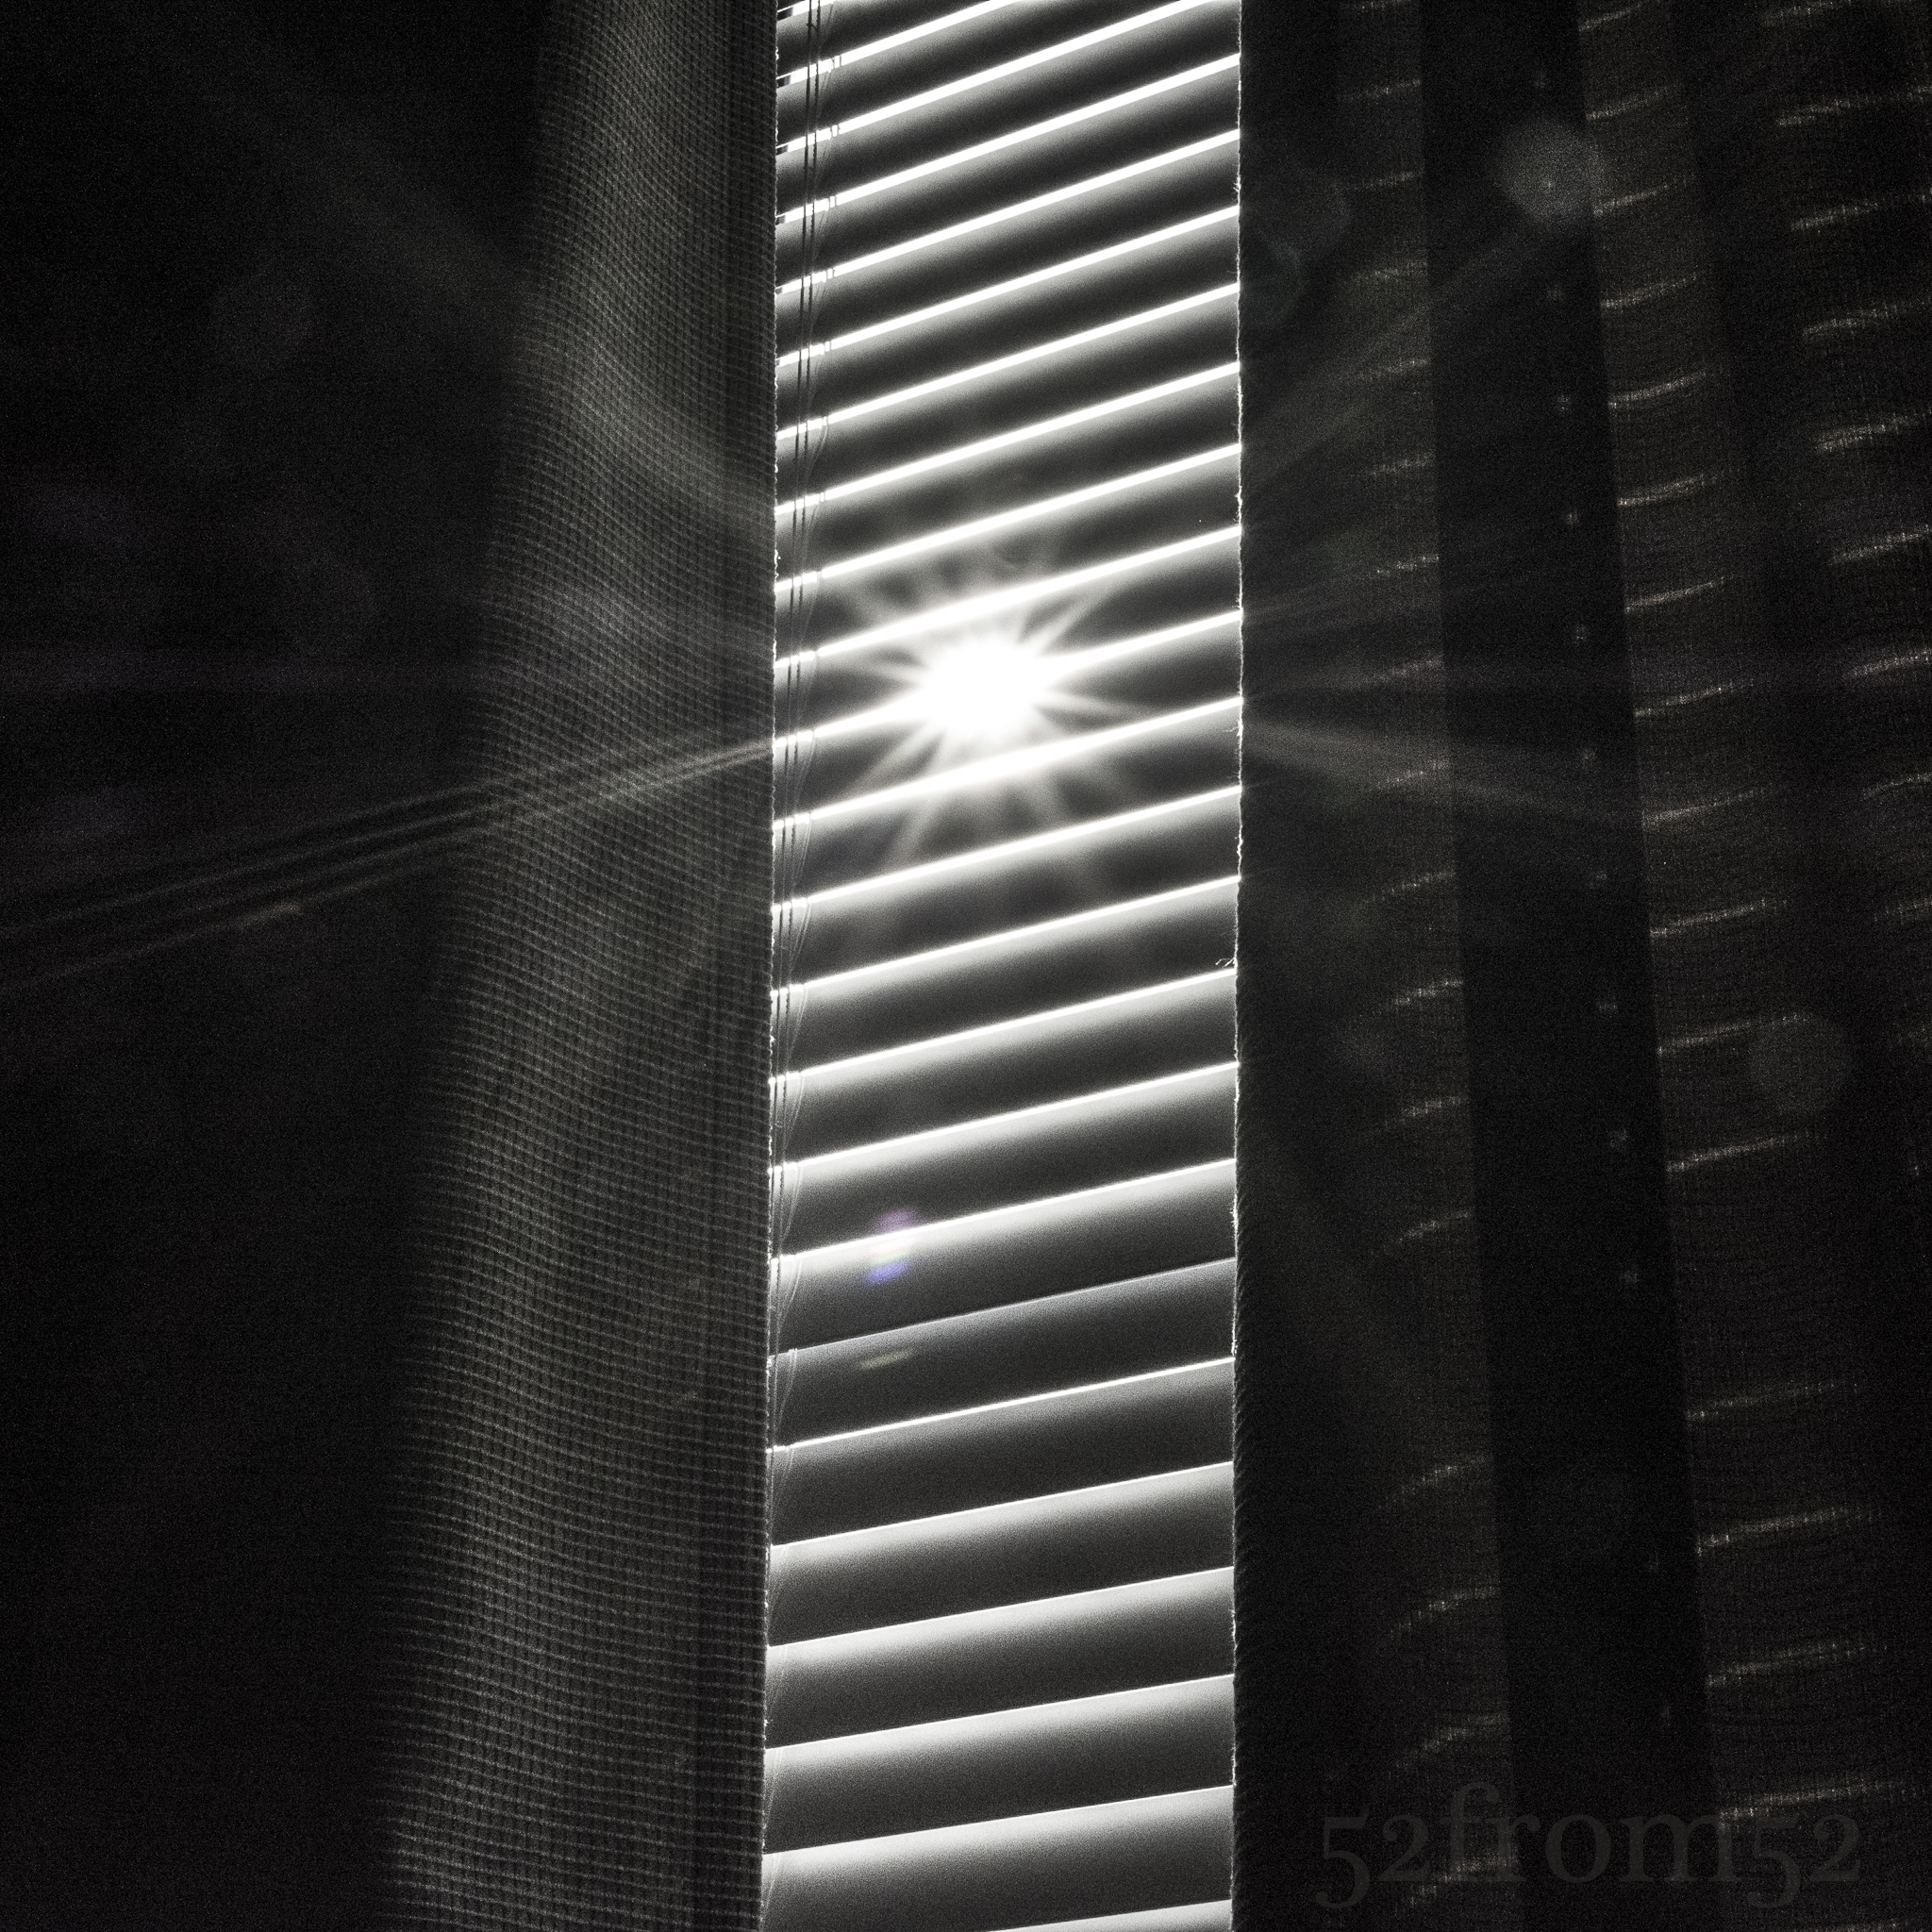
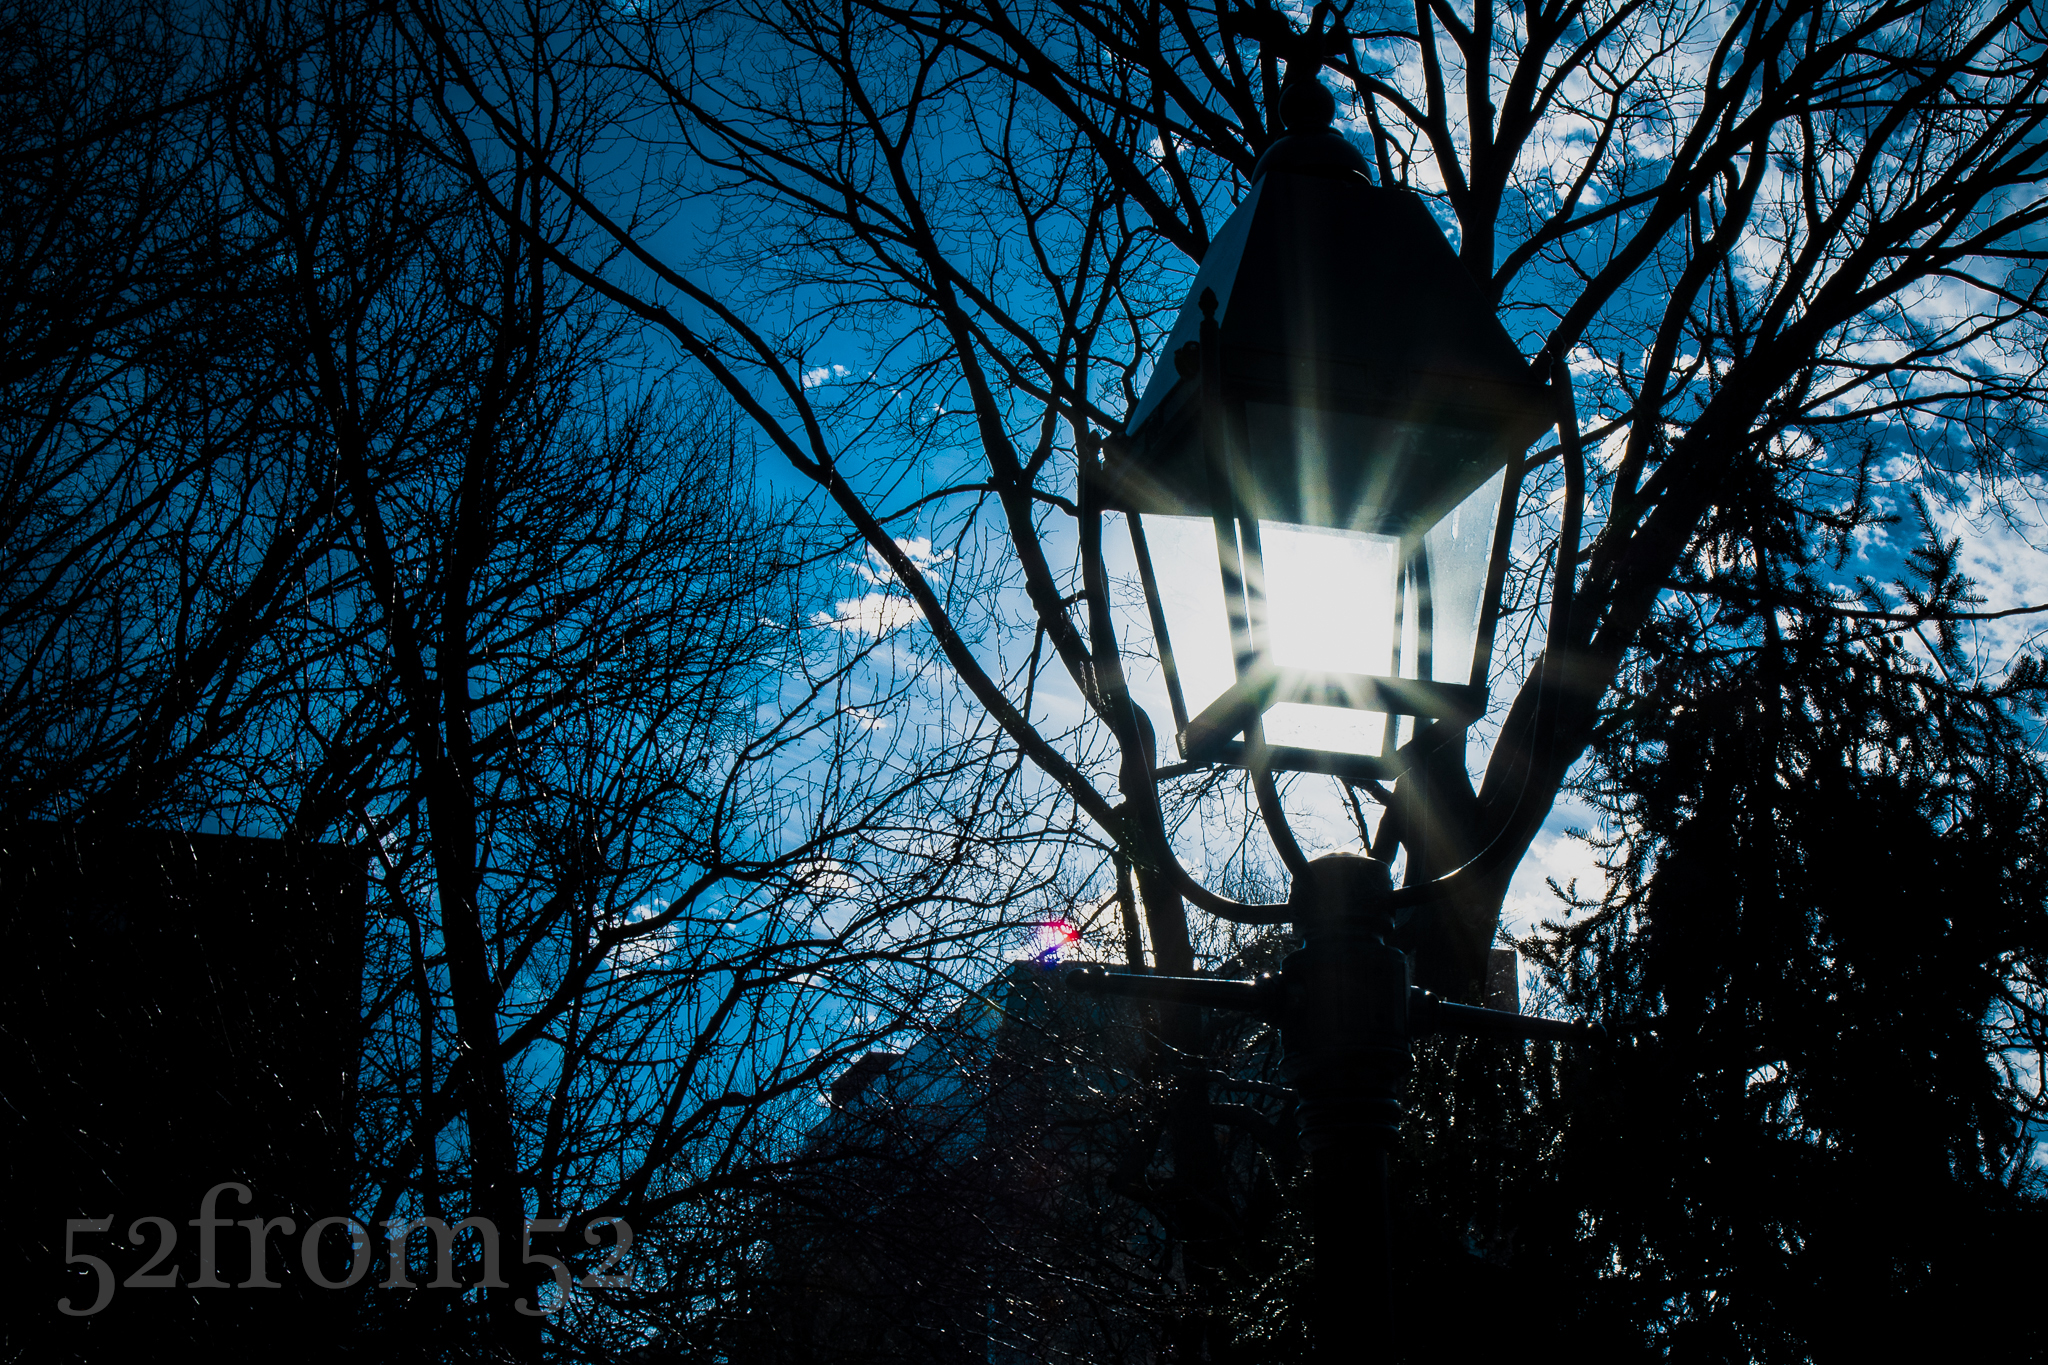
Old picture using f/22
The second half of creating this week’s image was done in lightroom. Raising the Highlights, Contrast, Whites, and Clarity while lowering Shadows, and Blacks is how I achieved this week’s image. The more you play with these settings the better you will become with knowing what to raise or lower to achieve your look. It can be intimidating the first time you use Lightroom when you see all of the adjustments at your fingertips, but trust me before you know it you’ll be flying through them and wish you had more ways to tweak your image. Lightroom has become my greatest tool for fine tuning an image to be exactly what I want. The only way you’ll learn is through practice, I’ve edited 1000’s of images since starting this blog and I’m still learning new tricks. If you haven’t already I highly recommend purchasing lightroom and trying it out today!