Picture info: ISO 100, 35mm, f/22, 4 seconds, -2.1 ND filter, -.7 exposure
Week 26 (1/27/2014 – 2/2/2014) : Hoboken Uptown Pier
Picture taken on 2/1/2014 at 3:30 PM
Picture description:
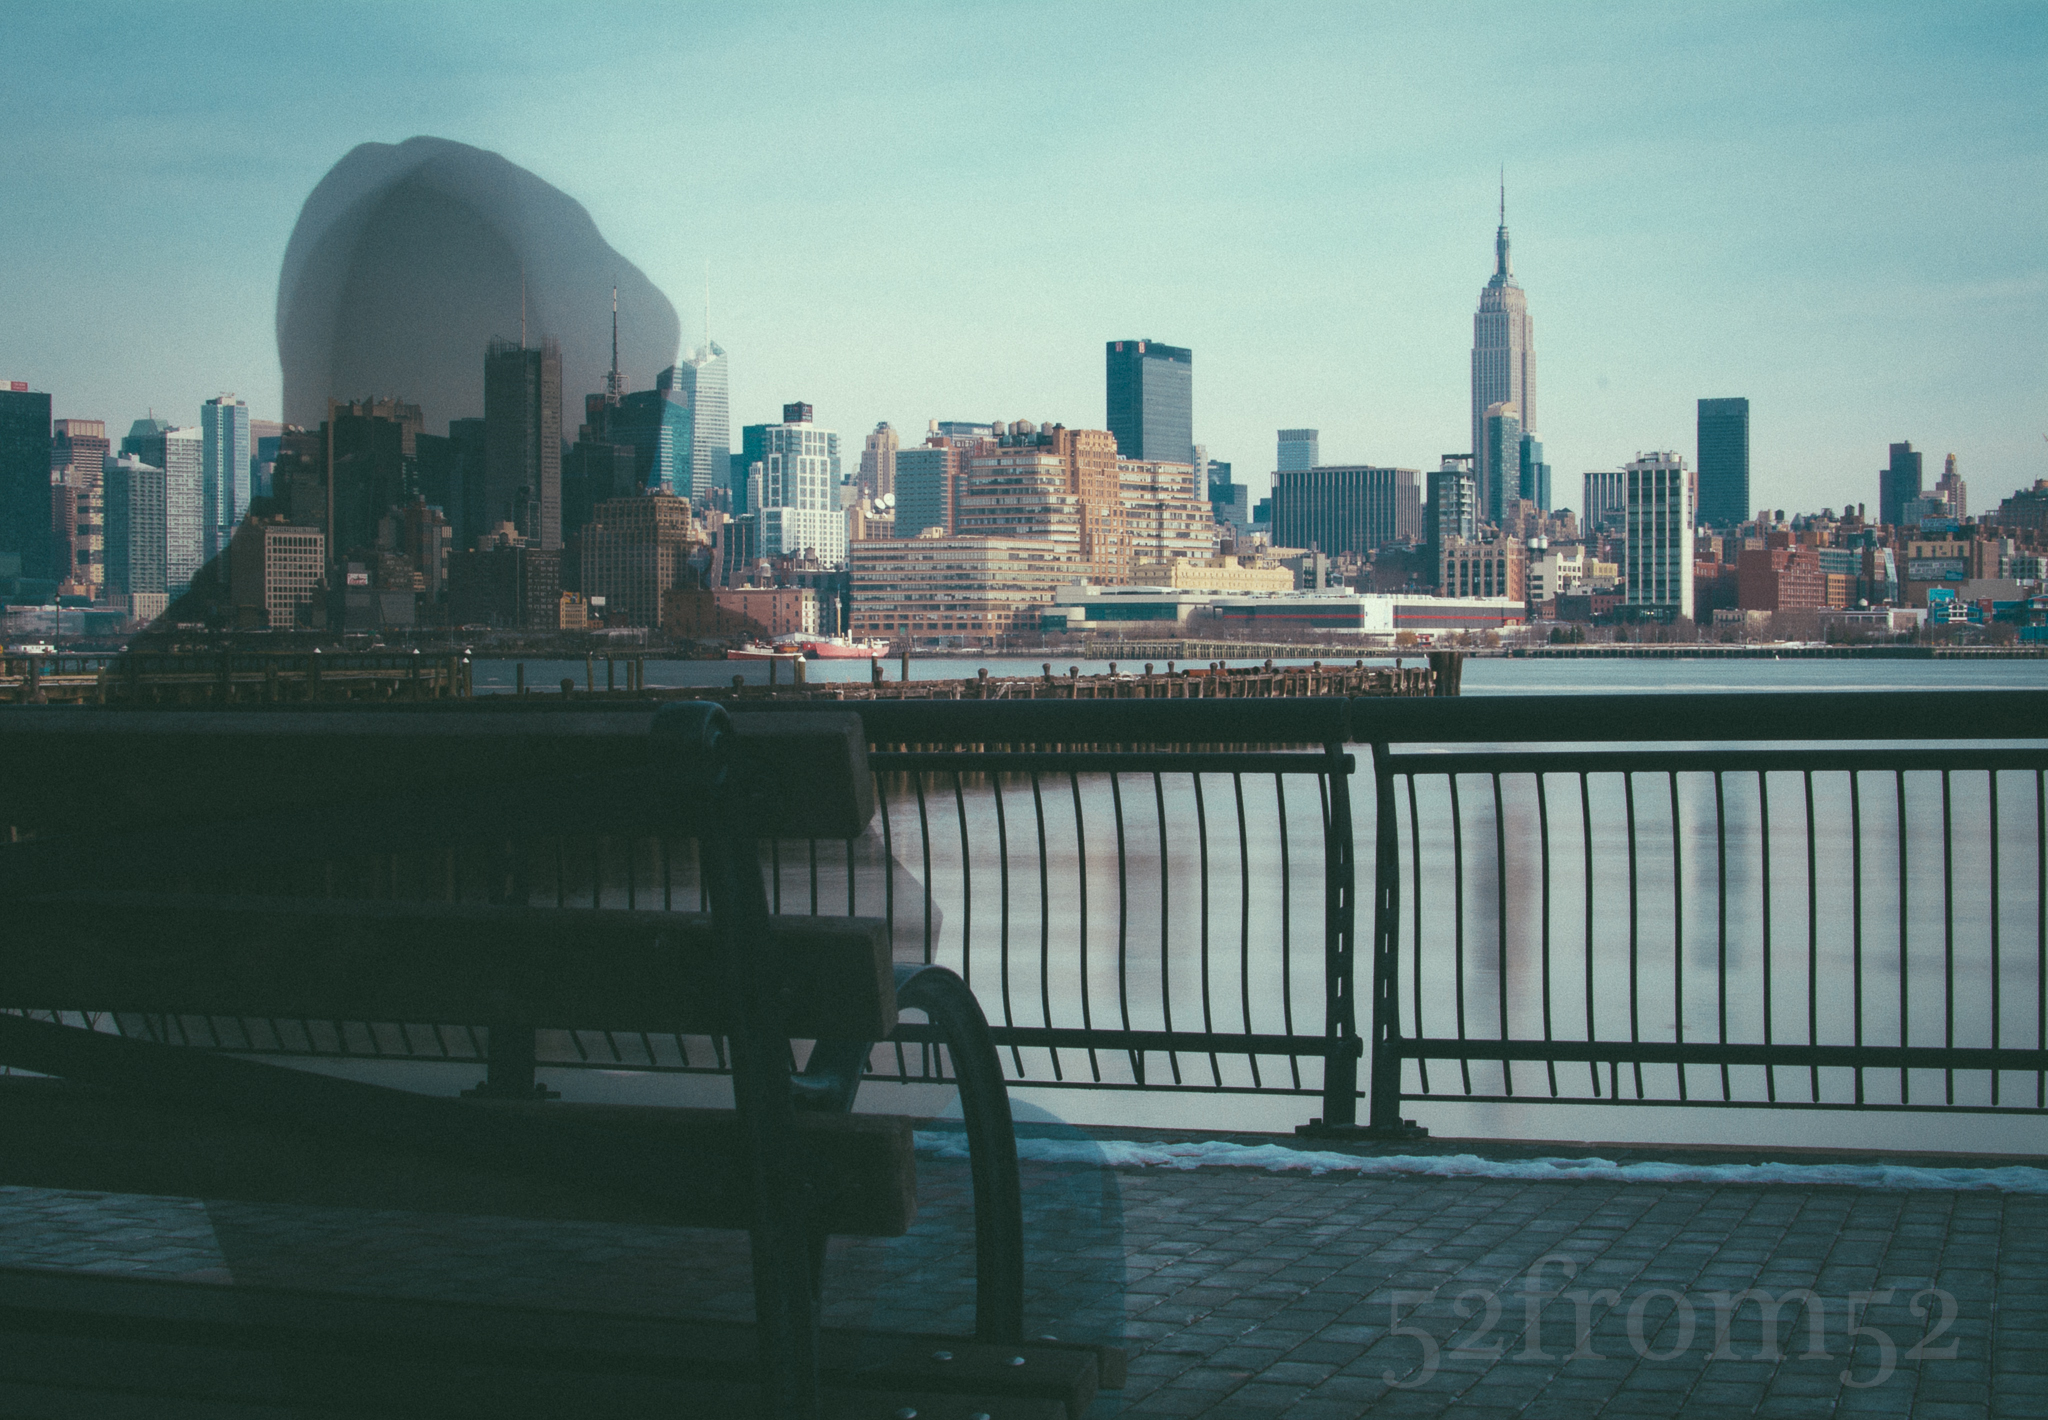
This week marks the halfway point of my fifty two week photoblog series. Throughout the week I jumped back and forth a lot trying to decide what picture/subject to shoot for my twenty sixth post. In the end I decided where better to shoot than where I started twenty six weeks ago? That’s right, I returned to my favorite spot in Hoboken along the uptown waterfront. After I finally submitted to the idea I grabbed a coffee from bwè kafe and sat on “my bench” to think out how I could put a new twist on a picture I’ve taken so many times. As I mentally flipped through the various pictures that I’ve taken at the location I paused on one picture taken with a triple exposure. In the picture a runner zoomed through the frame and gave off a ghost like image. As I sat at my bench dwelling on the ghost image it hit me, what if I used myself to create another “ghost like” image and thus was literally halfway in the picture, or “halfway there.” This seemed like a cleverly fun idea and I’m glad that I was able to pull it off.
Photography concepts:
To pull off the “halfway there” image idea I had two options. My first option was to shoot the picture like the original “ghost like” image using a double or triple exposure. A multiple exposure picture would have been easy, so I decided to go with a more challenging option that utilized more of the skills/knowledge I’ve learned over the past twenty six weeks. What I decided was to shoot my picture using a long exposure and wireless trigger. This sounds straight forward enough too but the challenge was to do this during the day. In daylight long exposures are hard to execute, luckily this is something I’ve done in the past in a few of my posts. With the use of my handy neutral density filters, and a super small aperture of f/22, I was able to hit a shutter speed of four seconds. Four seconds was the perfect amount of time to create a “halfway there’ image. I stayed in the frame for 2 seconds then quickly jumped out of frame for the remaining 2. It took me a couple of attempts but eventually I nailed it!
Challenge number two of this week was how to edit an otherwise boring skyline. When shooting the skyline from Hoboken I typically wait for a day with interesting clouds, or wake up really early to shoot at sunrise. This time I had already missed my sunrise option for the day, and literally had too many clouds to work with. When I shot this picture it was a cloudy overcast day with a slight tint of blue showing up in the clouds. Here is where being able to edit an image in an artistic manner pays off. For this week I went with a dull look with some slight color tints. The way I achieved my final look was by first applying some of my usual edits such as lowering highlights, increasing contrast, clarity and color saturation, along with applying some sharpening. After getting my picture prepped I then applied a VSCO preset filter “Polaroid 669” which gives the image a film look. I also applied some presets to boost the blues and saturation even more in the image. The finishing touch was to add a slight vignette around the edges. As you can see from the before and after comparison, the right editing makes all the difference.

Before and After
