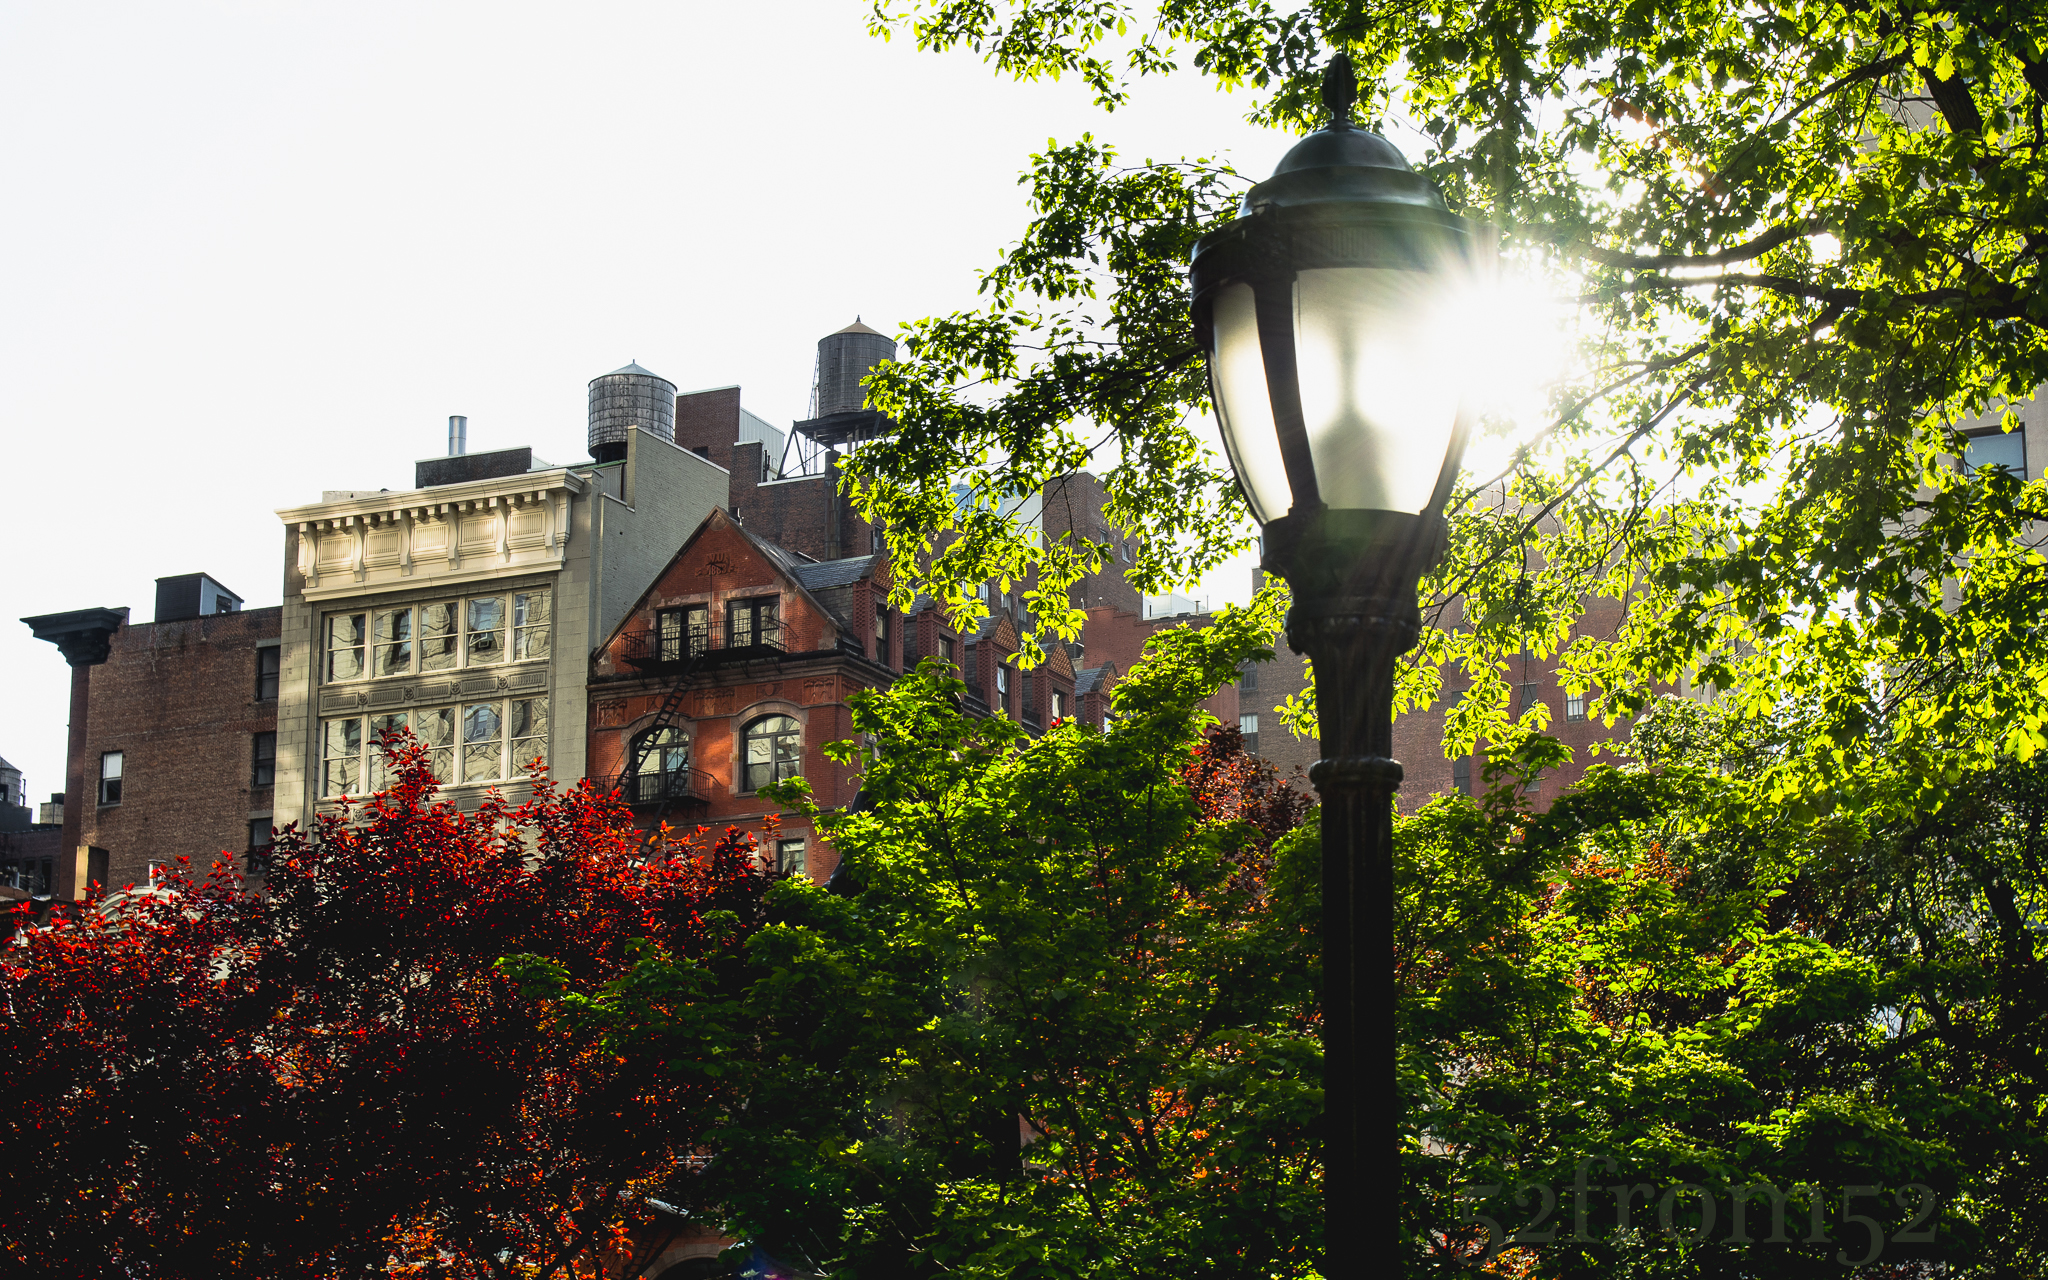
Week 41 (5/12/2014 -5/18/2014): Madison Square Park, NYC
Picture taken on 5/18/2014 at 5:30PM
Photograph description:
Anyone that knows me would probably tell you that I’m an Instagram addict. I share a picture typically 1-2 times a day, and I’m constantly in pursuit of my next post. The reason I enjoy Instagram is mainly because it’s very simple, take a picture, share a picture, like a picture, and yet there is a depth to it. If something is going on in the world, chances are you can find basically a live feed to it on Instagram. Think of Instagram as your square portal to everything and anything happening around the world. You’re never more than a hashtag search away from getting a glimpse into anything from having tea in London, to a wild safari ride in Africa. The possibilities of what you can find are endless.
This past weekend Instagram tapped into the power of hashtags by using them to unify coordinated events around the world. The overall event was officially referred to as “WorldWide Instameet 9” and had the official hashtag of #WWIM9. The concept was simple, each city or region had an organizer that picked a time and location to meet. After meeting up everyone did exactly what brought them together, take and share pictures via Instagram. Each local “instameet” had their own hashtag in addition to the official worldwide one. This concept enabled people to search pictures at the worldwide level, or by the specific location.
A few days before WWIM9 a post about it popped in my Instagram feed. One of the more popular New York City instagrammers posted up the event details and pointed everyone in the direction of the organizers feed. Of course after stumbling upon this, it immediately peaked my interest. I’ve been meaning to check out one of these “instameets” but always seem to be busy on the day it’s held. Luckily, this time around I was finally free to participate.
I could probably write a 10 page post detailing the entire event, but where is the fun in that? Don’t just read about my instameet, go to one yourself! I promise you won’t be disappointed, unless your camera dies. My friend Becky may have put it best, there is so much creative energy flying around it’s hard not to get inspired.
Photography concepts:
This week I’m going to change it up. Instead of breaking down my picture I’m going to talk about some of the new photography concepts I was introduced to this past weekend. There was far more than just DSLR’s being used amongst the many participants. There were three different styles/equipment that really caught my attention. First, and probably the most captivating was how one instagrammer (@huper_X) used a drone/gopro combo to capture amazing aerial footage. I didn’t get a chance to talk to the photographer, so I’m not sure about the exact drone he used, but below is link to something that looked identical to his drone. Bottom line, this drone captured footage that looked like it came from a helicopter. It was truly amazing to witness this thing on display.
The second new style/equipment of photography that I was introduced to was a 360 camera called the “Theta” by Ricoh. This compact device was used by @tsaebadliw (Will) to capture one of my favorite pictures from the day (below). Will set up the camera, then had everyone gather around to capture an amazing 360 degree view of the group. Usually, a 360 camera is used in real estate for virtual tours, but as Will and the “Theta’s” creators display on their site, it’s great for getting creative as well.
The third and most relevant piece of equipment to my style of photography that I learned about was Olloclips. Olloclips are lenses for your iPhone/iPad that mimic the capabilities of a DSLR. Olloclips has telephoto, macro, and wide angle lenses. The idea of enhancing my iPhone’s picture capabilities was very appealing since it’s impossible to carry my DSLR everywhere. Taking great pictures with your phone doesn’t require an Olloclip, but it would certainly help.
Check out below for links to all of the new toys I learned about, along with some links to the instagram blog for the WWIM9 event. I’ll get back to breaking down my pictures next week, enjoy your memorial day weekend!
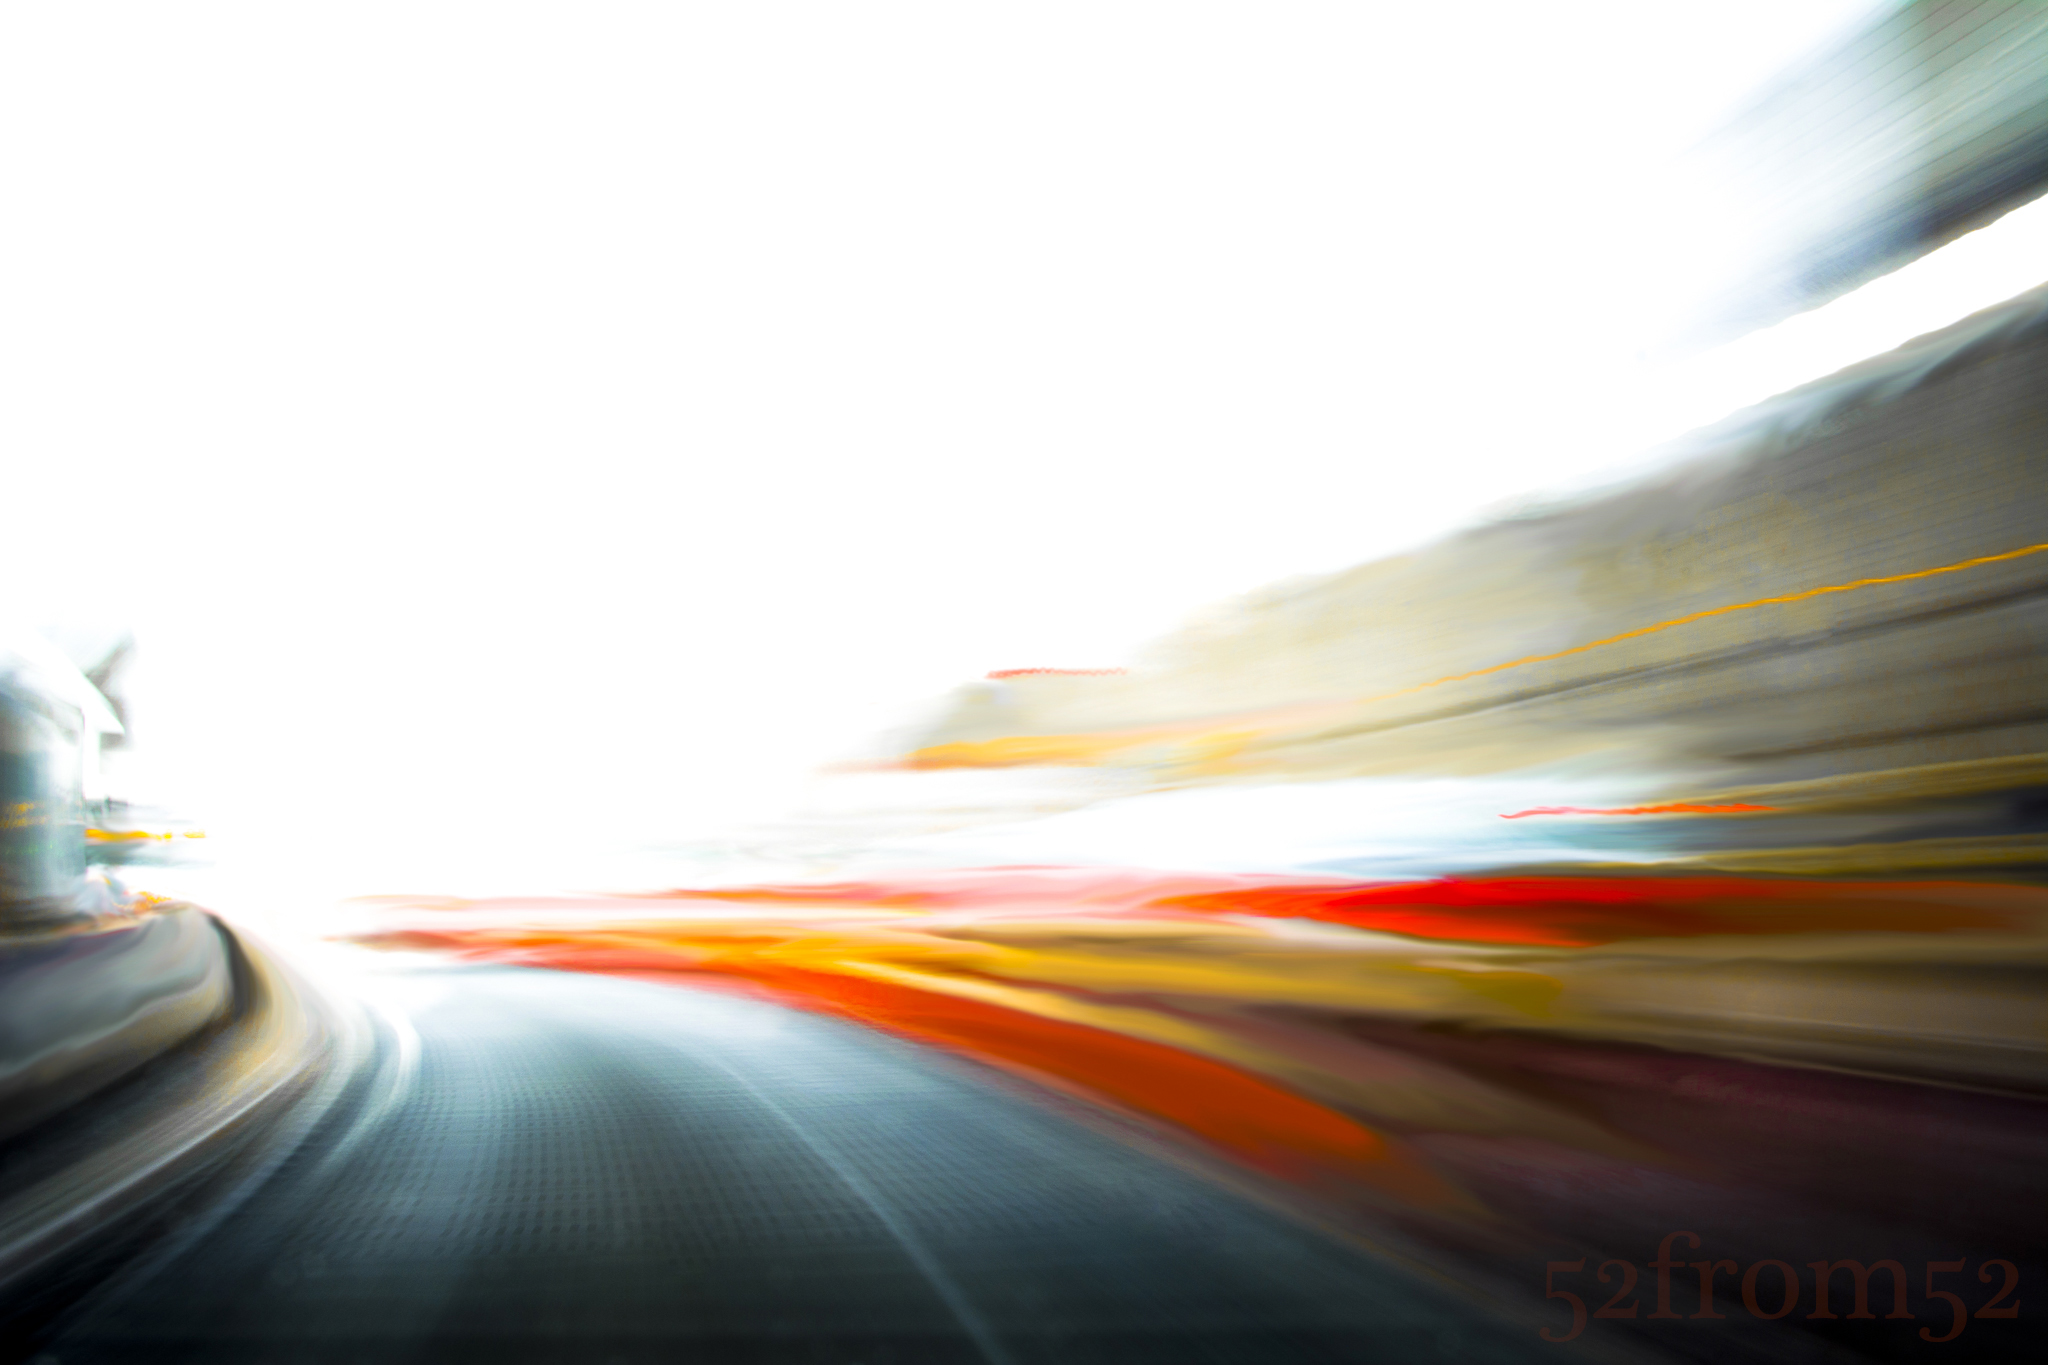
Week 34 (3/24/2014 -3/30/2014): Lincoln Tunnel, NJ Exit
Picture taken on 3/28/2014 at 4:44 PM
Photography description:
Long exposure photography has been a passion of mine since day one of purchasing my Nikon DSLR. Most recently, my favorite subject for long exposures have been tunnels. The effects that result from shooting with slow shutter speeds while driving in a tunnel are truly amazing. My interest in tunnel/driving long exposures started after seeing a stunning picture posted on Instagram. Some photographer wedged his DSLR in the back of his car and triggered it remotely. The final image looked like something out of Star Wars. All of the lights streaked, giving the feeling of motion to the viewer. The concept captured my attention not only because it was visually beautiful, but because I like the idea of portraying a feeling through photography. After seeing the picture on Instagram I knew that I had to try my hand at that type of picture.
Over the past couple of months I’ve had a couple opportunities to try out a tunnel long exposure. Thus far I’ve only experimented in the Lincoln and Battery tunnels, but both have provided great images. I haven’t strapped my camera to the back of the car yet, instead I came up with my own method. I sit in the passenger seat and use a mini tripod to stabilize my camera on the dashboard.
Prior to this week, most of my tunnel pictures were shot using aperture priority, with an exposure time of under one second. As I’ve mentioned over the past few weeks one of my new goals is to shoot in manual more often, so this weeks tunnel picture was shot in manual. I’ll talk more about why I chose specific settings in the photography concepts section.
This week’s capture was the last picture I took before exiting the Lincoln tunnel during my Friday commute home. I previously shot a picture that I really liked at the exit of the Battery tunnel, so my goal was to shoot something similar inn the Lincoln. The contrasting or “fighting light” (dark/bright) that exists at a tunnels exit presents the perfect scenario for an interesting photograph.
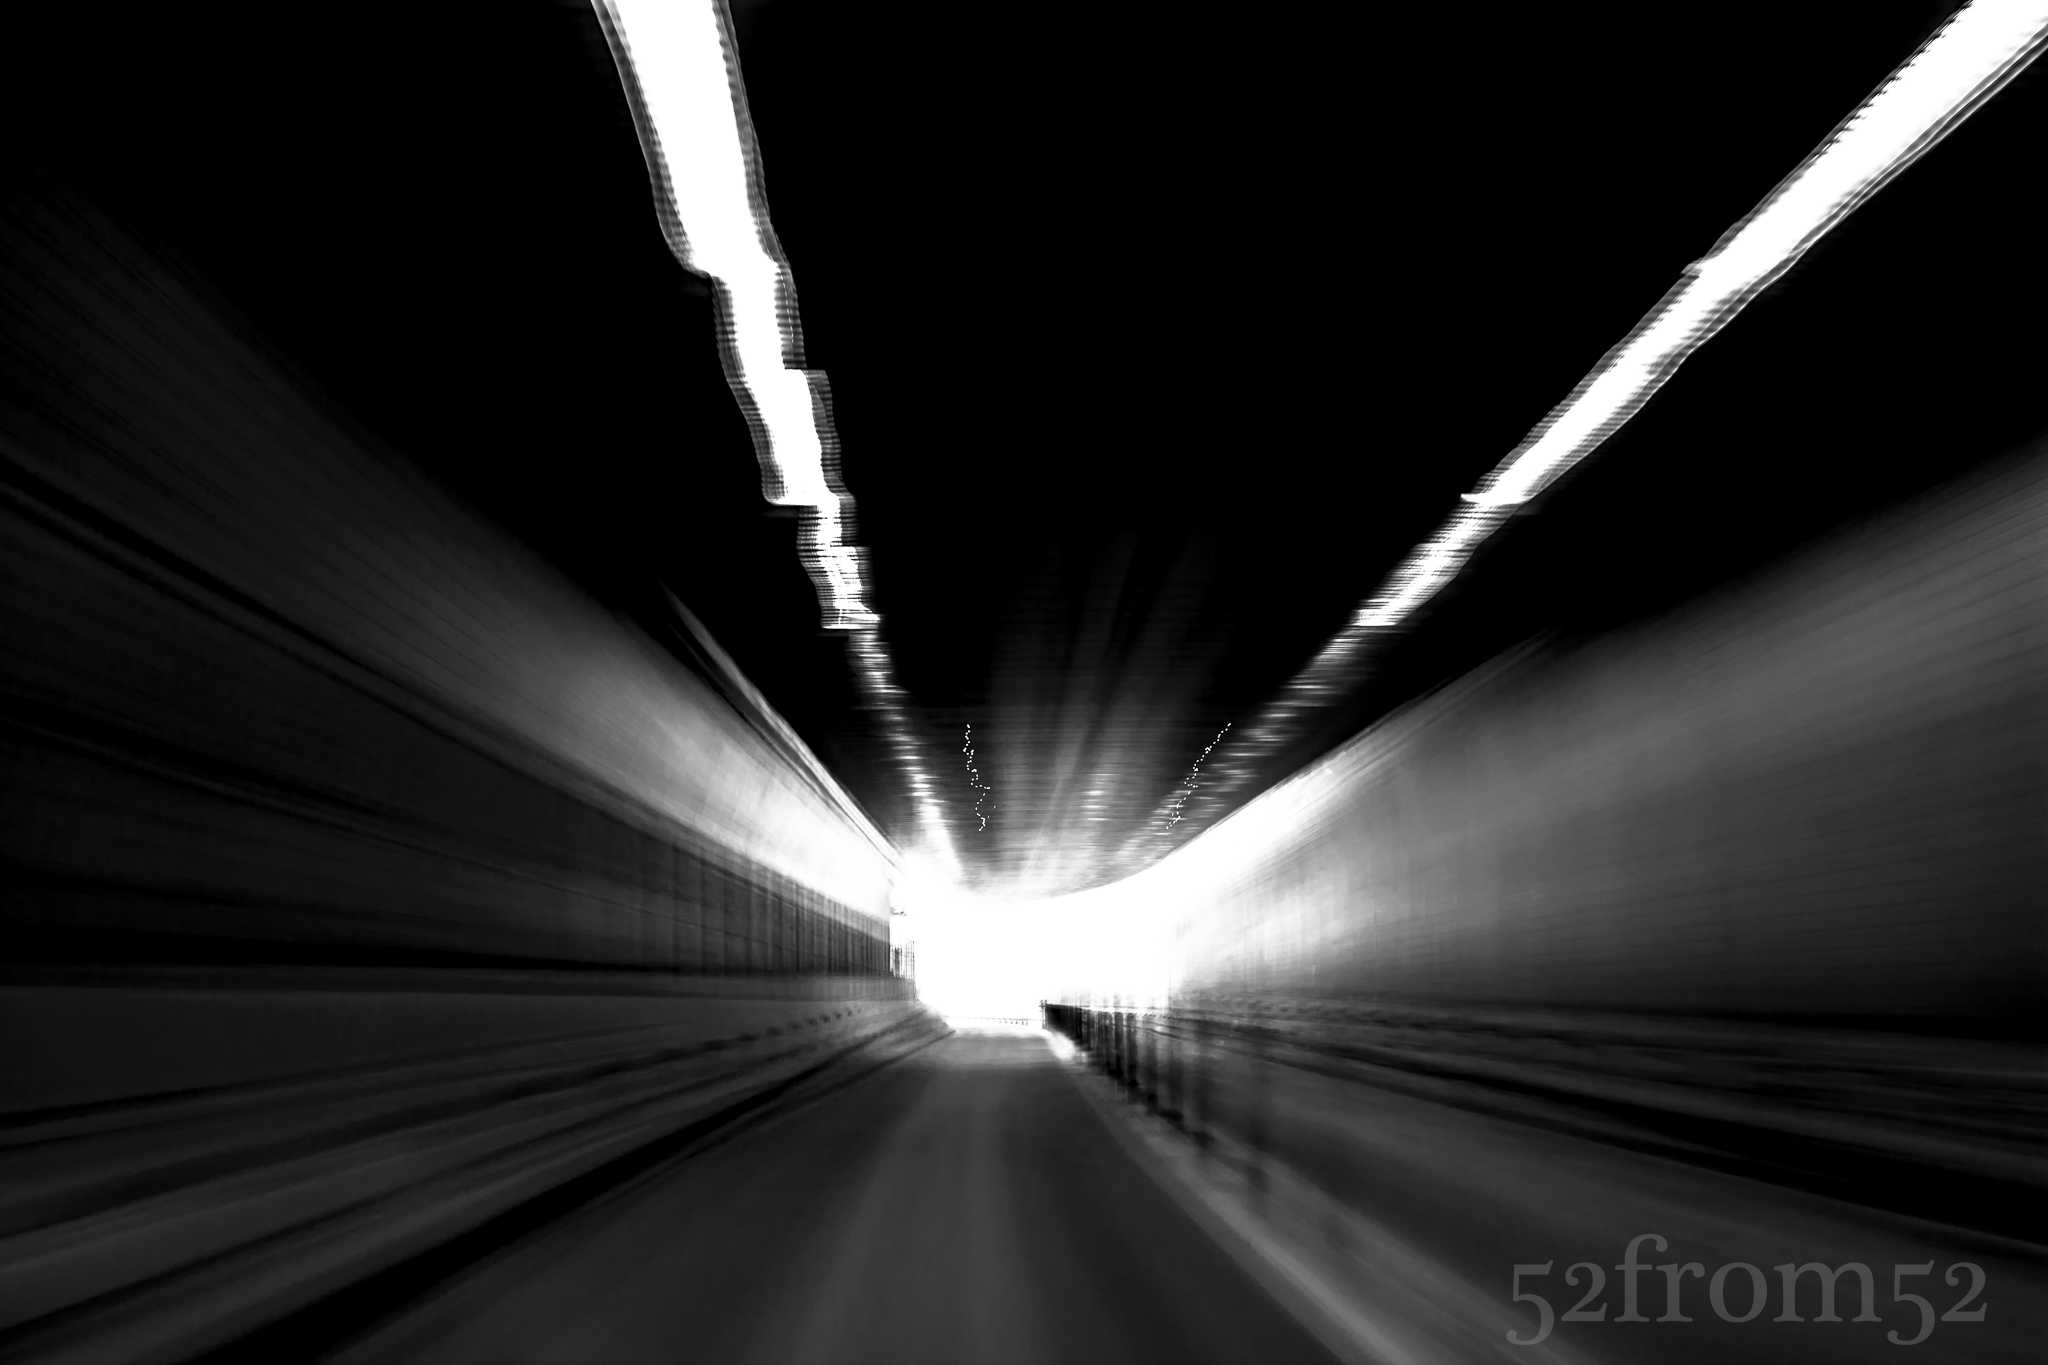
Battery Tunnel Long Exposure
Photography concepts:
As the end of the tunnel approached, it felt like a race to get my camera’s settings right for my photograph. The stress and potential for a mistake that exists while shooting is the main negative about being in manual mode, but the risk is worth the reward. Shooting in manual was the key to this week’s picture because I didn’t want to lose control of my shutter speed. In order to get the picture looking as I imagined, I needed a slow shutter and for it to close right as I exited the tunnel. Had my shutter stayed open too long after exiting, my entire image would have been blown out. The aperture I selected (f/22) was more of an experiment than something I knew would work. Previously I shot most of my tunnel pictures with a wide aperture, the smallest being about f/7. Post picture, I’m happy with the look that f/22 generated. Although mostly everything is blurred, the texture of the road at the tunnel exit is still visible, and that’s due to shooting at f/22. Shooting at such a small aperture also enabled me to hit a slower shutter while maintaining the exposure that I wanted. In my mind I wanted the exit of the tunnel to be completely blown out (white) so I purposely overexposed my image. The result of all these things turned out to be almost exactly what I was looking for.
This week was the first time that my post production led me to doing photoshop manipulation. I’m not a fan of “editing” an image in the way of changing what you originally shot. I don’t mind editing the raw images attributes (contrast, clarity, hue, ect.) to modify an image, but I usually feel changing the structure of an image in photoshop is cheating. In my opinion once you start changing your image, you move out of the photography world, and more into the art realm of painting and or drawing. This week however I made an exception to my rule. As a result of my longer shutter speed, some of the light blur in my image became choppy. The choppiness was due to the car’s vibrations which usually aren’t as obvious with quicker shutters ( < 1 second). What I decided to do was use the smudge and blur tools in photoshop to smoothing things out. The result of my photoshop manipulations left my image looking more like a painting than an actual photograph. As I said I’m usually not a big fan of doing this, but I’m really happy with the way this image came out this week. I’m not planning on making a habit of manipulating my photo’s like this, but it’s nice knowing that I can with some sort of success.
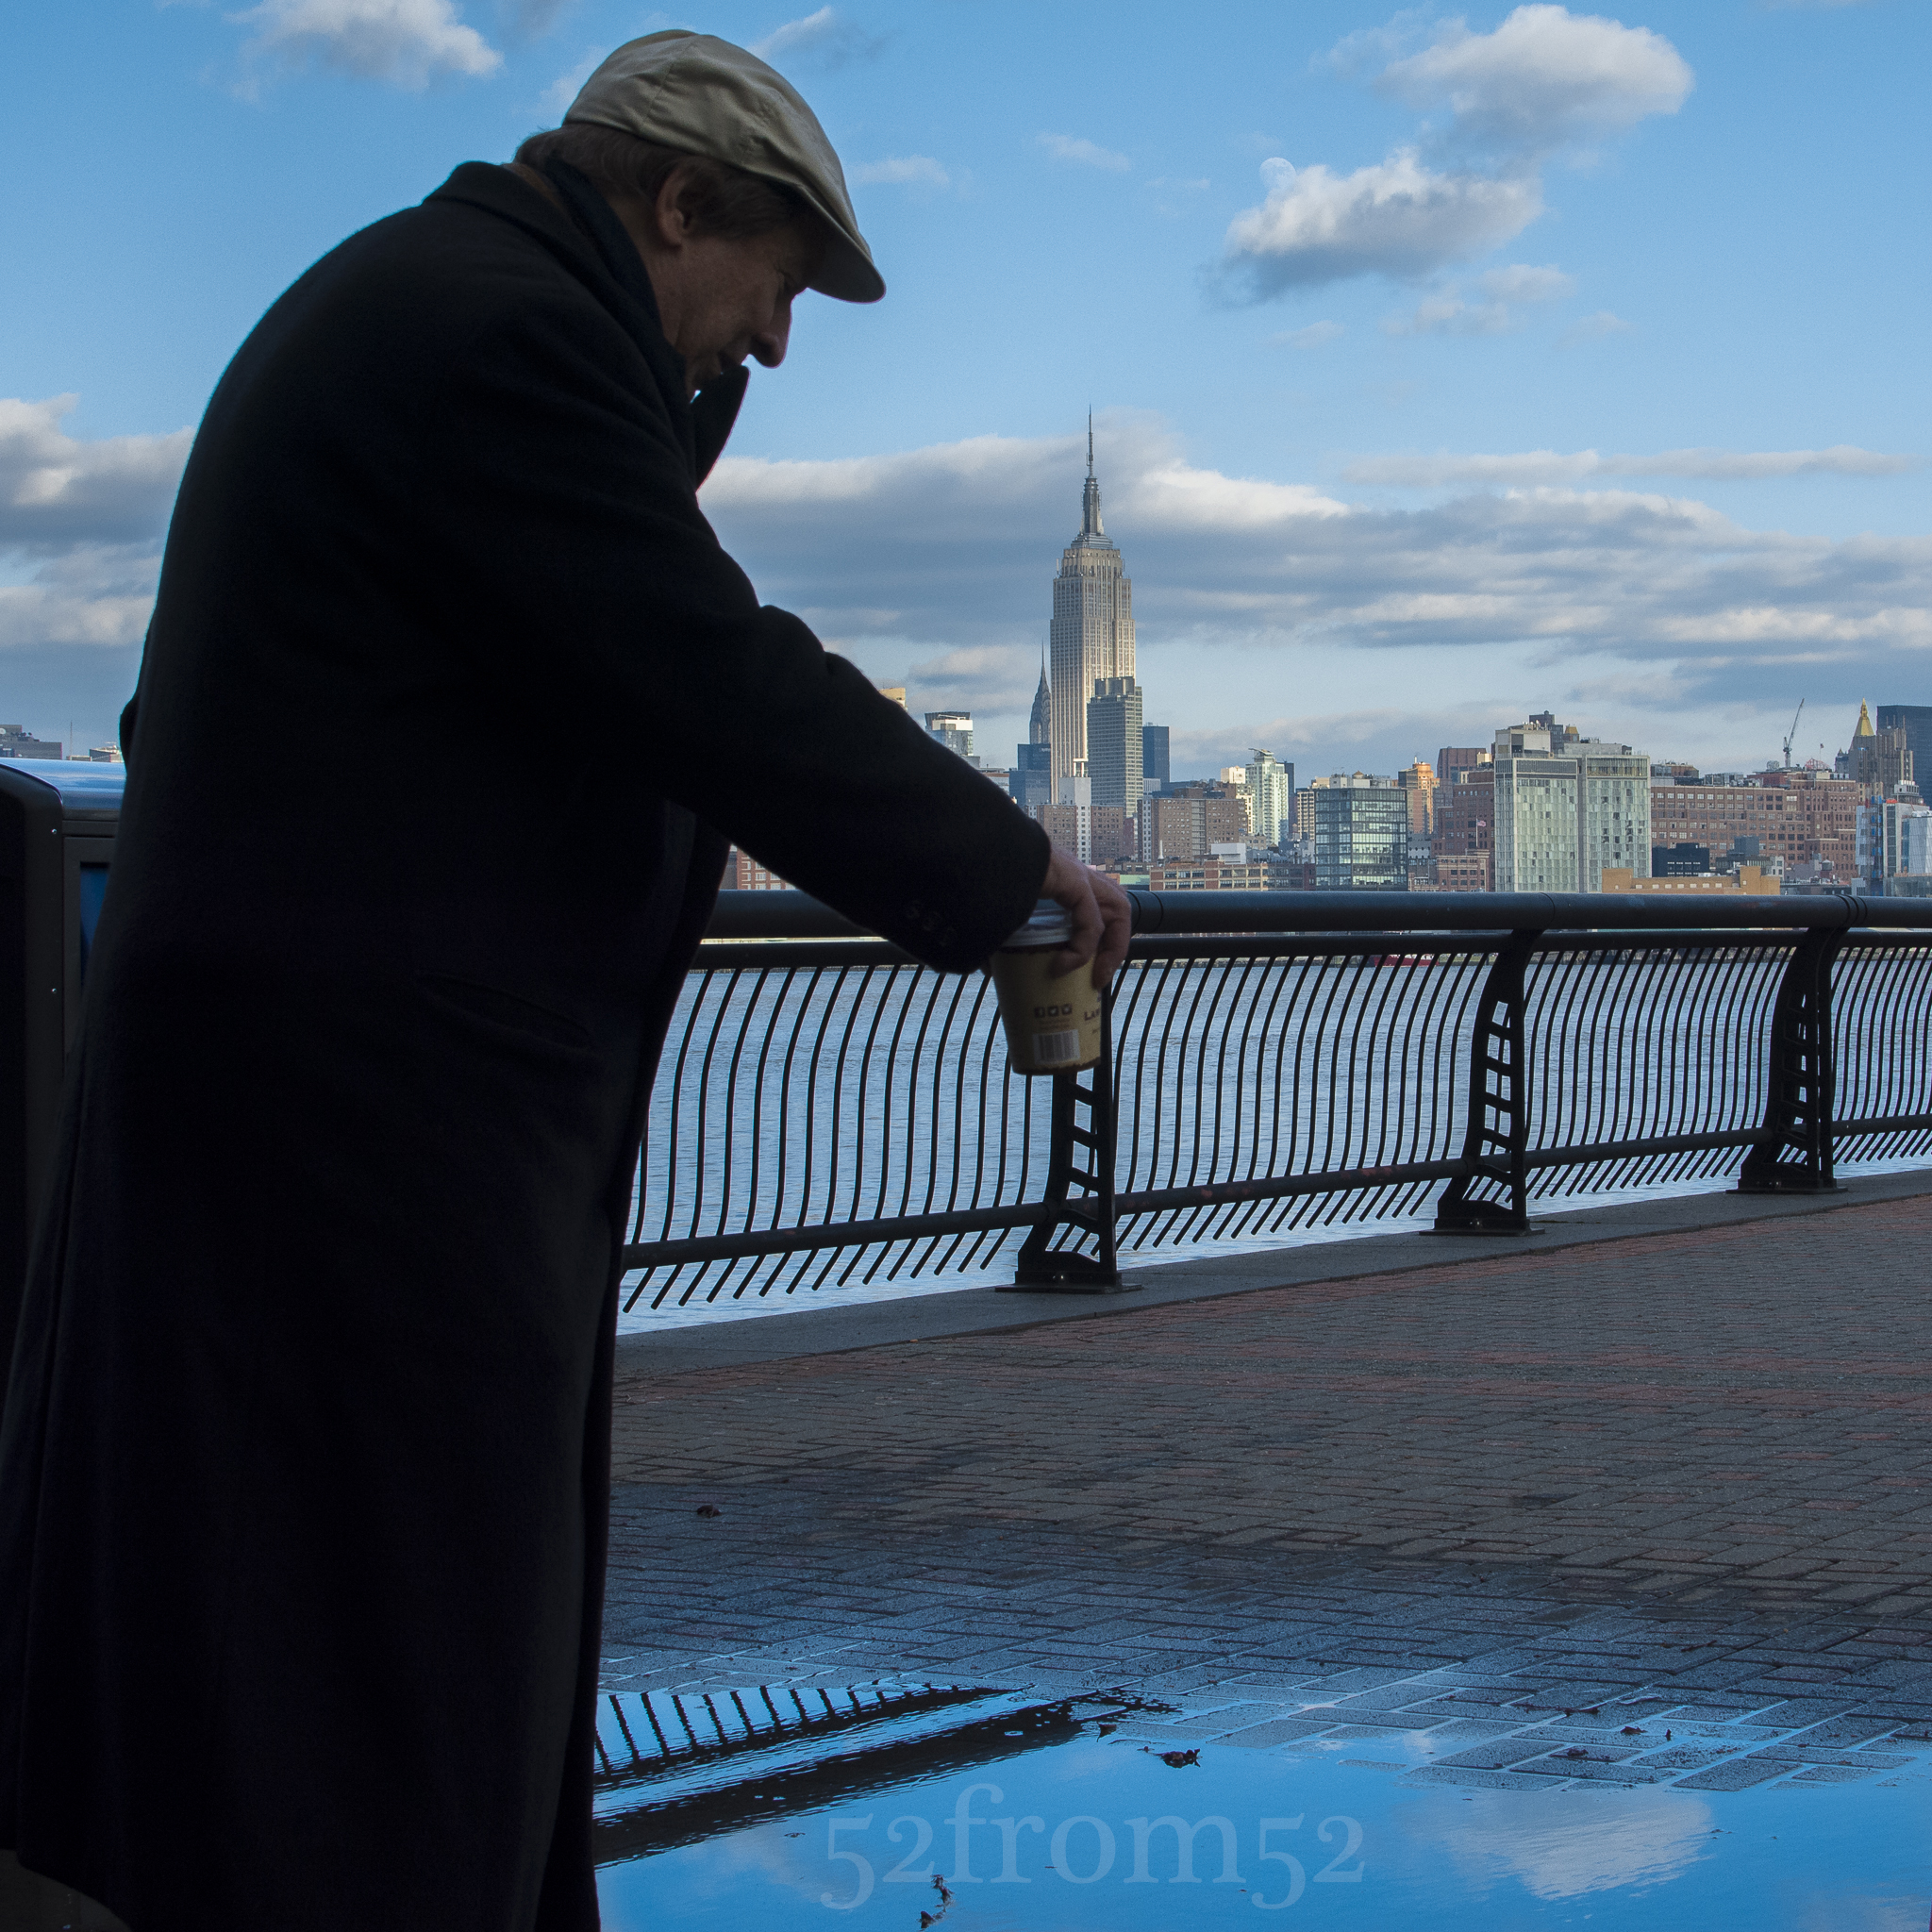
This week marks the halfway point of my fifty two week photoblog series. Throughout the week I jumped back and forth a lot trying to decide what picture/subject to shoot for my twenty sixth post. In the end I decided where better to shoot than where I started twenty six weeks ago? That’s right, I returned to my favorite spot in Hoboken along the uptown waterfront. After I finally submitted to the idea I grabbed a coffee from bwè kafe and sat on “my bench” to think out how I could put a new twist on a picture I’ve taken so many times. As I mentally flipped through the various pictures that I’ve taken at the location I paused on one picture taken with a triple exposure. In the picture a runner zoomed through the frame and gave off a ghost like image. As I sat at my bench dwelling on the ghost image it hit me, what if I used myself to create another “ghost like” image and thus was literally halfway in the picture, or “halfway there.” This seemed like a cleverly fun idea and I’m glad that I was able to pull it off.
Photography concepts:
To pull off the “halfway there” image idea I had two options. My first option was to shoot the picture like the original “ghost like” image using a double or triple exposure. A multiple exposure picture would have been easy, so I decided to go with a more challenging option that utilized more of the skills/knowledge I’ve learned over the past twenty six weeks. What I decided was to shoot my picture using a long exposure and wireless trigger. This sounds straight forward enough too but the challenge was to do this during the day. In daylight long exposures are hard to execute, luckily this is something I’ve done in the past in a few of my posts. With the use of my handy neutral density filters, and a super small aperture of f/22, I was able to hit a shutter speed of four seconds. Four seconds was the perfect amount of time to create a “halfway there’ image. I stayed in the frame for 2 seconds then quickly jumped out of frame for the remaining 2. It took me a couple of attempts but eventually I nailed it!
Challenge number two of this week was how to edit an otherwise boring skyline. When shooting the skyline from Hoboken I typically wait for a day with interesting clouds, or wake up really early to shoot at sunrise. This time I had already missed my sunrise option for the day, and literally had too many clouds to work with. When I shot this picture it was a cloudy overcast day with a slight tint of blue showing up in the clouds. Here is where being able to edit an image in an artistic manner pays off. For this week I went with a dull look with some slight color tints. The way I achieved my final look was by first applying some of my usual edits such as lowering highlights, increasing contrast, clarity and color saturation, along with applying some sharpening. After getting my picture prepped I then applied a VSCO preset filter “Polaroid 669” which gives the image a film look. I also applied some presets to boost the blues and saturation even more in the image. The finishing touch was to add a slight vignette around the edges. As you can see from the before and after comparison, the right editing makes all the difference.
A new year and a new perspective. One of the keys to making progress is the idea that only by searching for new ideas and perspectives will you truly grow. Therefore finding new perspectives in life and photography is my goal for 2014. This week I decided a good way to challenge myself would be to set out in Hoboken to find a new perspective on some of the locations I’ve so often photographed over the past year.
Starting out on 4th street I begin working my way towards Pier A park. When I arrived at the park I noticed that there were quite a few puddles still around even though it was a bright blue sunny day. I’m a big fan of puddle pictures, so I set my sights on one rather large puddle at the corner of Pier A. As I crouched down to get a good angle an old man tapped me on the shoulder and asked what I was photographing. I proudly hit my camera’s review button and showed him my most recent shot. He responded with a “Wow” and told me that reminded him of something he did when he was young. Intrigued, I asked him what it was that he did with puddles when he was young? He proceeded to stand over the puddle and intensely look down into the shallow pool of water. I initially thought he was checking himself out but then he explained what he was doing. He was standing at such an angle that he couldn’t see himself, just the reflection of the sky in the puddle. He said I’d stand here and look, look into the puddle, and if you do it long enough you can lose yourself in it’s reflection. Little did this man know he had just in part described my goal for the day. You see as this man stared into the puddle he wasn’t simply looking at the ground, no he was gazing into the deep blue sky but only from a new perspective. As the old man stood there for a few more seconds in silence I could see he was adrift in the skies reflection and found happiness from this new perspective. That’s what I want in 2014, I want to find happiness through the eyes of a new perspective.
The “Old Man”
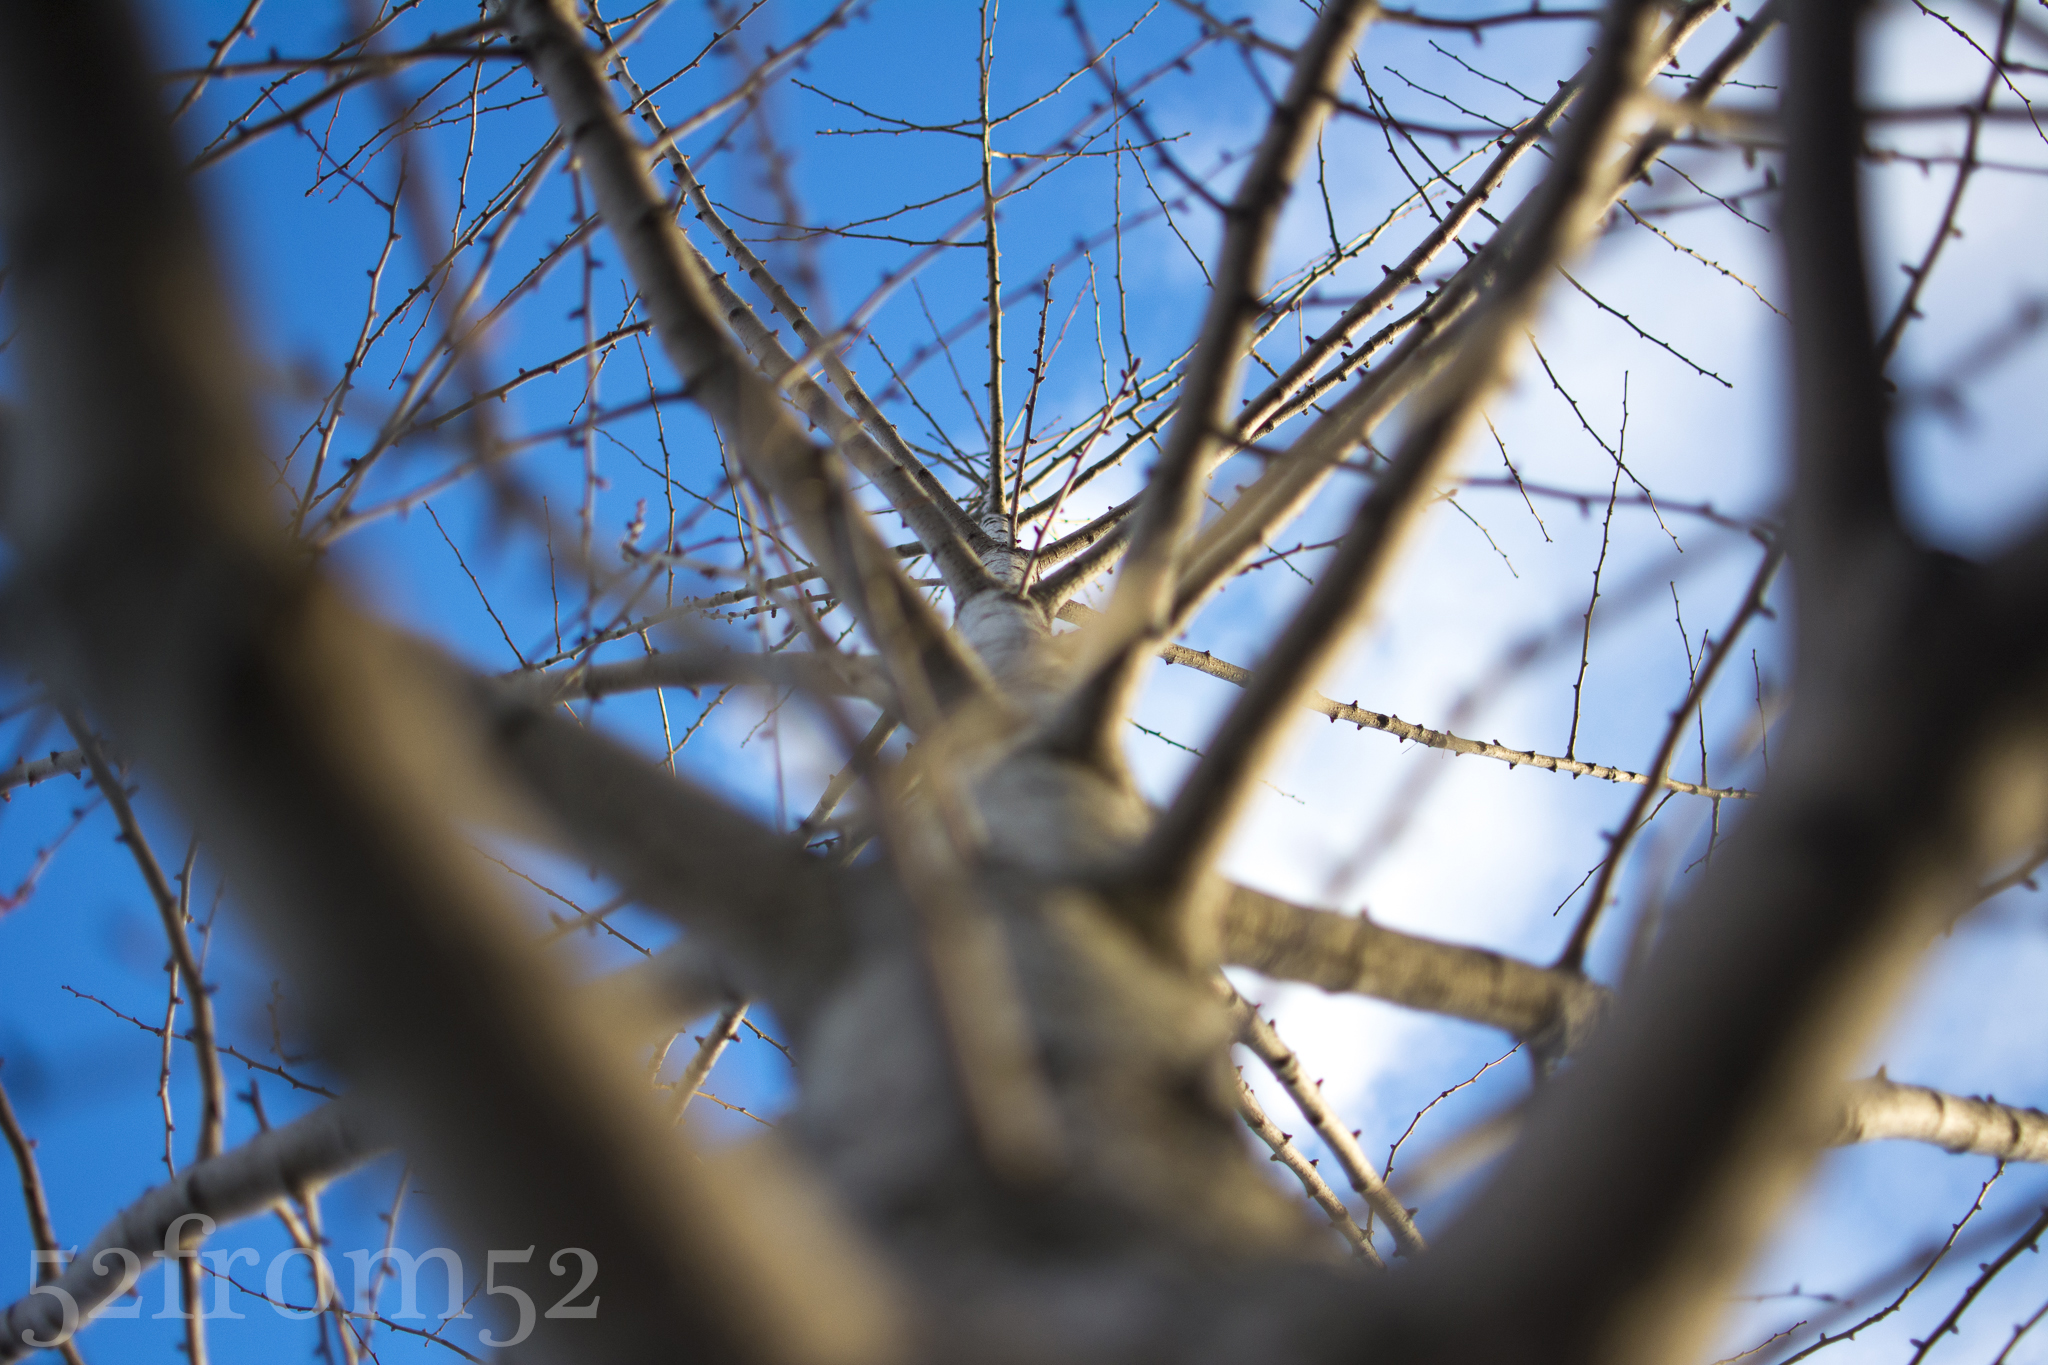
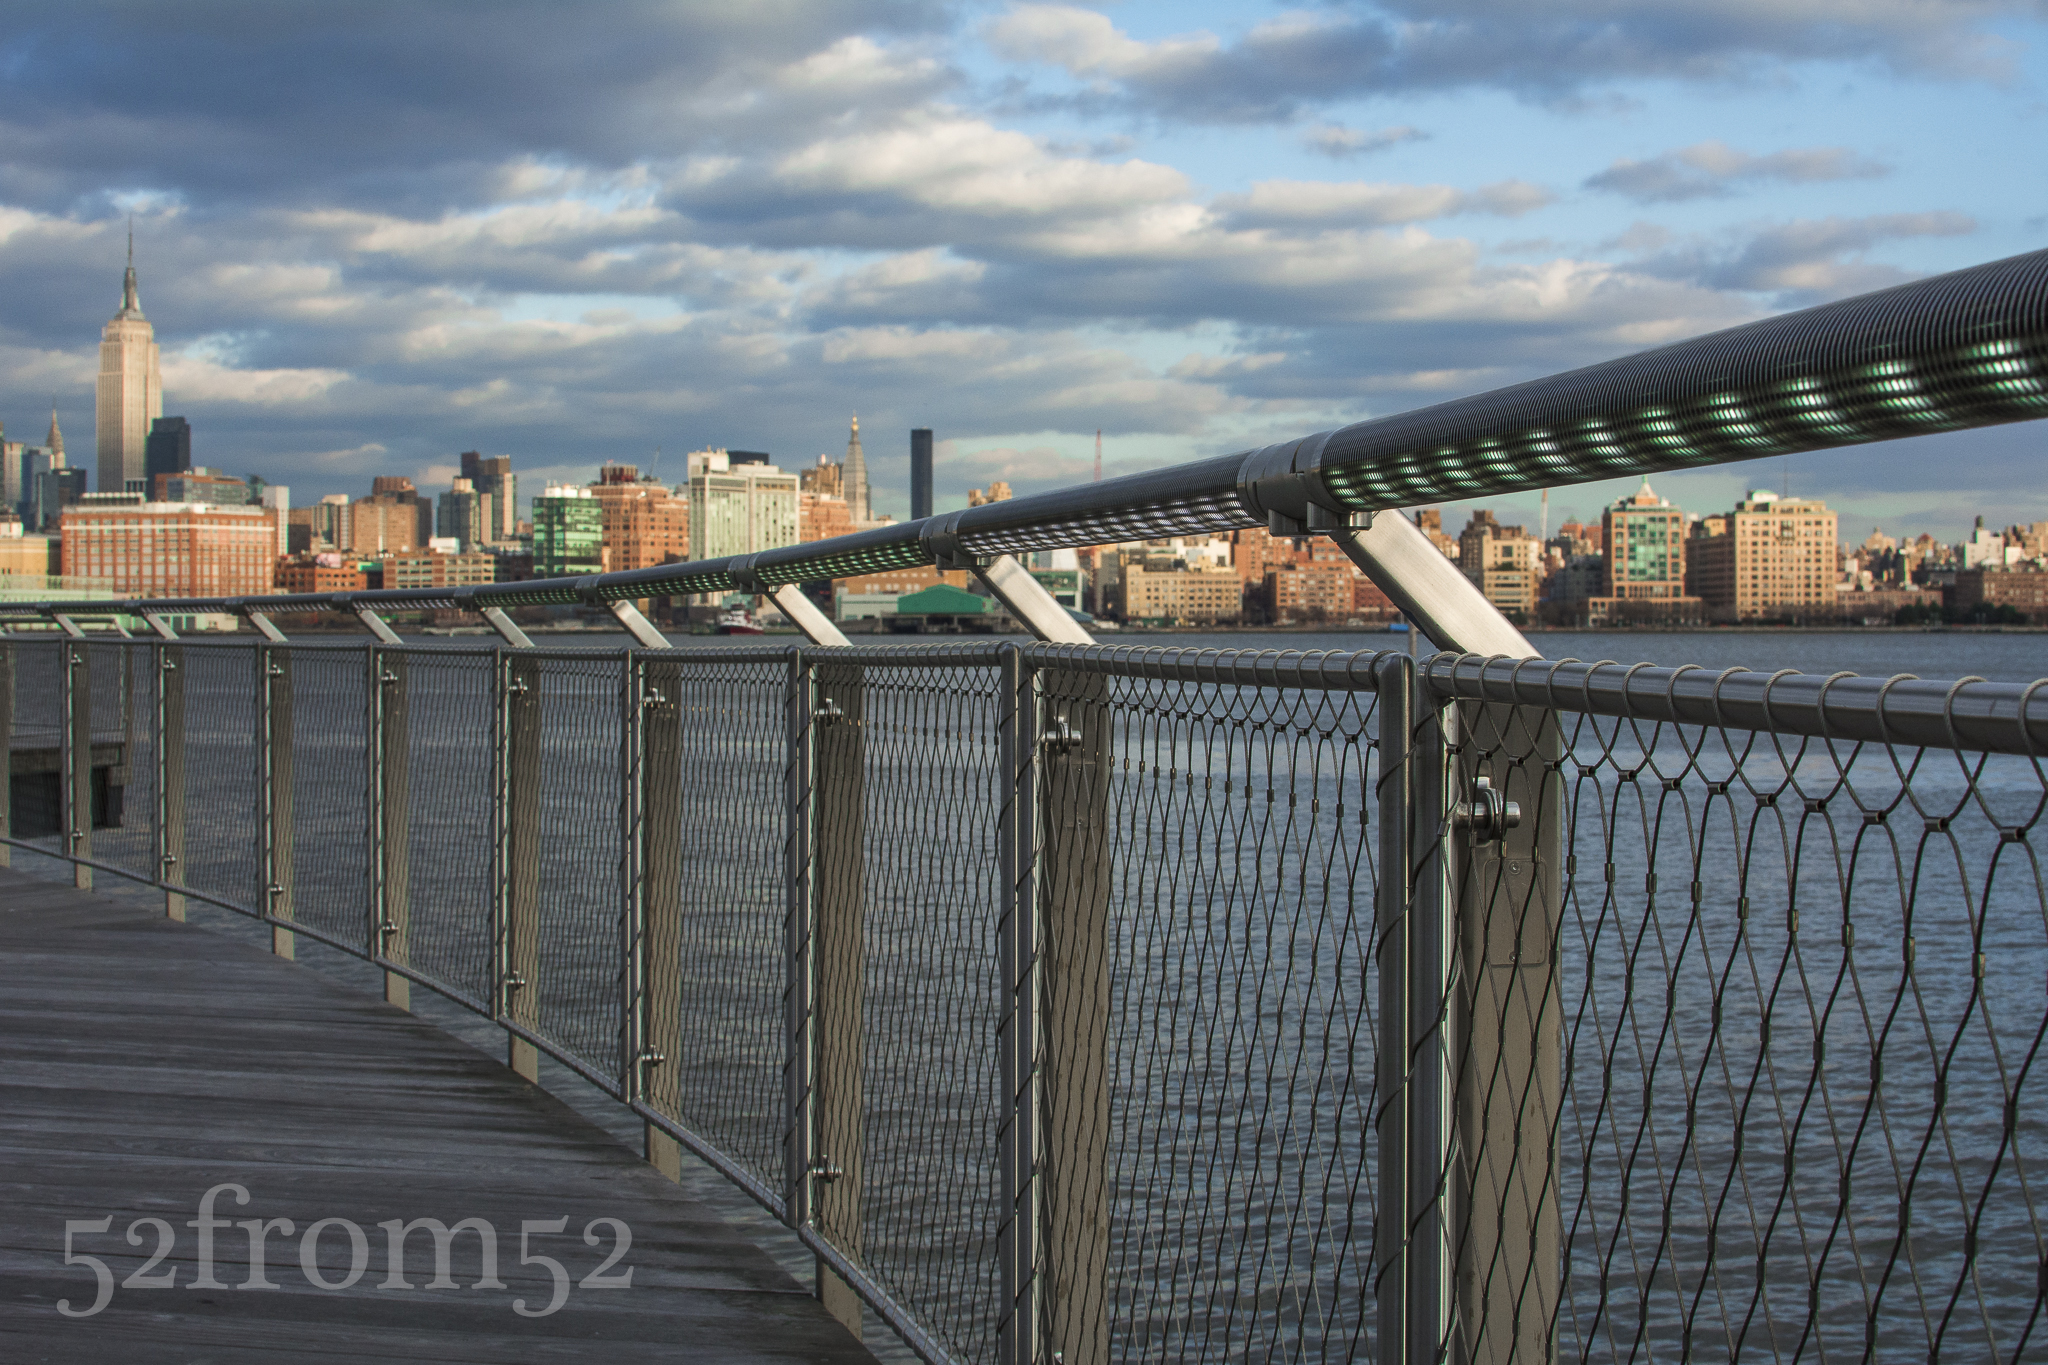
After my nice interaction with the old man I continued on my quest for this week’s picture. I took pictures looking straight up trees, crouches at ground level, and I even fired off some no look shots while chasing some birds. Although I might have looked like a real oddball to anyone that may have been observing, after they saw my pictures they would understand. Eventually I worked my way back towards 4th street and the took one final detour at Pier C, or as I like to call it, Hoboken island. I’ve attempted to get a picture from the winding entrance of Pier C many times. This time I decided to drop to one knee and see what perspective that brought. What I saw was how the railing of the path was leading directly towards the city skyline. I snapped of a couple pictures until homing in my settings then leaned directly against the railing for what would be my final picture.
Tree Perspective
Photography concepts:
The focus of this week’s picture was finding a new perspective which essentially meant I needed to find a unique composition. In this week’s picture the look that I was going for was one of a focus to blur effect on the railing that led to the city skyline. To get this look I had to set my aperture not too small (f/22) nor too large (f/1.8). A logical approach was to split the two numbers and that’s exactly what I did. I shot my picture with an aperture of f/11 which usually puts mostly everything in focus but because I was so close (actually touching) the railing it gave a good blur to the city skyline. Below is an example of how the closeness of the railing and use of focus points got me the “blur” look I was going for. This picture is identical to my featured picture from a setting (ISO/aperture/shutter speed) standpoint but as you can see the skyline is a lot more in focus. This is the picture that I think most people would take at this low angle. I took this picture first, then to get a “new perspective” leaned into the pole to get a new spin on the view.
Picture Info: ISO 500, 35mm, f/11, 1/320 seco
As I edited the picture in Lightroom, I wanted to emphasize the metallic look of the railing along with the lights that were built into it. To do this I worked with the color sliders but unlike last week, I was actually adjusting the colors not black and white shading. As a result of tweaking the green in the railing you’ll notice all the green in my picture really pops. I wanted the green to stand out so it would first draw your eye to the railing then the green of the railing transitions into the green of the city skyline.
Overall lot of my “new perspective” shots involved getting lower to the ground or closer to my subjects than usual. I encourage you to do the same with some of your pictures this week. After you take a picture pause and ask yourself, without changing your subject how can you adjust your composition to get a new look?
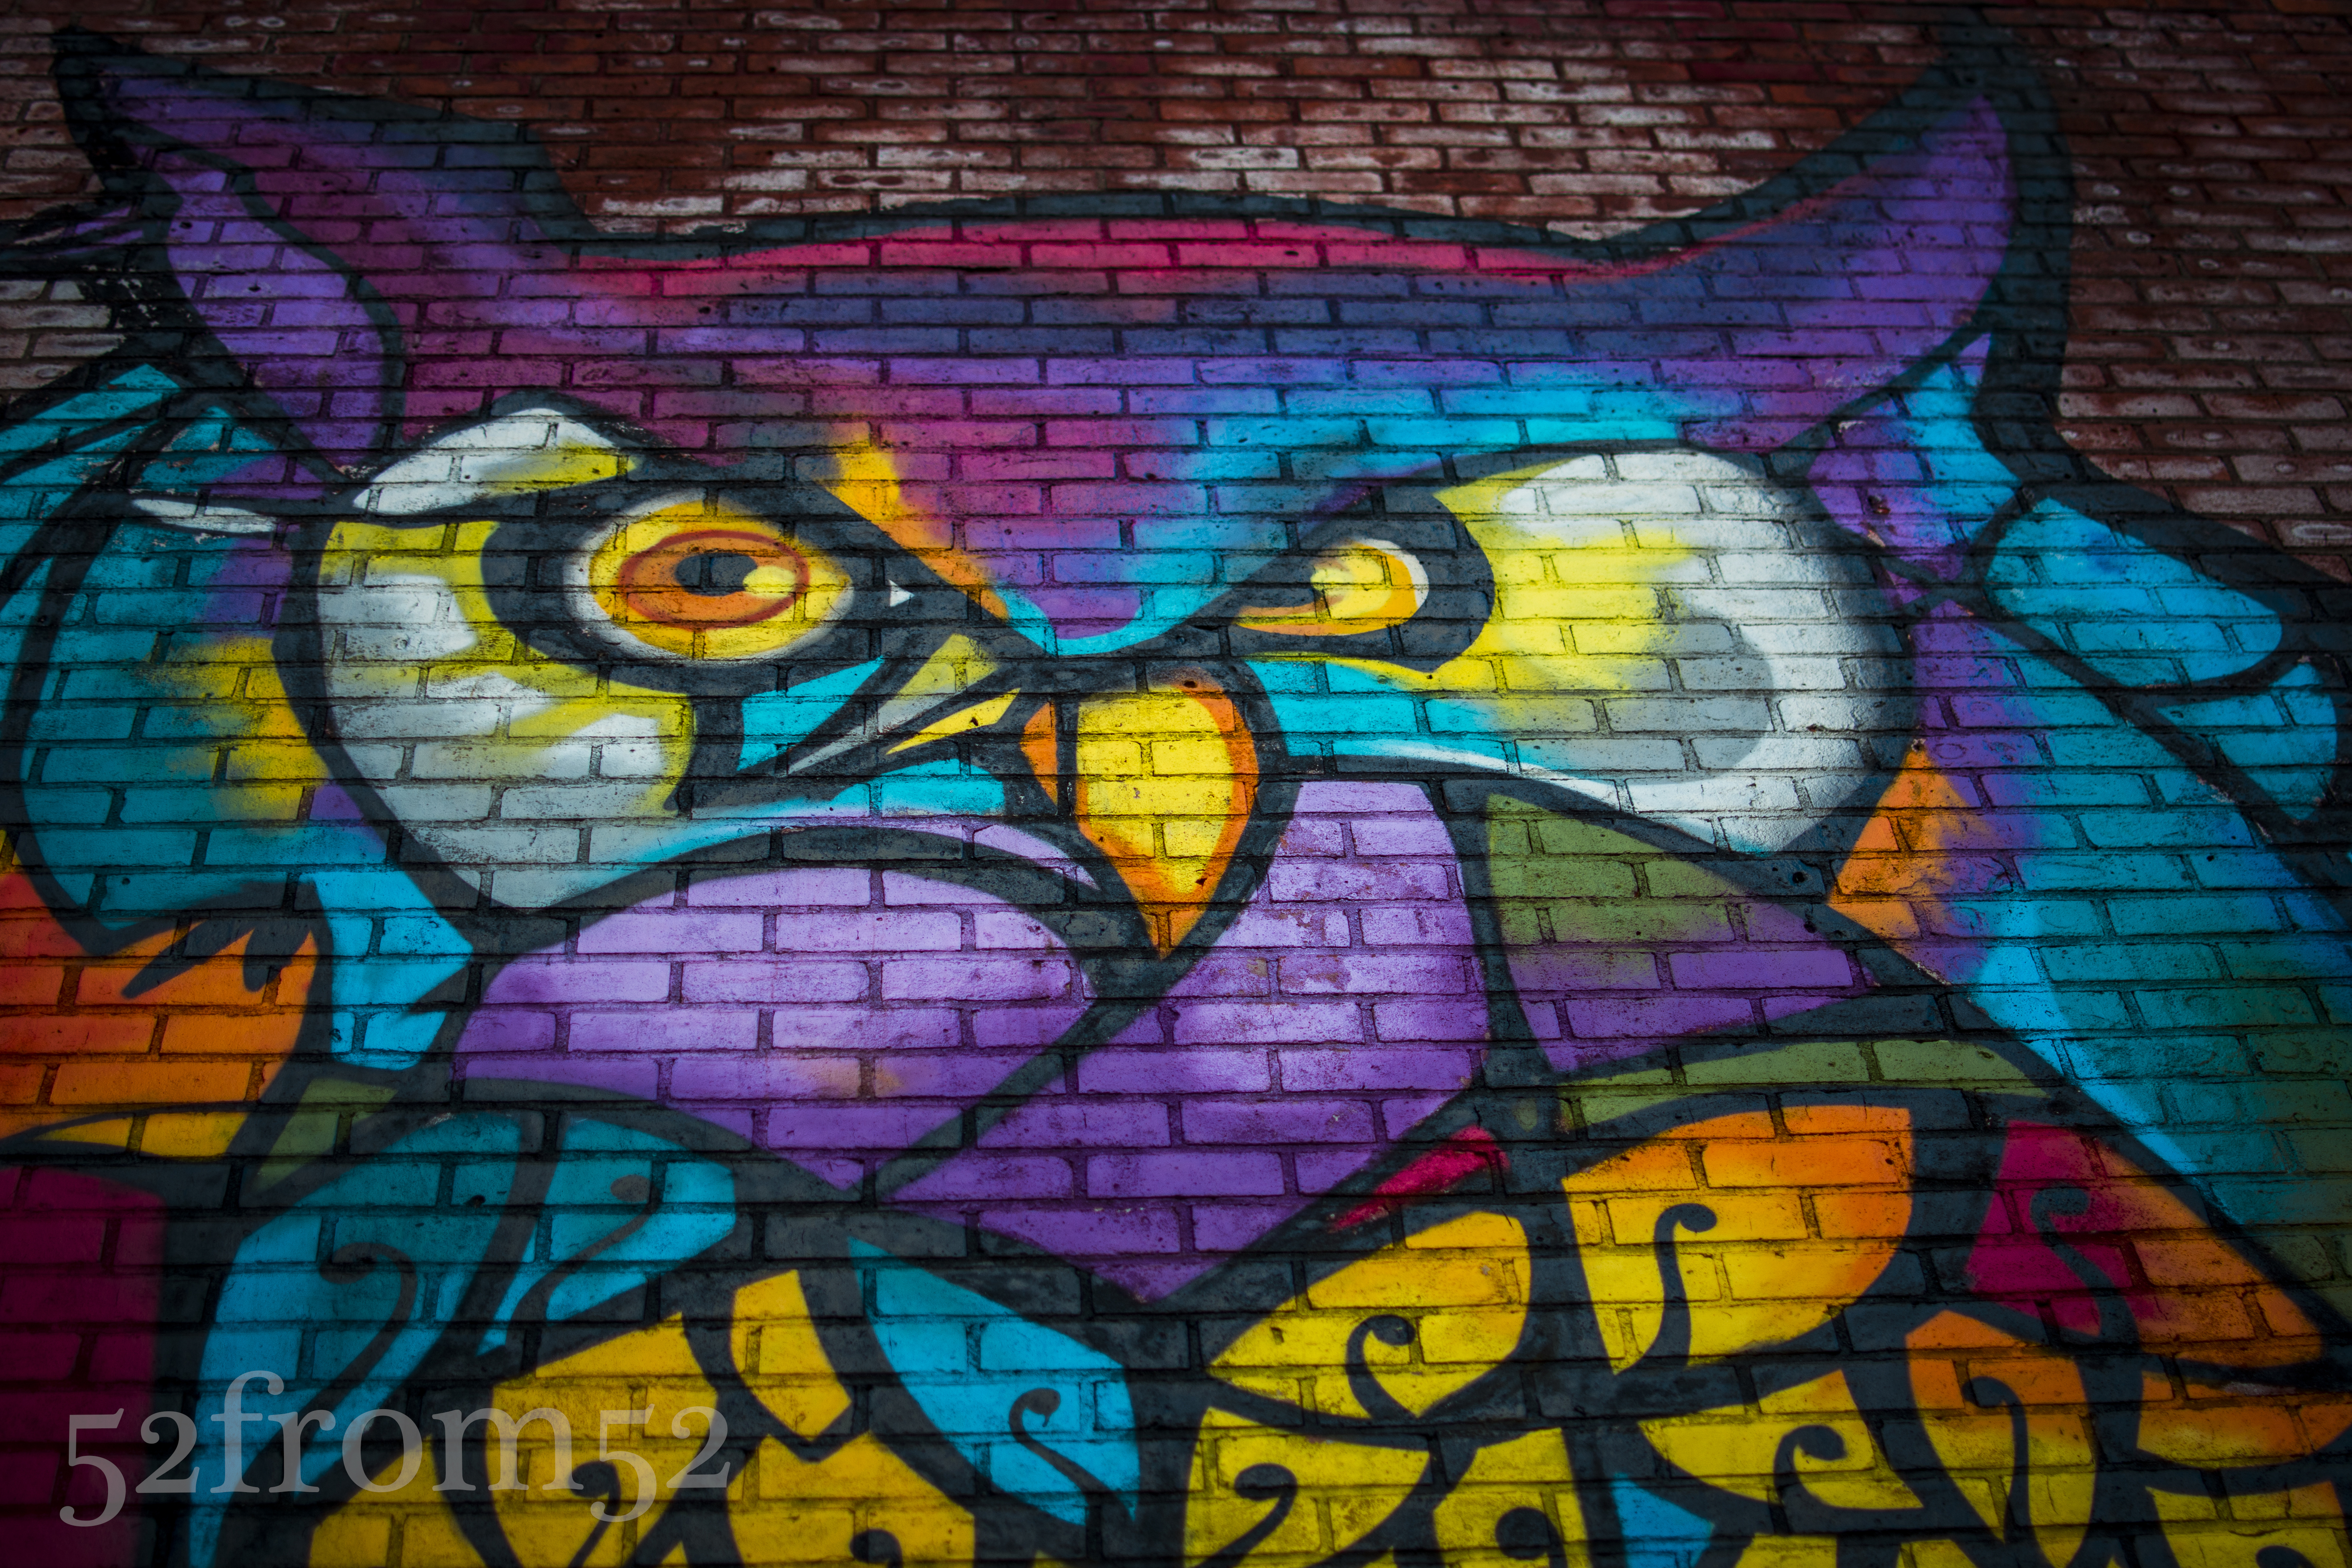
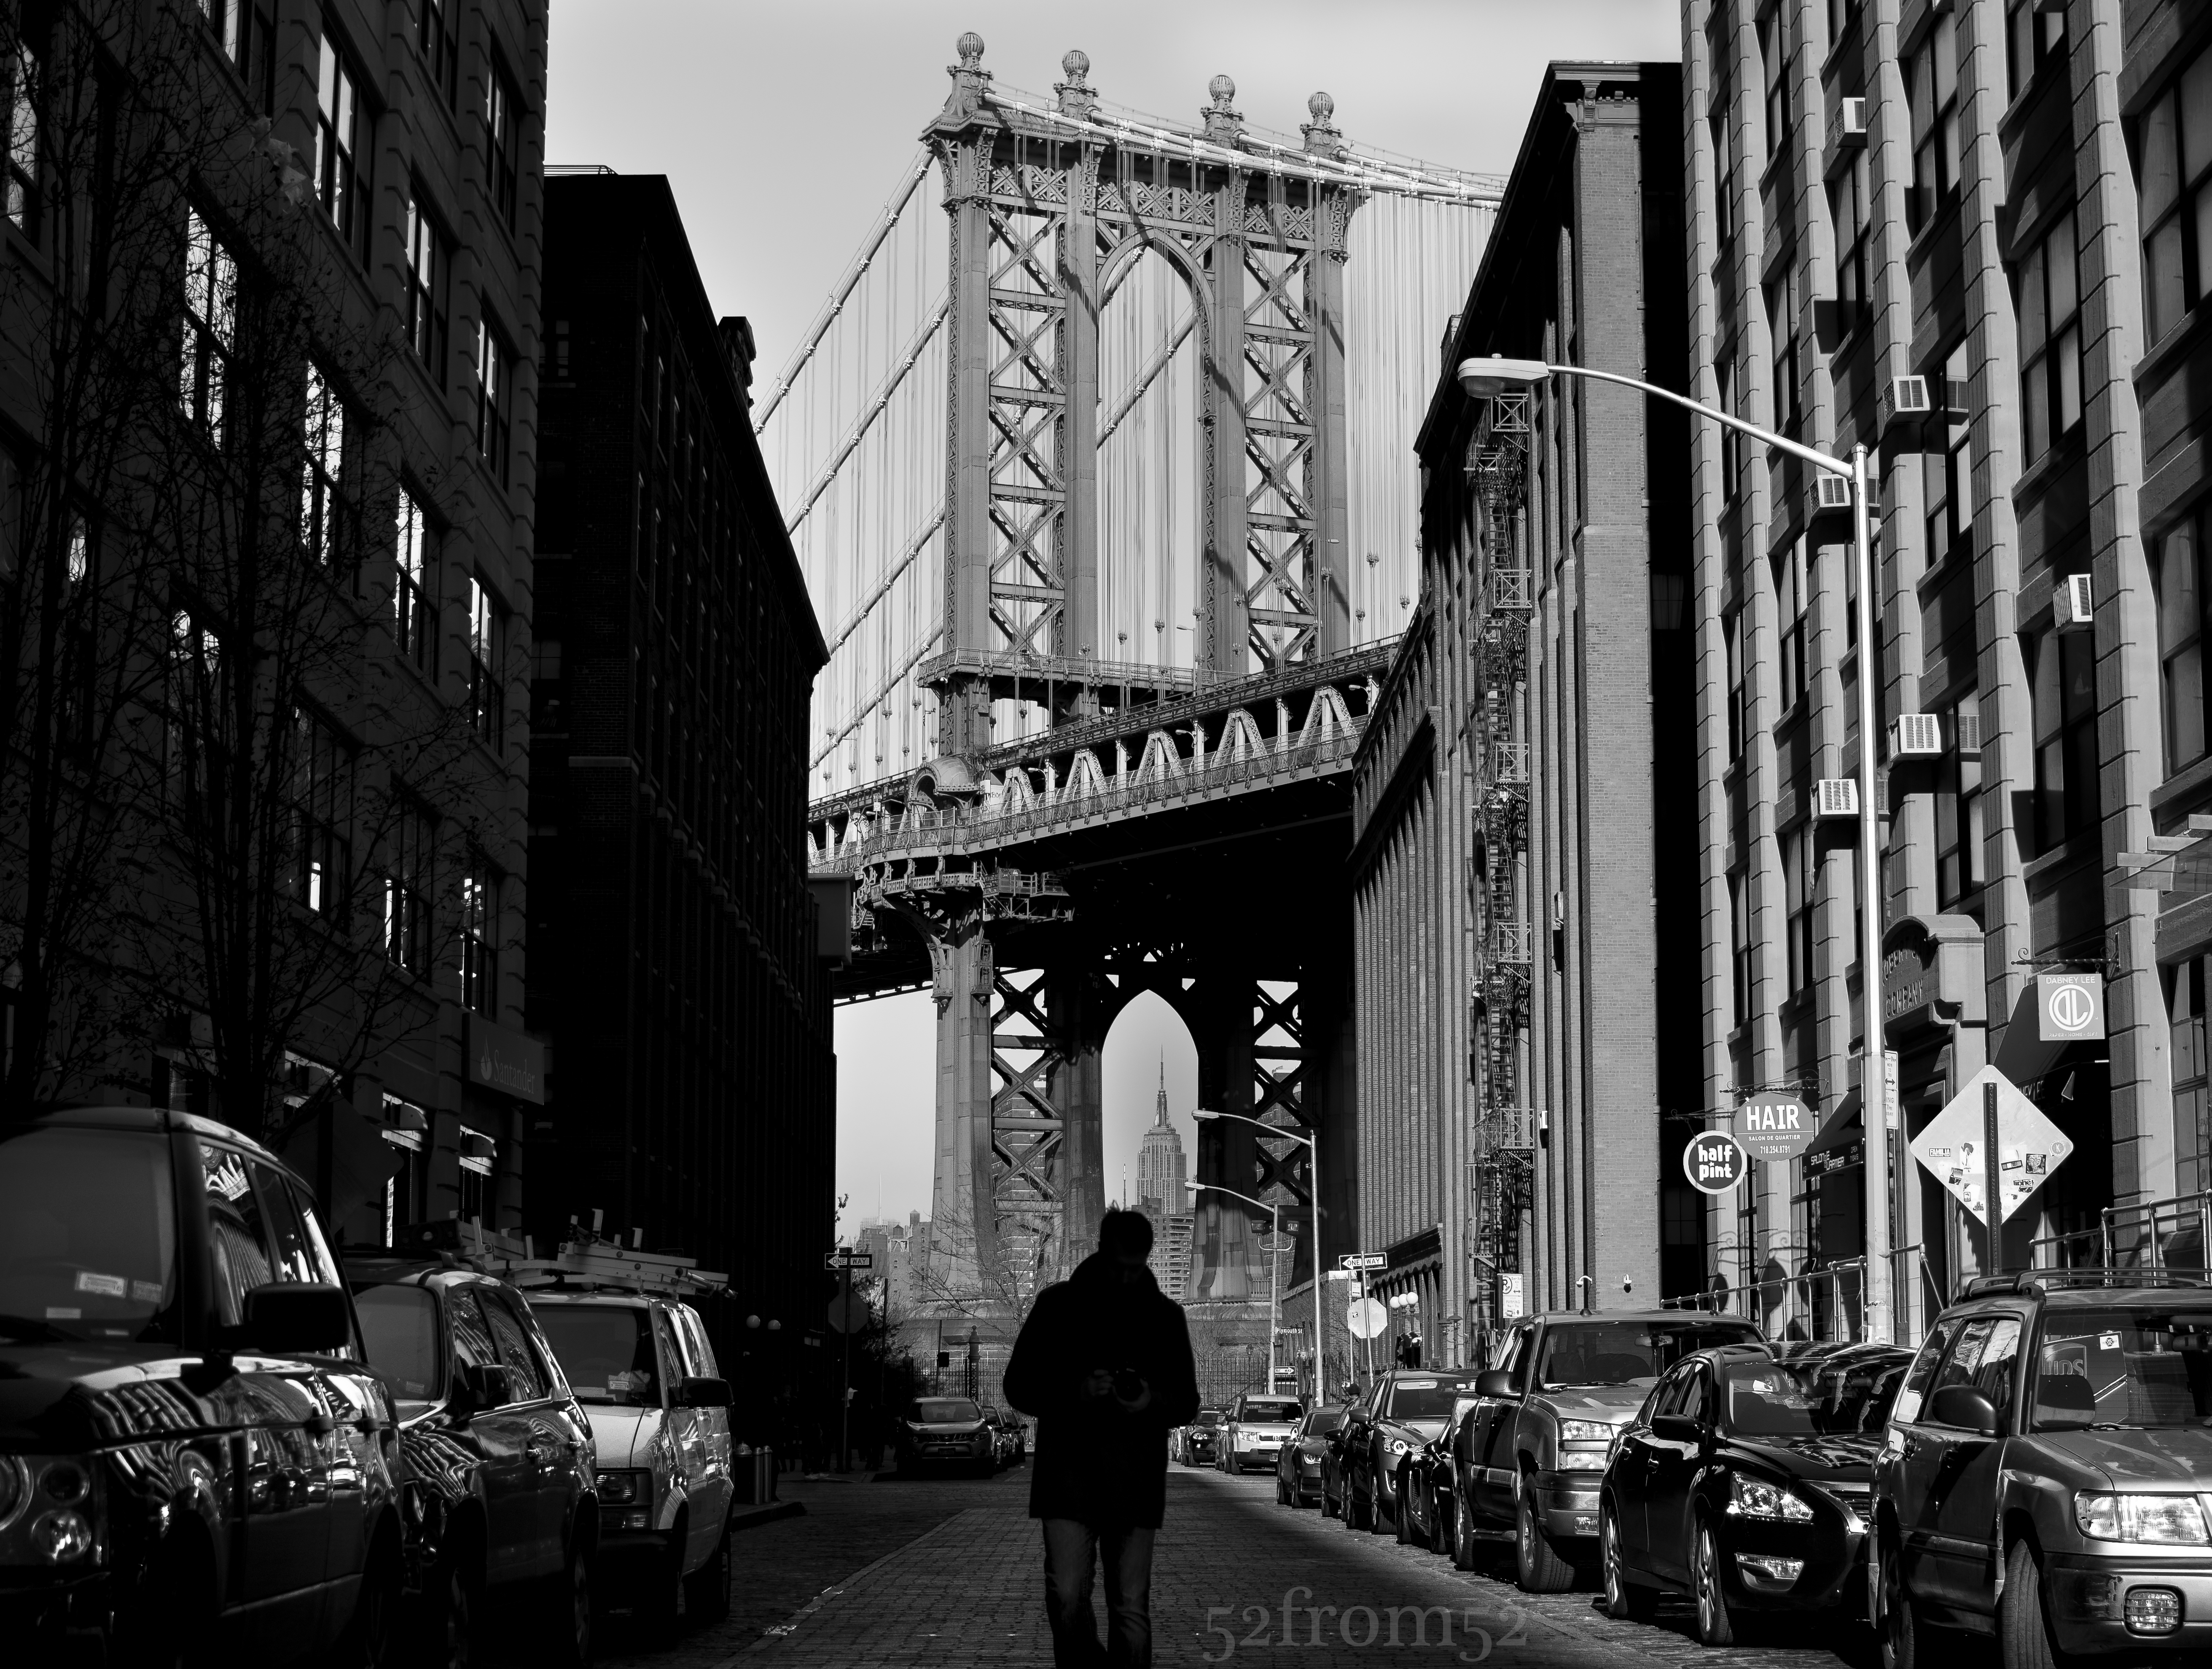
Being an admitted cornball, I couldn’t pass up the opportunity to work “hoot” into this week’s title. This Saturday marked the first time that I participated in what is often referred to as a “photowalk” in the photography world. The idea was hatched by two of my friends, one a photography enthusiast like myself, and the other a professional photographer. We kicked around some location ideas and eventually settled on DUMBO since it’s one of the more interesting and subject rich locations in the New York area. DUMBO, located in Brooklyn, stands for Down Under the Manhattan Bridge Overpass. Before Saturday I had never been to DUMBO so it was nice to finally cross it off my location bucket list. The area can get touristy not only because of the beautiful views but also because it’s home to the famous “Grimaldi’s Pizza”. Though not the original, there is a Grimaldi’s located in Hoboken so standing in line for pizza was not part of Saturday’s agenda.
Classic DUMBO Picture
Shortly after arriving on location I spotted what I consider to be the classic DUMBO picture. Although I didn’t want to use this as my featured picture, I couldn’t pass up the opportunity to take the shot. We spent the morning walking around discussing different techniques, equipment and comparing pictures. After walking around the east river’s shore line we decided to head into the streets to see if we could find some lunch and perhaps some graffiti. Post lunch we stumbling upon the brick wall that contained this weeks picture. All three of us worked the wall individually to find what we thought would be the best way to photograph it. It was interesting seeing how other photographers approached shooting the same subject and how each of us had our own unique view. After a few minutes of working on our own we compared pictures and tried our hand at duplicating each others shots. We continued doing this for a little while then eventually decided to call it a day. While driving back to New York City we came to the conclusion that this shouldn’t be our first and only photowalk. In the coming week’s expect more posts chronicling different “photowalks” and if you’re interested in participating in one shoot me an email.
Bokeh Owl Version
Photography Concepts:
This week I learned less from my own shooting and more from the discussions and tips that were traded during the photowalk. One of the biggest takeaways, which might come as a surprise to anyone familiar with photography, was the concept of spot metering. Prior to this weekend I heard the term before but never really understood what it meant or where it would be applicable. In a nutshell spot metering allows you to lock in the exposure you want then recompose and shoot your picture. I didn’t get any good photo example for spot metering this weekend but you can bet I’ll be experimenting more with this in the future and do a post on it.
Another subject that came up worth noting was white balance and the importance of doing it in camera. I always thought that I could do white balancing during editing and there was minimal to no trade offs. This however was not entirely true. Essentially although you can fix white balance after shooting, by getting the correct white balance in camera I’ll have more flexibility in editing later. I mainly shoot landscape and outdoors pictures, so luckily white balance hasn’t come into play that much for me thus far. In 2014 my goal is to take more pictures of people so expect more posts on white balancing now that the subject is a lot less murky.
Picture info: ISO 3200, 35mm, f/1.8, 1/200sec, -1 Exposure step
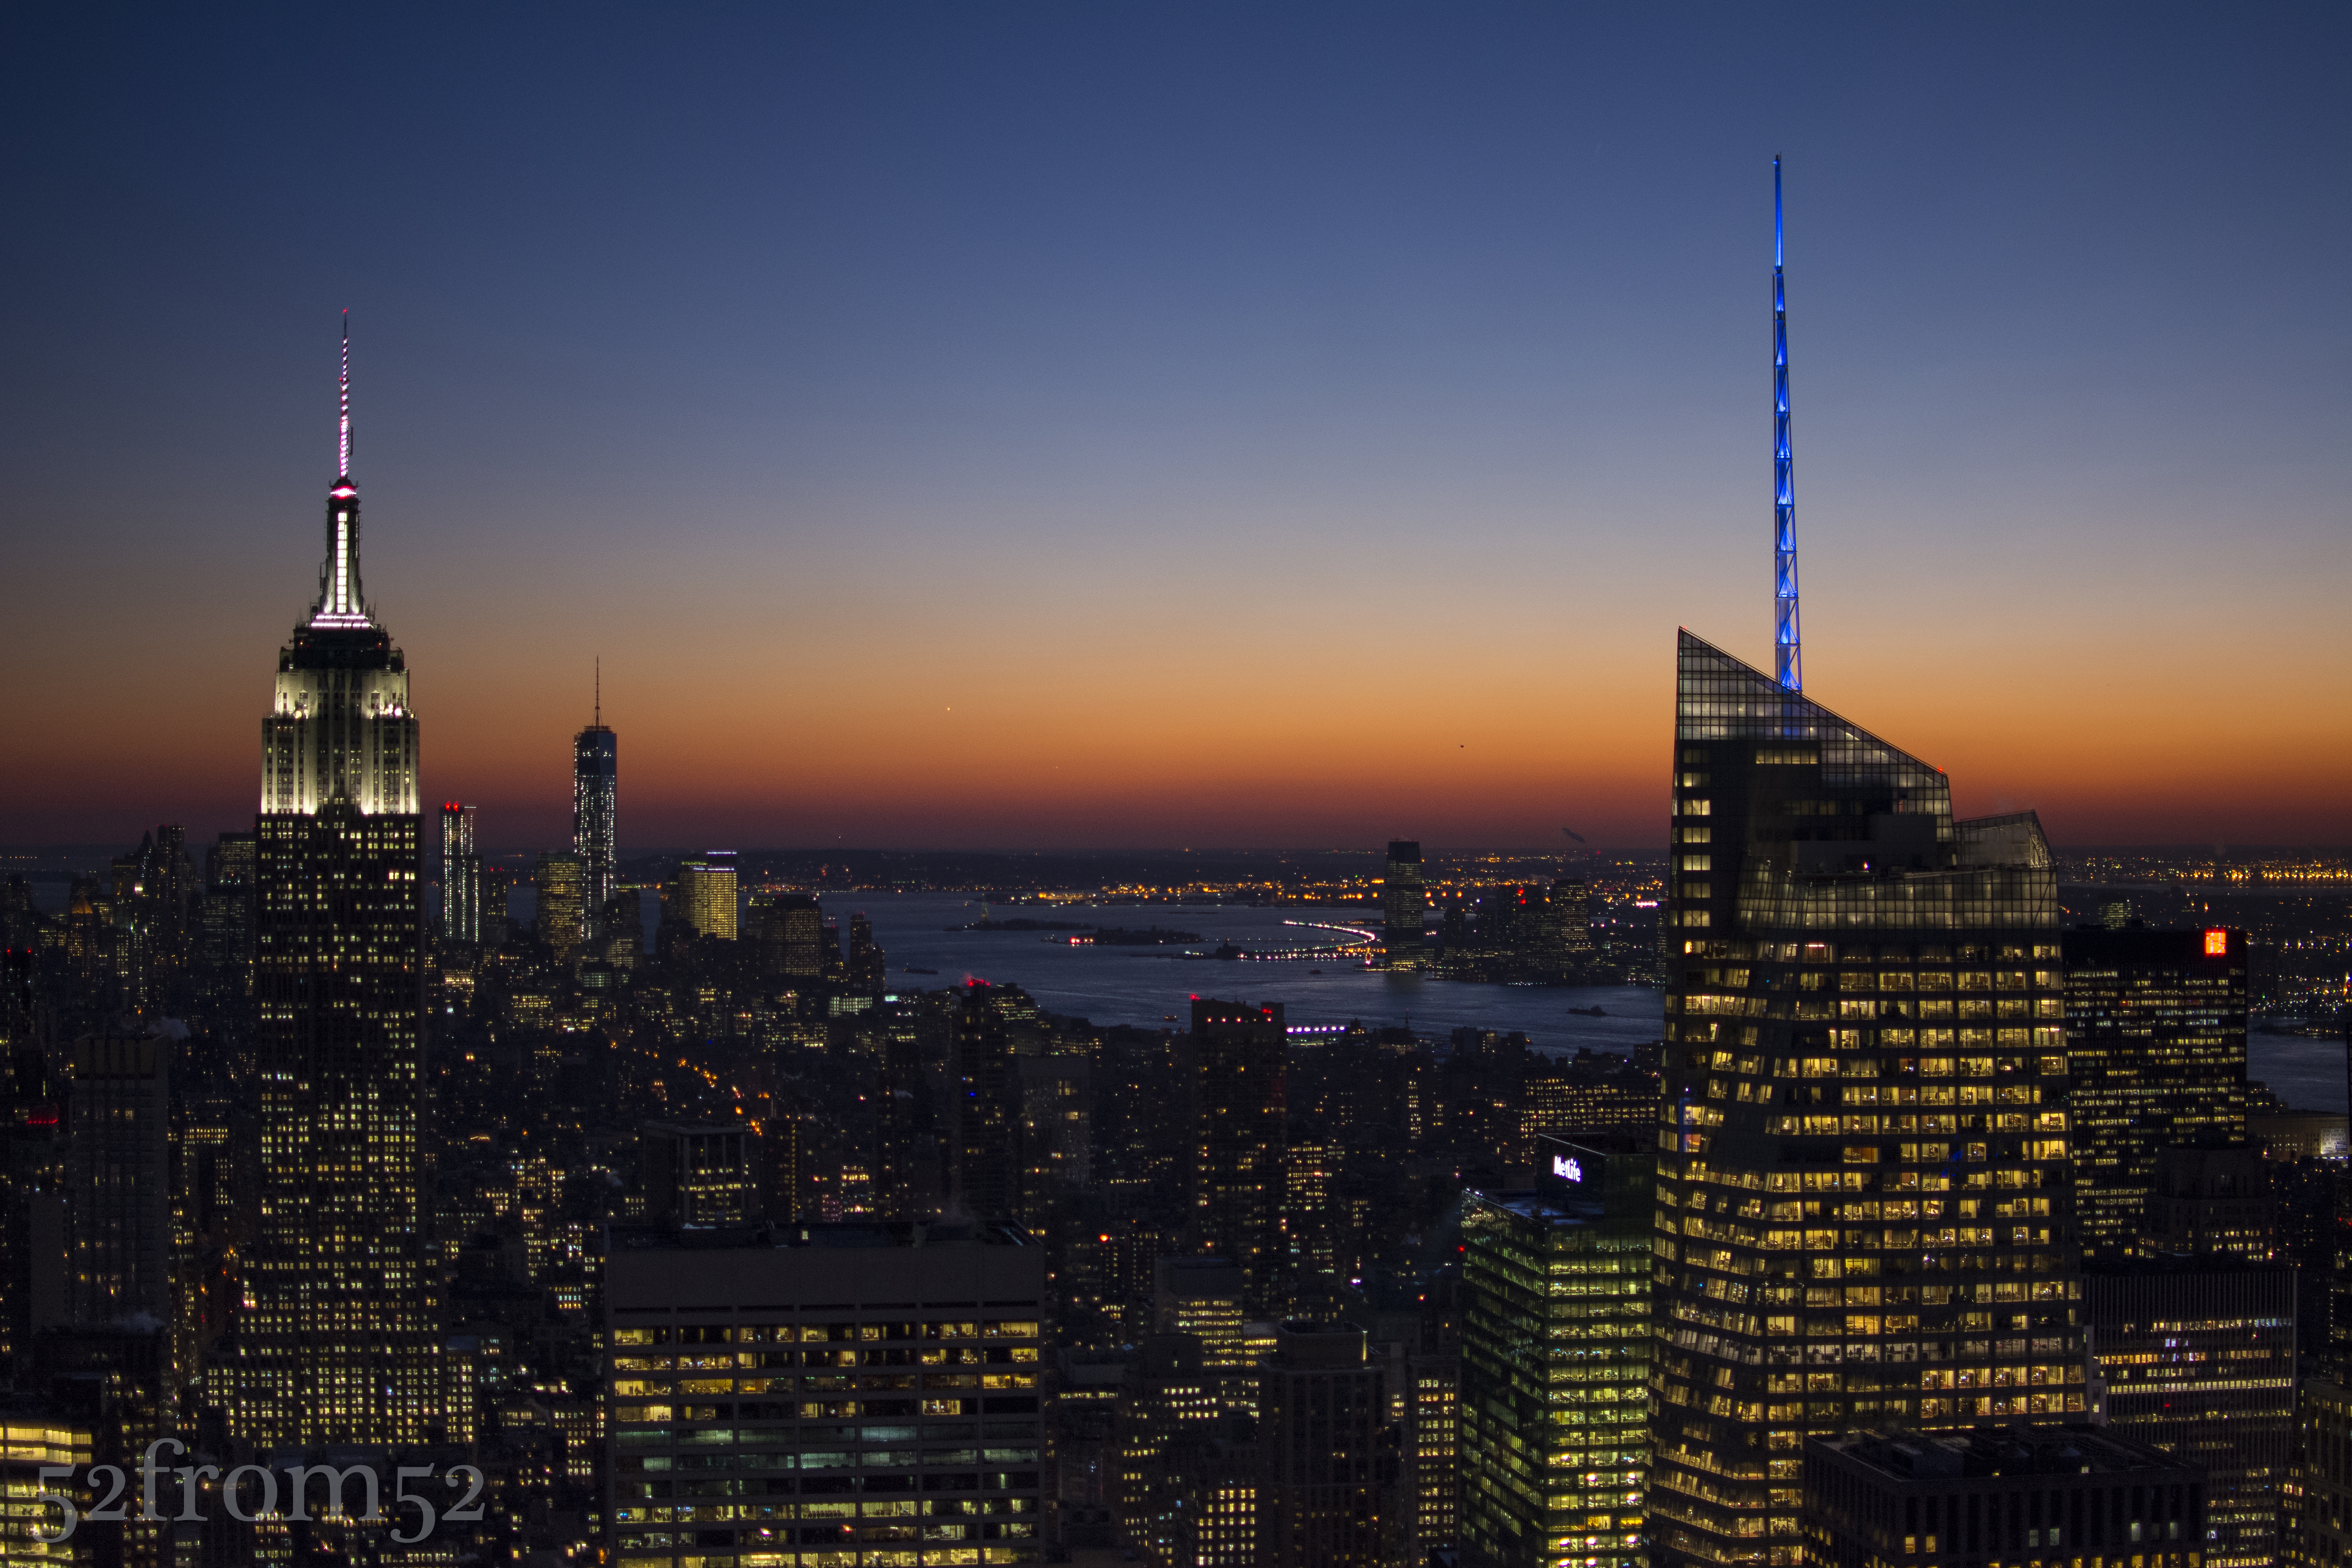
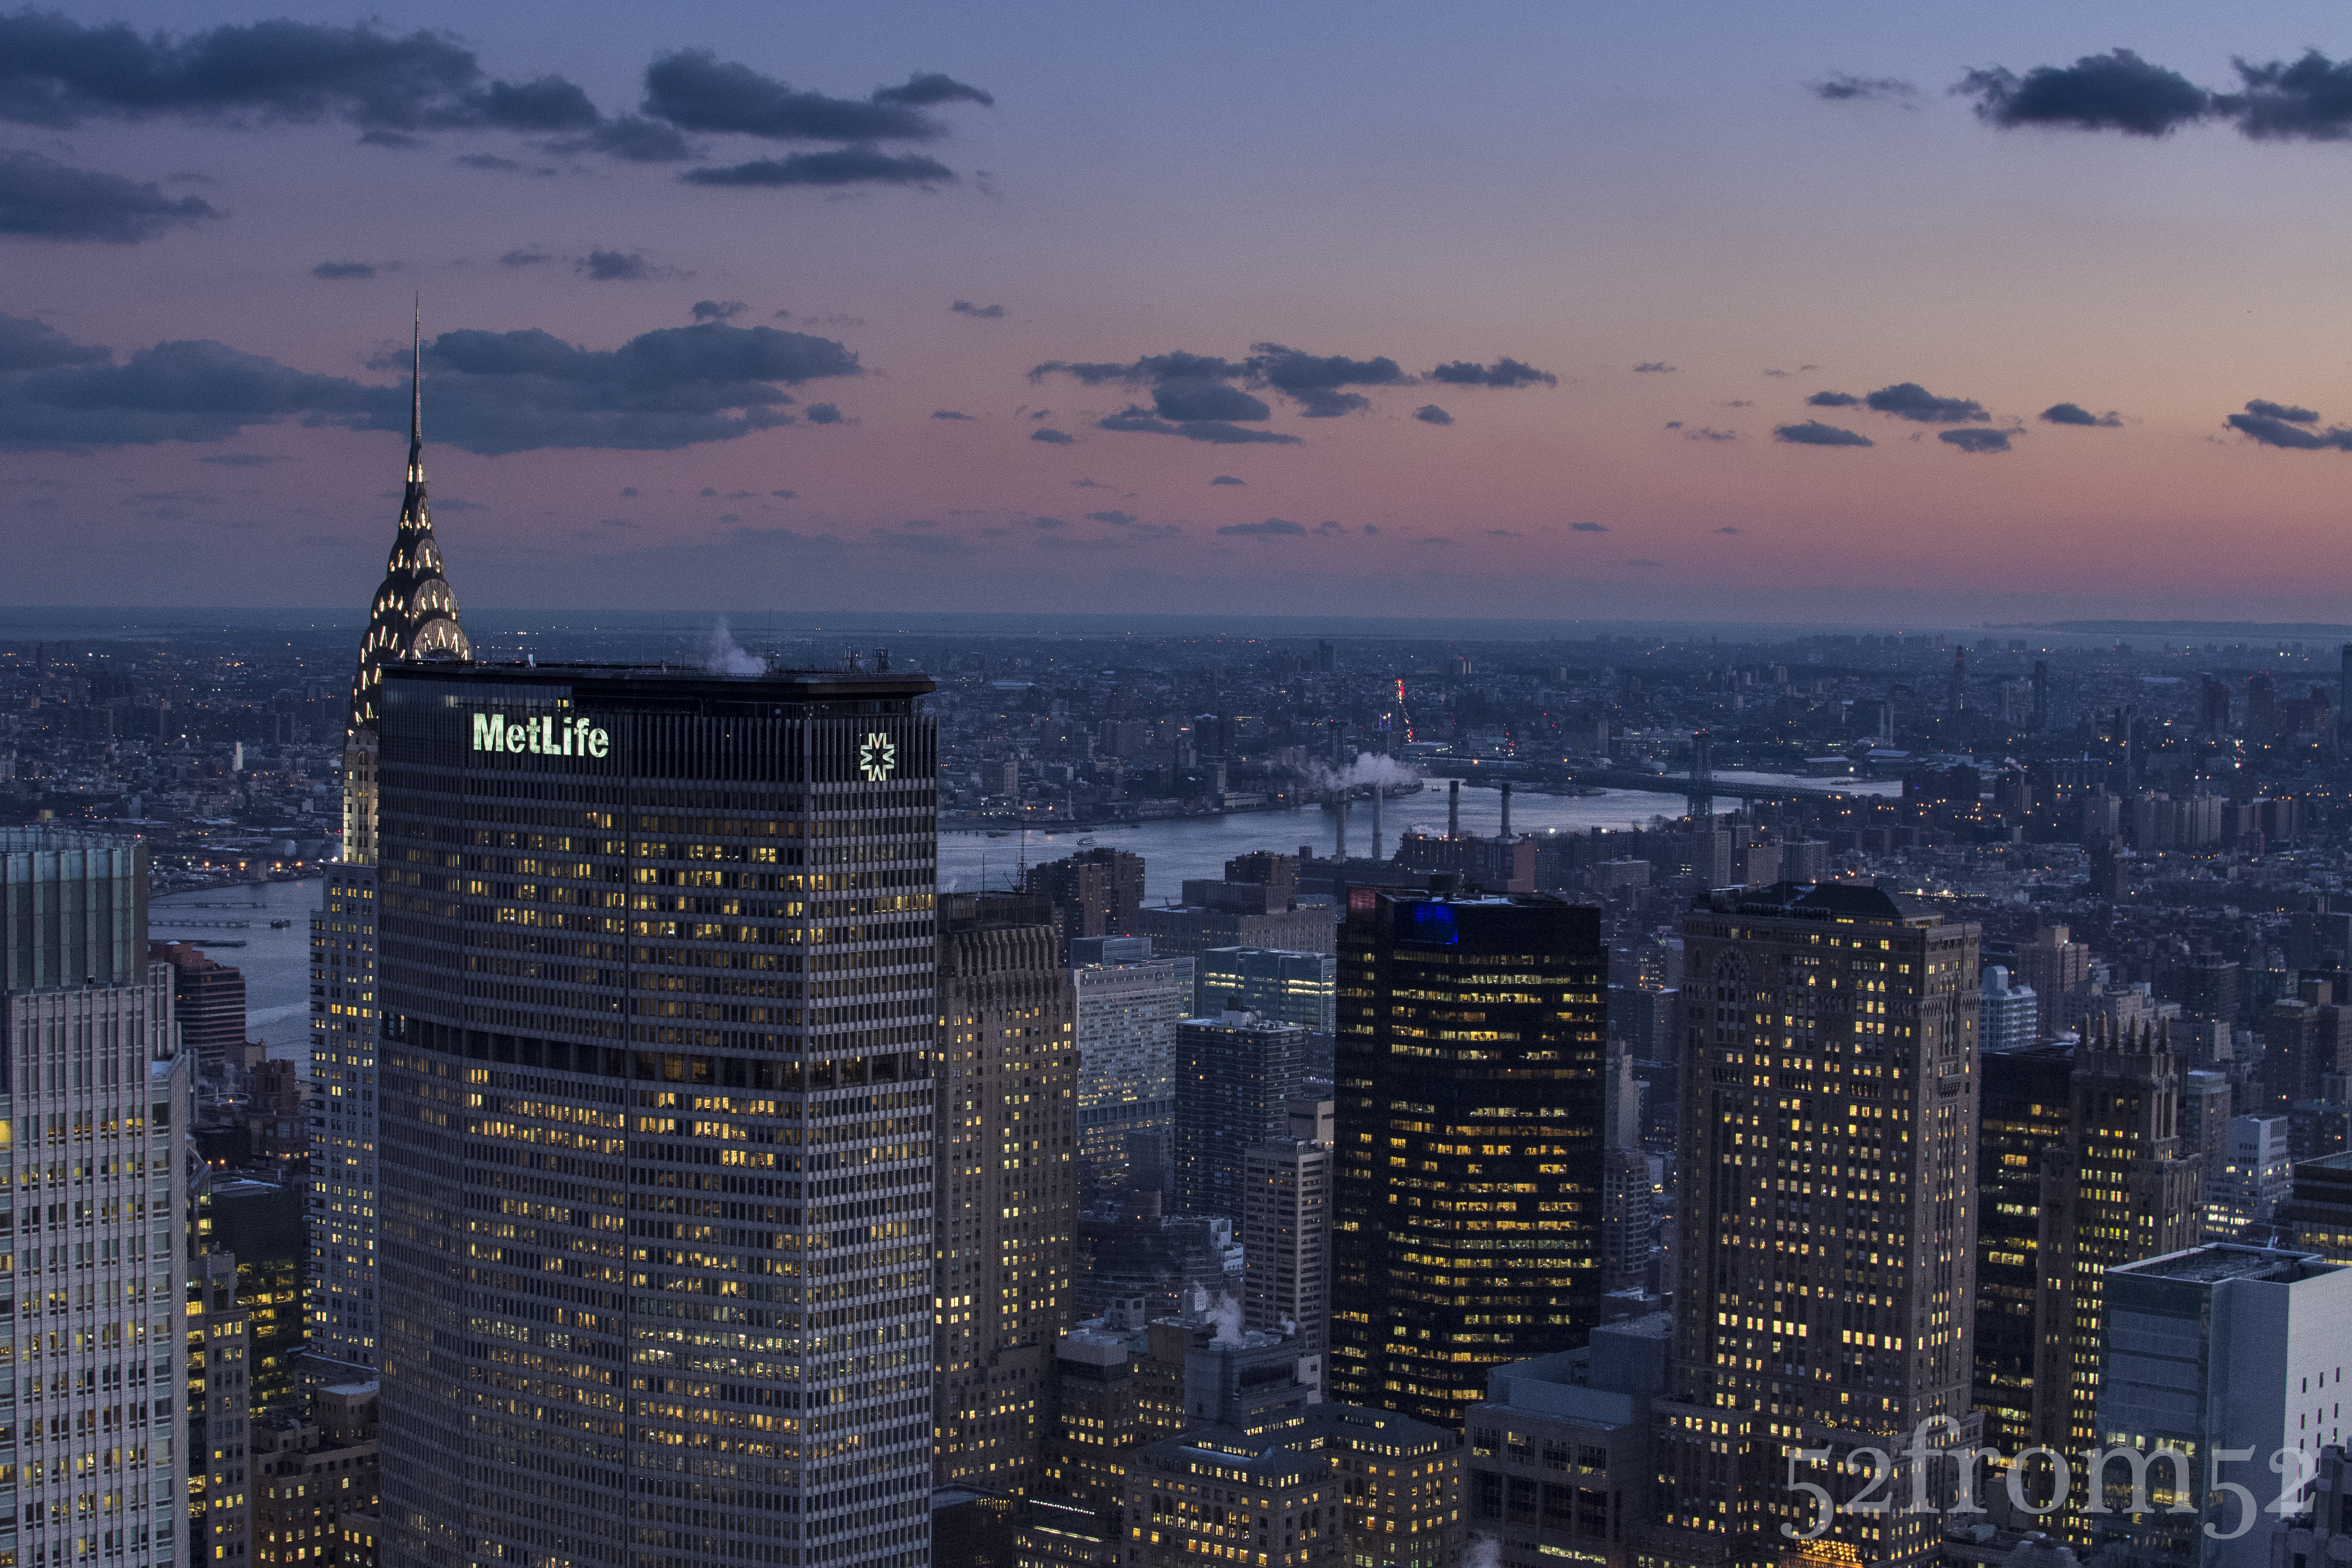
Week 19 (12/9/2013 – 12/15/2013): Top of the Rock Observation Deck
Picture taken on 12/12/2013 at 5:15 PM
Picture description:
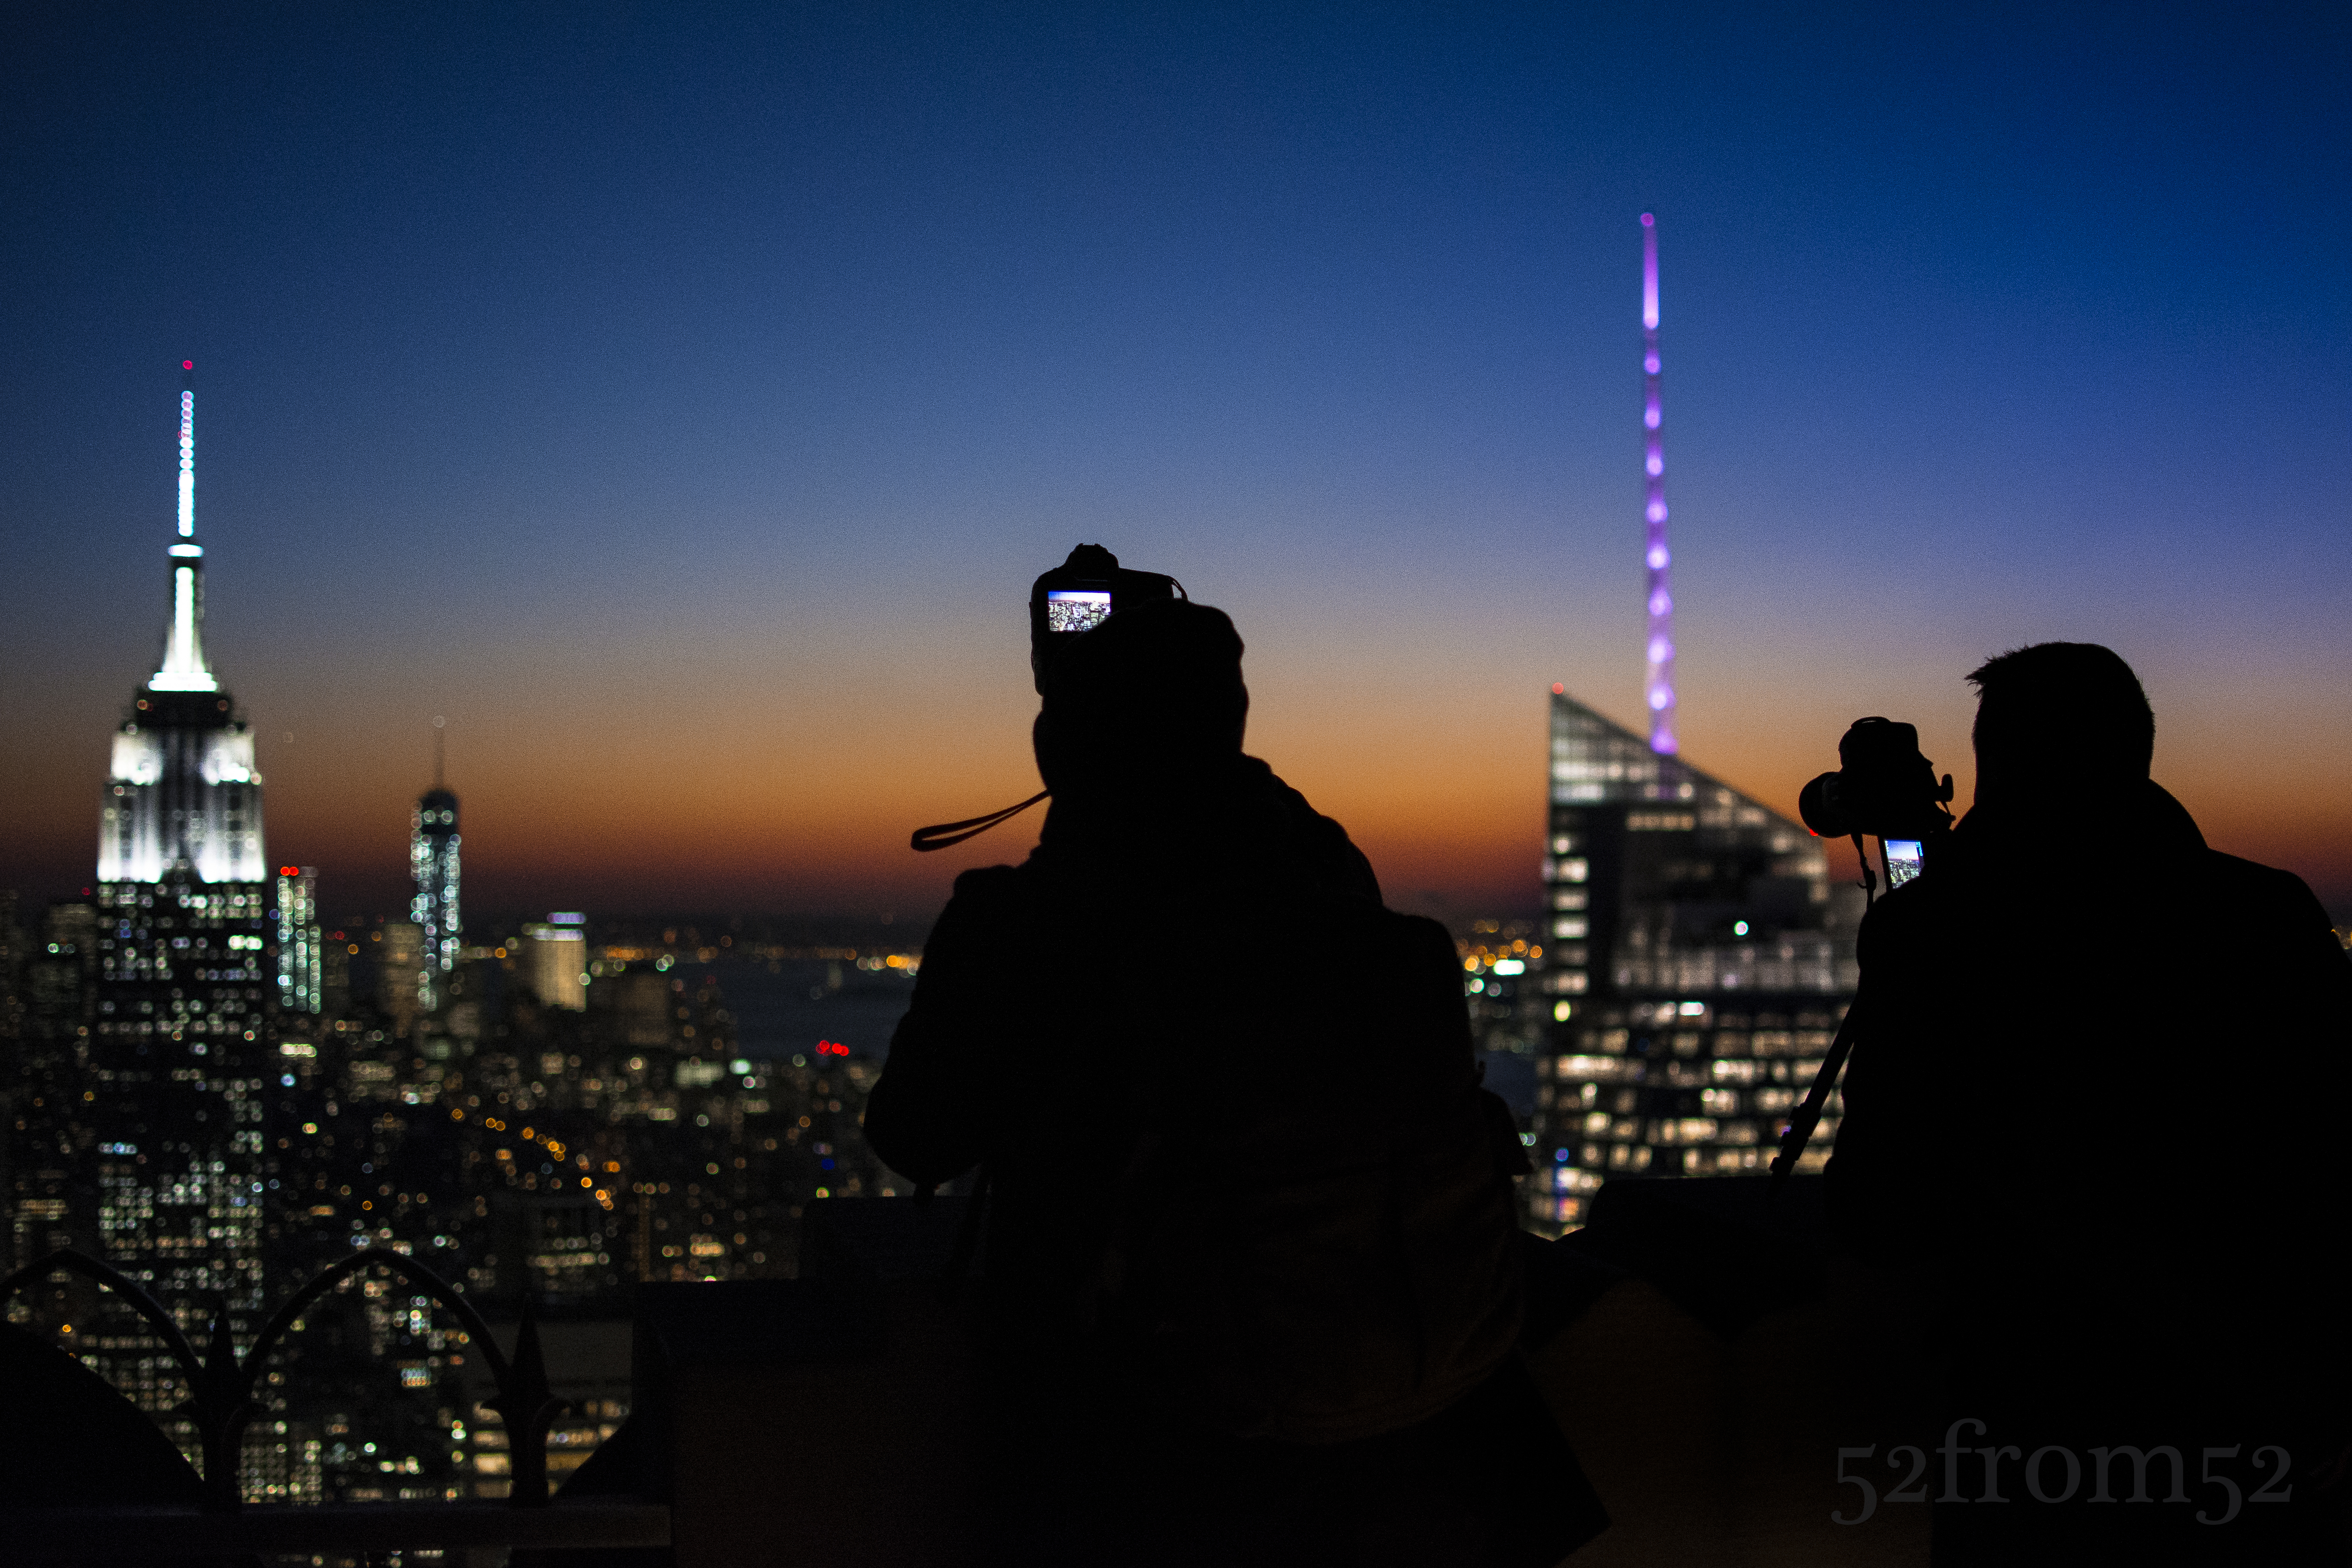
This week I finally got the chance to make a return visit to Top of the Rock. My first visit was six months ago and was only two weeks after I purchased my Nikon. Since my last visit I’ve often looked back at the pictures I took and thought about the many things that I could have done better. I’ve learned many lessons over the past six months, in part because of this blog but also because I’ve immersed myself in photography. Articles, YouTube tutorials and experimenting with different techniques have been my main sources for learning. One other source of learning that might surprise you is instagram. I often flip through different hashtags looking for ideas of what to shoot or to see how people photograph certain subjects or places. Instagram has photographers of every level ranging from the professional to amateur, and or dare I say serial selfie taker. Before and after my trip I looked through the hashtag #topoftherock to see the kind of pictures people took during their visit. Besides the selfies and couple pictures I noticed that nearly all of the pictures looked identical with the exception of changes to the sky or filter the person used on the picture. After seeing how people have been over-sharing the same picture I knew that I had to find some way to differentiate mine from the rest.
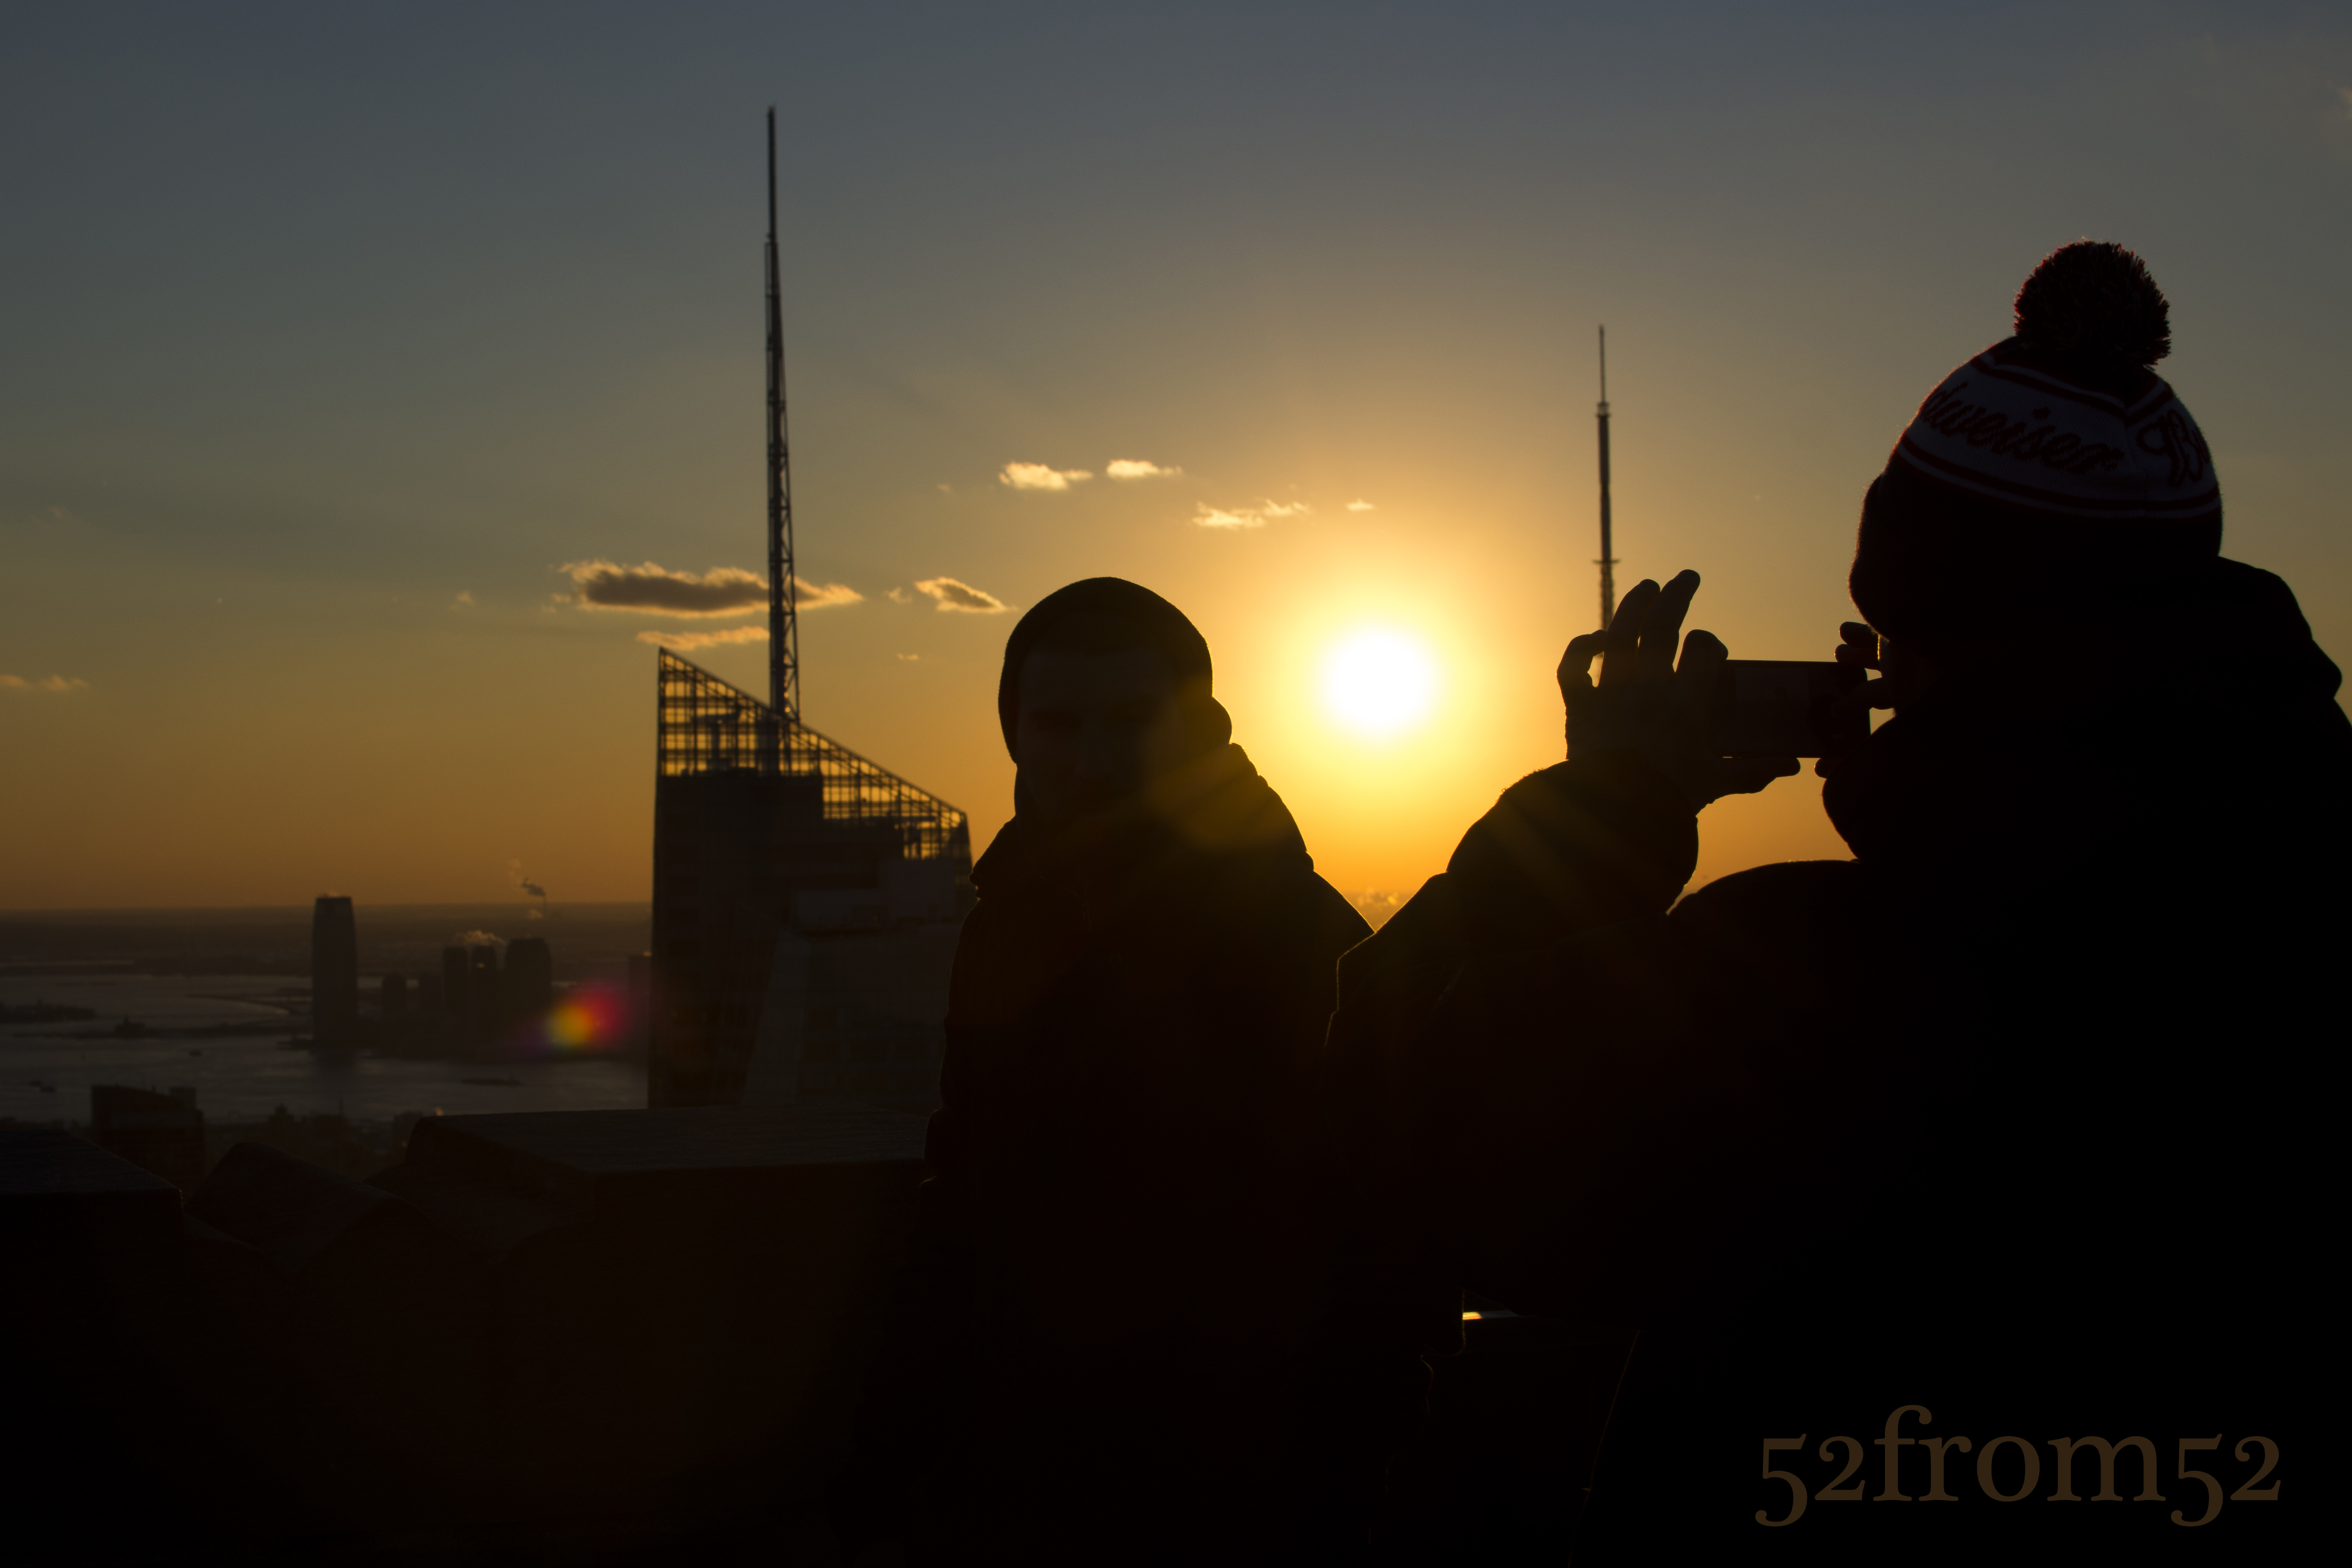
During my visit even though my goal was to take an original picture, I couldn’t help myself from taking the classic Top of the Rock picture. I found myself taking the same kind of picture over and over again partially to make sure I got a good one, but also because in person it’s just that hypnotizing of a view. After about an hour of scanning the horizon for a unique view I came to the conclusion that from my vantage point there really was none. It didn’t matter where I aligned the buildings, I had already seen that picture, or one very similar, shared countless times. At that moment I decided to take a step back from my coveted position to see what new perspectives I could find. Within a matter of seconds I was rewarded for my decision. After stepping back I saw that all the people taking pictures were casting silhouettes in front of the very same view I was just photographing. I spent the next couple of minutes wading in and out of the crowd to try and get the a picture that met my satisfaction. Eventually the 20 degree weather got the best of me and I decided to call it a night. On my way home while thinking about my night, I realized the valuable lesson that I just learned. It’s very easy to get drawn into taking the obvious picture. The only way my photography is going to continue to improve or “move forward” is if I regularly remind myself to take a “step back” and find a new perspective on what’s right in front of me.
Photography Concepts:
Although I used the previous section to talk about avoiding the obvious shot, it doesn’t mean the classic Top of the Rock pictures aren’t good ones. For the purpose of this blog I wanted to challenge myself to get something unique but it leaves the question, how do you take a good picture at Top of the Rock? As I mentioned earlier I often look back at the pictures I took during my first visit and dwell on what I could have done better. Let me share with you some of the lessons I learned between my two visits in terms of taking pictures at Top of the Rock.
Example of the classic Top of the Rock Pic
The first thing you have to ask yourself is what kind of picture are you looking to take? Do you want take pictures of only the buildings or are you planning on featuring yourself or friends in the picture with the buildings in the background? Knowing your subject is important to so you can determine the time you’re going to go and where you should set up shop once you’re there. Let’s start with talking about taking pictures of people. If you’re taking pictures that will feature yourself or your friends the location is less critical but the time that you arrive is important. In this case you’ll want to go about an hour before sunset this way you have time to take nice pictures in softer light and without flash. In my opinion flash is the worst when taking pictures at Top of the Rock. Unless you’re an absolute pro and know how to compensate correctly flash tends to wash out the city backdrop, which is one of the main reasons you’re at Top of the Rock right? In order to feature the cityscape behind you, don’t use flash, especially if you’re taking pictures on the 68-69th floor behind the glass. Once you find a nice location play around, take pictures of you subjects looking out towards the buildings or doing some forced perspectives (google it). If you want to get more original, take pictures of your subjects from a distance. Perhaps have your subject stand looking out towards the city and snap your picture focusing on them through the busy crowd? As was the theme of this blog, once you take a step back you’ll be surprised what new perspectives you’ll see.
Example of a unique Top of the Rock Picture
What about the settings to use or not use when taking pictures of people, other than flash? One option is to use the smallest aperture your camera will allow which will give you nice background blur and permit you to use a low ISO. The negatives of this is the exposure of your cityscape background might be overexposed. The solution, shoot your picture in such a way that you’ll be able to only edit the background later to correct the overexposure (don’t forget to shoot in RAW to enable this). Option two in terms of aperture would be to use a small aperture which if you took my advice and came close to sunset, is going to force you to use a high ISO. The negatives, you’ll have a grainer photo but the positive is you will have a more detailed cityscape background. If you’re only looking to share this picture on something like instagram a high ISO image is fine. Even with the wide aperture you still might have an issue with overexposure for the background so compose your picture accordingly. The last setting I mention is try to use a focal length of 50mm+, I won’t go into detail about why but if you want to know why check out the video below from one of my favorite YouTube sources.
Now let me talk about what to do if you’re looking to take pictures of the buildings. First, I recommend going to the 70th floor and trying to lock down a position in the center area where you don’t have the bottom floors jutting into your picture. Getting this prime location is even more important if you’re using a wide angle lens. Just like shooting people, I think the best time to take pictures of buildings is right before and during sunset but you can go any time especially if there are nice mid-day clouds. For now I’ll talk about what to do at sunset. Going at sunset or at night really forces your hand in terms of camera settings. Unlike taking pictures of people, when you use a small aperture there aren’t many positives. Your plane of focus is going to be narrow even with the buildings being far away. What’s going to happen is one building might appear in perfect focus while the others are a little blurry. You can still take a good picture using small apertures but if your goal is to get a crisp image that you can blow up on perhaps a canvas, I don’t recommend using small apertures. What are your options then? Option one, you can boost your ISO but this is going to still leave you with the problem of not having a crisp image for enlarging later. Option two, bring a tripod and shoot with a small aperture and slow shutter speed. This seems simple right? Well tripods are not allowed at Top of the Rock but there are ways around this rule. As you can see in this week’s featured picture people bring tripods. The key is to bring one small enough to fit in your bag, and one that has a small leg spread so it can sit on top of the cement pillars. This is also why getting a good location is critical, there are a limited number of cement pillars and or locations that can facilitate the use of a tripod. I’m not going to go into the all settings specific to tripods because if it’s pretty simple, small aperture, low ISO, slow shutter. Two things I will recommend though is use the multiple focus point setting which will grab more buildings in focus, and underexpose your image. One thing not to do, which believe it or not I saw someone do, don’t use flash while you’re shooting buildings on a tripod. Maybe I’m missing something and if I am please comment and correct me, but I don’t see any positive in using flash on a tripod when you’re not taking pictures of motion or people.
ISO 2500, 35mm, f/7.1, 1/40 sec, no tripod
These are some of the lessons/tips I’ve learned from my two trips to Top of the Rock. I still haven’t gotten what I would consider a great classic Top of the Rock picture, but that’s mainly because I haven’t brought a tripod or wide angle lens. I think I’ll take at least one more trip in a few months and try my hand using more than just my 35mm lens and perhaps a tripod. Until then I hope the lessons I’ve learned and shared so far help you shoot some great pictures at Top of the Rock, have fun and remember take a step back!
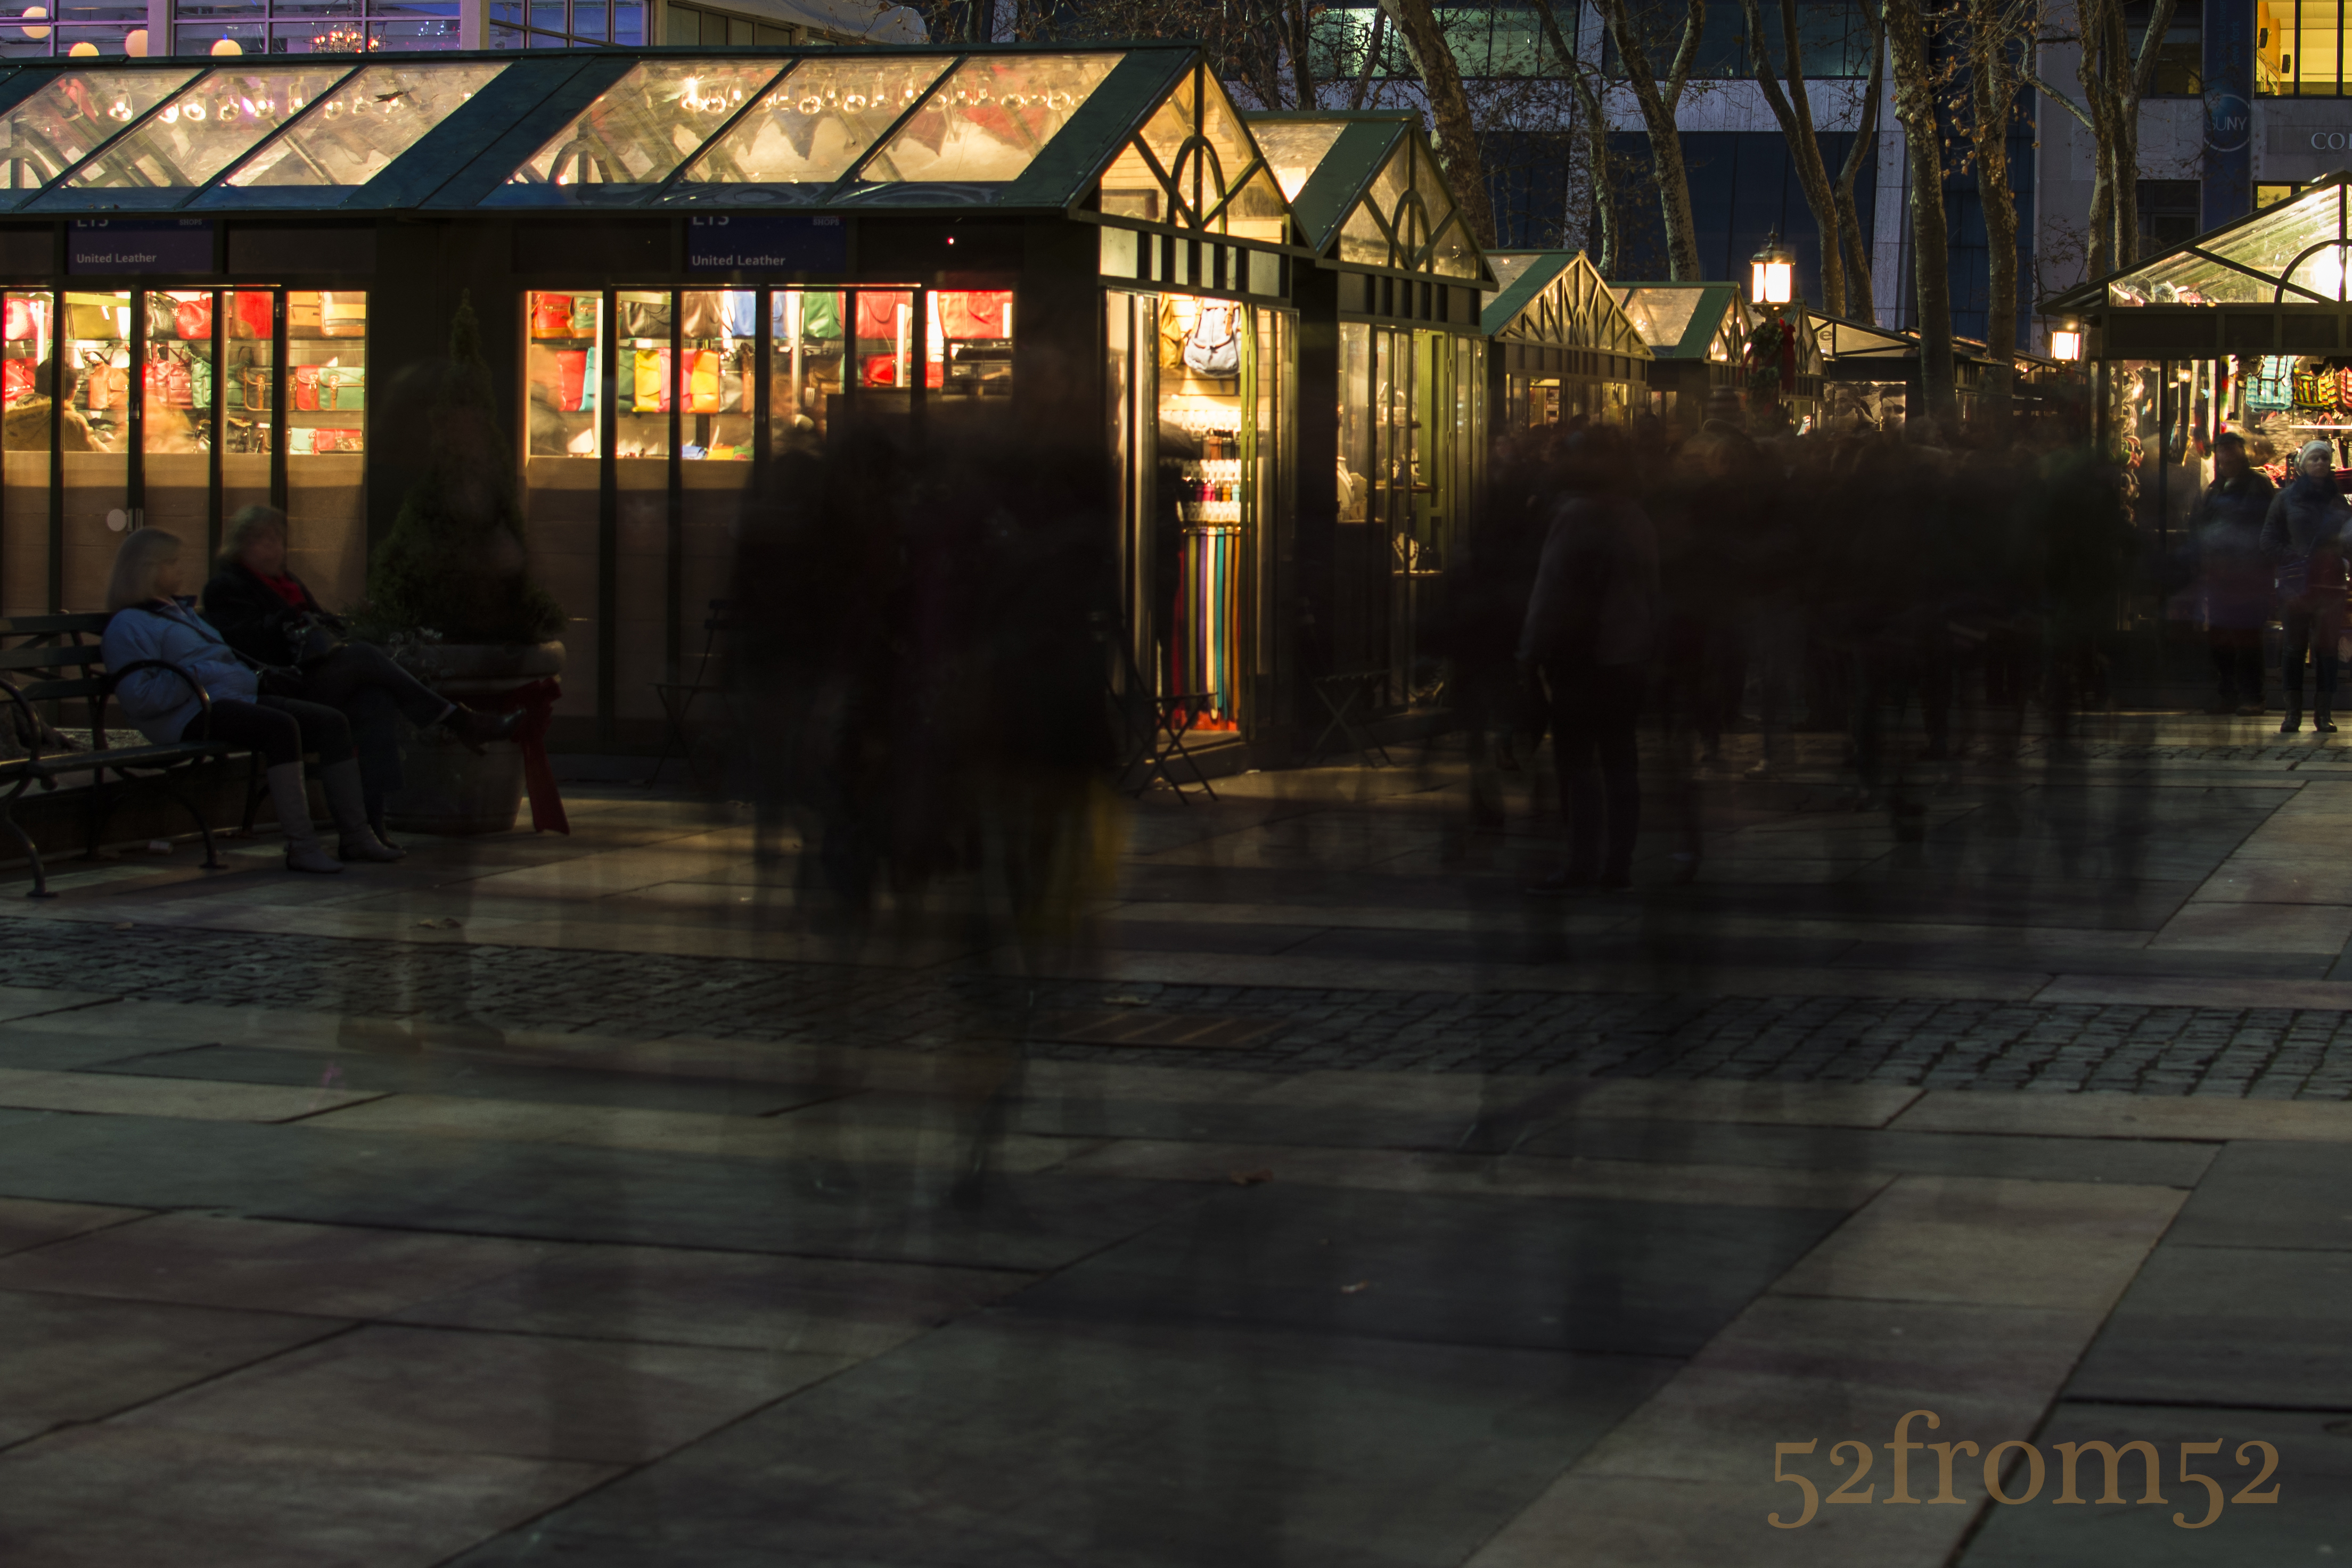
Week 18 (12/2/2013 – 12/8/2013): Bryant Park, New York City
Picture taken on 12/7/2013 at 4:46 PM
Picture description:
It’s hard to top New York City during the Holiday season. Everywhere you turn there are festive window displays, giant Christmas trees and glowing lights filling the night sky. If you’ve been reading my blog from the beginning you might remember my week 2 post, “A Day of Reflection” where I visited Bryant Park. As I said in week 2, Bryant Park is one of my favorite locations in New York City. One of the best things about Bryant Park is how it transforms throughout the year with each season. During the winter months the center grass area turns into an ice skating rink with a beautiful panoramic view of midtown New York. Surrounding the rink is a network of stores in in the form of tiny huts. As you can imagine this winter wonderland attracts visitors from all over. In case you didn’t guess by now Bryant Park is obviously where I got this week’s photo, but before I talk about my time in the park let me tell you how I ended up there.
In the beginning of the week I wasn’t sure what to photograph so I threw out a status on Facebook to get some ideas. One of the suggestions I got was to capture the “hustle and bustle” of holiday shoppers, thanks Laura! After getting this suggestion Bryant Park and its “Winter Village” instantly came to mind. Since I pass the park during my commute to work I stopped in on the way home to scout for a good picture. After briefly walking around I found what I thought would be a great angle for a long exposure. The picture I had in mind would feature the Christmas tree centered between the store huts and shoppers in the foreground. The reason I had a long exposure in mind was so I could get all of the shoppers in the foreground to blur as they moved around. With my picture planned there were only two more questions I needed answered, could I use a tripod in the park, and could I fit everything in the frame of my 35mm lens? I got one of my questions answered the next day after emailing the company that manages Bryant Park. The tripod was permitted; I just couldn’t use it on the ice, too bad right? The last question wouldn’t be answered until I got on location with my camera.
This brings me to the day of the picture. Let me give you some advice, if you’re ever in New York City during December; don’t walk up 42nd street unless you want the full tourist experience. I usually avoid 42nd street but for some reason I decided to take it after getting out of port authority, bad move! I literally felt like I was an extra in the Walking Dead. The streets were so packed that you couldn’t move any faster than at a zombie pace. I fought through the crowd thinking it’s okay I’ll have space once I get to the park, wrong. When I finally got to the park I was greeted with an even larger crowd than was on 42nd street. I knew this might be a problem for my picture but I remained optimistic until I got to my spot. Once I fought my way to my planned location it was time to answer my last question, will everything fit in frame…and the answer was no. As you can imagine this was very disappointing, but I couldn’t give up so I starting thinking how I could still get this picture but from another angle? I started walking around, and then while I was standing in front of the tree it hit me. Just like in my last visit to Bryant Park, why not use a reflection to capture my subject? Look closely at the Christmas ball and you’ll see the reverse angle of my original picture. Now it’s your turn, try to capture a creative reflection shot! When you do use the hashtag #52from52_wk18 and post it on Instagram.
Photography Concepts:
There wasn’t really anything tricky about capturing this picture from a photography technique standpoint. This week’s picture was made mostly via creativity which is less of a concept and more of an attribute that each individual photographer possesses. This is why I threw out the challenge for people to take their own reflection shots, I’d like to see them and see how your creativity is displayed. All that being said even though this week’s picture wasn’t too technical I can still briefly talk about the picture I was originally going to take and some of the lessons I learned.
Original Picture Idea
Above is picture from the position I originally planned to take a this week’s photograph from. As you can see it took a portrait composition to capture the tree and the crowd in one frame. I could have taken two pictures and stitched them together via photoshop (definitely a future blog subject) but I didn’t know if that would work well with a long exposure. I also could have tried to get my long exposure from this portrait composition but I wasn’t happy with the way the stores were getting cut off. There was also one more issue with my long exposure idea that I didn’t learn until after the fact. Dealing with a crowd of this density doesn’t really provide the look I was going for when using a long exposure. Of the pictures I did take via long exposure, I learned that at 30 seconds the crowd disappeared and just blotched out the area they were standing in. Even when I took shorter exposures (4-10 seconds) the crowd’s density still didn’t allow you to clearly see these were people I was photographing. Below is an example of a 5 second exposure . This concept of using long exposures to capture the movement of people is something I’m going to experiment with more in the future so stay tuned.
Picture specs: ISO 500, 35mm, f/4.0, 1/4000 second
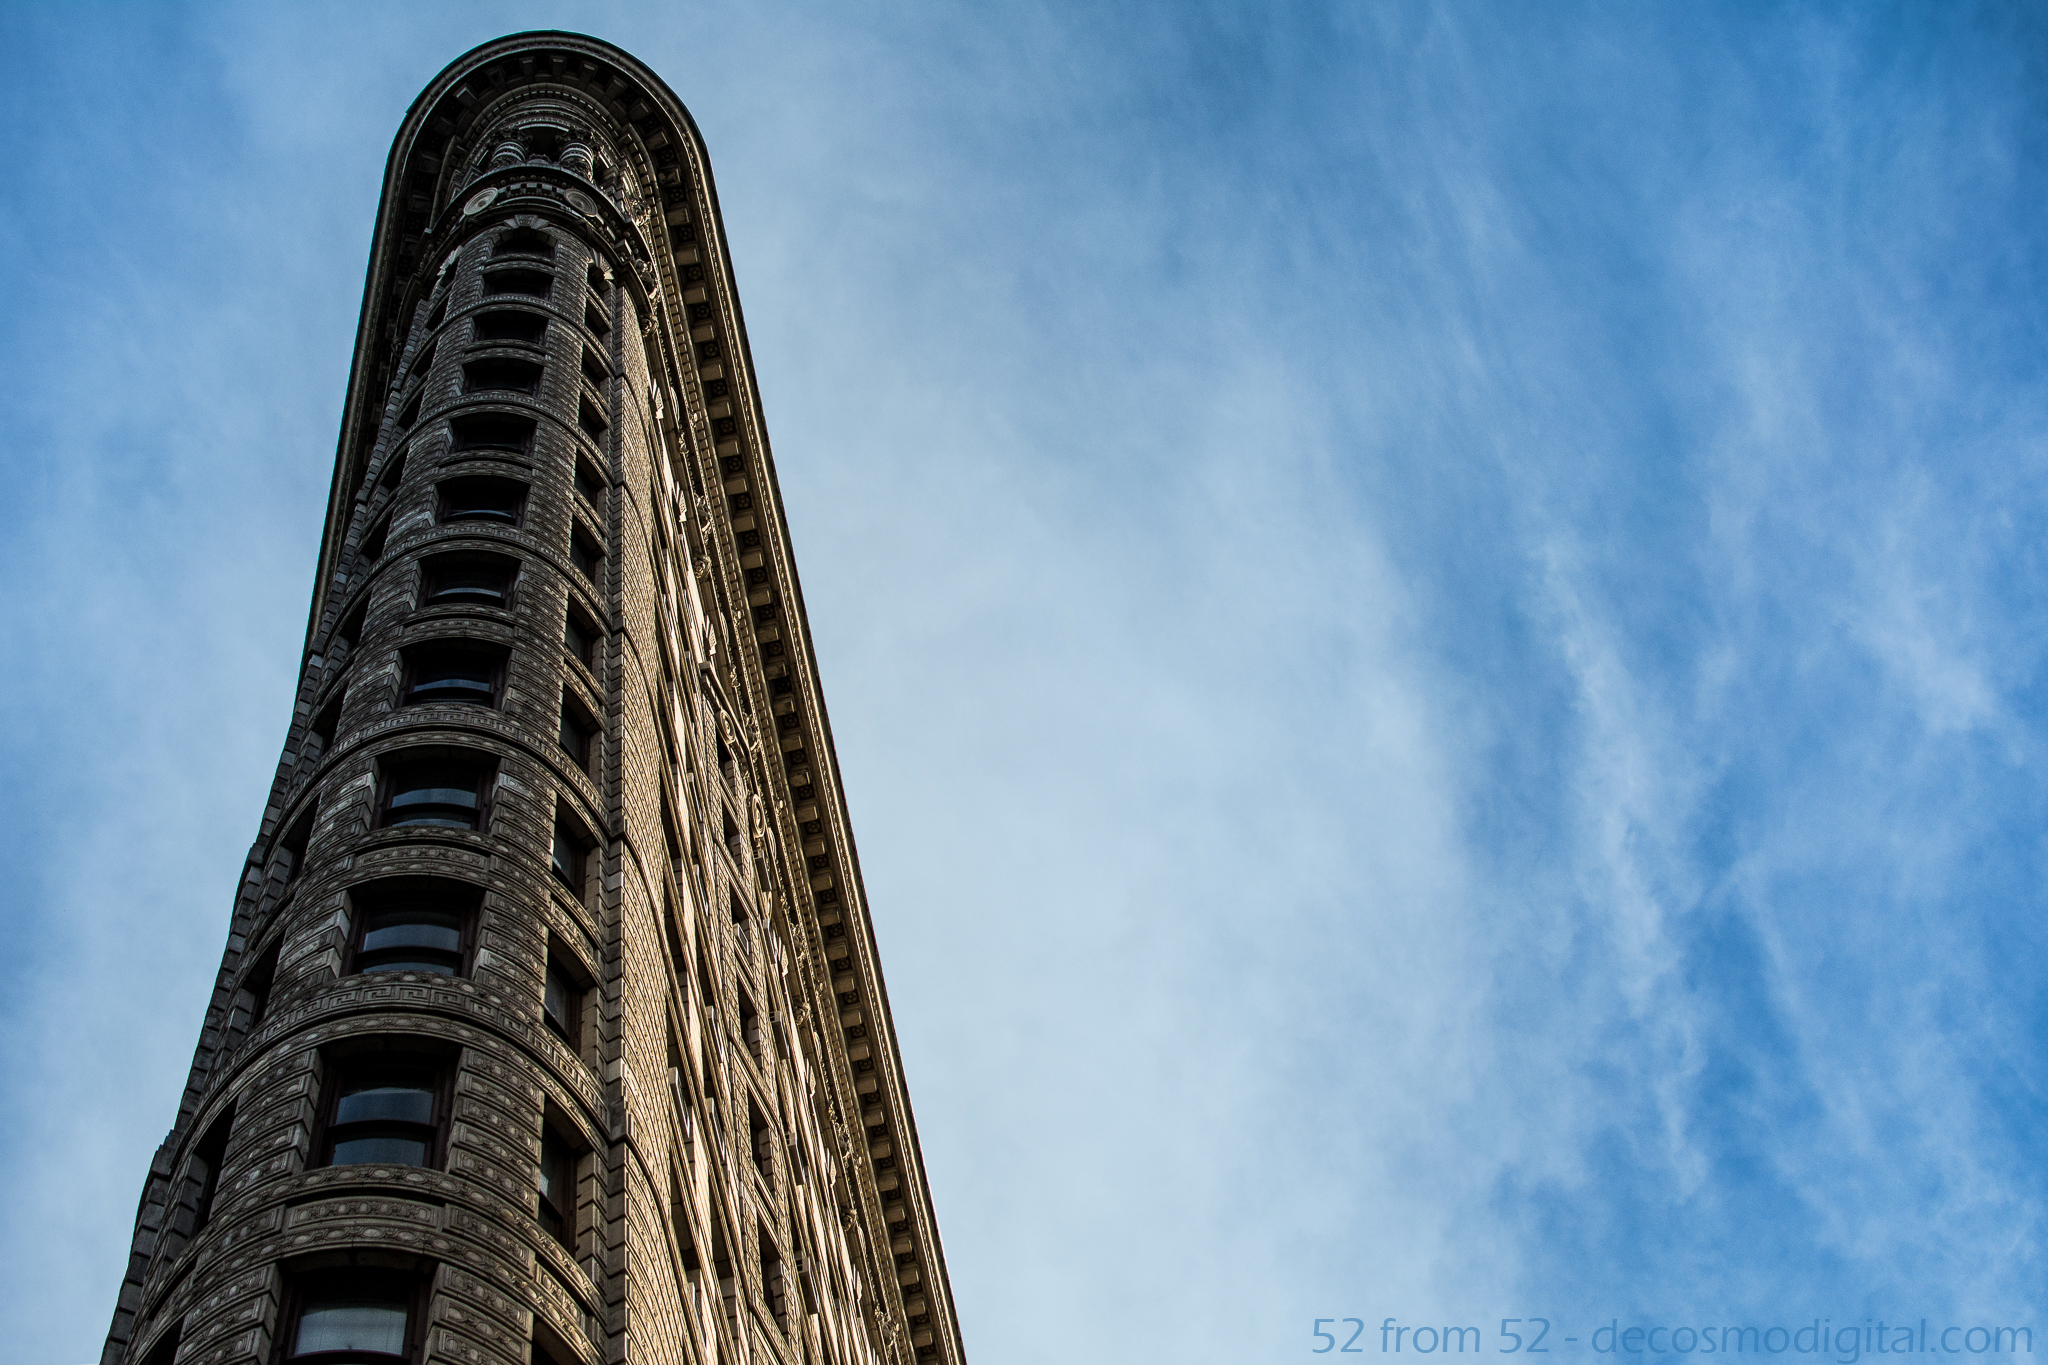
Week 8 (9/22/2013 – 9/28/2013): Flatiron building, corner of 23rd/5th NYC
Picture Taken on 9/25/2013 at 4:58 PM
Picture Description:
No, don’t worry I’m not going on any kind of negative rant in this week’s post. If you want to understand the “negative” reference in the title you’ll have to read the photography concepts! Enough on that, time for the story behind the picture.
I was reminded about a very valuable lesson this week, that lesson being that you really can’t force things. As usual I had a plan for this week but by Tuesday I realized my plan was pretty much a wash. The plan was to get a picture of or around the United Nations building. The reason I chose this week was because it’s the annual United Nations General Assembly. Most people have no idea about when the General Assembly happens let alone the chaos that happens in the area surrounding the UN. I work not too far from the UN so each year I get a front row seat to the insanity. SWAT cars, Secret Service, hundreds of NYPD officers, and countless diplomats converge on my little east side nook. What I wanted to do was get a picture that in some way captured the madness. On Monday I scouted the surrounding area to see if there were any good pictures that caught my eye. Due to all the added security I couldn’t get close to the UN building so I knew I’d have to get some kind of distant shot. The only idea I could think of was a sunrise picture since the UN is right on the water. Sunset shot easy right, yes…on any other week!
It wasn’t until Tuesday morning when I brought my camera into work with me that I realized the flaw in my plan. With so many cops and security personnel around the second I took my camera out all eyes focused on me. Why is he photographing the UN? Why is he wearing a black coat? Why is he walking down that street? Why is he looking around in such an odd way? These are all of the questions I could almost hear getting asked as I felt the burning stares. After a few short minutes I decided to move locations to the waterfront on the East river, bad idea. Once I got to the waterfront I saw police boats circling which seemed to immediately fixate on me. As one large boat headed in my direction, I quickly threw my camera into my bag and slowly walked away. In my head I had this sudden fear that some kind of unmarked car was going to zoom up, grab me, and take me away for hours of questioning. At this point I said you know what I really don’t want to get arrested this week, I’m going to get a bagel and call it a morning.
That afternoon as I thought about what unfolded in the morning I realized even though I really wanted the UN picture this week, now isn’t the best time, there is always next week. Giving up on something like this is difficult for me. Once I see something I want I go for it but as I said earlier, this week I was reminded sometimes you can’t force things you just have to be patient and wait for the right time.
Once I came to terms with holding off on the UN idea I decided that I would take a trip to the flatiron building to see if I had better luck without all the piercing police eyes. Prior to this week I had only seen the flatiron building from a distance or very briefly up-close while driving by. The building is quite the scene in person and can make you a little dizzy when you’re standing right next to it looking straight up. Luckily I was able to conquer the dizziness and get this week’s shot, hopefully you like it!
Photography Concepts:
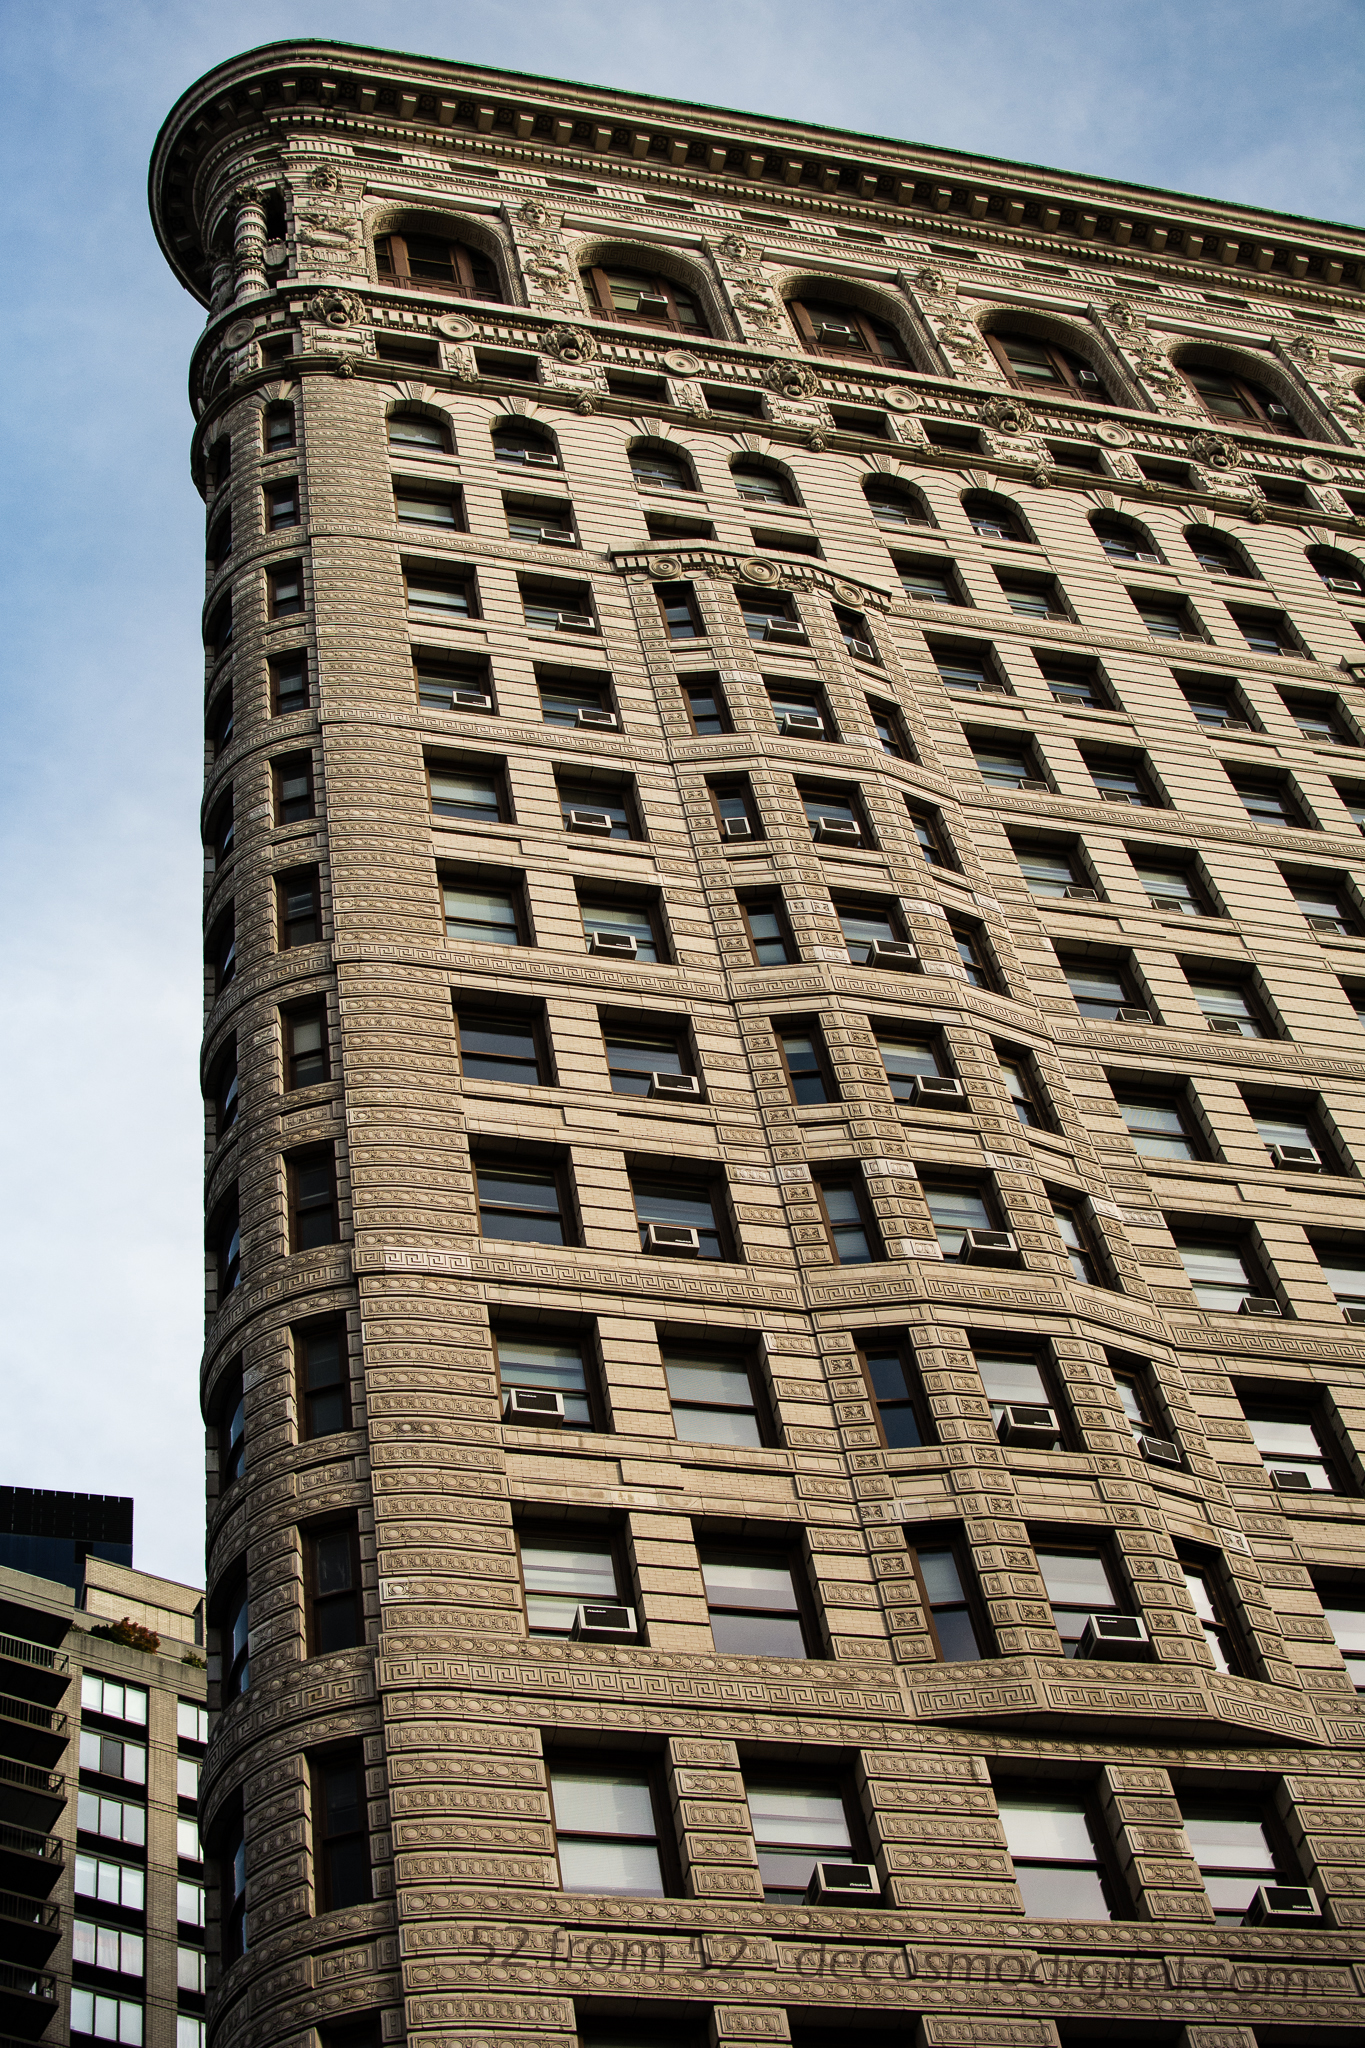
Photography wise what I learned this week is “getting negative” isn’t a bad idea, let me explain. As I continue to read about the concepts of photography one term that’s come up a lot when referencing a pictures composition is “negative space.” Based on everything I’ve read negative space is the area surrounding your subject (which is positive space). It seems logical enough right? I’ve seen that in some photos people literally fill the negative space with well nothing. What this does it it really emphasizes the subject. In my case my subject was the flatiron building and my negative space was filled with the nice blue sky. When I first started taking pictures if I took a picture where half of it was empty I’d probably think about cropping it down to eliminate that space. What I’ve now learned is if used correctly the empty “negative” space is a nice tool to put in your composition toolbox.
An example of a picture where the subject takes up most of the frame
One trick I learned this week while getting myself dizzy from looking up for too long was how to line up my pictures better. In a lot of the pictures I’ve previously taken of buildings while looking straight up I noticed that the picture always seems tilted. The way I lined the picture up or saw it in real life didn’t translate well to the composition of the photo once I reviewed it at home. While I was shooting this week I tried to choose a line or lines in the building that would level things out when I looked at the picture later on. It felt odd while I was taking the picture but my results were a lot better. For example in the below picture I chose the corner line between the two sides of the building to line up my shot. It’s hard to give some kind of formula for choosing the right line, but it’s something I’m going to try and pay closer attention to in the future.
Week 2 (8/11/2013 – 8/17/2013): Corner of 6th/42nd Bryant Park, New York City
Picture taken: 8/14/2013 at 5:50PM
Picture Description:
If you were to ask me what are my favorite locations in New York City, Bryant Park would absolutely be in my top five. Although I pass the park almost every day (during my commute to work) I don’t always have the time to stop and enjoy everything it has to offer. If you’ve spent any amount of time in the park you know it’s a very busy place filled with a diverse group of people. It’s safe to say there is an activity for almost anyone, year round. One part of the park that I never explored was the New York Public Library. Yes, for those of you that know me I went into the library, voluntarily! No I did not borrow any books BUT I did have fun checking out the amazing architecture throughout the building. At the start of my visit, my plan was to get a picture of the “Rose Main Reading Room” however that didn’t come out as I hoped. A picture with the 35mm didn’t do the room justice (trust me, Google it) you really need a wide-angle lens, so I decided not to use that picture for this post.
Taken via NYPL’s Photobooth
After exploring the library, I took my adventure outside. In the heart of the park there were hundreds of people out enjoying the beautiful 70 degree sunny weather. Both of the park’s restaurants were buzzing and the lawn was littered with people hanging out next to the towering movie screen sitting on the west side of the lawn. In case you don’t know, HBO has a film festival that runs every Monday during the summer. The festival makes for a great dinner and a movie idea, but those kind of tips would need a whole other blog so I’ll leave it at that.
After doing a quick walk-through of the park one thing that immediately caught my eye was how most of the buildings surrounding the park were picking up great reflections of one another. A reflection shot usually makes for an interesting and unique photo so I decided this would be the perfect idea for this weeks post.
Photography Concepts:
There weren’t a lot of technical intricacies to this week’s photo other than timing. Prior to going to Bryant Park I knew when the sun would be at the right angle (no pun intended) for some nice shots and maybe even a good reflection picture. I use an APP on my iPhone called “The Photographer’s Ephemeris” which tells me the angle of the sun based on time/day. If you’re looking to use the sun as a part of your picture or get a reflection shot I highly recommend using this application when planning your shot.
One composition concept that I attempted to use at least subtly is “leading lines”. When you look at the picture the lines sort of lead you to the corner of the building where you notice you’re not looking at a blurry picture, you’re actually looking at a reflection. At least that’s the way I saw it.
Last, when shooting during the day even though there is plenty of natural light, at some points I had to slow down my shutter speed or boost my ISO. I’ll talk about this more when I take a night picture but take note that for a picture like this when you want everything in focus you need to use a smaller aperture. I used f/9 which is (based on everything I read) a good aperture for landscapes. Since a smaller aperture means less light, you have to compensate with a higher ISO or slower shutter speed.
Challenges:
I’m only in week two and I can already see how challenging the 52 from 52 concept is going to be. Luckily I like a challenge, anything worthwhile takes time and effort. I put a decent amount of thought into what I wanted to photograph this week. I naturally have lots of ideas but some of them are about timing (weather, time of day, ect.) while others are location based and require traveling. With a busy schedule, one of my biggest difficulties will be setting aside the time to go out and take pictures each week…but that’s the purpose of this, to force me to get out there and learn!
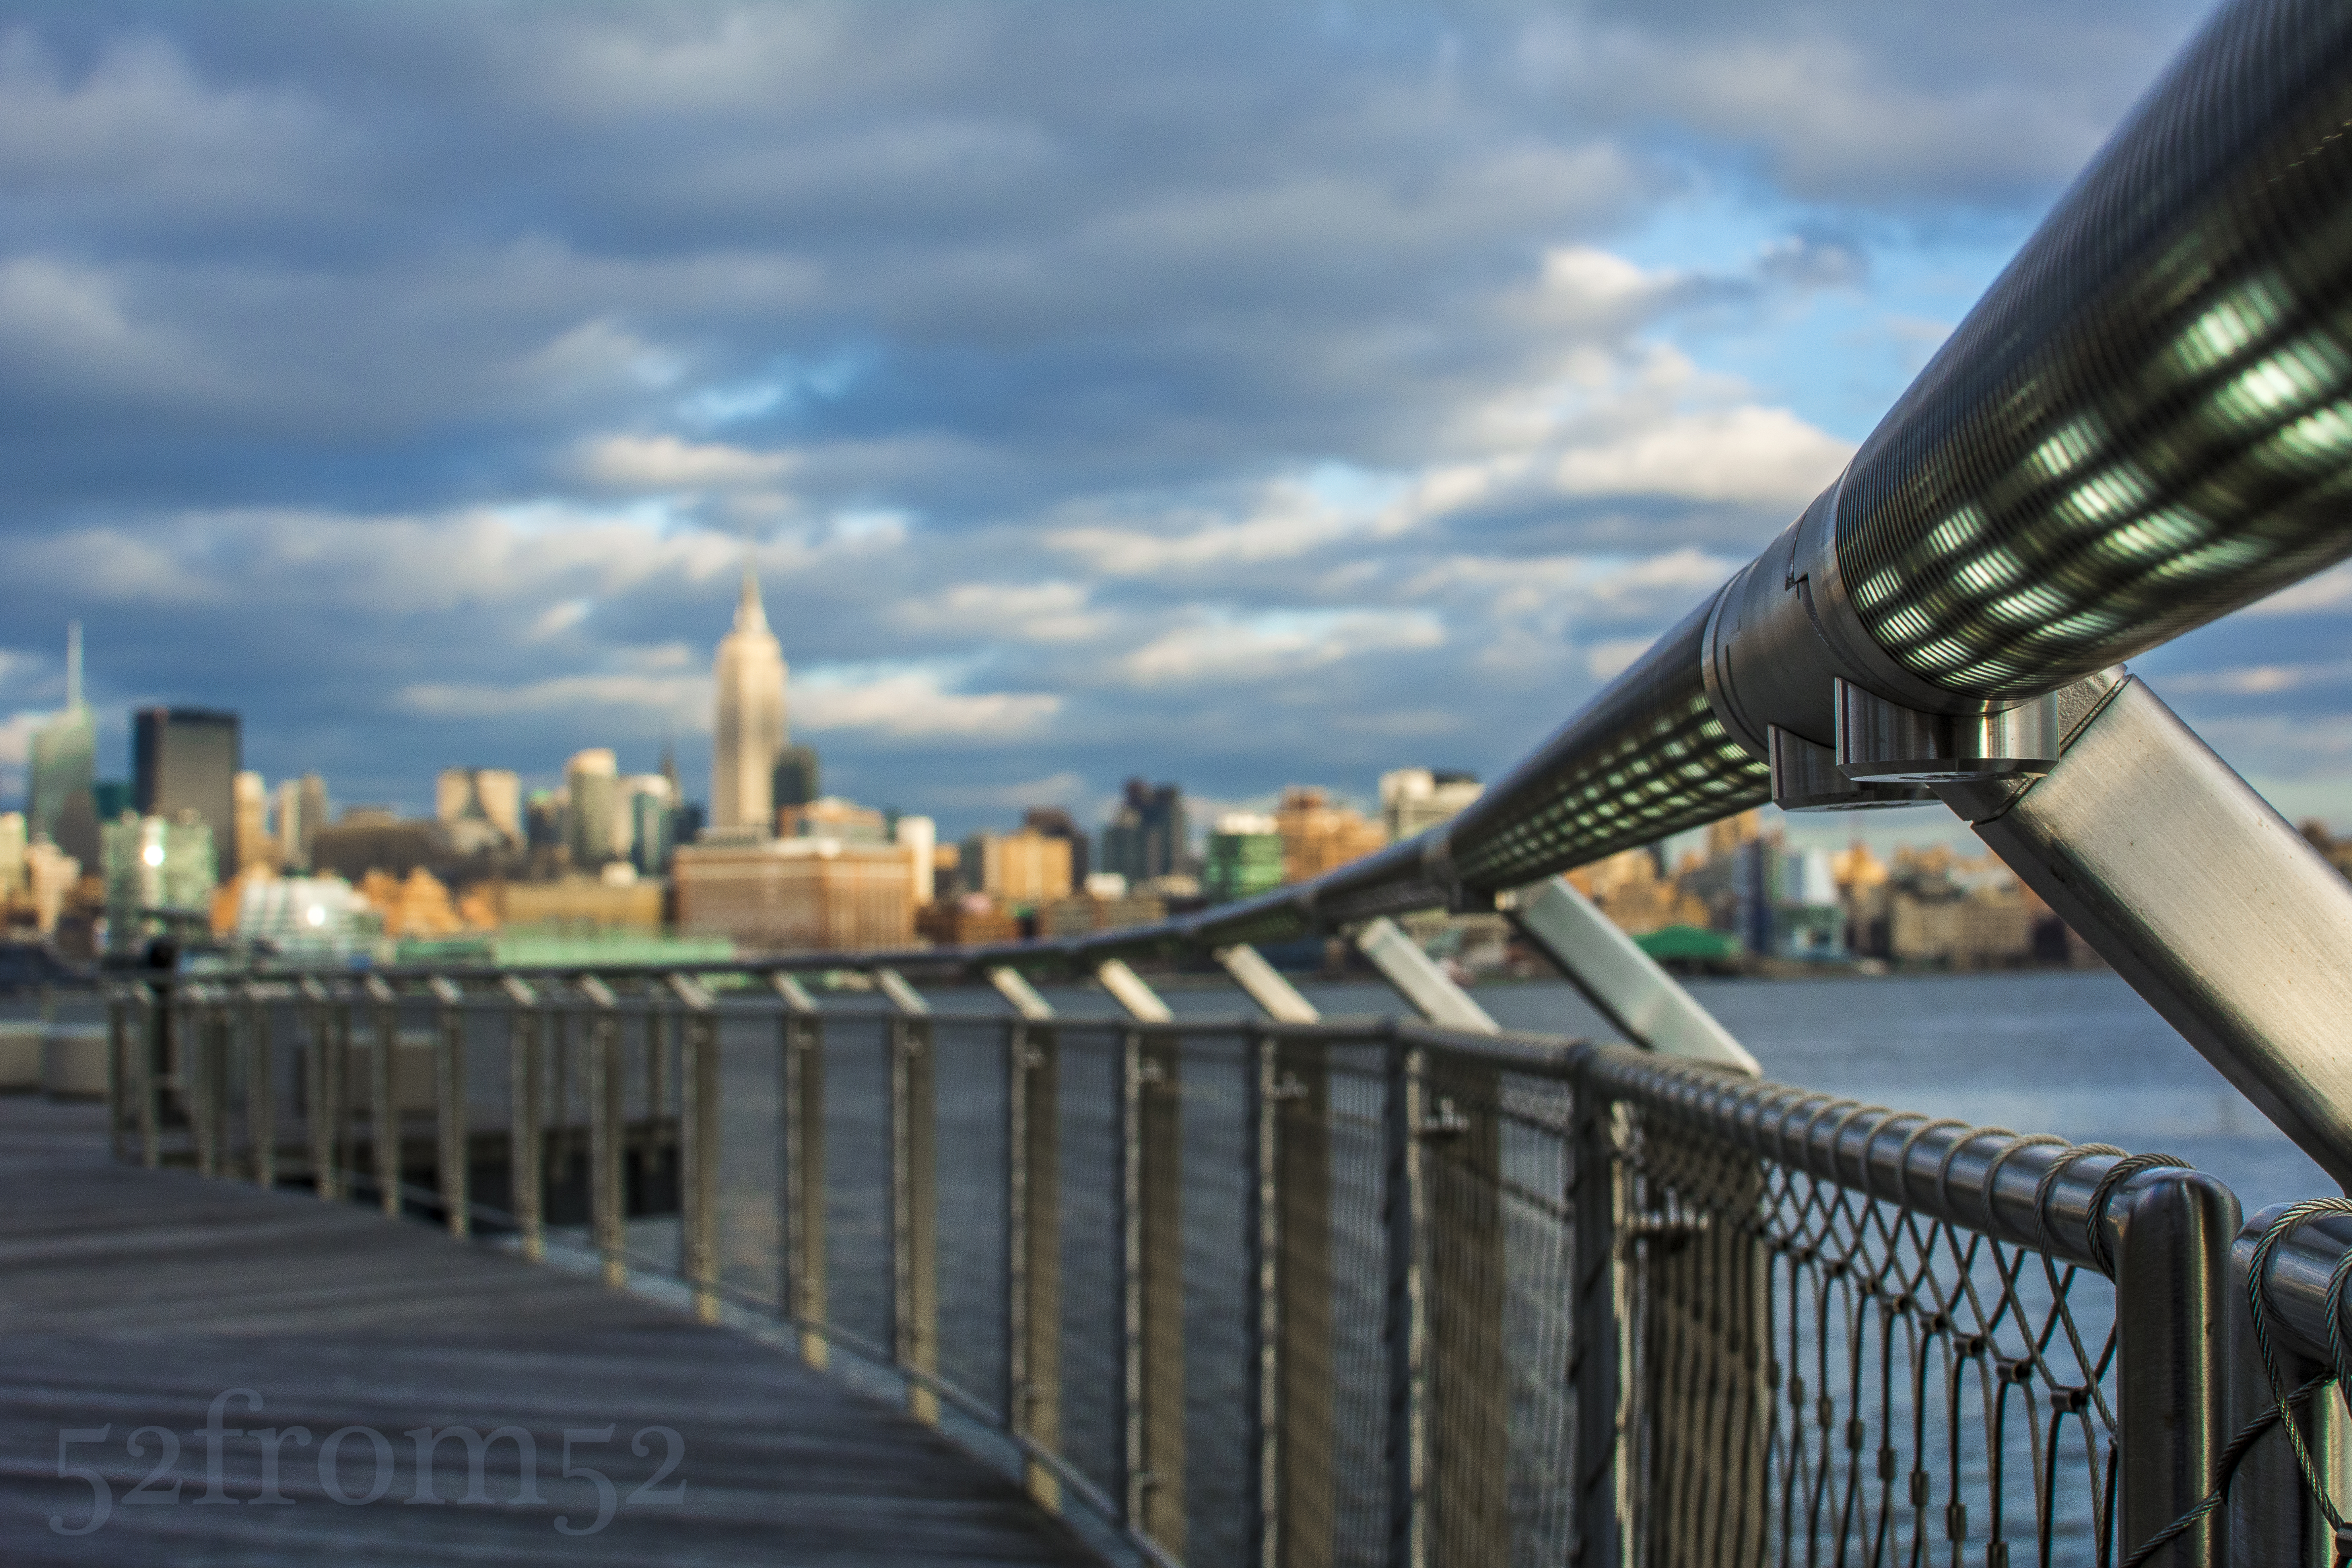
Week 1 (8/4/2013 – 8/10/2013): Hoboken uptown Pier
Picture taken on 8/6/2013 at 5:45AM
Picture description:
For those of you that follow my instagram or are friends with me on facebook you’ve probably noticed I like to take pictures of the New York City skyline, particularly from the Hoboken piers. Initially I told myself I wasn’t going to start with a skyline shot but in the end it made the most sense for at least one BIG reason. Taking skyline pictures is pretty much what got me into photography in the first place. The more skyline pictures I took the more I realized how much I enjoyed taking pictures and that I really needed a better camera. The second reason this picture is significant is because it’s by far my favorite spot in Hoboken. I’ve dubbed this “my bench” and usually spend at least one morning/evening a week sitting here soaking in the view. Whether I’m drinking my morning coffee or taking a breather after a run on the pier, I often find myself back at this bench. My favorite time to sit here is the early morning for a couple reasons; there are a lot less people walking around, you hear tons of birds chirping and waves crashing during high tide, and you obviously get a great view of the sunrise. It’s very tranquil and a great way to start out your day. Trying to capture the feeling of sitting in this bench is why I decided to start out with this picture.
Photography concepts:
First I shot this picture at f/1.8 which is the widest aperture (opening of the lens) and shallowest depth of field I can take. It might seem odd but the smaller the ‘f’ number the larger the opening of the lens is. While the larger the ‘f’ number the smaller the opening is and the more things are in focus. I took this picture with a small ‘f’ (fstop/aperture) of 1.8 initially to put the bench in focus and blur out the skyline but after trying one in reverse with my focus point on the buildings, I liked this one better. Shallow depth of fields give that blur effect and are hard if not impossible to pull off with a camera phone since you can’t control your camera’s lens opening like with a DSLR. For my fellow instagramers, the blur feature on instagram is meant to mimic depth of field shots but it’s limited to the circle or straight area. I felt like by using the shallow DOF in this picture it makes it easier to imagine yourself sitting on the bench.
The second concept in play is the rule of thirds. In this picture the bench is in the far left/bottom third of the picture with the rest of the scene in the middle/right thirds. For anyone that doesn’t know about the rule of thirds, it’s just breaking the picture into thirds vertically and horizontally (seen below). This results in 9 boxes with 4 intersection points. It’s said that by putting subjects or things such as eyes on these lines makes for more dramatic pictures. In my picture the bench is on one of the intersection points and clouds are on two. Using the rule of thirds in this way helps you focus on the sky and give you the feeling of looking out from the bench from left to right.
The last sort of “concept” that I want to point out is the timing of the shot. When shooting sunrises or sunsets it’s said that the best light is +/- 30 minutes of the actual sunrise or sunset time. On the morning of this picture the sunrise was at 5:58 AM. I got to my spot a little later than I had hoped (hit the snooze a couple times) but I still managed to get the light I was looking for. Once it got close to and then past the actual sunrise time the colors seemed more washed out. Overall I’ve learned that my favorite time to take pictures of the sunrise is before the time and for sunsets is after.