Circling Back

Picture Info: ISO 100, 36mm, f/20, 20 Second

Picture Info: ISO 100, 36mm, f/20, 20 Second

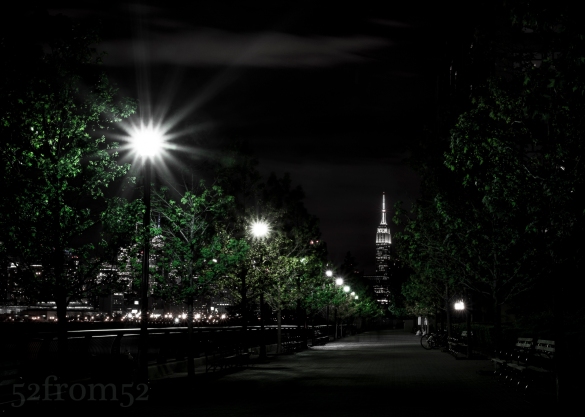
Week 43 (5/26/2014 -6/1/2014): Uptown Hoboken

Picture taken on 5/30/2014 at 9:49 PM

Photograph description:

Hoboken is a great place to live if you enjoy running.  Hoboken has countless running routes to choose from, most of which are accompanied by an amazing view.  Since moving to Hoboken over a year ago I’ve mapped out a few of my own running routes.  Each route presents a different physical challenge along with the constant mental challenge of fighting the urge to stop and take pictures every few steps.  Out of all the routes I run, my favorite is what I refer to as my “uptown route.”  My uptown route starts at Maxwell Park and hugs the water line all the way into Weehawken.  Eventually I circle back to Hoboken the same way I came, with my finish line being the path featured in this picture.  The reason this route is my favorite is because typically there aren’t many other joggers to get in my way and of course having this view as my finish line is a nice perk.

I run a few times per week so I’ve seen this view countless times and countless times I’ve said to myself that would make for a great picture.  Not only is this a beautiful site, it also reminds me to always finish what I start.  Each time I get to this point of my run I’m usually tired and ready to stop, but instead of slowing down I usually kick up the intensity for this last straight away. Typically I wait until some other runner makes it about halfway then I chase them down and try to finish ahead of them.  I believe that the more you train yourself to push through hard situations, the more it becomes second nature and the stronger you’ll be both physically and mentally.  This is the code that I live by and this picture reminds me to practice this each and every day.  Always finish and always finish strong!

Photography concepts:

One of the reasons this view always draws me in is because of the natural “Leading Lines” composition.  The lights and trees that line the path converge and take your eyes straight towards the Empire State Building.  Year round this is a powerful view but the conditions never seemed right for me to get a good picture.  Additionally the street lights always presented glare issues that took away from the picture.  Recently I figured out the right camera settings and editing techniques to eliminate the glare issues so I finally decided to give this picture a shot.

The camera setting that has helped the most with photographing strong light sources (e.g. the sun, street lights, ect.) has been a small aperture.  The smaller the aperture the less bleeding light and the cleaner it looks.  For night photography f/18 and above is a great aperture to use.  If you’re using this small of an aperture at night it’s more than likely that you’ll be hitting some slow shutter speeds so don’t forget your tripod.

When it came time to edit this picture there were two adjustments that were key.  First, to bring out the detail in the Empire State Building I dropped the highlights of the area surrounding the building.  I’ve found that dropping the highlights of buildings at night makes them look very crisp.  The second adjustment was to lower the saturation all colors in the image except green.  What this did was eliminate any of the lens glare that showed up as random colors, and it made the leading lines composition of the trees even more of a focal point.  As a result the not only does the composition of the image take you down the path but the isolation of the green color also acts as a guide for your eyes too.

The last aspect of this picture that helped enhance the composition was the size of the Empire State Building.  If you’re a Hoboken local and you’ve taken this picture before chances are the Empire State Building was much smaller than in this picture.  Why is that? It’s because of my focal length 36mm x 1.5 = 54mm.  Most phones shoot at around 30mm and since focal length essentially equates to zoom so when I use ~54mm the building is larger.  The thing that’s interesting about zoom is if you stand further back your foreground will be scaled regular, but whatever is in the background (e.g. the Empire State Building) will appear larger than usual.  You see this technique a lot when people photograph the moon and get that insanely large moon backdrop.  Although I shot with a greater zoom then people do with phones, my image resembles how this path looks like to the naked eye.  Had I stood further back and zoomed in with 80mm+ the Empire State Building would have looked massive.  I’m limited to the 35mm range for this blog but I encourage you to try zoomed focal lengths to scale up your backdrop subjects.  Experiment with your camera’s settings and new focal lengths, it’s the only way you’ll learn!
Instameet

Picture Info: ISO 100, 36mm, f/9.0, 1/80sec

Picture Info: ISO 100, 36mm, f/9.0, 1/80sec

Week 41 (5/12/2014 -5/18/2014): Madison Square Park, NYC

Picture taken on 5/18/2014 at 5:30PM

Photograph description:

Anyone that knows me would probably tell you that I’m an Instagram addict.  I share a picture typically 1-2 times a day, and I’m constantly in pursuit of my next post.  The reason I enjoy Instagram is mainly because it’s very simple, take a picture, share a picture, like a picture, and yet there is a depth to it.  If something is going on in the world, chances are you can find basically a live feed to it on Instagram.  Think of Instagram as your square portal to everything and anything happening around the world.  You’re never more than a hashtag search away from getting a glimpse into anything from having tea in London, to a wild safari ride in Africa.  The possibilities of what you can find are endless.

This past weekend Instagram tapped into the power of hashtags by using them to unify coordinated events around the world.  The overall event was officially referred to as “WorldWide Instameet 9” and had the official hashtag of #WWIM9.  The concept was simple, each city or region had an organizer that picked a time and location to meet.  After meeting up everyone did exactly what brought them together, take and share pictures via Instagram.  Each local “instameet” had their own hashtag in addition to the official worldwide one.  This concept enabled people to search pictures at the worldwide level, or by the specific location.

A few days before WWIM9 a post about it popped in my Instagram feed.  One of the more popular New York City instagrammers posted up the event details and pointed everyone in the direction of the organizers feed.  Of course after stumbling upon this, it immediately peaked my interest.  I’ve been meaning to check out one of these “instameets” but always seem to be busy on the day it’s held.  Luckily, this time around I was finally free to participate.

I could probably write a 10 page post detailing the entire event, but where is the fun in that?  Don’t just read about my instameet, go to one yourself!  I promise you won’t be disappointed, unless your camera dies.  My friend Becky may have put it best, there is so much creative energy flying around it’s hard not to get inspired.

Photography concepts:

This week I’m going to change it up.  Instead of breaking down my picture I’m going to talk about some of the new photography concepts I was introduced to this past weekend. There was far more than just DSLR’s being used amongst the many participants.  There were three different styles/equipment that really caught my attention.  First, and probably the most captivating was how one instagrammer (@huper_X) used a drone/gopro combo to capture amazing aerial footage.  I didn’t get a chance to talk to the photographer, so I’m not sure about the exact drone he used, but below is link to something that looked identical to his drone.  Bottom line, this drone captured footage that looked like it came from a helicopter.  It was truly amazing to witness this thing on display.

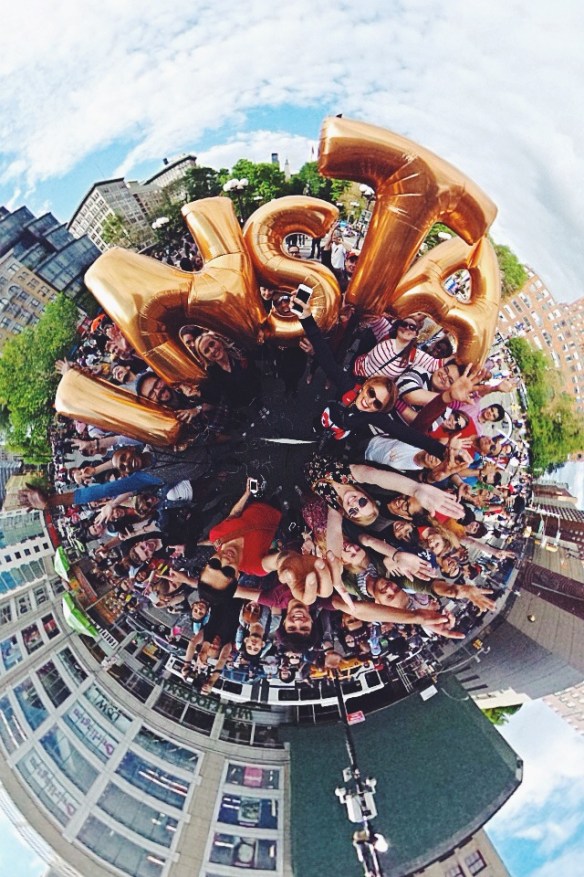
The second new style/equipment of photography that I was introduced to was a 360 camera called the “Theta” by Ricoh.  This compact device was used by @tsaebadliw (Will) to capture one of my favorite pictures from the day (below).  Will set up the camera, then had everyone gather around to capture an amazing 360 degree view of the group.  Usually, a 360 camera is used in real estate for virtual tours, but as Will and the “Theta’s” creators display on their site, it’s great for getting creative as well.

360 PhotoSphere by: @tsaebadliw (instagram) _wildabeast1 (twitter)

360 PhotoSphere by: @tsaebadliw (instagram) _wildabeast1 (twitter)

The third and most relevant piece of equipment to my style of photography that I learned about was Olloclips.  Olloclips are lenses for your iPhone/iPad that mimic the capabilities of a DSLR.  Olloclips has telephoto, macro, and wide angle lenses. The idea of enhancing my iPhone’s picture capabilities was very appealing since it’s impossible to carry my DSLR everywhere.  Taking great pictures with your phone doesn’t require an Olloclip, but it would certainly help.

Check out below for links to all of the new toys I learned about, along with some links to the instagram blog for the WWIM9 event.  I’ll get back to breaking down my pictures next week, enjoy your memorial day weekend!


Links:

Phantom 2 Vision Drone:

http://www.dji.com/

“Theta” 360 Camera by Ricoh

https://theta360.com/en/

OlloClip:

http://www.olloclip.com/

Instagram’s blog post on WWIM9

http://blog.instagram.com/post/82909503229/wwim9-announcement

Video shot by @huper_X at Madison Square park via an aerial drone.


Bloomfield in Bloom

Picture info: ISO 250, 36mm, f/11, 1/80sec

Picture info: ISO 250, 36mm, f/11, 1/80sec

Week 39 (4/28/2014 -5/4/2014): 10th & Bloomfield, Hoboken

Picture taken on 5/3/2014 at 9:13 AM

Photograph description

Last week I mentioned that one of the biggest challenges for my Hoboken streets project would be to taking pictures that don’t in some way involve the sun .  Naturally I’m drawn towards taking pictures that utilize some kind of light source to create contrast.  In order to keep improving my photography, it’s important that I constantly challenge myself to go outside of my comfort zone.  It’s as the saying goes, “variety is the spice of life”

This week’s picture was taken while I was on my Saturday morning bagel run…for those of you that don’t know, I’m a bagel addict.  Moving on though. It was still early enough that the sun wasn’t high in the sky but it was still filling the day with plenty of natural light.  Although my usual Hoboken bagel spot is on Washington street, I decided to walk down Bloomfield instead so I could photograph the cherry blossoms that line the street.  It only seemed fitting that bloomfield would be filled with so many blooming trees.  Early into my trip I came across an apartment building that had a pinkish tint which acted as the perfect backdrop for the cherry blossom.  I shuffled around for a few minutes trying to find the best angle to fit everything in frame at ~35mm.  Eventually I found the spot and the here you have it!

Photography concepts:

One of the advantages of taking pictures with even light is that it’s easier to set your exposure for the entire scene.  When you include a bright light source in your picture (e.g. the sun) you have to worry about some or all of the image getting blown out (overexposed) or underexposed.  I usually worry more about overexposing the image because it’s harder to recover overexposed areas, than underexposed areas.  Since this week’s picture had no harsh light source setting my exposure was a breeze!

The hardest part of shooting this picture was capturing what I considered to be the good part of the scene at ~35mm.  The reason I’m saying approximately (~) is because I’ve been shooting more and more with my 17-50mm Sigma lens.  Yes 35mm is within the range of my lens, but for some reason the lens never seems to settle on 35mm exactly.  Any picture I take at 35mm usually reads as 34mm or 36mm when I review the image.  I’m not sure why this happens, but it’s not really a big deal.

If there is one thing I learned this week it’s evenly lit pictures are relatively easy to shoot, if you can find interesting ones.  The last part of that statement is the key, “if you can find interesting ones.”  My usual move in the absence of contrasting light is to find a unique angle or move in close and use a wide aperture to tap into a depth of field element.  I did neither this week and that again plays into my desire to shoot more variety.  Variety should be everyone’s goal.  Flip through the pictures on your computer, facebook or instagram and I bet you’ll see a trend.  Hopefully the trend isn’t selfies, but even if it is, this week try to shoot something new.  Find something you don’t usually photograph and get to it!

The right spot

Picture Info: ISO 640, 38mm, f/22, 1/400sec

Picture Info: ISO 640, 38mm, f/22, 1/400sec

Week 33 (3/17/2014-3/23/2014): Hoboken NJ

Picture taken on 3/22/2014 at 6:08 PM

Photography description:

Late again, but just with the post.  I got this picture over the weekend which was within my self imposed weekly deadline.  Usually missing my deadline (or any deadline) would drive me absolutely nuts, but I decided that I wouldn’t beat myself up about it this time.  Lately I’m trying to be more relaxed and not stress myself out over little things.  Although my stress free mentality was partially  why I missed my posting deadline, the main reason for the latent post was because last week was one hell of a week.  It was my turn again to provide support coverage for work, and let’s just say the luck of the Irish was not on my side.  Every time I tried to venture out to get a picture my phone buzzed.  The constant interruption, or threat of one, didn’t allow me to get more than a few blocks from my apartment.  Although my localized limitation still would have permitted me to visit the Hoboken waterfront, I didn’t want to feature another skyline picture this week.  There are a lot of techniques that I’m still exploring and to do so I need to find something beyond the skyline to experiment on.

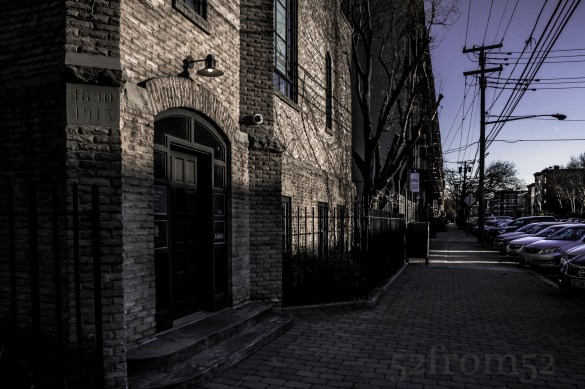
After walking around for about an hour I got a couple good pictures which I thought would potentially work as a featured photo but nothing made me too excited.  On my way back to my apartment I stumbled upon a church with this beautiful stone front exterior.  The masonry was looking exceptionally nice because of the way it was catching the fading light of twilight.  I reached back into my bag pulled out my camera and began the result is what you see here.

Photography concepts:

Last week I threw out a challenge to try and shoot more pictures in “manual” mode.  Unfortunately this week’s photograph was not shot in manual, but it was a step in the right direction.  After spotting how the light was getting captured along the church’s jagged stone edges, I knew that I couldn’t let my camera make the exposure decision.  As good as my camera is, the human eye is better at judging exposure.

When I pulled out my camera it was in aperture priority with spot metering turned on, so I stuck with that setting.  In case you didn’t know, spot metering mode allows you to set (or “meter”) the exposure of your image from a specific point.  Usually if you leave your camera on the default mode, which for my Nikon is “matrix metering” (the name varies by camera brand), the camera will inspect what’s in frame and choose what it thinks is the best overall exposure.  The important part of that statement is the word “overall.”  What I’ve noticed is that when a picture has lots of variance in shading sometimes the camera will try to compensate for the darker areas such as shadows and overexpose the image.  The image won’t be overexposed to the level that there is damage done, but it doesn’t look like what you see with the naked eye.  One way to prevent your camera’s miscalculation is to shoot in manual, which as I said I did not do this time.  The other is to use a more manual metering method, which is what I did with spot metering.  For this picture I metered my exposure off of the top of the image.  The top had the most amount of light so I wanted to make sure that stayed exposed just right, with the rest of the image fading into shadow.  The difference in lighting a little more obvious in a zoomed out version of my picture.

Picture Info: ISO 640, 17mm, f/22, 1/400sec

Picture Info: ISO 640, 17mm, f/22, 1/400sec

As you can see spot metering allows you to get a very natural look with the shadows.  This is a mode that I’ve been experimenting a lot with lately, the hardest part is having the time to select the exposure point and recompose.  In the coming weeks I’ll continue to work spot metering into my photography and try to point it out whenever I do.

Springing into Winter

Picture info: ISO 250, 35mm, f/8, 1/1250 sec

Picture info: ISO 250, 35mm, f/8, 1/1250 sec, – 1 exposure stop

Week 20 (12/16/2013 – 12/22/2013): Central Park, Sheep Meadow

Picture taken on 12/21/2013 at 3:00 PM

Picture Description:

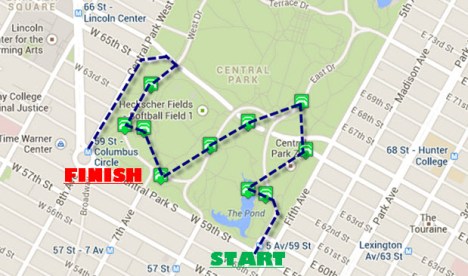
With Christmas less than a week away, New York City is buzzing with holiday festivities.  This week I decided to check out the Columbus Circle Holiday Market located at the south west corner of Central Park.  As the weekend approached, the weather forecast was calling for a warmer than usual day for December, so I decided to add a visit to Central Park to my agenda.  While visiting the Central Park website I noticed that on their map page you’re able to select specific destinations of interest within the park.  For weeks I’ve seen lots of great pictures taken of various arches and bridges in the park, which gave me an idea.  My idea was to use the map and plot out an “Arch and Bridge Tour” which would bring me to all of the southern arches and bridges, starting with the Gapstow bridge (South/East corner) which is adjacent to the ice rink.  With my plan set, all that was left was setting out on my weekend adventure.

Planned Arch/Bridge Tour

Planned Arch/Bridge Tour

My trip started with about an hour of fighting traffic and subway crowds prior to finally popping out of the 59th/5th subway tunnel.  Upon emerging from the subway  tunnel I was oddly greeted with the smell of spring.  If the streets weren’t packed with holiday decorations I would have swore to you that I had traveled back in time to April.  Even though I appreciated the nice weather I was a little disappointed, I really wanted to get some pictures of Central Park in the snow.  Later on my disappointment was cured by the much appreciated feeling in my fingers and toes I enjoyed throughout the day.

After visiting the first couple of bridges and arches, Gapstow included, I was running into issues with getting good compositions with my D5200.  The sky was getting washed out because it was earlier in the day than I usually shoot.  I also wasn’t able to fit enough of the landscapes that I was photographing into my 35mm lens frame.  Since the bridges weren’t cooperating I decided to cut my tour short and work my way to a part of the park called Sheep Meadow.  The large 15 acre “meadow” is special to me because it’s actually where I finally decided to due this blog.  Back in July I toured the park and ended up at the Meadow which I photographed and realized how fun it was to set out on photo adventures.  July’s trip cemented my idea and I moved forward with this blog, and I haven’t looked back since.

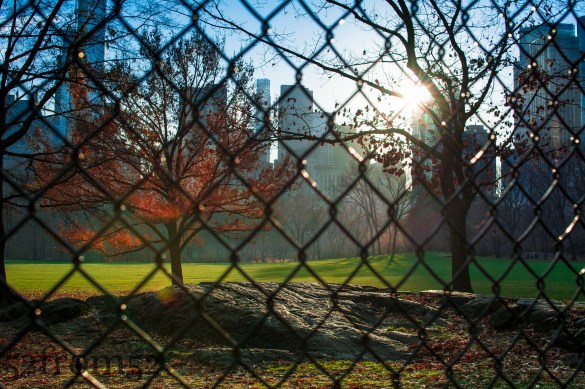
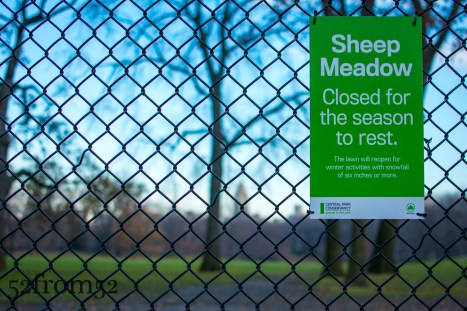
As I got closer to the Meadow I noticed that there were no visitors on the beautifully lush green lawn.  When I finally arrived at the fence surrounding the meadow I realized why it was so empty, it was closed for the winter.  Although I was disappointed this provided me with an opportunity to photograph the meadow without any visitors crashing my picture. I worked my way around the fenced perimeter shooting pictures above and through the fence. At the end of my trip around the meadow I spotted this week’s picture.  The way the rock picked up the sun with the contrasting green meadow really caught my eye.  Although the day didn’t turn out as planned, I was very pleased with this picture and really enjoyed my day in Central Park.

Sheep Meadow Closed!

Sheep Meadow Closed!

Photography concepts:

Over the past couple of weeks I’ve been experimenting with different editing techniques and applications.  I use Lightroom for all of my blog photographs but for Instagram, Facebook and Twitter I use Snapseed and VSCOCAM.  The advantage of Snapseed and VSCOCAM is that I’m able to give my pictures a little more “pop” with just a few clicks.  The disadvantage of both applications is that they don’t maintain the quality of the original picture, therefore they’re not suitable for editing pictures for this blog or any kind of high quality sharing.  All that being said, there is no reason why I can’t create the same type of vibrant images with Lightroom, it just takes a little more work.

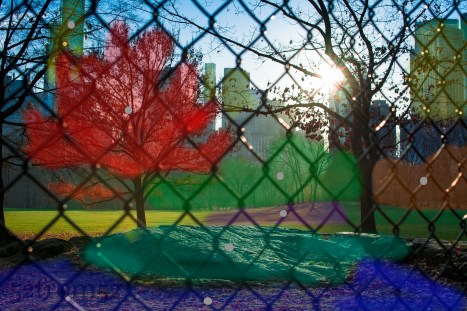
Edited Location comparison

Edited Location comparison

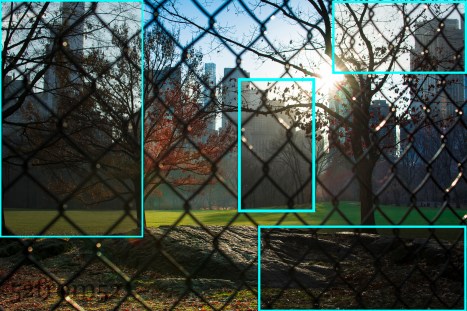
This week I put a lot more effort into editing specific details of my photograph, with the goal of creating a more vibrant picture.  I shot my picture straight into the sun which in turn caused a lot of shadows and dulled out the many of the colors in frame.  The way I corrected both issues was via Lightroom’s spot correction tool.  This tool allows you to do exactly what it sounds like, select certain area’s of your picture and adjust things such as color, exposure, contrast and so on.  I usually do these kind of adjustments globally (to the entire picture) or through the use of gradual filters.  In the past the issue I’ve run into is gradual filters aren’t good when you have to apply different settings to lots of different small areas.  This is where spot editing comes in handy.  The challenge that spot editing presents is keeping your picture looking a natural by manually blending your edits seamlessly into the picture.  You want to avoid creating obvious edit lines and look for natural breaks in your picture to tie your edits together.  Above and below are examples of before and after, along with a representation of the areas I focused in on with the spot edit tool.

Different colors represent different spot edits/localized adjustments

Different colors represent different spot edits/localized adjustments

Prior to editing the picture I obviously had to shoot one that was crisp and provided me with flexibility for editing.  To do this I underexposed my original picture and made sure I shot with a small aperture to keep more things in focus.  The last aspect of this picture I’ll briefly touch on is how lined it up. As I talked about in my week 16 post, framing a picture that’s shot into the sun can be tricky because you’re basically forced to use the live view.  I really don’t like taking pictures in the live view so what I do is line up my shot via live view, then switch the camera back to through the lens and fire away.  Once I get my first picture I adjust the composition via slight tilt and shift adjustments until I get the picture I want.  I used this method to get this picture and I think it worked well.

Step forward by stepping back

52from52 - Week 19

Picture info: ISO 3200, 35mm, f/1.8, 1/200sec, -1 Exposure step

Week 19 (12/9/2013 – 12/15/2013): Top of the Rock Observation Deck

Picture taken on 12/12/2013 at 5:15 PM

Picture description:

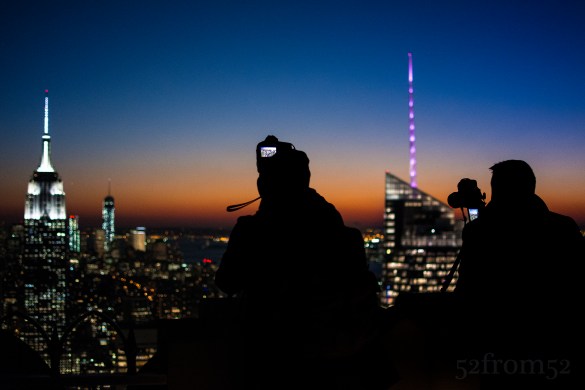
This week I finally got the chance to make a return visit to Top of the Rock.  My first visit was six months ago and was only two weeks after I purchased my Nikon.  Since my last visit I’ve often looked back at the pictures I took and thought about the many things that I could have done better.  I’ve learned many lessons over the past six months, in part because of this blog but also because I’ve immersed myself in photography.  Articles, YouTube tutorials and experimenting with different  techniques have been my main sources for learning.  One other source of learning that might surprise you is instagram.  I often flip through different hashtags looking for ideas of what to shoot or to see how people photograph certain subjects or places.  Instagram has photographers of every level ranging from the professional to amateur, and or dare I say serial selfie taker.  Before and after my trip I looked through the hashtag #topoftherock to see the kind of pictures people took during their visit.  Besides the selfies and couple pictures I noticed that nearly all of the pictures looked identical with the exception of changes to the sky or filter the person used on the picture.  After seeing how people have been over-sharing the same picture I knew that I had to find some way to differentiate mine from the rest.

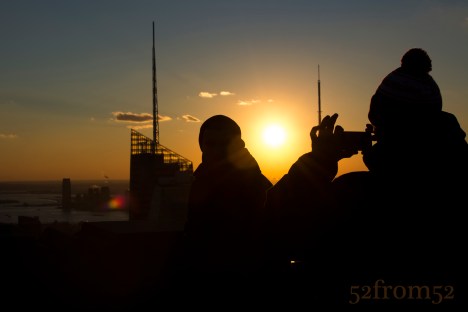
During my visit even though my goal was to take an original picture, I couldn’t help myself from taking the classic Top of the Rock picture.  I found myself taking the same kind of picture over and over again partially to make sure I got a good one, but also because in person it’s just that hypnotizing of a view.  After about an hour of scanning the horizon for a unique view I came to the conclusion that from my vantage point there really was none.  It didn’t matter where I aligned the buildings, I had already seen that picture, or one very similar, shared countless times.  At that moment I decided to take a step back from my coveted position to see what new perspectives I could find.  Within a matter of seconds I was rewarded for my decision.  After stepping back I saw that all the people taking pictures were casting silhouettes in front of the very same view I was just photographing.  I spent the next couple of minutes wading in and out of the crowd to try and get the a picture that met my satisfaction.  Eventually the 20 degree weather got the best of me and I decided to call it a night.  On my way home while thinking about my night, I realized the valuable lesson that I just learned.  It’s very easy to get drawn into taking the obvious picture. The only way my photography is going to continue to improve or “move forward” is if I regularly remind myself to take a “step back” and find a new perspective on what’s right in front of me.

Photography Concepts:

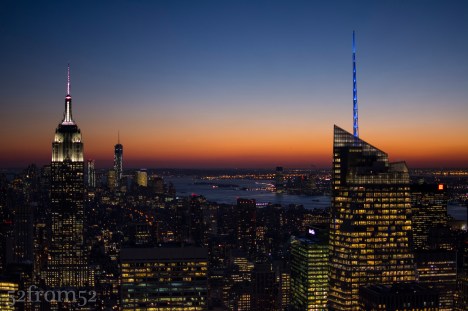
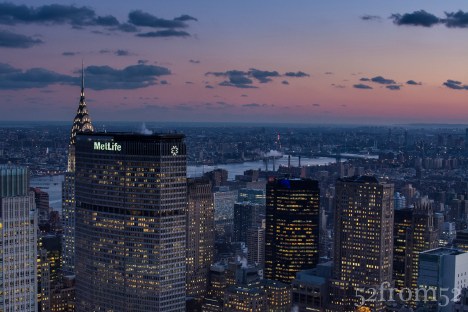
Although I used the previous section to talk about avoiding the obvious shot, it doesn’t mean the classic Top of the Rock pictures aren’t good ones.  For the purpose of this blog I wanted to challenge myself to get something unique but it leaves the question, how do you take a good picture at Top of the Rock?  As I mentioned earlier I often look back at the pictures I took during my first visit and dwell on what I could have done better.  Let me share with you some of the lessons I learned between my two visits in terms of taking pictures at Top of the Rock.

Example of the classic Top of the Rock Pic

Example of the classic Top of the Rock Pic

The first thing you have to ask yourself is what kind of picture are you looking to take?  Do you want take pictures of only the buildings or are you planning on featuring yourself or friends in the picture with the buildings in the background?  Knowing your subject is important to so you can determine the time you’re going to go and where you should set up shop once you’re there. Let’s start with talking about taking pictures of people.  If you’re taking pictures that will feature yourself or your friends the location is less critical but the time that you arrive is important.  In this case you’ll want to go about an hour before sunset this way you have time to take nice pictures in softer light and without flash.  In my opinion flash is the worst when taking pictures at Top of the Rock.  Unless you’re an absolute pro and know how to compensate correctly flash tends to wash out the city backdrop, which is one of the main reasons you’re at Top of the Rock right?  In order to feature the cityscape behind you, don’t use flash, especially if you’re taking pictures on the 68-69th floor behind the glass.  Once you find a nice location play around, take pictures of you subjects looking out towards the buildings or doing some forced perspectives (google it).  If you want to get more original, take pictures of your subjects from a distance.  Perhaps have your subject stand looking out towards the city and snap your picture focusing on them through the busy crowd? As was the theme of this blog, once you take a step back you’ll be surprised what new perspectives you’ll see.

Example of a unique Top of the Rock Picture

Example of a unique Top of the Rock Picture

What about the settings to use or not use when taking pictures of people, other than flash?  One option is to use the smallest aperture your camera will allow which will give you nice background blur and permit you to use a low ISO.  The negatives of this is the exposure of your cityscape background might be overexposed.  The solution, shoot your picture in such a way that you’ll be able to only edit the background later to correct the overexposure (don’t forget to shoot in RAW to enable this).  Option two in terms of aperture would be to use a small aperture which if you took my advice and came close to sunset, is going to force you to use a high ISO.  The negatives, you’ll have a grainer photo but the positive is you will have a more detailed cityscape background.  If you’re only looking to share this picture on something like instagram a high ISO image is fine.  Even with the wide aperture you still might have an issue with overexposure for the background so compose your picture accordingly.  The last setting I mention is try to use a focal length of 50mm+, I won’t go into detail about why but if you want to know why check out the video below from one of my favorite YouTube sources.

Now let me talk about what to do if you’re looking to take pictures of the buildings.  First, I recommend going to the 70th floor and trying to lock down a position in the center area where you don’t have the bottom floors jutting into your picture.  Getting this prime location is even more important if you’re using a wide angle lens.  Just like shooting people, I think the best time to take pictures of buildings is right before and during sunset but you can go any time especially if there are nice mid-day clouds.  For now I’ll talk about what to do at sunset.  Going at sunset or at night really forces your hand in terms of camera settings.  Unlike taking pictures of people, when you use a small aperture there aren’t many positives.  Your plane of focus is going to be narrow even with the buildings being far away.  What’s going to happen is one building might appear in perfect focus while the others are a little blurry.  You can still take a good picture using small apertures but if your goal is to get a crisp image that you can blow up on perhaps a canvas,  I don’t recommend using small apertures.  What are your options then?  Option one, you can boost your ISO but this is going to still leave you with the problem of not having a crisp image for enlarging later.  Option two, bring a tripod and shoot with a small aperture and slow shutter speed.  This seems simple right? Well tripods are not allowed at Top of the Rock but there are ways around this rule.  As you can see in this week’s featured picture people bring tripods.  The key is to bring one small enough to fit in your bag, and one that has a small leg spread so it can sit on top of the cement pillars.  This is also why getting a good location is critical, there are a limited number of cement pillars and or locations that can facilitate the use of a tripod.  I’m not going to go into the all settings specific to tripods because if it’s pretty simple, small aperture, low ISO, slow shutter.  Two things I will recommend though  is use the multiple focus point setting which will grab more buildings in focus, and underexpose your image.  One thing not to do, which believe it or not I saw someone do, don’t use flash while you’re shooting buildings on a tripod.  Maybe I’m missing something and if I am please comment and correct me, but I don’t see any positive in using flash on a tripod when you’re not taking pictures of motion or people.

ISO 2500, 35mm, f/7.1, 1/40 sec, no tripod

ISO 2500, 35mm, f/7.1, 1/40 sec, no tripod

These are some of the lessons/tips I’ve learned from my two trips to Top of the Rock.  I still haven’t gotten what I would consider a great classic Top of the Rock picture, but that’s mainly because I haven’t brought a tripod or wide angle lens.  I think I’ll take at least one more trip in a few months and try my hand using more than just my 35mm lens and perhaps a tripod.  Until then I hope the lessons I’ve learned and shared so far help you shoot some great pictures at Top of the Rock, have fun and remember take a step back!

Big Head Focal Length by CameraRecToby:

Out of time

Picture Specs: ISO 400, 35mm, f/1.8, 1/800sec

Picture Specs: ISO 400, 35mm, f/1.8, 1/800sec

Week 14 (11/3/2013 – 11/9/2013): Hoboken Terminal
Picture taken on 11/9/2013 at 4:31 PM

Picture description:

As the days continue to grow shorter and colder it’s becoming harder to find time during the week to snap a picture.  Once winter hits I get the feeling that I’ll be taking more nighttime shots since the sun goes down so early.  Option two would be to take pictures on Saturday and cut it close to the self imposed weekly deadline I adhere to.  Having completed over one quarter of my 52 week blog I’ve come to notice when I’m taking most of my pictures and for that reason I’m going to adjust my weekly window.  Usually I run my week Sunday-Saturday which means I have a weekend day on either side of the week to get a picture.  What I’ve noticed is due to my schedule I hardly every (as in never) take pictures on Sunday but it would be the prime day to write a blog if I take a picture on Saturday. For that reason I’m going to change it up and move my weekly window to Monday-Sunday.  I guess it’s my own daylight savings adjustment.

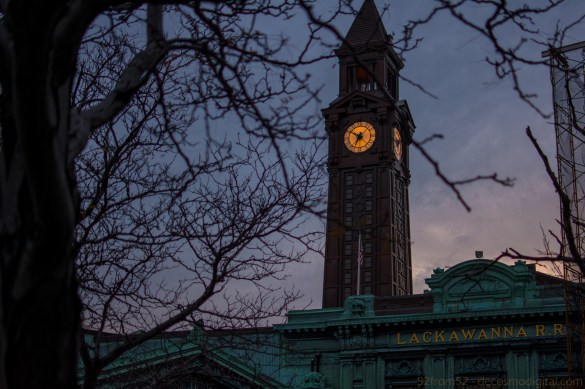
Now that I’ve worked out my time issue let me talk about this week’s picture and how it had a role in my recent decision.  Going into this week my plan was to revisit Top of the Rock (went in June) after work to get a picture looking downtown at sunset.  Unfortunately due to my busy schedule and daylight savings moving sunset times to around 4:30/4:45 this was an impossible goal to accomplish.  This made me realize that if I wanted to continue to take advantage of shooting during the “golden hour” I’ll have to do more of my picture taking on the weekends.  Taking a picture and writing a blog all in one day, especially on Saturday, a day/night I usually go out, can prove difficult.  This is the exact scenario that transpired this week.  My window of opportunity to get the picture I wanted fell to Saturday and in the end I didn’t have the time to make it to Top of the Rock.  Thankfully getting an interesting picture in Hoboken is as easy as taking an afternoon stroll, no planning required.  After setting out to get my picture I began to work my way down the Hoboken waterfront.  As I got closer to downtown  my eye’s were drawn to the train station’s clock tower. With the idea of running out of time in the forefront of my mind a clock picture seemed fitting, all that was left was finding the right angle.

*Never noticed before taking this week’s picture, this clock is not set to the correct time. 

Photography concepts:

As I mentioned in this week’s description section I try to take most of my pictures during what’s referred to as the “golden hour” or “magic hour.”  It’s said that during the “golden hour” you have the best/softest light for taking more dramatic pictures.  Although it’s called the “golden hour” it’s really closer to four total hours a day, one before and one after the sunrise and sunset times.  At these times the sun is at a prime angles for soft light which is roughly 10 to -10 degrees in relation to the horizon.  Having softer light provides lots of advantages for getting a nicely exposed and vivid picture.  Below are two links to some articles which go into more detail about the “golden hour” in case you want to read more.  Back to this week’s picture, I set out to get my picture at the start of the “golden hour” which for Saturday was around 3:45.  I ended up getting my picture just before sunset (4:45) which was good because any later and I might have needed a tripod or  to boost my ISO.

If you’ve been reading my blog or if you’re familiar with photography you might be able to guess how I was able blur out most of the tree and focus on the clock/train station.  In case this is your first time reading this effect is done through the use of a wide aperture, this week’s was f/1.8.  I’ve talked about aperture and it’s affects on an image in many of previous blogs so if you’d like to learn more circle back and read some of my older posts.  The last concept I used which is one I’ve also already talked about during my week 5 post “never forget” is selective focus points.  Just to quickly rehash, on most nice cameras and absolutely every DSLR’s you can manually select one point to base your camera’s focus.  This is different from auto-focus points in that those will often pick up whatever is closest or largest.  I use selective focus points very frequently when shooting with both my DSLR and even my iPhone 5s.  Why leave things to chance, it’s always better to control your focus so this is a tool I highly recommend any photographer uses.

http://www.photographymad.com/pages/view/the-golden-hour-in-photography
http://photographyconcentrate.com/make-your-photos-magical/

Getting Negative

Picture specs: ISO 500, 35mm, f/4.0, 1/4000 second

Picture specs: ISO 500, 35mm, f/4.0, 1/4000 second

Week 8 (9/22/2013 – 9/28/2013): Flatiron building, corner of  23rd/5th NYC
Picture Taken on 9/25/2013 at 4:58 PM

Picture Description:

No, don’t worry I’m not going on any kind of negative rant in this week’s post.  If you want to understand the “negative” reference in the title you’ll have to read the photography concepts!  Enough on that, time for the story behind the picture.

I was reminded about a very valuable lesson this week, that lesson being that you really can’t force things.  As usual I had a plan for this week but by Tuesday I realized my plan was pretty much a wash.  The plan was to get a picture of or around the United Nations building.  The reason I chose this week was because it’s the annual United Nations General Assembly.  Most people have no idea about when the General Assembly happens let alone the chaos that happens in the area surrounding the UN.  I work not too far from the UN so each year I get a front row seat to the insanity.  SWAT cars, Secret Service, hundreds of NYPD officers, and countless diplomats converge on my little east side nook.  What I wanted to do was get a picture that in some way captured the madness.  On Monday I scouted the surrounding area to see if there were any good pictures that caught my eye.  Due to all the added security I couldn’t get close to the UN building so I knew I’d have to get some kind of distant shot.  The only idea I could think of was a sunrise picture since the UN is right on the water.  Sunset shot easy right, yes…on any other week!

It wasn’t until Tuesday morning when I brought my camera into work with me that I realized the flaw in my plan.  With so many cops and security personnel around the second I took my camera out all eyes focused on me.  Why is he photographing the UN?  Why is he wearing a black coat?  Why is he walking down that street?  Why is he looking around in such an odd way?  These are all of the questions I could almost hear getting asked as I felt the burning stares.  After a few short minutes I decided to move locations to the waterfront on the East river, bad idea. Once I got to the waterfront I saw police boats circling which seemed to immediately fixate on me.  As one large boat headed in my direction, I quickly threw my camera into my bag and slowly walked away.  In my head I had this sudden fear that some kind of unmarked car was going to zoom up, grab me, and take me away for hours of questioning.  At this point I said you know what I really don’t want to get arrested this week, I’m going to get a bagel and call it a morning.

That afternoon as I thought about what unfolded in the morning I realized even though I really wanted the UN picture this week, now isn’t the best time, there is always next week.  Giving up on something like this is difficult for me.  Once I see something I want I go for it but as I said  earlier, this week I was reminded sometimes you can’t force things you just have to be patient and wait for the right time.

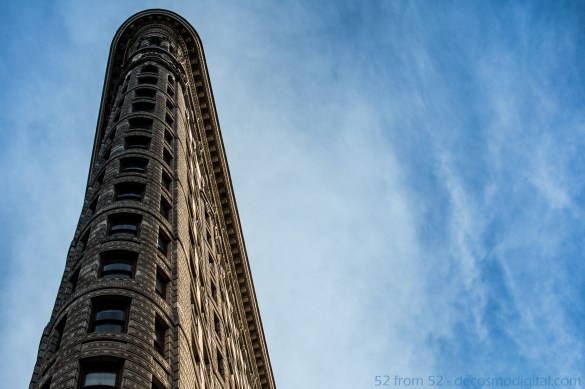
Once I came to terms with holding off on the UN idea I decided that I would take a trip to the flatiron building to see if I had better luck without all the piercing police eyes.  Prior to this week I had only seen the flatiron building from a distance or very briefly up-close while driving by.  The building is quite the scene in person and can make you a little dizzy when you’re standing right next to it looking straight up.  Luckily I was able to conquer the dizziness and get this week’s shot, hopefully you like it!

Photography Concepts:

Photography wise what I learned this week is “getting negative” isn’t a bad idea, let me explain.  As I continue to read about the concepts of photography one term that’s come up a lot when referencing a pictures composition is “negative space.”  Based on everything I’ve read negative space is the area surrounding your subject (which is positive space).  It seems logical enough right?  I’ve seen that in some photos people literally fill the negative space with well nothing.  What this does it it really emphasizes the subject.  In my case my subject was the flatiron building and my negative space was filled with the nice blue sky.  When I first started taking pictures if I took a picture where half of it was empty I’d probably think about cropping it down to eliminate that space.  What I’ve now learned is if used correctly the empty “negative” space is a nice tool to put in your composition toolbox.

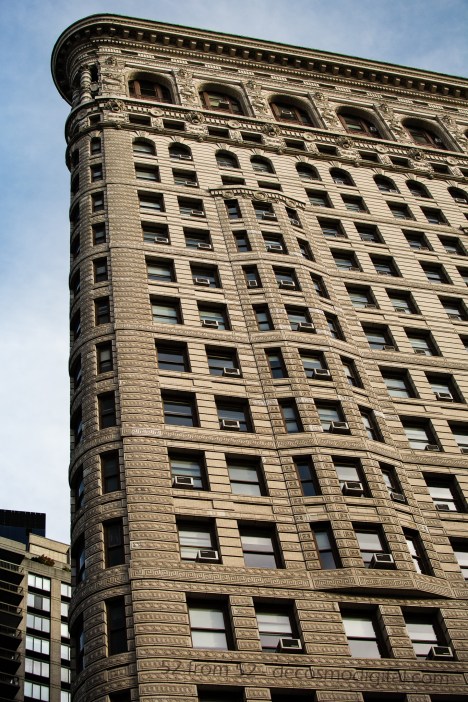
An example of a picture where there is no negative space.

An example of a picture where the subject takes up most of the frame

One trick I learned this week while getting myself dizzy from looking up for too long was how to line up my pictures better.  In a lot of the pictures I’ve previously taken of buildings while looking straight up I noticed that the picture always seems tilted.  The way I lined the picture up or saw it in real life didn’t translate well to the composition of the photo once I reviewed it at home.  While I was shooting this week I tried to choose a line or lines in the building that would level things out when I looked at the picture later on.  It felt odd while I was taking the picture but my results were a lot better. For example in the below picture I chose the corner line between the two sides of the building to line up my shot.  It’s hard to give some kind of formula for choosing the right line, but it’s something I’m going to try and pay closer attention to in the future.

Blog_8(final)3