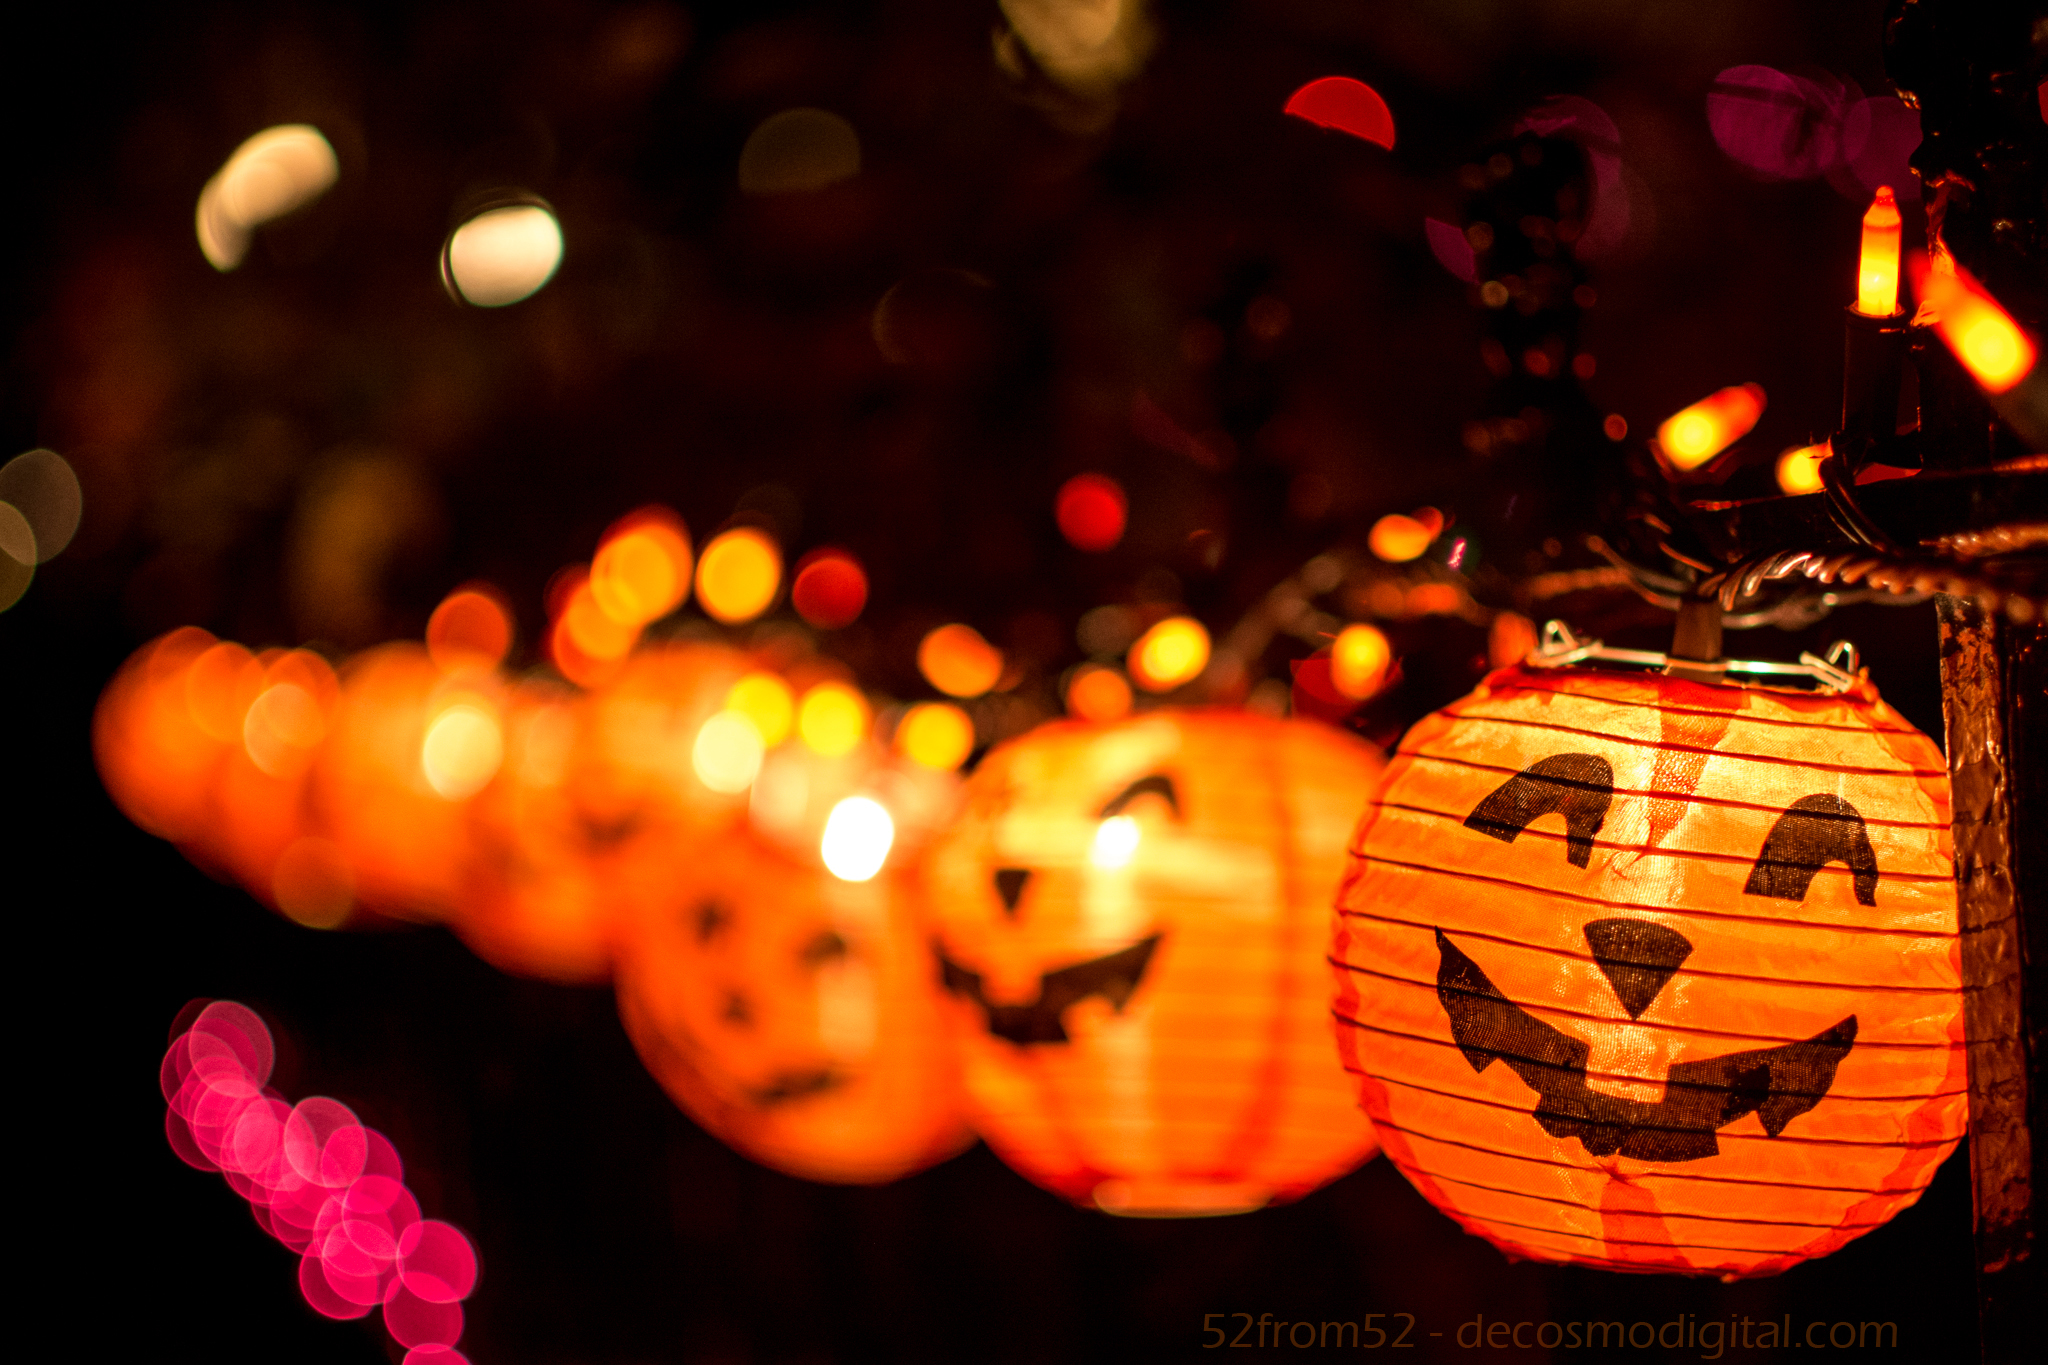
Picture Specs: ISO 800, 35mm, f/2, 1/125sec
Week 12 (10/20/2013 – 10/26/2013): Bloomfield St., Hoboken NJ
Picture taken on 10/24/2013 at 8:14 PM
Picture description:
What a busy week! Lucky walking, or running, around Hoboken always seems to provide interesting pictures when I don’t have the time to plan something. This week my goal was to try and get a picture related to the fall or Halloween. With a crammed schedule all I could do was hope that something would present itself, and it did!
Normally I run along the water in Hoboken but on Thursday I decided to change it up and run down Bloomfield St. since lately there seemed to be this orange glow emitting from the street. Much to my surprise the people in Hoboken are really into decorating for Halloween. Most of the houses lining Bloomfield had at least some interlaced webbing along their stoop, if not a full out Halloween scene. Running down the street was almost like going through a haunted house since there were witches, ghosts and spiders littered all over. Along my path I even stumbled upon a news crew camped out around one of the more creative houses. The news crew was likely talking about how intense and competitive decorating for Halloween gets in Hoboken. There were so many houses I could have chosen but the one that caught my eye featured a string of jack-o-lanterns that seemed to be smiling at me. After finding my subject I ran, literally, back to my apartment to grab my camera (no I didn’t run with it!) and went back out to get my shot.
Photography concepts:
Like in my other night pictures the biggest challenge was dealing with the low amount of light. My subject (the jack-o-lanterns) were nice enough to emit a good amount of orange glowing which enabled me to drop my ISO. Hopefully by now you know what ISO is and how it’s related to light, if not circle back and read either my week 3 or week 4 blog. Back to ISO, thanks to the light coming from the lanterns I could shoot my picture with an ISO of 800. I probably could have gone lower but I didn’t want to creep in front of some persons house for too long. Using the lower ISO left my picture looking crisp rather than grainy as is usually the result from a higher ISO.
The other aspect of the “triangle of photography” which helped shape my picture was the aperture that I used. In this picture my aperture was f/2 which is part of why I was able to shoot with a low ISO. f/2 is one of the largest apertures you can use and lets in a lot of light. One of the results from using wider apertures is the background blur caused by a shallow plane of focus that I’ve talked about in past blogs. Having a shallow plane of focus is why you can clearly (or not so clearly) see the pumpkins gradually get more and more blurry as they move further away.
The last thing I want to point out about this picture is how I lined it up. It’s often tempting to take a picture head on but I highly encourage you to try to find a unique angle that perhaps you wouldn’t see while walking around. Not too many people would bend down and look straight down the line of jack-o-lanterns. Anyone passing by might stop and look at the lanterns head on, this is why finding a unique angle is way more interesting. Get low, get high (legally), and find that unique angle!