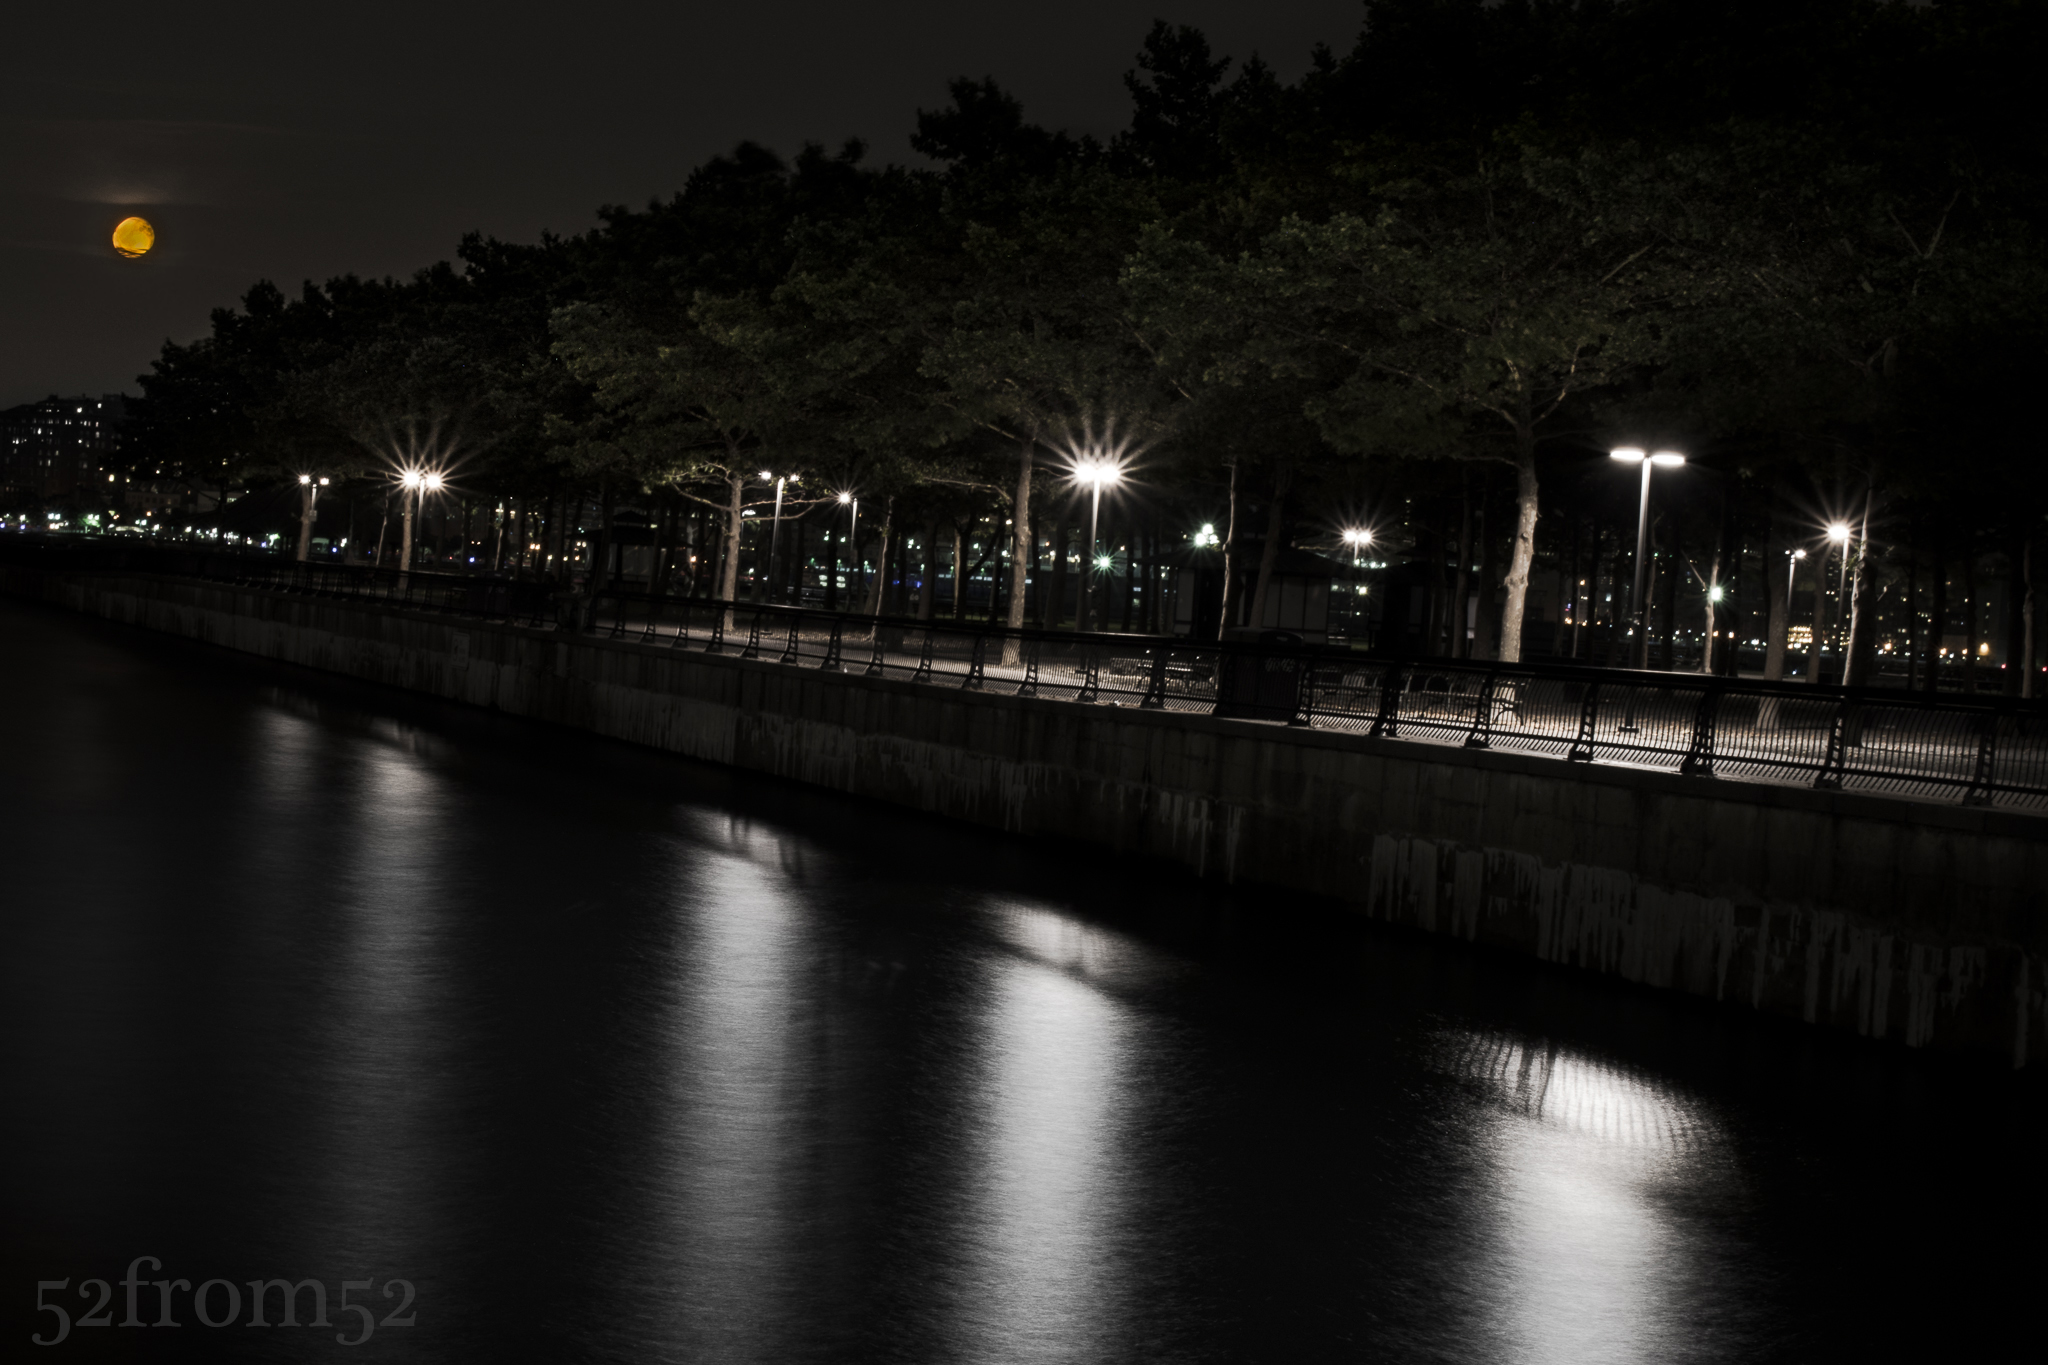
Picture Info: ISO 100, 36mm, f/16, 30sec
Week 49 (7/7/2014 -7/13/2014): Pier A, Hoboken NJ
Picture taken on 7/13/2014 9:42PM
Picture description:
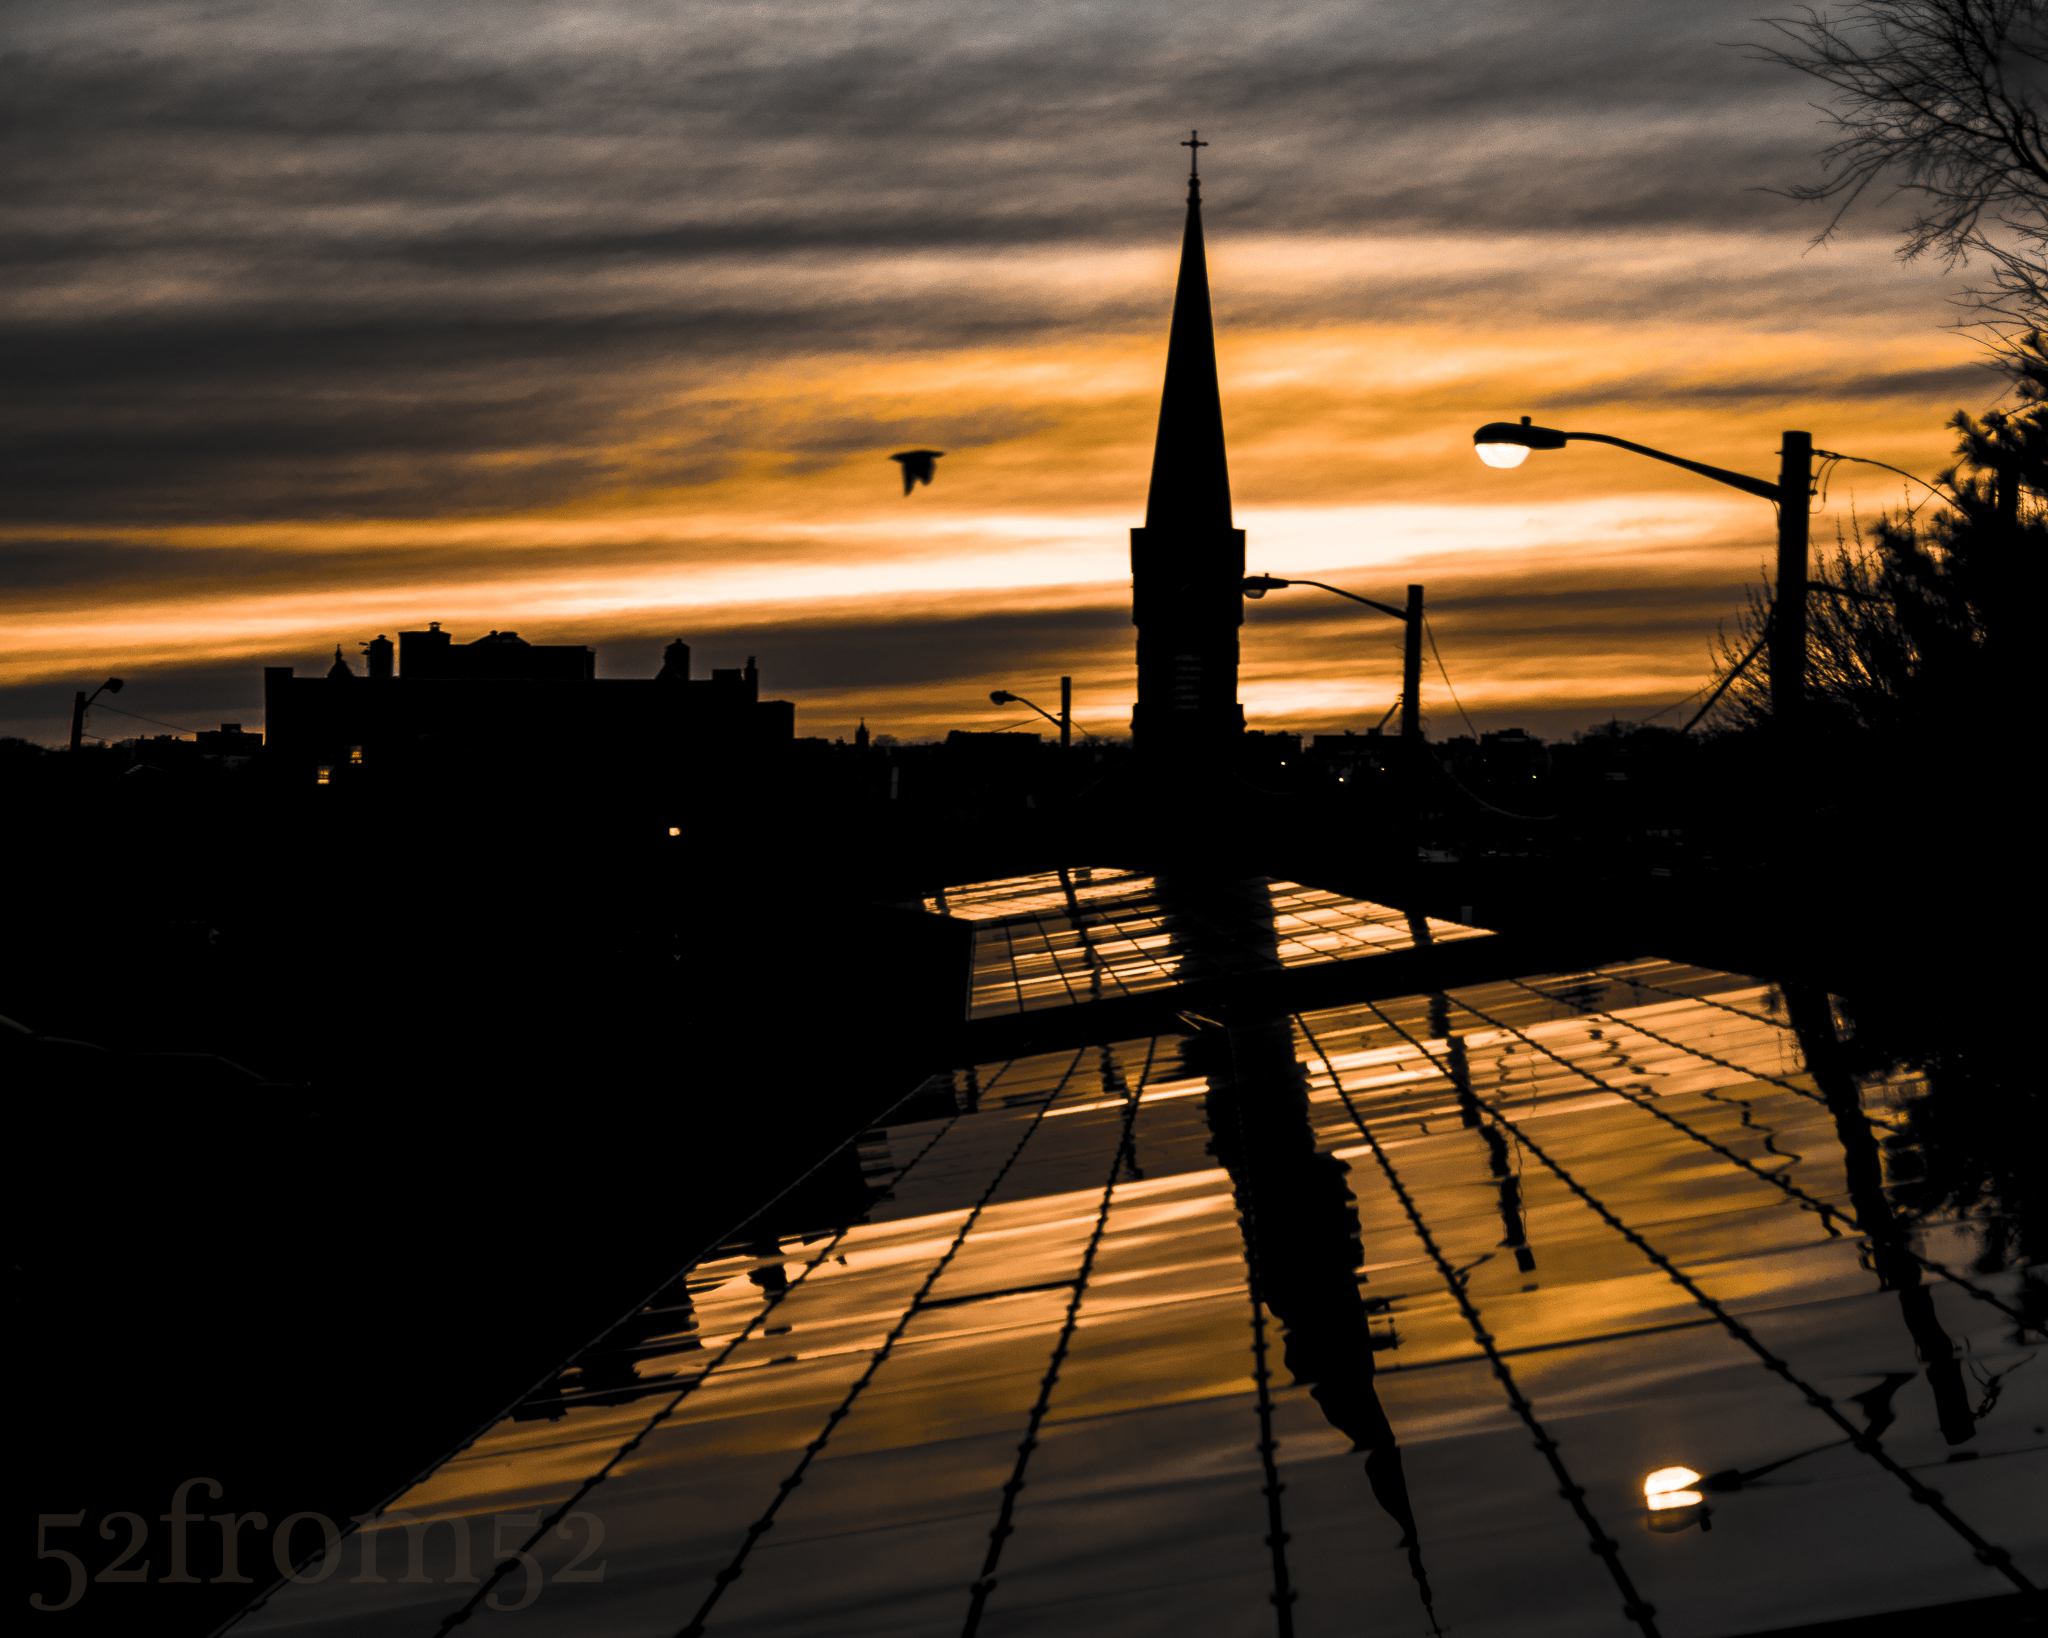
No matter how many times it happens, a full moon always seems to invoke a certain amount of awe after it emerges from the horizon. This past Saturday I was out camping for paintball in Pennsylvania when I first spotted the orange full moon. Although I was in a magnificent location to capture the moon in all it’s glory, I did not have my Nikon with me. It was hard not being able to photograph the rare event but in a way I was glad. Not having my camera forced me to sit back and just appreciate the moon in the raw, not through a lens, not on the back of a LCD screen, but through my own two eyes. As I gazed upon what seemed like a giant orange in the sky, I couldn’t help but think how I would compose a picture feature the moon once back home. I spent the rest of the evening kicking back with friends reminiscing about our glory days in college, knowing that tomorrow I’d have my shot at the moon.
After getting home from my trip to PA, I quickly gathered my gear and set out for the waterfront to get in position to shoot for the moon. It was cloudy on Sunday but I remained optimistic that the moon would find a way to peek through the clouds. After arriving at Pier A, I scouted a few spots for my picture then patiently waited for the moon to rise from the Western horizon. The predicted moonrise time came and went, and there was still no sign of the moon. After about 15 minutes doubt started to creep into my mind and I began to think that perhaps the clouds were just too thick to see the moon. Once 20 minutes hit I started to head back uptown feeling very defeated. As I walked past Pier C I took a quick glance at the horizon and much to my surprise I saw an orange glow starting to burst through the clouds. Could it be?! Yes it was, it was the orange mood that I was eagerly waiting for. I quickly ran back to my spot at Pier A, composed my picture and the rest is history.
Photography Concepts
When it comes to composing a picture featuring a full moon, or even the sun, one of the keys is knowing where your subject (the moon/sun) will be and when. Although the moon popped out later than I originally expected, I still had a good idea about when it would rise and where I should look for it. I’m sure there are plenty of options out there for figuring out the moon’s location but my information source is typically an iPhone application called “The Photographer’s Ephemeris.” I’ve mentioned this application in the past, but it’s so valuable that it’s worth a second shout out. Below is an example of how I planned the composition of my picture based on where the moon would be.
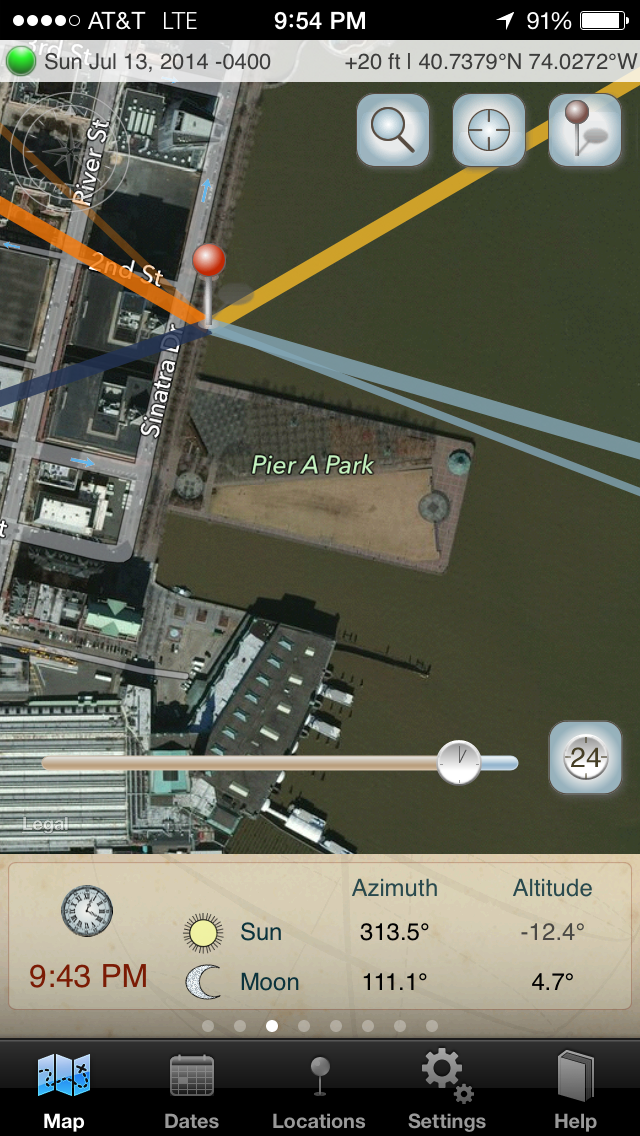
iPhone App Screen Shot
The reason I chose this location was because the trees lining Pier A created a natural leading lines composition, drawing your eyes down the pier towards the moon. I knew my focal length would leave the moon looking tiny, so I had to give the moon a boost a good composition to make it stand out. Other than the trees, I also used the light reflections in the water to naturally point towards the moon. In order for me to get the water looking as smooth as it did, I had to shoot a long exposure. The trade off of shooting a long exposure was the moon wasn’t as in focus as I would have liked. In hindsight I wish that I shot a few pictures using a quicker shutter to capture more detail in the moon. The next full moon like this is on August 10th which leaves me plenty of time to plan out my next shot. Mark it on your calendar, pick a location and shoot for the moon!