Getting Negative

Picture specs: ISO 500, 35mm, f/4.0, 1/4000 second

Picture specs: ISO 500, 35mm, f/4.0, 1/4000 second

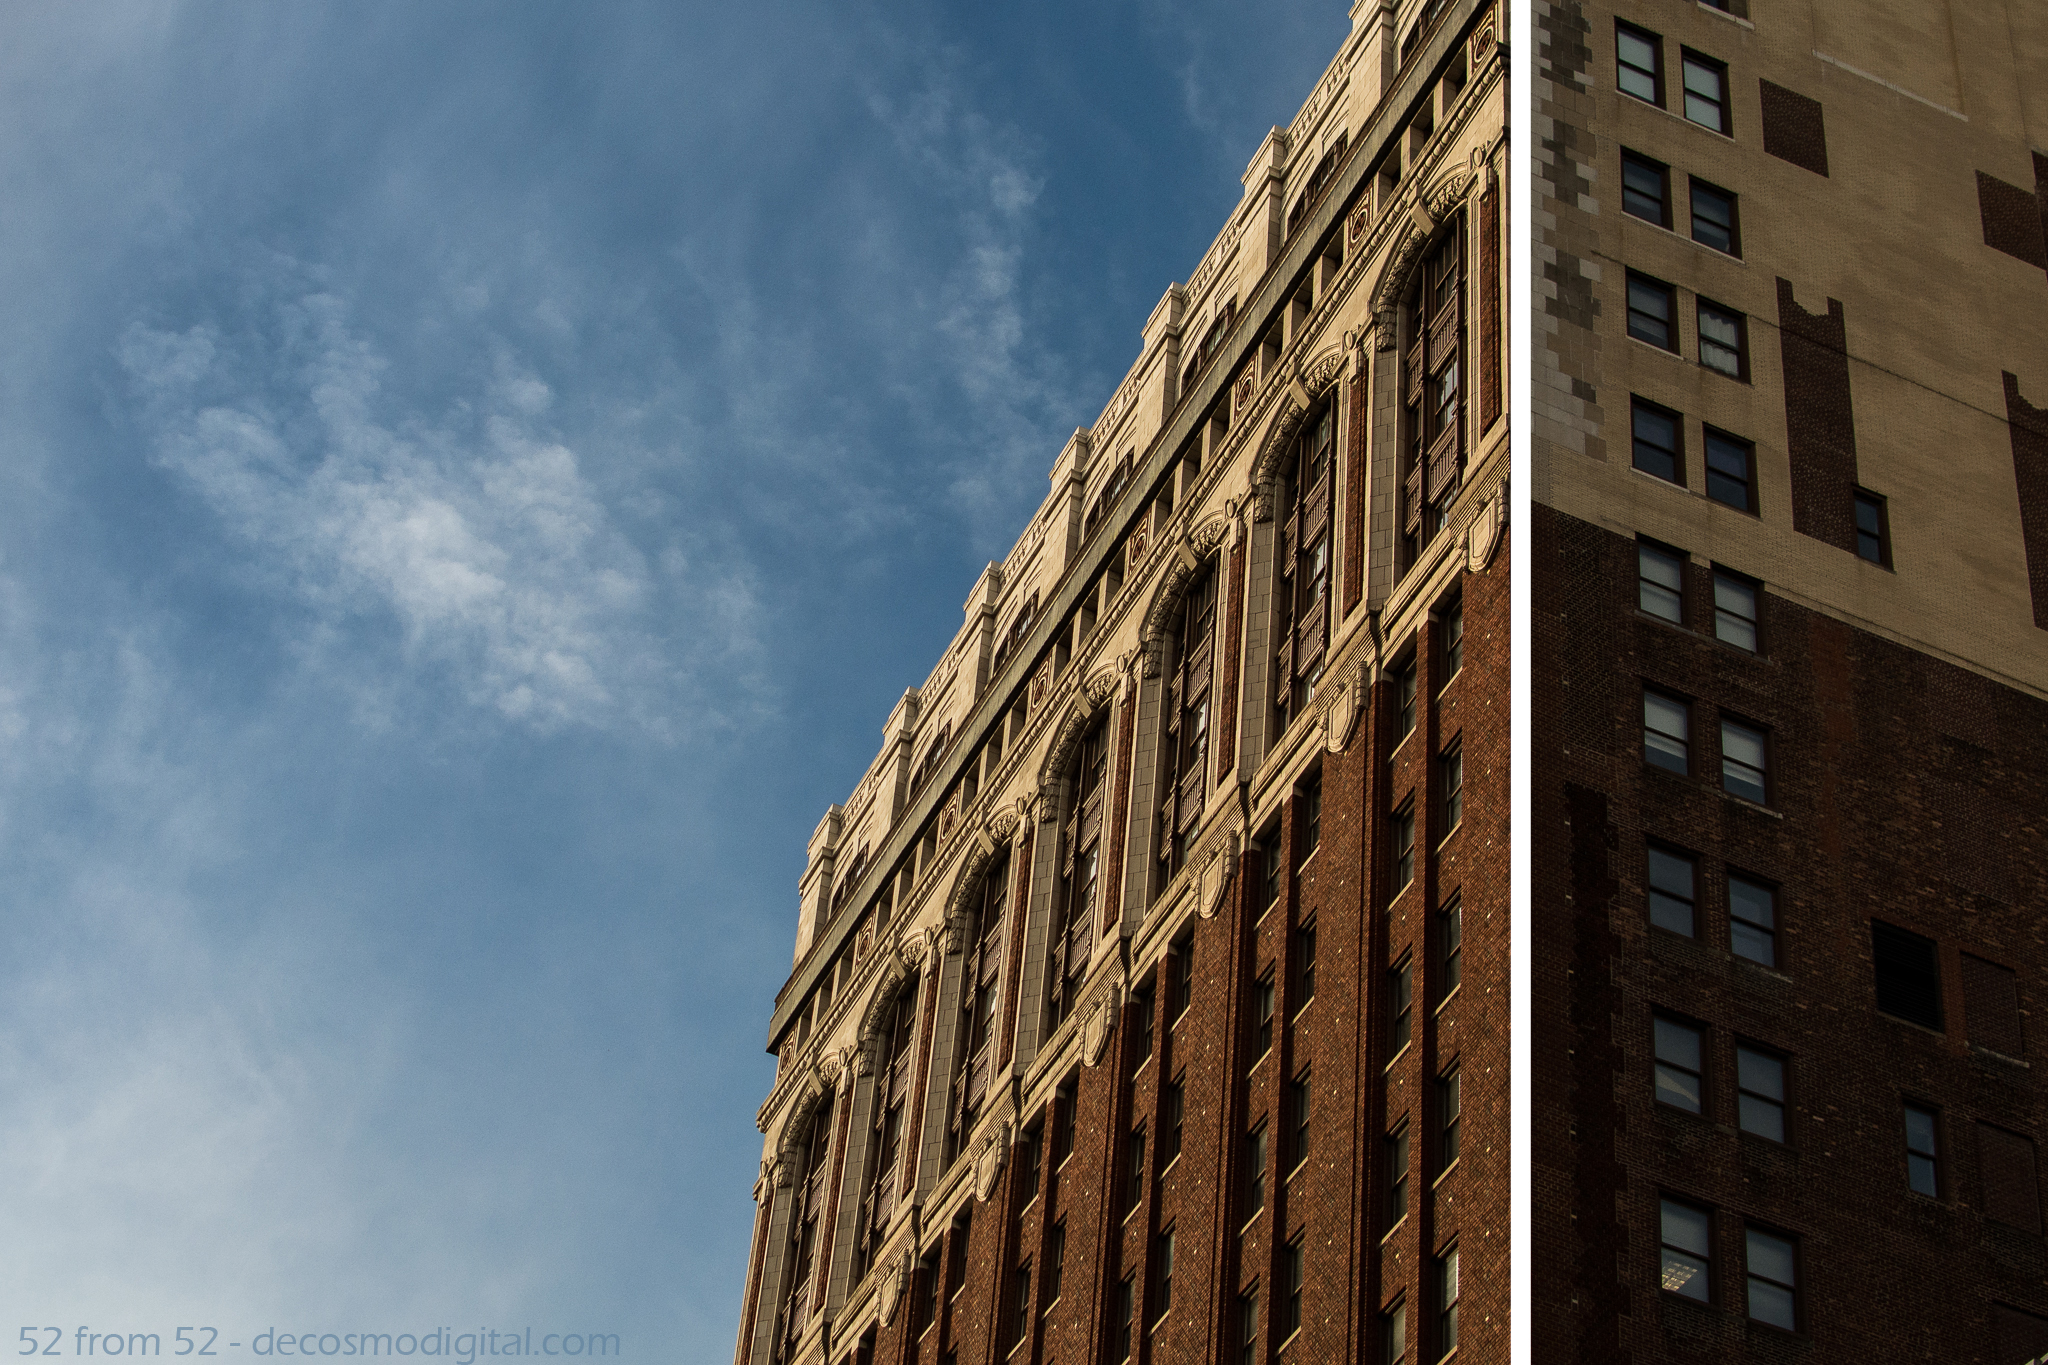
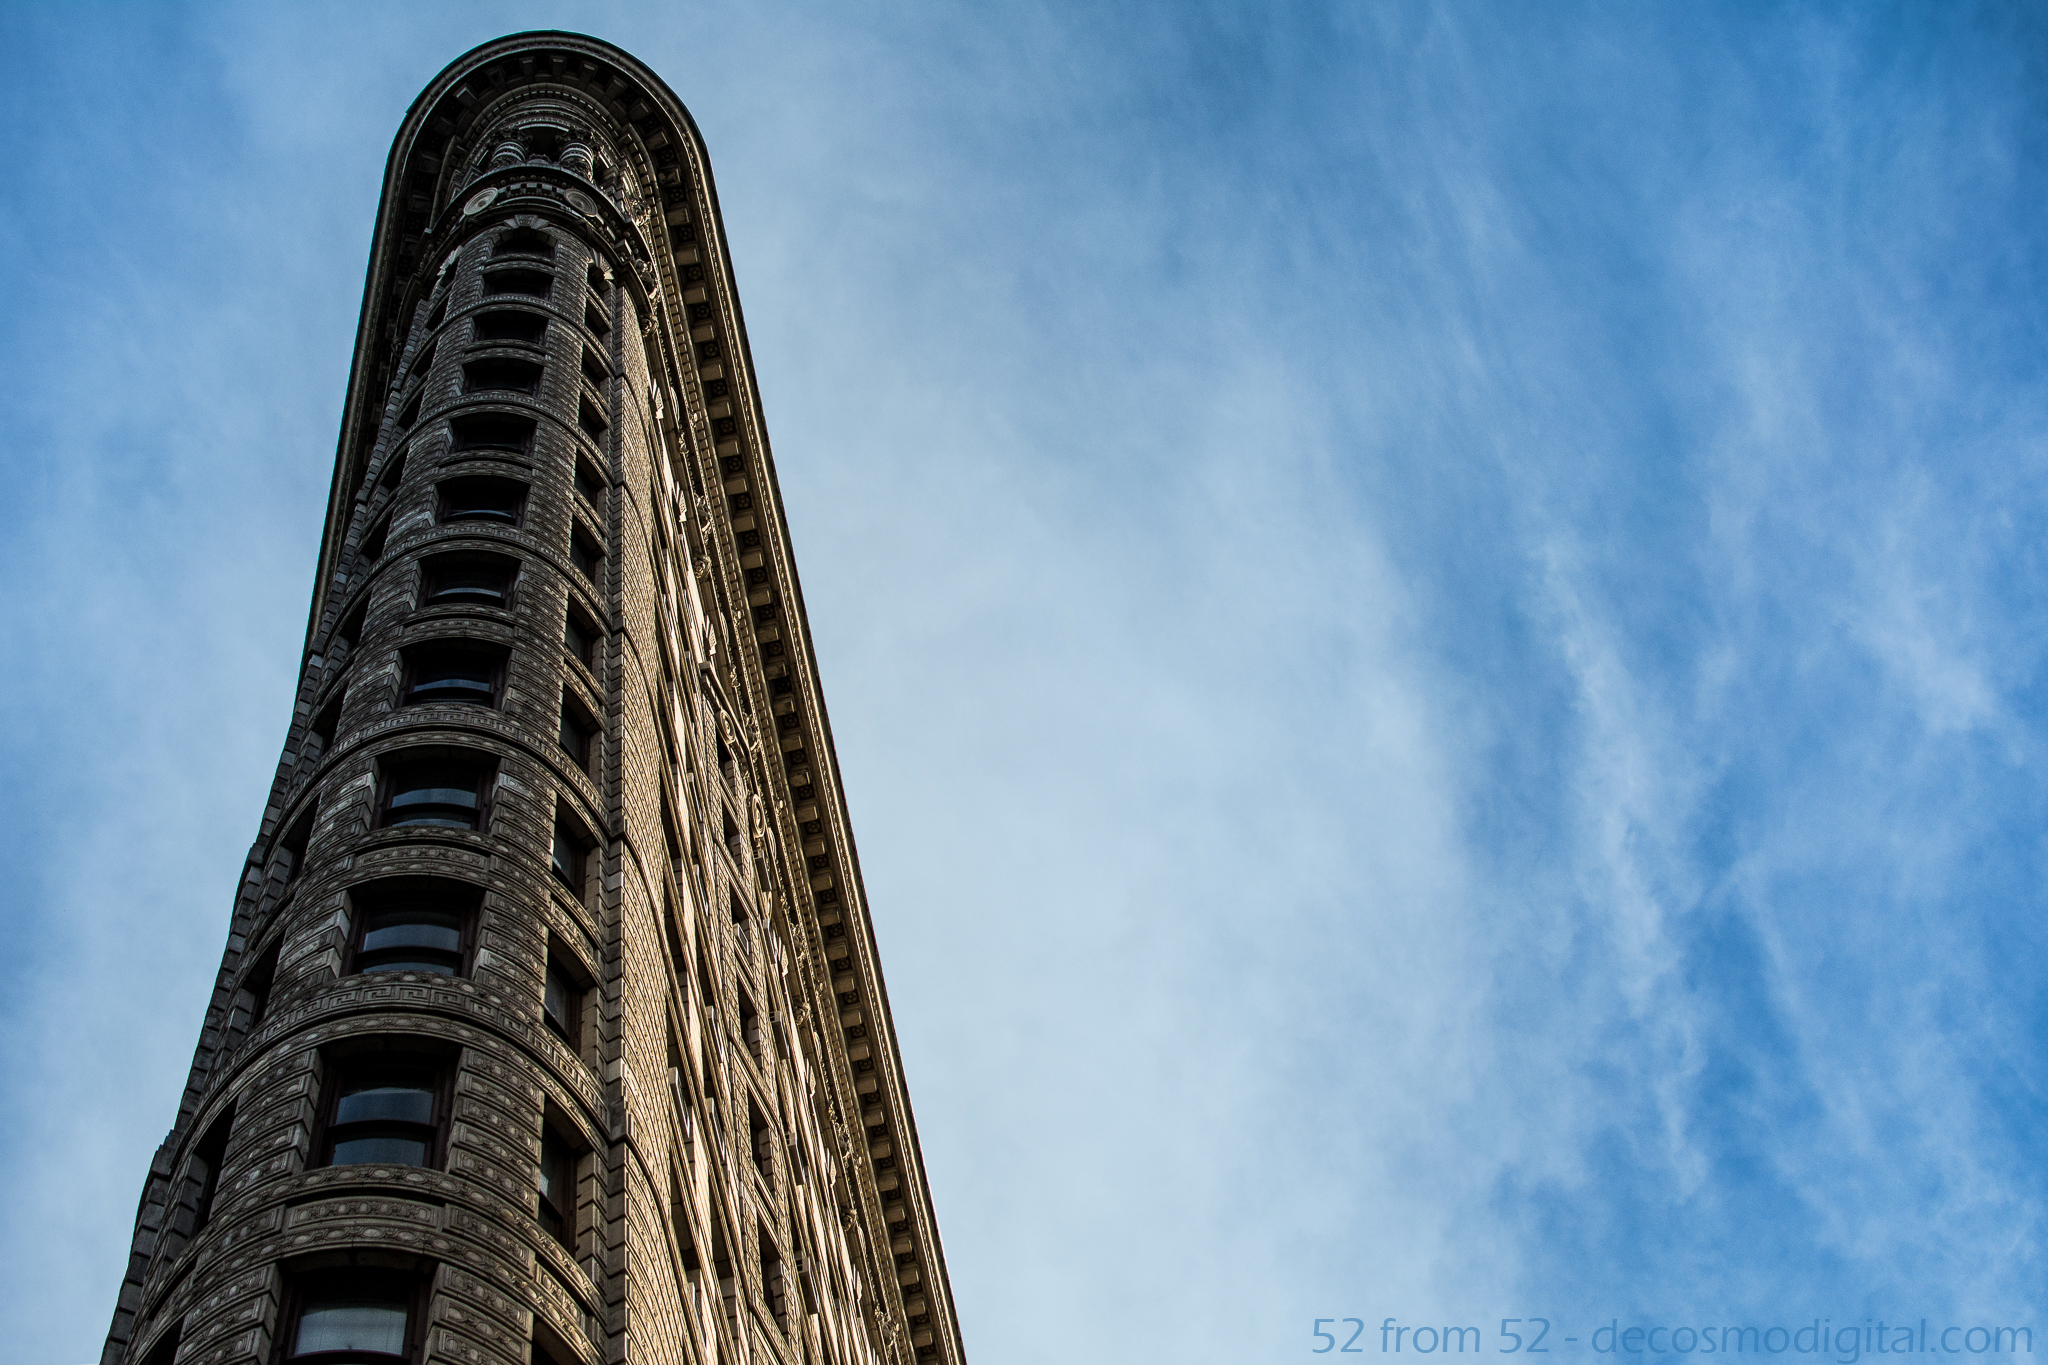
Week 8 (9/22/2013 – 9/28/2013): Flatiron building, corner of  23rd/5th NYC
Picture Taken on 9/25/2013 at 4:58 PM

Picture Description:

No, don’t worry I’m not going on any kind of negative rant in this week’s post.  If you want to understand the “negative” reference in the title you’ll have to read the photography concepts!  Enough on that, time for the story behind the picture.

I was reminded about a very valuable lesson this week, that lesson being that you really can’t force things.  As usual I had a plan for this week but by Tuesday I realized my plan was pretty much a wash.  The plan was to get a picture of or around the United Nations building.  The reason I chose this week was because it’s the annual United Nations General Assembly.  Most people have no idea about when the General Assembly happens let alone the chaos that happens in the area surrounding the UN.  I work not too far from the UN so each year I get a front row seat to the insanity.  SWAT cars, Secret Service, hundreds of NYPD officers, and countless diplomats converge on my little east side nook.  What I wanted to do was get a picture that in some way captured the madness.  On Monday I scouted the surrounding area to see if there were any good pictures that caught my eye.  Due to all the added security I couldn’t get close to the UN building so I knew I’d have to get some kind of distant shot.  The only idea I could think of was a sunrise picture since the UN is right on the water.  Sunset shot easy right, yes…on any other week!

It wasn’t until Tuesday morning when I brought my camera into work with me that I realized the flaw in my plan.  With so many cops and security personnel around the second I took my camera out all eyes focused on me.  Why is he photographing the UN?  Why is he wearing a black coat?  Why is he walking down that street?  Why is he looking around in such an odd way?  These are all of the questions I could almost hear getting asked as I felt the burning stares.  After a few short minutes I decided to move locations to the waterfront on the East river, bad idea. Once I got to the waterfront I saw police boats circling which seemed to immediately fixate on me.  As one large boat headed in my direction, I quickly threw my camera into my bag and slowly walked away.  In my head I had this sudden fear that some kind of unmarked car was going to zoom up, grab me, and take me away for hours of questioning.  At this point I said you know what I really don’t want to get arrested this week, I’m going to get a bagel and call it a morning.

That afternoon as I thought about what unfolded in the morning I realized even though I really wanted the UN picture this week, now isn’t the best time, there is always next week.  Giving up on something like this is difficult for me.  Once I see something I want I go for it but as I said  earlier, this week I was reminded sometimes you can’t force things you just have to be patient and wait for the right time.

Once I came to terms with holding off on the UN idea I decided that I would take a trip to the flatiron building to see if I had better luck without all the piercing police eyes.  Prior to this week I had only seen the flatiron building from a distance or very briefly up-close while driving by.  The building is quite the scene in person and can make you a little dizzy when you’re standing right next to it looking straight up.  Luckily I was able to conquer the dizziness and get this week’s shot, hopefully you like it!

Photography Concepts:

Photography wise what I learned this week is “getting negative” isn’t a bad idea, let me explain.  As I continue to read about the concepts of photography one term that’s come up a lot when referencing a pictures composition is “negative space.”  Based on everything I’ve read negative space is the area surrounding your subject (which is positive space).  It seems logical enough right?  I’ve seen that in some photos people literally fill the negative space with well nothing.  What this does it it really emphasizes the subject.  In my case my subject was the flatiron building and my negative space was filled with the nice blue sky.  When I first started taking pictures if I took a picture where half of it was empty I’d probably think about cropping it down to eliminate that space.  What I’ve now learned is if used correctly the empty “negative” space is a nice tool to put in your composition toolbox.

An example of a picture where there is no negative space.

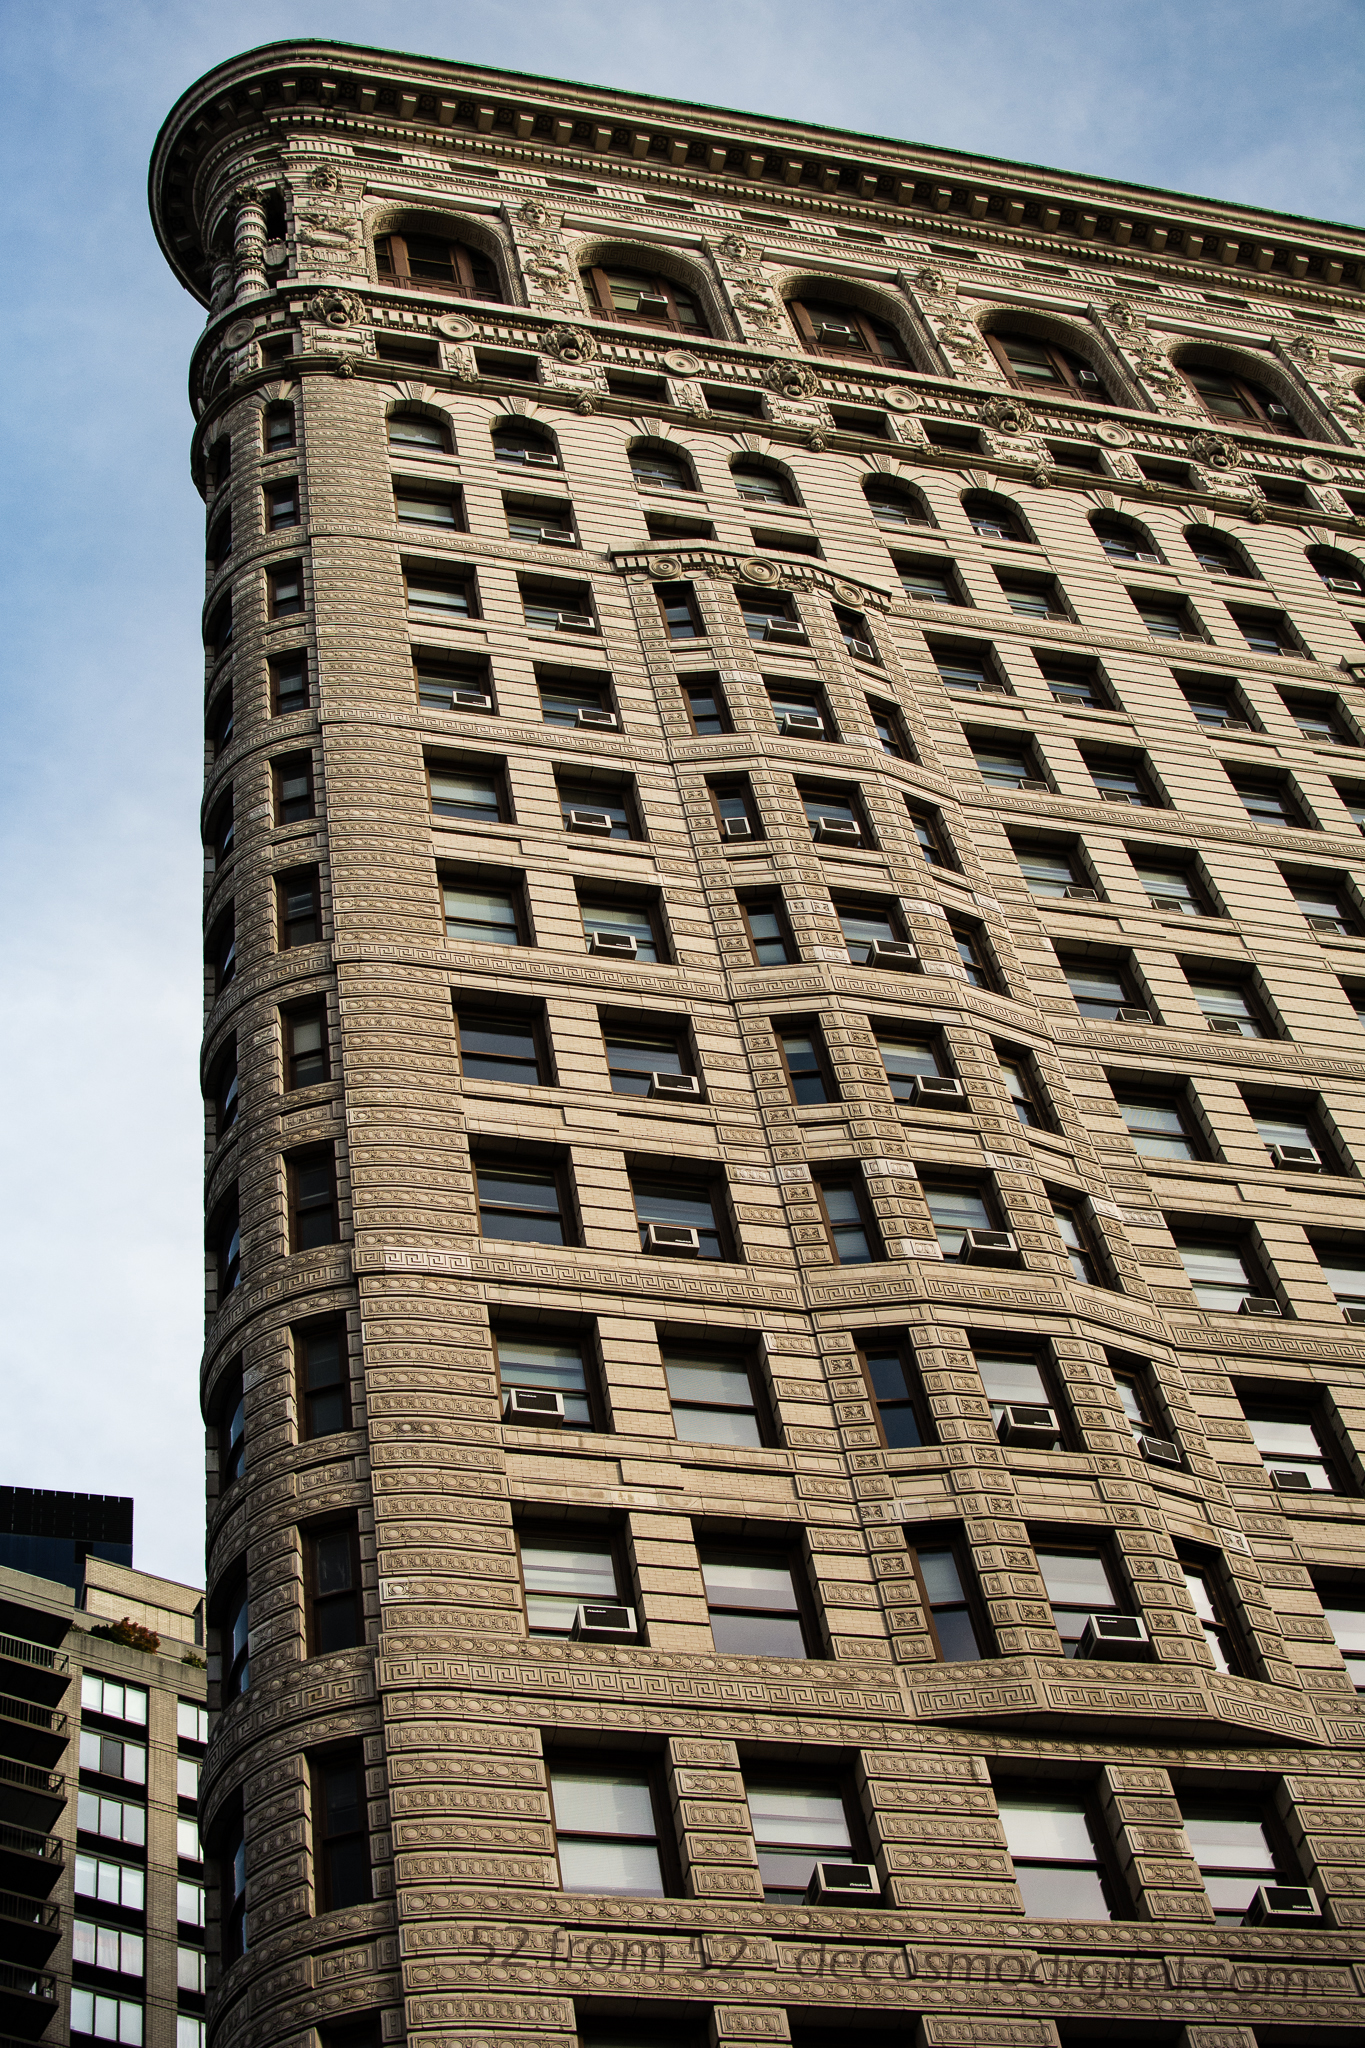
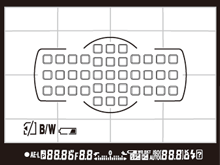
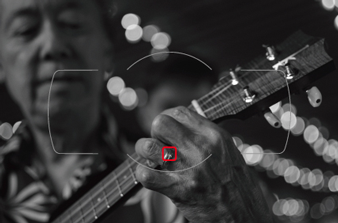
An example of a picture where the subject takes up most of the frame

One trick I learned this week while getting myself dizzy from looking up for too long was how to line up my pictures better.  In a lot of the pictures I’ve previously taken of buildings while looking straight up I noticed that the picture always seems tilted.  The way I lined the picture up or saw it in real life didn’t translate well to the composition of the photo once I reviewed it at home.  While I was shooting this week I tried to choose a line or lines in the building that would level things out when I looked at the picture later on.  It felt odd while I was taking the picture but my results were a lot better. For example in the below picture I chose the corner line between the two sides of the building to line up my shot.  It’s hard to give some kind of formula for choosing the right line, but it’s something I’m going to try and pay closer attention to in the future.

Blog_8(final)3

Rushing to/Rushing from…

ISO 400, 35 mm, f/3.2, 1/80 second

ISO 400, 35 mm, f/3.2, 1/80 second, -2 stop exposure

Week 7 (9/15/2013 – 9/21/2013): Hoboken Terminal, Hoboken NJ
Picture Taken on 9/17/2013 at 6:55 PM

Picture Description:

Have you ever noticed that almost everyone at train stations are in a rush? I have to admit in most cases I’m one of those people. Think back to your last time at a train station, chances are you were either rushing to or from your destination and paid little attention to your surroundings. In the rare instance (or maybe not so rare depending on how punctual you are) that you miss your train the thought of waiting for the next one can almost seem like a prison sentence. I’m no stranger to mass transit, I’ve been taking it for years and I’ve become all too familiar with the scenarios I just described. I have often wondered about all the little things I’ve missed over the years while rushing around or overlooked while being frustrated by some unplanned circumstance such as missing a train. Maybe I missed out on an interesting conversation with a passing stranger? I might have trampled right over a rare coin laying abandoned on the ground or perhaps walked past a person that needed my help with something as simple as directions. You would be surprised what you notice when you actually take the time to pause, think and observe. This concept of how people rush through train stations and life in general is what gave me the idea for this week’s post.

This week I decided to try and observe things, people and places I regularly might overlook. I’ve been riding the bus with my headphones out, phone in my pocket and head up. I made it a point to sit outside for lunch rather than eat at my desk on the computer. Besides the little day to day changes I also decided to take a trip to the train station, not to catch a train but give a photographic demonstration of what you/we often miss out on. My plan was to get to the Hoboken train station just before sunset because I knew the station was aligned East to West so there would be a good sunset down the tracks.

Upon arriving at the station it was exactly how I imagined it. I got to the station around 6:45 which is the tail end of rush hour but the station was still very busy. Crowds of people were weaving in and out of one another, some on their phones while others just with this blank look on their face. As I tried to shuffle between the waves of people to line up my shot I got tapped on the shoulder, “Can I help you?” I heard. My unusual behavior caught the eye of a police officer, apparently being the only person not rushing looked a little suspicious . I politely replied no (didn’t want to get arrested) and said I was just trying to get a sunset photograph while offering to show my pictures as proof. The police officer looked dumbfounded but said okay and walked away. I spent a couple more minutes fighting the crowd trying to get the best shot the whole time noticing that literally no one was seeing this awesome view. One person stopped and I thought they were checking it out, but it turned out they were just looking for a train time. By the end of my little endeavor I felt validated about my rushing theory and accomplished that I was able to get the the exact picture I had in mind. One oddly coincidental aspect of this photo, this is my seventh blog and somehow I ended up getting a photo of track 7. This wasn’t planned but sometimes the best things aren’t…

Photography Concepts:

I applied a couple of the basic composition techniques I’ve talked about in my previous posts to deliver what I felt to be an interesting picture. The rule of thirds and leading lines are the two most main composition concepts at work in this photo. Instead of going for a symmetrical picture and having the track split my picture down the middle I went with having it take you right to left and right out of the station, or is it leading in? I felt like this picture can give the feeling that you could be waiting to leave, or you just said good-bye to someone leaving you with nothing but an empty track. Basically when someone looked at the photo I was hoping they would almost ask the question, am I coming or going, am I rushing to or rushing from?

Ruleofthirds2

The rule of thirds gave less of a message and was more of the framework for lining everything up. I put the train right on the bottom third intersection line and did my best to have the exit for the station at the intersection point of the bottom and left thirds lines. The last two main pieces of the picture were the track sign and the empty platform, I lined both of those up along the left thirds lines. You might be saying to yourself wow you gave lining up a lot of thought. Surprisingly I really didn’t think too much while framing everything. Over the past couple of weeks as I have taken more and more pictures along these guidelines I’ve started to do it automatically. I’ve noticed a big difference in the pictures I’ve been taking, and judging by peoples comments they have too. Don’t take my word for it, pay more attention to lining up your pictures and see what you think or better yet what other people think.

Night Light

ISO 100, 35mm, f/8.0, 4 sec

ISO 100, 35mm, f/8.0, 4 sec

Week 6 (9/8/2013 – 9/14/2013): Shipyard Marina, Hoboken NJ
Picture Taken on 9/9/2013 9:11PM

Picture Description

Going into this week my goal was to create a multiple exposure photograph or light trail night picture.  As a possible secondary option I bookmarked the possibility of photographing the freedom tower.  On Monday night I went out around 6ish to mess around with my new Nikon ML-L3 remote.  I was aiming for either a double/triple exposure of the Hoboken ferry or some kind of sunset shot.   After messing around for about an hour I went back to my apartment to eat some dinner, review my pictures, and wait until the sun was totally down so I could try for a night picture.  Unfortunately after reviewing the pictures on my computer none of them worked out as I planned so I was going to have to go back out for the night shot.

After dinner as I stepped outside of my apartment my eyes were instantly drawn to the distant southeastern skyline.   What I was looking at was simply amazing, the 9/11 memorial lights were getting trapped in some low thick clouds and forming this surreal spherical glow.  All of my other night picture plans went out the window at that point, I had to take a picture of this unique occurrence.

After taking the picture I thought it was good (not great) but didn’t want to use it as my picture for this week.  As I do with most unused pictures I posted it up on Facebook to share with my friends.  To my surprise this picture got more activity than any other one I’ve posted.  Coming up with a picture to top this one, at least this week would have been hard so in the end I decided to use this picture.

 Photography Concepts 

To get this picture I had to apply many of the tricks I’ve learned over the past couple of months. In some of my previous long exposure pictures I noticed a slight camera shake.  To prevent getting shaky images I’ve moved towards using either a 2 second delayed shutter release or in this case a remote.  Next I regularly use a UV filter on all my camera lens to prevent any wear and tear.  Over time I noticed that at night using a filter increases the amount of light distortion and bleed, so prior to this picture I removed the UV filter.  The last two keys to this photo, which I’ll talk about in a little more detail, are the exposure settings I used and editing in Lightroom.

The exposure I used was -2 (stops) which for anyone that doesn’t know, it’s an underexposure.  The reason I underexposed was because after taking other nighttime city shot I’ve noticed that with so many lights from all the buildings my pictures tend to get overexposed.  There are lots of negatives with overexposing, in terms of my city pictures the most noticeable is the change in the sky color.  After messing around with different exposures I’ve settled on -2 for my go to exposure setting.

Now it’s hard to describe all the different tweaking I did in Lightroom but one of the main fixes was the white balance setting.  I forgot my white balance cards when I went out to shoot this picture so I had to do it after the fact.  I also made some moderate adjustments to the Highlights, shadows, whites, blacks and clarity to get the picture to look like what I saw in person.  If you want to learn about Lightroom I highly recommend going on youtube and watching some tutorial videos.  There is so much information out there to support learning photography (and most other hobbies) it’s just about finding it.

Before and After Editing in Lightroom

Before and After Editing in Lightroom

Since I originally did not want to use this picture let me quickly explain why and what I could have done better.  For starters if I remembered my white balance cards I would not of had to do so much editing in Lightroom.  I rather get a good picture in camera rather than edit it especially for this photoblog. I also wasn’t happy about my composition, the green in the picture is really nice but I was made I cut off some of the left side of the peninsula that is shipyard park.  I wish that I would have stepped back another 30-50 ft to get more into the picture.  Last I wish I found something interesting to put into the foreground of the picture, it just makes for a more interesting picture.

Article about Exposure
http://bit.ly/1eOEzt8

Lightroom Video’s
http://bit.ly/140WqbT
http://bit.ly/1ddxPTS

Never Forget

ISO 160, 35mm, f/ 2.5, 1/500 sec

ISO 160, 35mm, f/ 2.5, 1/500 sec

Week 5 (9/1/2013 – 9/7/2013): 9/11 Memorial, New York City, NY
Picture taken on 9/5/2013 at 5:44 PM

Picture Description

In a less than a week 12 years will have passed since September 11th, 2001 and prior to this week I never visited the hallowed ground that was the location of the World Trade Center towers.  I have wanted to pay my respects by visiting the grounds for some time now and this week I finally made the time to visit the 9/11 memorial.

As expected prior to entering the memorial you’re paraded through an array of security screenings and lots of twisting alley ways.  When you finally get into the memorial area it’s a surreal feeling especially when you think about the significance of the ground you’re now standing on.  So much that has happened over the past 10+ years has been a result of what happened there on that fateful day.  The events of 9/11 will forever remain in the forefront of my mind.  As with most Americans, especially those that live in the New York area, I can vividly replay much of the day in my mind as if it was only yesterday.  I was fortunate to not lose any loved ones through the tragic events and it’s hard for me to even fathom what those that did had to go through, and still do.  As I walked around I tried to do so respectfully since I’m sure among the crowd there were at least a few visitors that had lost someone.   The reflecting pools are both architecturally beautiful and symbolically somber.  The pools each take up about an acre of space and the perimeter of each pool is lined with the names of those that lost their lives.  The relationship you can draw between the magnitude of the pools and encircling list of names is powerful and very sobering.   While walking around you randomly come upon names with flowers, flags and other items placed or wedged into the cracks of letters.   I don’t know how often flowers and such are removed but my guess is that the presence of one means someone placed it there that day or very recently.  During my walk around the North pool I noticed that someone had placed a flower on a loved one’s name just below the World Trade Center heading.  I thought the flower with the reflection pool backdrop would make for a meaningful picture.

blog_5-final(2)

I hope after reading this you too go visit the memorial to pay your respects and experience this all for yourself.  I’d also like to say if anyone is reading this and lost a loved one, you have my deepest condolences.

Photography Concepts 

This picture was very straight forward, unlike last week nothing was moving so I just line everything up and fired away.  As I take more and more pictures I’m beginning to learn what the ideal settings are for specific ‘looks’.  This picture for example, I wanted to emphasize the flower, names and obviously “World Trade Center.”  If you read my first blog you might be able to guess one of the settings I used to get the blurred background.  If you said wide aperture, you were correct!  I used an aperture of f/2.2 to blur out the reflecting pool.  The second and main part in capturing this picture was utilizing my camera’s focus points.  I used a single point auto-focus to mainly to make sure “World Trade Center” was properly focused but oddly enough there is more effected with using focus points than just ‘focus’ so that’s what I’m going to talk about.

Nikon D5200 Focus Points - Taken from below Nikon Website

Nikon D5200 Focus Points – Taken from below Nikon Website

When it comes to “auto-focus” my Nikon D5200 has 4 different focusing modes but for now I’ll just talk about the one I used. I used single point auto-focusing for this picture which is what I use for most of my pictures. For anyone that doesn’t have a DSLR you might be unfamiliar with the term focus points.  They’re exactly what you’d think they are, selectable focus areas I see when looking through the lens.  Similar to what you see on standard camera’s or camera phones, however on my camera they’re not totally free moving.  For example, on most camera phones you pretty much touch anywhere on the screen and it uses that as the main focus point.  On a camera such as mine I’m limited to 39 focus points.  The really high end DSLR cameras (e.g. Nikon D4 – 51 focus points, Canon EOS 5D Mark III – 61 focus points) have more but I’m yet to run into any issues using 39.  Beyond focusing, by manually selecting the exact focus point I’m able to have more control over my camera’s exposure. One scenario where how the camera sets exposure comes into play is when you’re dealing with multiple light sources such as natural/unnatural light in one photo.  I’ve noticed that finding the best medium exposure matters most when you’re trying to incorporate the sky into a photo.  A lot of times if you set your exposure off an object the sky gets over exposed meanwhile if you set it off the sky your object (subject) gets under exposed.  Finding the middle ground in terms of exposure can be hard and is somewhat fixable after the fact but pictures come out way better if you do the right exposure in camera.  What I usually do is try to set my focus point somewhere close to both my subject and the sky to obtain the best exposure.  The problem with not selecting your actual subject is you have to use a smaller aperture to make sure more of the image (such as your subject) is in focus and not blurred out.  Since I wanted a blurred background in my photo I had to go with the wider aperture so when I put my focus point on the World Trade Center it ended up over exposing the background a little.  Nothing I wasn’t able to fix in LightRoom but it’s something you have to keep in mind.  If you over expose too much the detail of a picture isn’t always recoverable.  To have more flexibility lately I’ve been shooting in RAW form or in Nikon terms .NEF files.  Based on everything I’ve watched/read shooting in RAW verses JPEG retains more of the pictures editable attributes.  No matter what camera you have, one with RAW mode, 1 or 51 Focus points, when used correctly focus points can greatly help set the right exposure for you picture.

Nikon D5200 Single Focus Point - Taken from below Nikon Website

Nikon D5200 Single Focus Point – Taken from below Nikon Website

Nikon D5200 Article source for two pictures:
http://imaging.nikon.com/lineup/dslr/d5200/features02.htm